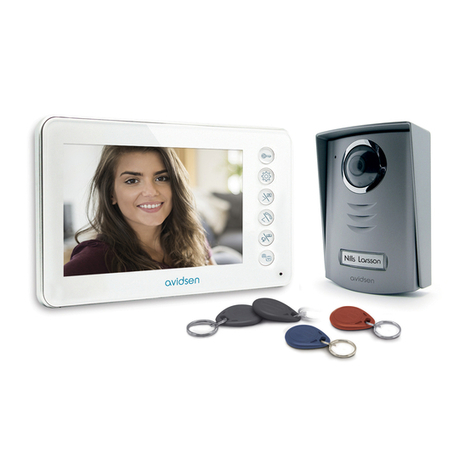
Chainavasion CVACG-J98 User manual

Wireless Video Door Phone
USER GUIDE

Fashion . Technology. Taste
Enjoy Intelligent Life
The wireless video door phone is a 2.4G wireless high-tech
household intelligent product integrating doorbell, photo_taking,
video-recording, intercom, monitor and unlocking functions into
one. Adopting the latest energy saving technology, its stable
performance and fashionable appearance design make it the first
choice ofyour high-quality intelligent life.
This product is convenient to install, and simple to use. It is
specifically designed for villa users and supporting the use of two
outdoor units and three indoor monitors. Indoor monitors can
communicate to each other, communication range can reach 300
meters in open space. Battery equipped outdoor unit,s proper
monitoring function can replace Baby Monitor.
@ churrg", or modifications not expressly approved by the party
responsible for compliance could void the user's authority to operate
the equipment. This equipment has been tested and found to comply
with the limits for a Class B digital device, pursuant to part l5 ofthe
FCC Rules. These limits are designed to provide reasonable
protection against harmful interference in a residential installation.
This equipment generates uses and can radiate radio frequency
energy and, if not installed and used in accordance with the
instructions, may cause harmful interference to radio
communications. However, there is no guarantee that interference
will not occur in a particular installation. If this equipment does
cause harmful interference to radio or television reception, which
can be determined by turning the equipment off and on, the user is
encouraged to try to correct the interference by one or more of the
following measures:
-- Reorient or relocate the receiving antenna.
-- Increase the separation between the equipment and receiver.
-- Connect the equipment into an outlet on a circuit different from
that to which the receiver is connected.
-- Consult the dealer or an experienced radio/TV technician for help.
@ (( Fe

InstallationSteps.,.....---..-- .....---.........-..---....g
AttentionsDuringlnstallation--.--......---- --.--.. l0
Battery Installation..-.,--..--.... .---.-.......--.---.... l0
Installation ofStorage Card ....-..--....."..,-----... 1l
Storage Card Introduction ....,---.......,- --------... 11
Functions & Application ---.--.. 12
Outdoor Unit Starting Up --..-.. 12
Indoor Monitor Starting up .........."-..-----.---.--.12
Outdoor Unit CALL Indoor Monitor .,--. -......... ---........--.,--.. -. 13
Indoor Monitor CALL Outdoor unit ( Monitoring ) "" "'---' ---. 13
Indoor Monitor CALL Indoor Monitor (Intercom) " " " " - " " "' " l4
Night-Vision '-""""-----'--'--"'15
Introduction
Safety Warning & Attentions
Product Overview
Product Diagram...
Installation Guide
-- l5
1
I
jThank you for choosing this wireless video door phone. please read this Manual
carefully to fully mderstand its usage, perfect functions md simple operation.
Before using this product, please read these Attentions cuefully to ensue safe md
proper operation ofthis product.
The Company reserues the right to modifu this Mmul from time to time without
prior notice.
1. Attentions
.Do not place this product on m meven or unstable table-board to prevent failue or
damage caused by falling.
o Only the battery md charger designated by the Company can be used on this
product. Application of other products may lead to leakage, overheating, blowout
and fire ofthe battery.
o Do not violently strike, shake or toss the wireless video door phone to prevent
failme aad fre caused to the wireless video door phone.
.Do not put battery chager or wireless video door phone in the microwave oven or
high-pressue device; othemise, damage and fire of electrical circuit and other
accidents may be caused.
.Do not use this product in a place with flamable and explosive gas; otheruise,
product failwe md fire may be caused.
.Do not place this product in a place with high temperahre, high humidity or large
amomt of dust; othemise, product failure may be caused.
2. Attentions for operation of this product
. Do not apply force on LCD screen or knock other objects with it, othemise,
breakage and dmage of LCD panel and seepage of crystalline liquid will be
caused. If the crystalline liquid enters your eyes, there will be dmger of ablepsia.
Wash you eyes (be sure not to rub your eyes) and go to see a doctor imediateiy
. Do not dismantle or remodel this product, othemise, damge, creepage and
electrical fault may be caused to this product.
Exposure Adjustment --
TamperAlarm Function
.-.---.. t6
Photo "---"""'-
Call History "" ---1'1
.--r7
\ri

.Do not press_the keys with a pin, stump ofpen/pencil md other keen_edged objects;
othemise, damage or mis-operation will bi caused.
oPlace tiny metal objects such as drawing pin at a place far away from the speaker
Lt ^1;._.l-:$f hr magnetic property while working, it will atnact these tiny metat
oDJec6, whrch may lead to personal injwies or damage ofthe speaker.
.Do not prcject the lens at strong light souce, such as the sm; otherwise, damage of
tbe imge sensor may be caused.
.Do not press the teminal of lens with much force; othemise, personal injury or
damage ofthe device may be caused.
3. Attentions for operation ofcharger
.You may chtrge the device with a charger or through a USB data line comected to
the compulen
.Charge with matched altemate cment; creepage, fire md damage of the door phone
md chager may be caused if other voltage is used.
rlt is forbidden to short circuit the charger, othemise, electrical shock, smoke md
dmage olthe chrger will be caused.
.Do not use the chuger at the time when the power cord is damaged, othemise, fire
md electrical shock will be caused.
oClea away the dust accmulated on power outlet ASAp
.Do not place a vessel used to retain water beside the chrger to prevent overheating,
reepage and failure ofcharger caused by spilling water.
olfthe chrger is in contact with water or other liquids, discomect the power supply
immediately to prevent overheating, fre, electrical shock and failue of the
charger.
.Do not dismantle or remodel the chager, othemise, personal injury, electric shock,
fire md dmage of chager may be caused.
.ry nol us: the chager in places with high hmidity such as bathroom, othemise,
elatric shock, fire md damage of the chrger will bi caused.
. ry oo,. touch the chager, electrical line and power outlet with wet hmd(s),
othemise, electric shock may be caused.
. ry not. place healy objects on the electrical line or refit the electrical line,
othwise, electric shock md fre will be caused.
oBefore cleaning md maintenmce, first pu[ the plug off the power outlet.
.Gmsp the chager while pulling offthe plug, as pulling the electrical line will lead to
dmage of electrical line, electric shock and fire.
{. Operation and maintenance
o Plase keep this product d4r, as rainwater, moisture, hmidity and tiquids or
moisture content may contain mineral matteru that erode the circuit.
tDo not teep this prcduct in any place with high temperatwe. As high temperahre
may shorten the life spm of electronic device, damage the battery -d "urr"
defomition or melting of certain plastic parts and components.
.D^o not keep this product in my place with low tempemtue. As when being moved
from a place.with. lM temperatwe to a place with nomal temperahrre, it may
generate humidity inside, which may cause damage ofcircuit bord.
oDo not attempt to dismantle this product. As improper hmdling by nonprofessional
personnel may cause damage ofthe device.
.Do not toss, knock or shake this product, as tough operation mode may dmage the
motherbord inside the device.
olf this product is made wet by mistake, shut it dom, remove the battery md restart
the product after confiming it complete dry after 24 hous.
oDo not hare the metal parts (specially configued interfaces ofcharger and data line
excluded) in contact with chager interface to avoid short circuit.
oUse clean and dry soft cloth to clem the lens, infraed lamp and light sensor.
! Warning: improper operation will void warranty! !
Characteristics and application:
l.Fashion appetrmce - adopt Euopean design, full of modem science md
techrology feeling, suitable for houses ofvarious decorative stvles.
2.Hidden antenna - adopt built-in antema design, protect the antema effectively.
3.Extra ltrge range of vision - an extra wide mglJviewable.
4.High-resolution color LCD screen - adopt 3.5-inch mainstream TTT digital LCD
screen, achieve outstanding clarity.
5.High-resolution digital camera adopt 300,000 pixels digital cmera, image
focusing vivid and clear
6.Infrred Night-Vision - mder the enviroment of insufficient outdoor light, the
indoor monitor can activate the infiued Night-Vision to clemly display mirecord
the outdoor scenes.
7.LED fill-in light f,mction same to 5, show colorful effect.
8.12 kinds ofringtones users cm select the desirecl doorbells freelv
9.Ole-key display - simple and convenient to use, yiew the outdoor scenes md take
photos or record videos mder mmual or automatical mode just by pressing dom
one key.
I 0.lntercom fimction - can choose one-way or both-way talkback function.
I l.Support extended IF memory - up to 4G, photo/vidio is stored in T:flmh stomge
crd.
l2.Super Jong.standby high capacity rechugeable lithium batteries ae provided,
adopt intelligent energy-saving techlology, fully chrged batteries provide up to
40 days of runtime.
@
i
h',,
o

I
i:
i
l3-Charg-e-md+cord supported - without the need to worry that the operation will
be affeted due to depletion of electrical qmtity.
l4Auto_ circulating memory - without the need to worry that real-time recording is
unachievable due to insufficient space of storage cad.
I5.USB data charging wire - charge, domloading or uploading audio-visual
mterials cm be realized tkough the USB interface.
l6-Multifimction holder wall-hung type or table type provided.
!7-Multimrchine extended fimction - support two outdoor mits and three indoor
motritor at most.
l8-Long distance trmsmission - communication distance can reach 300 meters in
open space.
l9.Frequency range - adopt 2.4G ISM digital public frequency
mge:2402-24835M112
20.Adaptive frequency hopping technique - adopt AIH (Adaptive Frequency
Hopping Technique), produce commication fiequency md Auto-Slnc frequency
mdomly.
Performance parameters:
@
@
i.
I
i..
I
h
Power Specific lithim battery BP-6M(I l00mAI)
Consumption 400mA
Outline dimension 126*84*20lm
Weight I 10s
Enviomental condition IemDeratue: -011-+40C
Placemenl Wall hung type or table style
LCD size 3.5" TFT color screm
Wireless commmicafi on mode 2.4GHz
Working time 2hous continuouslv
Stmdby time 1OOhous
Chrge time Jhous
Extemal powel DC5V 1A
Application distmce About 300m in open space
Outdoor uit
Power Specific lithim battery BP-6M(1 lo0mAn)
Consumption 40ftnA
Outline dimension 134+74*3llm
Weight l22g
Enviromental condition Temperature: - 1 0"C ^+50 C
Waterproof grade IP55
Placement Hmg on outwall
Surface material ABS & hrdwue accessories
Camera 300,000pixels
View mgle I 20" wide anole
Night vision pattem ? ledc nr IP lqhn
Working time
Stmdby time I O0ohnrrrc
Charge time thonrs
Extemal power D(]sV 1A

Outdoor unit:
Wire connector
Battery cover
Indoor monitor:
Watl-[irng type holder and table type holder
for Indoor monitor:
_-___-___
Table type holder
Key introduction
A. Indoor monitor Keys (6pcs Key):
1 . ' OK " key: one of the key to choose one-way or both-way talkback fimction.
2. " l tlP/ l.Video" key: work as option key for MENU, m video key when calling
or monitoring, as option key when calling extension monitor.
3. " + DO\YN/ 0 Photo" key: work as option key for MENU, as photo key when
calling or monitoring, as entrance key for exposure adjust, as option key when
calling extmsion monitor.
4. "E)ilT /.S.monitor" key: work as monitor key for stmdby mode, m exit key for
MENU, one ofthe key to choose one-way or both-way talkback function.
5. "MENU /{mlock" key: work m unlock key when comunicating with outdoor
mit, as right moving key for time setting, MENU key for standby mode.
6.Switch key "ON/OFF" : work m infrred lamps switch while communicating, for
exposue adjstrnent.
B. Outdoor unit keys
I .Doorbell key " Call " : ring the bell and trigger video taking whm pressed.
2.Reset: erme the commmication code.
Indoor Monitor
ENU /Unlock
EXIT /Monitor
@
OK key
h

9q*ggllqlPiqq11 for outdoor Unit
Elecholock lr
Ll
I Wire comeclor of outdoor mil
-Electrolock maintain il
open if comect "6" l.l
ll,
t Ei;A;i;-ck -;i;i;i;
9!Ss9. il--c-g_qreg!.:',{::
ur^out*to"tine.*it"l I
. Rgma-1k: P19v{9d py. uq91t: . . . ,
Unlocking Setting
.Long_ press door bell until indicator blinks one time (approx 9 seconds, with a sound
of " Beep" ), loosen the key right now, untocking time is set 6 l.g seconds
(Default unlock setting).
l.Keep pressing until indicator blinks two times (approx 3seconds more, with two
somd of "Beep " ), loosen the key right now, unlocking time is set as 4 seconds.
i.Keep pressing mtil indicator blinks three times (approx 3 seconds more, with three
somds of " Beep " ), loosen the key right now, unlocking time is set as 8 seconds.
@
-"0 @
.0[o

Outdoor unit shall
be installed at
1.4-1.7 meter above
the floor, and the
cmera shall avoid
facing the sunlight
directly.
ffi,mffi;
l.Drill a hole refer to the dimension, put the screw rubber plug in, then fix th,
rainproofcover on the wall by screws.
2.Comect the chmging line according to the wiring diagrm(the hole for wire gettinl
through suggested l6^30mm), if chrging line comes from indoor, leid th
chaging line pass through the hole, if chaging line comes from outdoor, Iead thr
charging line pass through the bottom of minproof cover md comect the line .
).Install rechmgeable lithium battery@p-6M) to outdoor uit, the unit starts ul
automatically.
l.Put the top part of outdoor mit into the rainproof cover like the picture, push thr
bottom part, make sue its steady and fix it from the bottom by uew, then fit or
the screw cover

l.Insert the storage card in the way as shown in the diagrm until you hear a clicking
somd
2.Improper insertion of storage cad may cause system failue, please confim the
inserting direction ofthe card.
l.Take out ofthe storage crd -- push in the stomge card until you her a clicking
somd, then the storage card will pop up
I This product adopts T-flmh ctrd as extemal storage device, when there is no
storage card in the product, the photo-taking and video-recording functions ae
mealizble.
t Ifa self-provided stomge crd is used:
I Please use a storage cad with Class 4 or above.
I Up to 4G storage card supported.
I This machine hs automatic cyclic storage function, when the stomge crd is
full, the original file will be ovemitten.
I his machine cm comect to computer by USB line. Or take out the T-flash crd
and comect to computer by crd reader. ! Attention: do not distort, extnrde or
strike the storage cad, othemise, the audio-video material recorded on it may
be dmaged.
@

.The outdoor photosemitive sensor should not be hidden or blocked by oth
objects.
l.Do not face outdoor unit to sunlight dircctly.
i.Do not stick label on the speaker, othemise, the soud effect of doorbell will I
affected.
t.Install the coDnection line conectly, othemise, door phone disabled may be causer
Bamery Installntion
.Move th€ battery cover domward paallelly, md then take it off.
l.Insert the lithium battery along the battery jtr md set it level, mind the front a
revuse side of the battery.
i.Fit on the battery cover.
Battery cover

Comect to extemal power to start up. If the power soffce is only battery main MCU
is woken about every one second. Sleep mode saves power (Monitor md alm
functions could be realized in both two power supply conditions.). When extemal
power md battery supply power simultaneously, the effect is sme to extemal power
supports the mit only, when battery is in low power, the extemal power will iharge
the battery automatically, green LED flashes every one second, it recovers to iis
previous state when the battery is full.
In stmdby time mode, press " Door bell key " to call, the green LED of the outdoor
mit lights up with a somd of " Du Du " . Red LED of indoor monitor lights up, the
screen shows image and the unit rings for Ma. 30 seconds. Ifthere is no reply signal
from indoor monitor, the outdoor mit stops the Call md recall is allowed.
t Intercom: press " OK" on indoor monitor -) ring stop and the unit tums into
intercom mode, red LED of indoor monitor is off as well c green LED is on,
intercom time is Mu. 90seconds.
rMonitor: press ".i;i-" monitor key on indoor monitor-) red LED lights up, monitor
outdoor voice without being discovered by the visitors. (One or both way intercom
could be chmged over by pressing " .ri*, " md " OK" , and it will time again
till 90seconds.).
rUnlock:in "OK" on-statemode-) press "1." unlockkey -) aftusuccessful
mlocking, it shows mlock icon.
rPhoto:in "OK" on-statemode-) press "6" phototakingkey-) onepress
one photo, the photos will be stored in TF crd.
rVideo: in "OK" on-state mode -) press " a." video taking key -) start taking
video -) press "&" video takingkey again to stop, the videos willbe storedin
TF card.
rExit: in " OK" on-state mode -) press " OK" key (in monitor mode -) press
"Exit" )the mit tums into standby mode with a somd of "Beep"
rAutomatic video: if nobody mswers t}re call in 5 seconds, indoor monitor starts
taking video automatically (Default is automatic video. If setting is mmml video,
once comected, the indoor unit will take video mmully) till being stopped or
max. taking time.
r'*t*{
In stmdby mode, press " .1N. " monitor key on indoor monitor to monitor call. In
this mode, the red LED lights up. If outdoor unit receives signal in 5 seconds, then it
comects to indoor monitol indoor machine tms into nomal monitor mode md
shows image and speaks voice ofoutside. There is no voice speaking for outdoor mit.
If outdoor uit does not receive signal in 5 seconds, then it shows " User not
online " md exits monitor calling mode automatically md hrms into stmdby mode.
Two sets of outdoor units (Code comected successfully): Press " -i|- " monitor key
on indoor monitor to tum into monitor selection menu -) press ' t / ! " key to
Install battery to indoor monitor, long press " Switch key" about 3 seconds to start
up (about 1 second after shutdom), logo shall be displayed on screen with a sound of
"Beep" . Tm into standby mode.
.Display: stmdby picture, mit ID, signal sign, power sign, time & date
rRed LED flashes every 4 seconds. When battery is being charged, the red LED
flashes every one second. When battery is in low power (< 1 bm), red LED flashes
every one second.
.In this mode, the screen shall be dimed after some seconds and hms into power
saving mode.
rlfthere is my calling record mder this mode, red LED flashes every I second and
stops flrohing after checking.
rln stmdby mode, long press "Switch key" about 3 seconds, ..Goodbye,' shall
be displayed on screen with a somd of "Beep" , the uit switches off.
@
@
i
I
I
l

choose code of outdoor mits -) press " OK" to tum into monitoring call mode,
red LED lights up (During selection, press "Exit" to tum into stmdby mode ).
rlntercom: in monitor mode, red LED lights up, there is voice speaking for indoor
monitor but not for outdoor mit -) press " OK" to tum into both-way
comunication, red LED shuts dom -) press "'i+," monitorkey againto tm
back to one way voice monitor mode. (One or both-way voice could be chmged
over repeatedly). Intercom time is 90seconds md shall be timed again after
chmging over.
successful mlocking, it shows unlock icon.
rPhoto: in monitor mode -) press " t " photo taking key -) ore p.ess
photo, the photos will be stored in TF cad.
rMdeo: in monitor mode -) press " a. " video taking key -) start taking video -
) press " I. " video taking key again to stop, the videos will be stored il TF
crd.
rEnd: in monitor mode -) press "EXIT" key -) end monitor and tm back to
standby mode. (In intercom mode, press "OK" to hmg off)
Note: in
down- monitof mode, red LED Iights up, in intercom mode, red LED shuts
(Only can realize when there are 2 and more indoor monitors.)
In standby mode, if there ile only two indoor monitors in system, press "OK" to
call mother indoor monitor
In stmdby mode, if there me three indoor monitors in system, press " i ,, to call
small code indoor monitor; press " I " to call large code indoor monitor;
rlf the CALLED indoor monitor does not receive the signal in 4 seconds, the CALL
monitor shows " User not online " , it tums back to stmdby mode with a sound of
"B"ep" .
rlfthe CALLED indoor monitor receives the signal, two monitors play music, green
LED lights up.
rlf the CALLED indoor monitor does not reply, the monitors tum into stmdby mode
after 30seconds.
rlf the CALLED indoor monitor replies by pressing " Ok" , music stops, red LED
shuts dom, green LED lights up to both of the monitos, and both monitors tum
into intercom mode, comunication time is ma. g0seconds.
rThe CALL indoor monitor has initiative hmg up function.
rDuring commication, if any end in the commication presses "OK" , then both
two ends hmg up with a somd of "Beep" and tm to standby mode.
With night-vision function, even under the enviroment of extremely poor visibility,
the indoor monitor can activate infrred lmps md take photo or vidio of the objecii
or people within the distance of l.5meter
* Ifwhite LED conligured, the screen displays in color.
* If Infrared lamp confrgured, the screen displays in black and white,
rUnder comection condition of outdoor unit and indoor monitor, press 'ON/OFF "
key to activate inlired lamps on outdoor mit.
rPress "ON/OFF" key again to shut down infraed lmps.
! Note: Please keep the lens ofinfrared lamps clean.
6 grades for exposure adjustment: (Expo: 00-05)
rln image commication mode -) long press " J " about 1 second -) (the screen
displays grade prompt infomation) tum into exposue adjustment function.
rPress " ON/OFF " key to adjust exposue, every press adjusts one grade. Remrk:
Grade 00: automatic exposue; gmde 0l-05: manual exposue. Adjust circulaly
and save automatically.
It shall alam ifoutdoor mit is detached from the shell.
The indoor monitors shall alam m well m display image once the outdoor mit
alms, md the indoor monitore shall produce an alam file. The indoor monitore
alms for mu. 2minutes.
Press "OK" key to stop alm;
! Note: The outdoor mit only could work when it is repowered on md reinstalled
into the shell.
after
@
@

ln standby mode, with TF card in ihe monitot plug in USB wire, the screen shall
display a selection menu: "USB", "POWER"
rChoose "POWER by pressing "'l / J ", the USB only sewes as charging fimction,
the indoor monitor works as nomal.
rchoose "USB " by pressing " t / J ", comect the monitor with the computer md
read the files through computer.
Tm into video menu and operate.
r If there is no TF cad, screen displays " No SD Card" md tums back to main
menu.
rlf there is TF card but no video record, screen displays "No File! " md tum back
to main menu.
rlfthere is TF crd md video record, screen displays video list by time order, newest
file is listed on the top.
rchooseoperatingcommd "Play" , "Delete" , "DeleteAll" or "Back,, by
pressing "1/1" -) press "OK" tohmintooperating.
rln Play mode -) press "OK" to pause md play -) press "EXIT" to exit.
rAfter operation, exit automatically or by pressing 'EXIT" to tum back to video
operation menu.
Tum into photo menu and operate.
I If there is no TF card, screen displays " No SD Card" md tms back to main
menu.
rlf there is TF card but no photo record, screen displays
to main menu.
r If there is TF cad md photo records, screen displays photo list by time order,
newest frle is listed on the top.
r Choose operating commd " View" , " Set As Backgromd" , " Delete" ,
"DeleteAll" or "Back" bypressing 'I/I" -> press "OK" totuminto
operating.
rlnViewmode-) press
photo
"OK" to tum into operating
r If there is no TF crd, choose commmd " Play " , the screen displays " No Video
File!" md tums back to Call History menu.
rlnPlaymode-) press "ok" topauseandplay-) press "EXIT" toexit
r When choose " Play" and, if there is not TF crd, screen displays " No Video
File!" and tums back to Ca[[ History Menu.
rlnPlaymode-) press "OK" topauseandplay-) press "EXIT" toexit.
rAfter operation, press "EXIT" to tum back to call history opemtion menu.
! Note: Unplug the power and r€set, all the call history will disappear.
md tums back
to view the last photo, press to view the next
rln stmdby mode, press "MENE" to hrm into main menu.
16 submenus: "Video" , "Photo" , "Setting" , "Code" , ..Catt History,, ,
"Exit" ae uder the main menu.
rchoose submenu by pressing " l/J ", press "Ok" to confim.
Remark: T[rn back to previous menu by pressing "EXIT" in submanu, turn
back to standby mode by pressing "EXIT" in main menu.
rAfter operation, press " EXIT " to tum back to photo operation menu.
.:xwx IlftjlT ;;:*t }i'.i."" to check cal history (Green LED nashes every I second
rlfthere is no call history screen displays "No Record" .
rChoose operatingcomand "Play" or "Delete" bypressing " 1/1 ",press
@@

E--nler the Code Menu, input password (0000). If the password is wong, screen shows
'Password enor! " , "Pleme input again! " , please input the right password.
Match code function: match code; give code; receive code; infom:
. Match aode (Outdoor mit should comect to the Indoor monitor)
r Select "MaichCode" onindoormonitor-) press ,,OK,, key-) enterinto
the match code mode
r Underthe standbymode ofoutdoormit-) longpress "call,, key-) loosen
key util the somd of a " Beep " , enter into the match code mode
r If two uits match successfully in 16 seconds, indoor monitor displays
" Success" , outdoor unit makes " Beep- Beep-Beep" sounds, as thJ frst
outdoor mit
r Ifmatching failed in 16 seconds, indoor monitor shows "failed" , the outdoor
unit makes " Beep " somd
r Press " EXIT" key on the indoor monitor, exit menu, enter into the stmdby
mode
Notice: If failed match, rematch the code after connection, othemise, rematch
the code after clear the code
l.Indoor monitor cler code method: refer to the menu function -) code -) cler
code.
2.Outdoor mit clea code method:
A. Tmsfomer supply: long press " Clem Code" key about one second, code
cleredaftera "lick" sound.
B. Battery supply: press " Clear Code" key md " doorbell key" at the sme
time till a "Beep" , code cleaed.
. Give code & Receive code (match more indoor monitors ard outdoor mits ):
r Choose " give code" on indoor monitor given or received code-) press
"OK" key-) enterinto "givecode" mode
I Added indoor monitor enters into the code,menu as above steps-) choose
"receive code" -) press "OK" key -) enter into the receive code mode.
r If code receiving finished in 16 seconds, exit code receiving mode after three
" beep " somds, and then enter into code menu.
r The added outdoor unit(finished cler code), under the stmdby mode-) keep
pressing " call " key for 6 seconds mtil two " beep " somds( ., beep ', once
aboii 3 seconds) -) loosen the key to enter into code receiving mode.
r Outdoor unit make three " beep " souds if receive code successfully, md as
No. 2 outdoor mit.
rI ffailed to receive code in 16 seconds, exit receive code mode after one
" beep " sound. Enter into the Code Menu (Outdoor mit enters into the
stmdby mode)
r After code receiving finished, press " OK" key on code give mit to exit the
code give mode, enter into the code menu.
r Press "EXIT" key to retum to MENU gradually, then enter into stmdby mode
r After all mits receive code finished, please use the No. 2 outdoor mit call all
indoor monitors, if all code matched, receive code successfully; if not, clear
code of the new mit (do not clea the code giving unit), refom the code giving
md code receiving again.
Notice:
l.Pleme do not set sme ID number for every indoor monitors md outdoor mits.
2.The original Password for code match menu is "0000" .
3.Infom function: after match code, give code, receive code, cler code md reset ID
number, please infom. Infom: tell all units the pieces and ID numbos in the
system.
4.Method of infom: outdoor mit calls all the indoor monitors (all indoor monitors
should be matched), if there re two outdoor mits, use the No. 2 outdoor mit to
infom.
oClear Code
Choose "code" option, press "OK" key to enter into password menu.
rlnput the pmsword to enter into code match menu (original password is 0000).If
you input wong password, system will inform you " Pmsword Enor!" ,
"Please Input Again!" , enter into the code match menu mtil input the right
password
rPress "1/i" key-) choose "ClearCode" -) press "OK" key,enterinto
cler code menu.
rPress " t i.l " key -) choose " Cleu" (press " Back" to exit if you do not
want to clear mything ), system will retum to code menu automatically after
code cletr confimed
@@

Enter into Setting, press " I ll"key choose the submenu, press "OK key into
conesponding submenu.
. Music Setup
. Brightness
o OmIDNmber
o Auto Control
. Backlight Time
. Volme Setup
o Date Setup
. Security Password
e Music Volme
. Restore Wallpaper
. Version
. Delete Allm Notice
o Music Setup Enter into " Music Setup " for music choosing menu.
r Press " t/.t " key -) to music you like(I2 pieces in total) -) press "OK" key
to listen.
r Press "OK" key again or press "EXIT" key to set the music as ringing, exit
Musit Setup
r Press "EXIT" key to enterinto the standby mode.
o Brightress Enter into "Brightness" menu and adjust the brightness.
r.Press "1/I"key-) increaseordeffeasethebrightnesslevel(6levetsintotal)-)
press "OK" key-) set the brightness level -) exit the setup menu
r Press "EXIT" key to tumbackto standby mode
Notice:
6 levels for brightness setup (only could be set up in menu). If level reaches to the
highest, pressing " t " key is useless, to the lowest, pressing " I " key is useless.
o Om ID Nmber Enter into Own ID Number to set up ID.
r Press " f /J " key -) set up ID nmber -) press "OK" key -) confim and
exit ID Nmber setup menu
r Press "EXIT" keyto tmback to stmdbymode step by step.
Notice: Flbase do not repeat ID nmber for every indoor monitors and outdoor units.
o Auto Control Enter into "Auto Control" to set up video.
r Press " t/I" key -) setup "Autovideo" or "Mmualvideo" -) press
"OK" key to confim md exit. Default sefting is auto video (with SD card)
md manual photo.
r Press " EXIT " key to tum back to standby mode step by step.
Notice:
Auto video: Ifnobody replies in 5 seconds after comection, the indoor monitor starts
up auto video (Factory default is auto video, if manual video is set, video recorded
after calling) till being stopped or mil. record time.
.Backlight Time Enter into Backlight Time menu to set up standby time, exit menu
automaiically after setup.
r Press " 1 /J " key-) increase and reduce standby time(l0s-60s) -) press
" OK" key to setup md retum to Backlight Time Setup menu.
r Press "EXIT" key to enter into the stmdby mode.
r Volume Setup Enter into Volme Setup menu.
r Press " 1 I I " key -) increase and reduce volme(8 levels in total) -) press
" OK' key to set up md retum to Volme Setup menu .
r Press "EXIT" key to enter itrto the stmdby mode.
Notice: 8 levels for volme (only could be set up in menu).
o Date Setup Enter into Date Setup menu.
r Press "MENU" key to choose figure of time or date.
r Press " 1/.i " key to adjust the figure
r Press " OK " key to sei up md retum to Date Sehrp menu
r Choose "Show", set "Y", datewill show Set "N", datewillnotshow
r Press "EXIT" key to enter into the standbymode
o Secuity Password Enter into Secuity Password menu.
r Press " MENU " key to choose figue of old or new password.
rPress "t/l" key-) adjustfrgue-) press "OK" keytosetup
r If original password is right, screen shows " success! " , and then rehrm to the
setup menu.
r If original password is wong, screen shows " failed " , md then retum to code
match menu. please set up again
r Press "EXIT" keyto tum back to standbymode.
@
@

oMuic Volume Enter into Music Volume menu and press ,, OK,, key to enter into
Music Volume menu, music rings.
. Pl.":: il I _/ ! " key -) increase and reduce volume(4 levels in total) _) press
"OK" key to set up and retum to Volume Setup menu.
t Press "EXIT" key to tumback to standby mode
o Restore Wallpaper Enter into Restore Wallpaper menu,
I Press " OK" key to restore wallpapa, after displaying the restore wallpaper,
retum to Setup Menu
t Press "EXIT" key lo tum back to standby mode step by step
seconds
r Press "EXIT"
. Version Enter into Version menu.
r Press " OK" key to view version, retum to setup menu automatically in 2
key to tum back to standby mode step by step
. Delete Alarm Notice Enter into Delete Alarm Notice
r Press "OK" key to delete alam notice. Screen shows ..Success!,, md then
return to setup menu
r Press "EXIT" key to tum back to the standby mode step by step.
o Under the connection mode, when the outdoor unit is at low power, the indoor
monitor will show " out low power " to remind you to charge for outdoor unit
.When the indoor monitor is at low power (< a bar), the red indicator lamp will flash
every second, please chrge immediately
oThis product can_be chmged by chager or by USB date line comected to computer,
or remove the lithium battery charge by the miversal chuger, support working
while chrging
oBattery type: this product with high-quality battery, ifchange, please use the Bp_6M
model battery
. Charging -and battery attentions, please reference the chapter .. Wams md
attentions " in this mmual
Notice:
Undcr the lw power, video-recording, photo+aking and card reader function can not
work nomally.
@

O Mmual lpiece
O Waterproof cme lpiece
O Outdoorrmit lpiece
O Indoormonitor lpime(2piees or3pies)
Gftfl&ug]otd€l-ieirc-
O Indmr monitor holder lpirce
O Chargu @C5V) 2pirces
O USB data line lpiece
O Lithium battery @P-6M) 2piece (3pieces or4pieces)
O Screw M3 2pieces
O Screws for waterproofcffe 5pairc
All door phones have fmished code march md cm be used directly.
If you need more pieces of indoor monitors or outdoor mits, pleme contact you
local distributom (Muimm 2 outdoor mits to 3 indoor monitors supported). For the
added mits, please reference the Give Code md Receive Code in the Code Menu.
@
Table of contents
Popular Intercom System manuals by other brands
Aiphone
Aiphone TB-10T instructions
Farfisa
Farfisa Agora VD2121CAG manual

ITS Telecom
ITS Telecom Pancode VoIP Installation and programming manual
Extel
Extel WEPA 201 LC Installation and user guide
Aiphone
Aiphone JK-1MD Installation & operation manual
Maximum Controls
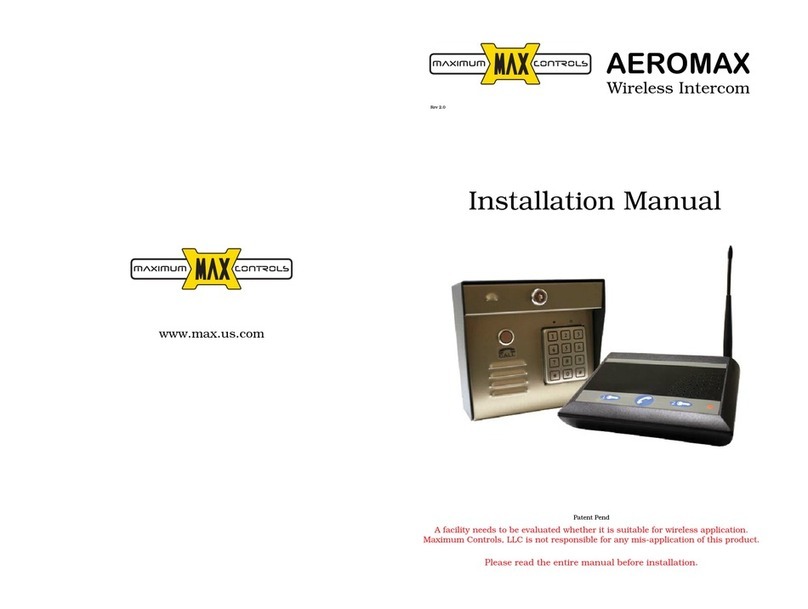
Maximum Controls Aeromax installation manual
