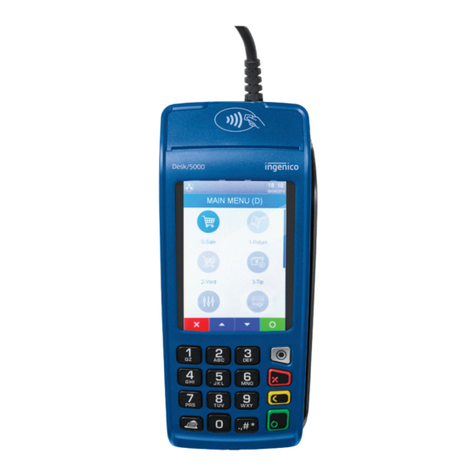
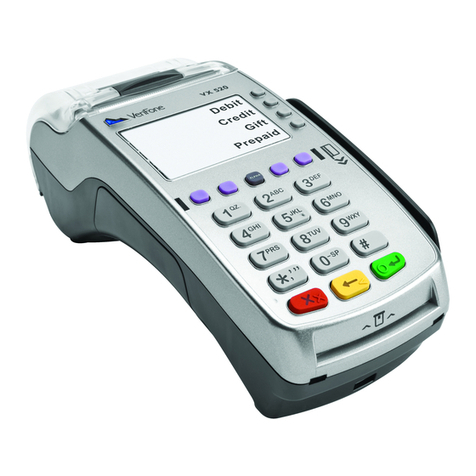
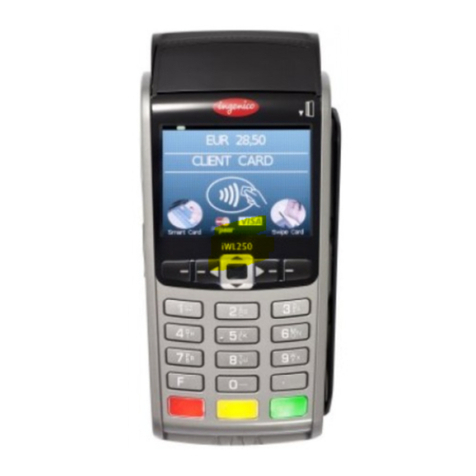
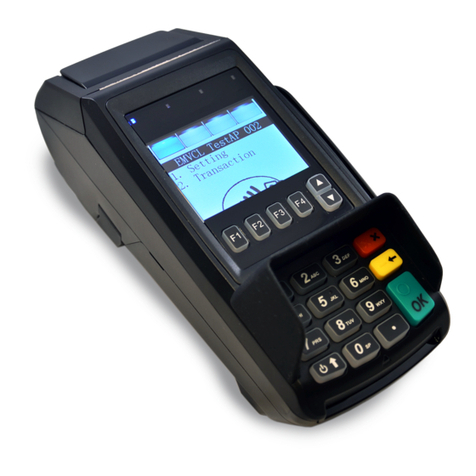
Chase Ingenico 5310 User manual

Ingenico 5310 & 7780
Retail & Restaurant
Terminal Guide
This Quick Reference Guide
will guide you through
understanding your terminal’s
functionality and navigation,
and will help you with
troubleshooting.

3
Contents
GETTING STARTED
Available Transaction Types.............................................................3
Gift Card Transaction Types (Opt.).................................................4
Available Reports ...............................................................................5
Navigating Your Terminal.................................................................6
Clerk/Server Setup.............................................................................6
Settling the Batch .............................................................................. 7
REFERENCE
Prompt Q&A.......................................................................................8
AVS Response Codes.........................................................................9
Common Error Codes......................................................................10
Chip Card Error Codes..................................................................... 11
Credit, Debit and Chip Card Transactions To initiate
Sale A sale transaction using a credit
or debit card using the magnetic stripe,
the chip or the account number if the
card is not present (i.e., phone order).
Press [F1], and
then press [1]
to select Sale.
Force Perform a force sale when the terminal
cannot reach the host (Chase Paymentech) to
authorize a transaction. Contact your voice
authorization center for an authorization
code, then force the transaction.
Press [F1], and
then press [6]
to select Force.
Auth Only An authorization only
transaction provides an approval, but
does not charge the consumer until the
transaction has been performed as a force.
Press [Admin],
and then press
[2] to select
Auth Only.
Void Perform a void to reverse a credit or
debit transaction and prevent any funds
from transferring from the cardholder’s
account. Only available for transactions
in the current batch (i.e., same day).
Press [F1], and
then press [2]
to select Void.
Refund Perform a refund to return
money to a cardholder’s account from a
credit or debit sale completed in a closed
batch (i.e., previous day). May also be
used to adjust a previous transaction.
Press [F1], and
then press
[3] to select
Refund.
Pay@Table (i7780 only) Allows the
terminal to be handed to the cardholder to
swipe the card and confirm any prompts
while still being in possession of the card.
Press [F1], and
then press [9]
to select Pay
At Table.
Open Tab (restaurant only) A pre-
authorization transaction for a specific,
pre-determined dollar amount.
Press [Admin],
press [3] to
select Tab,
and then press
[1] to select
Open Tab.
Close Tab (restaurant only) Perform
to close the opened tab and place the
transaction in the settlement batch file.
Press [Admin],
press [3], and
then press
[2] to select
Close Tab.
Tip Adjust Perform a tip adjustment
to add a gratuity to a completed
transaction prior to settlement.
Press [F1],
press [4] to
select Tip
Menu, and
then press
[1] to select
Tip Adjust.
Available
Transaction
Types
Your terminal
supports various
transaction types.
Refer to this section
for information on
what transactions are
available, when to
use them, and how to
begin the transaction.

4
5
Gift Card
Transaction
Types (Opt.)
If you are participating
in Chase Paymentech’s
proprietary Gift Card
program, your terminal
supports various
stored value card
transaction types.
Refer to this section for
information on what
gift card transactions
are available and
when to use them.
To initiate a gift card
transaction, press
[F1] to access the
main menu, and then
press [5] to access
the Stored Value
(Gift Card) menu.
Gift Card Transactions (Optional) To initiate,
press [F1], press
[5], and then:
Issuance/Add Value Adds value to the
account. This transaction can be used to
issue and activate a new card, or to reload
an active card with incremental value.
Press [1]
to select
Issuance/Add.
Activation/Block Activation Create an
account by assigning value to a card. One
or more can be activated at one time.
Activations can only be performed on
cards that have not been activated.
Press [8]
to select
Activation,
or press [9]
to select
Block Activ.
Redemption Decreases the value stored
on the consumer’s account. This transaction
is performed when a consumer uses the
card to purchase goods or services.
Press [2]
to select
Redemption.
Balance Inquiry Print a receipt that
displays the customer’s available gift
card balance (without changing it).
Press [3]
to select
Balance Inq.
Force Perform a force redemption
or issuance when the terminal
cannot reach the gift card host.
Press [6] to
select Force
Issuance, or
press [7] to
select Force
Redempt.
Add Tip A gift card redemption
transaction for the amount of the
tip, if tip processing is enabled.
Press [4] to
select Add Tip.
Deactivation Changes the status of a
card from active to inactive. Inactive cards
may not be used for redemptions.
Press [0] to
select Other
Options, and
then press
[1] to select
Deactivation.
Reactivation Changes the status of a card
from inactive to active.This transaction can
only be used to activate “deactivated” cards.
Press [0], and
then press
[2] to select
Reactivation.
Force Activation Perform a force
activation when the terminal cannot
reach the gift card host.
Press [0], and
then press [3]
to select Force
Activation.
Reports: Clerk/Server Reports Menu
Clerk/Server Total Report Prints totals
for all users, or a specific user.
Clerk/Server Detail Report Prints detail information on
all transactions performed by all users, or a specific user.
Clerk/Server Untipped Report Prints detail information on
untipped transactions performed by all users, or a specific user.
Reports: Main Menu
Batch Details Report Prints detail information
for each transaction by card type.
Batch Totals Report Prints totals by card type.
Clerk/Server Reports Launches Clerk/Server Reports Menu
options. (See Reports: Clerk/Server Reports Menu.)
HCS Batch Inquiry Contacts the host (Chase
Paymentech) for batch totals and prints a report.
Reports: Gift Card Reports Menu
Detail Report Prints detail information
for all gift card transactions.
Total Report Prints totals on all gift card transactions.
Clerk/Server Detail Report Prints detail information on
all transactions performed by all users, or a specific user.
Clerk/Server Total Report Prints totals
for all users, or a specific user.
Reports: Tab
Open Tab Report Prints a list of all tabs that have
not been closed and are not in the settlement file.
Available
Reports
Use this business
activity data to help
you make crucial
business decisions.
To initiate a report,
press [F1] to access
the main menu,
and then press [9]
to select Reports.
Or, if Pay@Table is
enabled, press [F1],
then press [0] to
select Other Options,
and then press [1]
to select Reports.
To initiate a gift card
report, press [F1]
to access the main
menu, press [5] to
select Stored Value
(Gift Card), and then
press [5] to access
the Reports menu..
To initiate a tab
report, press [Admin]
to access the Admin
menu, press [3] to
select Tab, and then
press [4] to select
Open Tab Rpt.

6
7
BEGIN A TRANSACTION
To begin a transaction, press [F1] to access the main menu,
and then select the transaction type you wish to perform.
Your terminal will guide you through the process.
REPRINT A RECEIPT
To perform a reprint, press the [F1] key to access the
main menu, and then press [7] to select Reprint.
ACCESS CLERK/SERVER SETUP
To access the Clerk/Server option, press the [Admin]
key and then press [5] to select Clerk/Server Set.
ACCESS REPORTS
Press [F1] to access the main menu, and then press [9] to
select Reports. Or, if Pay@Table is enabled, press [F1] to
access the main menu, press [0] to select Other Options, and
then press [1] to select Reports. Press the number next to the
desired report and follow the prompts to print your report.
SHIFT SETUP
Press [F1] to access the main menu, and then press [8] to
access the shift menu. Press [1] to select Start/End Shift
to manually change the shift start and stop times. Press
[2] to select Shift Report to print a report of all shifts.
Navigating
Your
Terminal
Refer to this section
to find and begin the
transaction or function
you wish to use.
Settling
the Batch
Your transactions
must be “settled”
daily. Read this
section to ensure the
settlement process
operates smoothly.
SETTLEMENT
A Settlement operation is used to close the current batch and
open a new batch for logging and accumulating transactions.
Your Ingenico terminal uses a Terminal Capture System
(TCS), meaning it stores transactions throughout the day
and sends batch totals (sales and refunds) to the host
(Chase Paymentech) after the close of business.
There are two settlement options: Manual
Settlement and Auto Settlement.
1 - Manual Settlement
If your terminal is set to manually settle, press the
[Admin] key to access the admin menu and then press [9]
to select Deposit. Follow the prompts that display.
2 - Auto Settlement
If your terminal is set to automatically settle, it will
automatically settle transactions in the current batch at
a specific, pre-determined time, within a 24-hour period.
When configured, auto settlement begins anytime after
the set time occurs if there are transactions in the batch.
For example, if auto settlement time is set to 22:30:00 (10:30
P.M.), then auto settlement occurs at approximately 22:30:00.
ADD CLERK/SERVER
Adds new clerks/servers to your terminal. You will
be prompted to create an ID for each new user.
DELETE CLERK/SERVER
Removes a single clerk/server from the terminal.
CLERK/SERVER REPORT
Prints user ID, name and the operator or supervisor level.
PURGE CLERK/SERVERS
Removes all clerks/servers from the terminal.
Clerk/Server
Setup
Accessible through
the Admin menu, the
clerk/server setup
allows you to manage
IDs.To access, press
[Admin] and then
press [5] to select
Clerk/Server Set.

8
9
Prompt
Q&A
While navigating
through transactions,
you’ll find that some
prompts aren’t as clear
as others. This section
clarifies those prompts.
Prompt Description/Action
SELECT PAYMENT METHOD
1 APPL NAME 1
2 APPL NAME 2
Press [1] for APPL 1
or [2] for APPL 2.
KEY VERIFICATION CODE
& PRESS OK
Key the credit card verification
code and press [OK/8]or
press [OK/8] to bypass.
CODE PRESENT?
ABSENT XREAD
Displays if V-Code prompt
is bypassed. Press [F1] to
select ABSENT or press
[F3] to select XREAD.
TIP = $X.XX
TOTAL = $XX.XX
YES NO
On PIN pad, customer
presses [CHQ] to select YES
or [ALPHA] to select NO.
On terminal, customer
presses [F1] to select YES
or [F3] to select NO.
SELECT ACCOUNT
CHQ SAV
On PIN pad, customer presses
[CHQ] for chequing or presses
[SAV/EP] for savings.
On terminal, customer
presses [F1] for chequing or
presses [F2] for savings.
PURCHASE
$XX.XX - OK?
YES NO
On PIN pad, customer
presses [CHQ] to select YES
or [ALPHA] to select NO.
On terminal, customer
presses [F1] to select YES
or [F3] to select NO.
SELECT TIP
PERCENTAGE
15% OTHER
On PIN pad, customer presses
[CHQ] for a predefined
tip percentage or [ALPHA]
to select OTHER.
On terminal, customer
presses [F1] for a predefined
tip percentage or [F3]
to select OTHER.
AVS
Response
Codes
The Address
Verification System
(AVS) is a feature that
adds fraud protection
on card-not-present
transactions. The
postal code is
compared against
the information
on file with the
card-issuing bank.
Use this chart to
interpret domestic
AVS Response Codes
by card type.
Code Description VISA MC AmEx Disc.
XMatch - Address and
6-digit postal code
Y
Match - Address and
postal code (for Discover,
address only matches)
A
Partial - Address matches,
postal code does not (for
Discover, both address
and postal match)
W
Partial - 6-digit postal
code matches, address
does not (for Discover,
no data from issuer)
ZPartial - Postal code
matches, address does not
N
No match - Neither
address nor postal
code match
U
Unavailable - AVS system
unavailable or issuer
does not support AVS
RRetry - Issuer’s system
unavailable or timed out
S
Not supported - AVS
not supported by
issuer at this time

10
11
Common
Error
Codes
In the event that your
terminal displays
an error, refer to
these error codes
to troubleshoot
your terminal.
If the code you are
experiencing is not
shown, retry the
transaction. To reduce
chargeback risks
and manage your
processing costs, avoid
keying transactions
when the card is
present. Instead, ask
for another method
of payment.
If the error persists,
contact your Help
Desk for support.
Error Code Description Action
Batch Full
Settle Batch
Number of
transactions in the
current batch has
reached its limit.
Press [ADMIN], and
then press [9] to
select Deposit.
Base Busy
Please Wait
Displays when the
i7780 terminal
attempts to connect
to the host and is
not successful.
No action.
Card Not
Supported
The card type
being attempted
is not supported
or not enabled on
your terminal.
Verify whether you can
accept the card type.
Check Pinpad The terminal is
unable to locate
the PIN pad.
Verify whether the
connection is valid and
disconnect/reconnect
power to the terminal.
Chip Card
Error
Codes
In the event that your
terminal displays a
chip-related error,
refer to these error
codes to troubleshoot
your terminal.
If the code you
are experiencing is
not shown, retry
the transaction.
If the error persists,
contact your Help
Desk for support.
Error Code Description Action
Application
Not Supported
Swipe Allowed
Remove Card
A chip card is
inserted, but
no application
on the chip can
be accepted.
Swipe chip card.
Can’t Read
Chip
Swipe Allowed
Remove Card
Displayed when
a chip card is not
inserted properly or
the card is faulty.
Retry the chip
transaction if card was
not inserted properly.
Then, swipe chip card.
Card Removed
Press Cancel
During a chip
transaction, the
card should not be
removed before
the transaction
is completed.
Retry the chip
transaction.
Not Processed
Swipe Not
Allowed
Remove Card
Displayed when a
processing error
happened where
a fallback is not
allowed. The
chip card cannot
be processed.
Remove card. Use
another card.
If the problem happens
to more than one card,
try the following:
Reboot the device.
If the problem is
persistent, contact
the Help Desk.
Insert Card in
Chip Reader
Will display if a
chip card is swiped
and not inserted.
Insert the chip card.

WCKA-016a-EN Ingenico, Retail/Restaurant 06/10
Merchant Support
1.800.265.5158
This manual suits for next models
1
Table of contents
Other Chase Touch Terminal manuals
Popular Touch Terminal manuals by other brands
ADTRAN
ADTRAN 621i XGS-PON ONT quick start

AINSWORTH
AINSWORTH A560 Service manual
Opticon
Opticon OPN2005 quick start guide

CLIVET
CLIVET ELFODuct HP 015.0 Instructions for installation, use and maintenance manual
Bosch
Bosch rexroth IndraControl VEP 30.6 operating instructions
Acroprint
Acroprint Data Collection Terminal DC7000 Hardware manual
