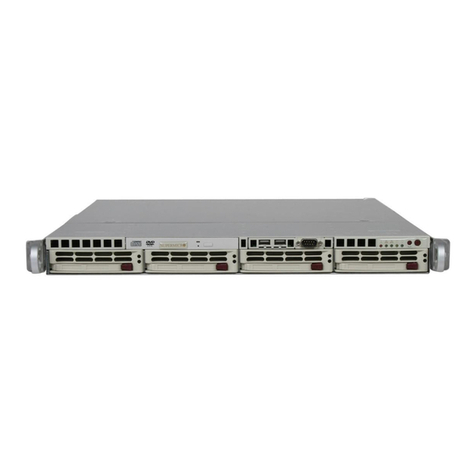
Checkpoint QUANTUM SMART-1 6000-L Operating and safety instructions

[Classification: Protected]
28 February 2021
QUANTUM SMART-1
6000-L/6000-XL
APPLIANCES
REPLACING STORAGE
DEVICES

Check Point Copyright Notice
© 2021 Check Point Software Technologies Ltd.
All rights reserved. This product and related documentation are protected by copyright and distributed
under licensing restricting their use, copying, distribution, and decompilation. No part of this product or
related documentation may be reproduced in any form or by any means without prior written authorization
of Check Point. While every precaution has been taken in the preparation of this book, Check Point
assumes no responsibility for errors or omissions. This publication and features described herein are
subject to change without notice.
RESTRICTED RIGHTS LEGEND:
Use, duplication, or disclosure by the government is subject to restrictions as set forth in subparagraph (c)
(1)(ii) of the Rights in Technical Data and Computer Software clause at DFARS 252.227-7013 and FAR
52.227-19.
TRADEMARKS:
Refer to the Copyright page for a list of our trademarks.
Refer to the Third Party copyright notices for a list of relevant copyrights and third-party licenses.

Important Information
Latest Software
We recommend that you install the most recent software release to stay up-to-date with the
latest functional improvements, stability fixes, security enhancements and protection
against new and evolving attacks.
Certifications
For third party independent certification of Check Point products, see the Check Point
Certifications page.
Check Point Quantum Smart-1 6000-L/6000-XL Appliances Replacing
Storage Devices
For more about this release, see the home page.
Latest Version of this Document in English
Download the latest version of this document in PDF format.
Feedback
Check Point is engaged in a continuous effort to improve its documentation.
Please help us by sending your comments.
Revision History
Date Description
28 February 2021 First release of this document

Table of Contents
Quantum Smart-1 6000-L/6000-XL Appliances Replacing Storage Devices|4
Table of Contents
Safety Instructions
5
Storage Devices and RAID Levels
6
Numbering of the Disk Slots on the Front Panel
7
Disk Carrier
7
Status Indicator LED Patterns
8
Procedure
9
Preparing the Appliance
9
Identifying the Disks
9
Removing the Disk Carrier
10
Installing the Disk Carrier
10
Installing the Front Panel Bezel
11
Making Sure the New Disk is Recognized and Synchronized
11
Disk Slot Blanks
12

Safety Instructions
Quantum Smart-1 6000-L/6000-XL Appliances Replacing Storage Devices|5
Safety Instructions
nLift the appliance with assistance. To avoid injury, do not attempt to lift the appliance by yourself.
nOpening or removing the appliance cover, while the appliance is powered on may expose you to a
risk of electric shock.
nDo not operate the appliance without the cover for more than five minutes. Operating the appliance
without the cover can result in component damage.
nMany repairs may only be done by a certified service technician. Only perform troubleshooting and
simple repairs as authorized in your product documentation, or as directed by the technical support.
nWe recommend that you always use an antistatic mat and antistatic strap on your wrist, while
working on components inside the appliance.
nTo ensure proper operation and cooling, all bays in the appliance and cooling fans must be always
populated with a component or a blank.
For more information, see the
Enterprise Products Safety, Environmental, and Regulatory Information
booklet supplied in the original appliance shipping carton.
Best Practice - We recommend that only experienced personnel install or remove
hardware components. Installing or removing components incorrectly can
permanently damage the Security Management Appliance.
Important - Make sure that you are electromagnetically grounded when working with
hardware components of the appliance. ESD (electrostatic discharge) can damage the
appliance.

Storage Devices and RAID Levels
Quantum Smart-1 6000-L/6000-XL Appliances Replacing Storage Devices|6
Storage Devices and RAID Levels
nSmart-1 6000-L - The supplied Enterprise graded SATA III 3.5" HDDs (Hard Disk Drives) are hot
swappable.
nSmart-1 6000-XL - The supplied Enterprise graded 2.5" SSDs (Solid State Drives) come in 1TB and
4TB capacities depending on your storage requirements and are hot swappable.
nHot swappable disks are supplied in hot swappable disk carriers that fit in the disk slots.
nIf you do not immediately install a replacement disk when a disk fails, leave the failed disk in place to
ensure proper appliance cooling until the new disk is installed.
Smart-1 6000-L
4TB HDD Disks
Smart-1 6000-XL
4TB SSD Disks
Smart-1 6000-XL
1TB SSD Disks
Default
RAID Level
5, 6, 50 for 6 disks 5, 6, 50 for 6 disks 5, 6, 50 for 6 disks
Default
Storage
6 x 4TB disks 6 x 4TB disks 6 x 1TB disks
Optional
Storage
12 x 4TB disks 12 x 4TB disks N/A
Supported
RAID
Levels
5, 6, 10, 50, 60 for 12 disks 5, 6, 10, 50, 60 for 12 disks 5, 6, 50 for 6 disks
Best Practice -The recommended default storage options for Smart-1 6000-XL
appliances are:
n6 x 1TB disks when using a Smart-1 6000-XL appliance as a Management
Server only.
n6 x 4TB disks when using a Smart-1 6000-XL appliance as a Management
Server+Log Server or a Log Server only. This is due to additional storage space
required for logs.

Storage Devices and RAID Levels
Quantum Smart-1 6000-L/6000-XL Appliances Replacing Storage Devices|7
Numbering of the Disk Slots on the Front Panel
Smart-1 6000-L/6000-XL Front Panel
Slot 0:
Disk
Slot 3:
Disk
Slot 6:
Optional
Slot 9:
Optional
Slot 1:
Disk
Slot 4:
Disk
Slot 7:
Optional
Slot 10:
Optional
Slot 2:
Disk
Slot 5:
Disk
Slot 8:
Optional
Slot 11:
Optional
Note - See the slot numbers below the bottom row of disk slots on the appliance.
Disk Carrier
Item Description
1 Status indicator LED.
Shows the power condition of the disk.
For LED patterns, see the table below.
2 Activity indicator LED.
Shows whether the disk is currently in use or not.
3 Release button.
4 Release handle.
5 Disk.

Storage Devices and RAID Levels
Quantum Smart-1 6000-L/6000-XL Appliances Replacing Storage Devices|8
Status Indicator LED Patterns
Status Indicator
LED Pattern Disk Condition
Steady green Disk is online.
Flashes green twice per second Identifying disk or preparing disk for removal.
Blinks green, amber, and then turns
off
Predicted disk failure.
Blinks amber four times per second Disk failed.
Blinks green slowly Disk is rebuilding.
Blinks green for three seconds, blinks
amber for three seconds, then turns
off after six seconds
Disk rebuild stopped.
Off Disk is ready for insertion or removal.
The status indicator LED remains off until all disks are
initialized after the system is turned on. Disks are not ready for
insertion or removal during this time.

Procedure
Quantum Smart-1 6000-L/6000-XL Appliances Replacing Storage Devices|9
Procedure
These steps are required to remove and install a disk:
1. Prepare the appliance.
2. Identify the disks.
3. Remove the disk carrier with the failed disk.
4. Install the disk carrier with the new disk.
5. Install the front panel bezel.
6. Make sure the new disk is recognized and synchronized.
Preparing the Appliance
1. Make sure to follow the
"Safety Instructions" on page5
.
2. If installed, remove the front panel bezel:
a. At the left end of the bezel, unlock the keylock using the bezel key.
b. On the left side of the bezel, press and hold the release button.
c. Pull the left end of the bezel away from the front panel.
d. Unhook the right end of the bezel.
e. Pull the bezel away from the appliance.
f. On the right end of the bezel, insert the bezel key into the back of the bezel, so it is not lost.
Identifying the Disks
To identify the disks individually:
1. Connect to the command line on the appliance.
2. Log in to Expert mode.
3. Send a signal to each disk to make the LED blink on the disk carrier (up to 12 disks):
/opt/MegaRAID/MegaCLi/MegaCli -v -PdLocate -start -physdrv\[32:0\] -
aALL
/opt/MegaRAID/MegaCLi/MegaCli -v -PdLocate -start -physdrv\[32:1\] -
aALL
/opt/MegaRAID/MegaCLi/MegaCli -v -PdLocate -start -physdrv\[32:2\] -
aALL
... ... ...
/opt/MegaRAID/MegaCLi/MegaCli -v -PdLocate -start -physdrv\[32:11\]
-aALL

Procedure
Quantum Smart-1 6000-L/6000-XL Appliances Replacing Storage Devices|10
For the location of disks in the corresponding disk slots, see
"Storage Devices and RAID Levels" on
page6
.
4. After you identified each disk, send a signal to each disk to stop the LED blinking (up to 12 disks):
/opt/MegaRAID/MegaCLi/MegaCli -v -PdLocate -stop -physdrv\[32:0\] -
aALL
/opt/MegaRAID/MegaCLi/MegaCli -v -PdLocate -stop -physdrv\[32:1\] -
aALL
/opt/MegaRAID/MegaCLi/MegaCli -v -PdLocate -stop -physdrv\[32:2\] -
aALL
... ... ...
/opt/MegaRAID/MegaCLi/MegaCli -v -PdLocate -stop -physdrv\[32:11\] -
aALL
Removing the Disk Carrier
1. Press the release button on the front of the hot swappable disk carrier.
2. Open the hot swappable disk carrier handle.
3. While holding the handle, slide the disk carrier out of the disk slot.
4. Wait for at least 15 seconds. The appliance needs time to recognize that you removed a disk.
Installing the Disk Carrier
1. Press the release button on the front of the disk carrier.
2. Open the release handle.
3. Insert the disk carrier into the disk slot.
4. Slide the disk carrier until the disk connects with the backplane.
5. Close the disk carrier release handle to lock the disk carrier in place.
6. Wait for at least 15 seconds. The appliance needs time to recognize that you installed a disk.

Procedure
Quantum Smart-1 6000-L/6000-XL Appliances Replacing Storage Devices|11
Note:
nWhen installing a disk carrier, before locking its handle, make sure that the adjacent disk carriers are
fully installed. Otherwise, you can damage the shield spring on the adjacent disk carrier that is
partially installed.
Installing the Front Panel Bezel
1. On the back of the bezel, locate and remove the bezel key.
2. Hook the right end of the bezel onto the appliance.
3. On the left side of the bezel, press and hold the release button. Fit the left end of the bezel onto the
appliance and release the button.
4. Lock the keylock at the left end of the bezel using the bezel key.
Making Sure the New Disk is Recognized and
Synchronized
1. Connect to the command line on the appliance (using SSH or console).
2. Log in to Expert mode.
3. Check that the replacement disk works correctly. Monitor the disk synchronization until it completes.
Run this command: raid_diagnostic

Disk Slot Blanks
Quantum Smart-1 6000-L/6000-XL Appliances Replacing Storage Devices|12
Disk Slot Blanks
This section shows how to remove and install disk slot blanks that cover the empty disk slots.
To remove a disk slot blank:
1. Press the release button to open the release handle on the disk slot blank.
2. While holding the handle, slide the blank panel that covers the disk slot out of the disk slot.
To install a disk slot blank:
Important - If you are not replacing the failed disk immediately, then to maintain proper system cooling,
install the blank panel that covers the disk slot in the empty disk slot. You can also remove the disk from the
disk carrier and install the empty disk carrier into its disk slot.
1. Insert the disk slot blank into the disk slot.
2. Push the disk slot blank into the disk slot.
The release button clicks into place.
Other manuals for QUANTUM SMART-1 6000-L
1
This manual suits for next models
1
Table of contents
Other Checkpoint Server manuals
Popular Server manuals by other brands
xFusion Digital Technologies
xFusion Digital Technologies FusionServer 2488H V6 Technical manual
HPE
HPE ProLiant MicroServer Gen10 troubleshooting guide
IBM
IBM Redbooks x3850 X5 Installation and user guide
Compaq
Compaq DL360 - ProLiant - Photon Maintenance and service guide
Huawei
Huawei FusionModule1000A20 Commissioning Guide
iXsystems
iXsystems TrueNAS ES24 Basic Setup Guide
