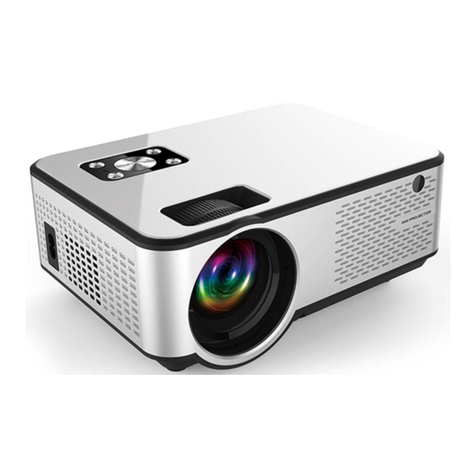
Cheerlux CL312 Series User manual

1
Home Theatre LED Projector
Model No.: CL312/CL317 Series
User's Manual

2
CONTENTS
Warning………………………………………………………………………………3
Safely Precautions…………………………………………………………………4
Caution……………………………………………………….………...……….……5
Appearance Instruction……………………………………………………...….....6
Top view…………………………………………………………..………………...6
Bottom view ……………………………………………………………..……..…..6
Front view ………………………………………………………………………….7
Back view …………………………………………………………………..…..…..7
Sides view ……………………………………………………………..…..……….8
Installation of projector…………………………………………………..…...……9
Full setting…………………………………………………………….…………… 9
Standard setting (front projection)……………………………………………….10
Installation of method…………………………………………………….………..11
Signal connection instruction…………………………………………….………12
Operation………………………………………………………………..……...…… 13
Open operation…………………………………………………………….….……13
Close opera Panel key-press instruct………………………………………… …14
Remote control instruction ………………………………………………..………15
Image trapezoid adjustment………………………………….…………….……...16
Focus adjustment………………………………………………………….………16
Keystone adjustment………………………………………………….……..……16
Menu setting method………..………………………………....…….……..….……17
System function operation…………………………………..……………….……17
TV menu……………………………………………………..……………………18
Picture menu………………………………………………………………………19
Option men…………………………………………………………………………20
Audio…………………………………………………………………………...……20
USB Port…………………………………………………………………….………21
USB support …………………………………………………………….…….…...22
Maintenance………………………………………………………………....………23
Filter clearance…………………………………..………………………..….……23
Cleaning of LCD panel …………………………………………….…..…………23
Trouble shooting…………………………………………………….…...…………24
Specification……………………………………………………………..…….……25
Accessory……………………………………………………………………….……26

3
W ARNING
▲ WARNING:
Please remember the model
Number
and series number if you
need.
And please check all
accessories
when you drop the carton
package
When you use this projector, please read this manual carefully
MODEL NUMBER:
SERIES NUMBER:
Warning: Do not place the projector in the wet condition,
avoid to getting an electric shock
It indicates there is a instruction for important operation
It indicates there is a dangerous voltage
Highvoltage,donotopenit
Exceptforprofession!
WARNING
Warning:
Do not stare directly into the light of the lens during operation.
The intense light beam may damage your eyes, especially for child-
ren
.

4
Safety precautions
▲Warning:
when using this projector ,please read this manual carefully.
If wrong operation, it will cause electric shock or fire. so when use and repair this projector ,please comply
with the following points
1,Read manual
Because use this projector, please read full manual carefully and operate according to this manual
Instruction.
2, Cleaning instructions:
when cleaning this projector ,please make sure the power cable is unplugged.. Use the wet cloth to
clean, not the cleanser.
3, Accessories:
To avoid any damaged to the projector, use accessories enclosed in the package.
4, Environment conditions:
Do notplacethe
projector
in wet or moist environment.
5
, Installation
and fix:
Pleaseplace this
projector
on a stable and leveled areas.
6, Ventilation:
The ventilation in the
projector
is best for
projector
work stably. Do not let the dust wall up the
filter,
or it will
cause the projector to overheat and high-temperature
protected. Poor heat dissipation will shorten the service
life of the projector, and will lead to dangerous.
So please rinsehefiltermonthly.
7, Power:
90 – 240 Volts AC
8, Ground Cable: It is a 3 pin plug.
9, Power cable:
Inspect the power cable before plugging into the power source.
10, Thunder:
When the thunder happen or long time no use, please pull the power cable out of projector.
11, Repairing:
As the high voltage inside, please do not open or try to repair the projector by yourself. Please ask a profes-
sional technician refer to the manual or the dealer’s advice to repair.
the projector.
12, Far away Heat sensitive device:
please make sure this projector far away other heat device . It will damage the projector service life

5
Caution
▲
▲▲
▲About the installation
In order to improve the projector service life, It should not place in a wet, dusty condition.
Do not put the projector under the sunshine directly
Projector working temperature:0.c~+60℃
Projector store temperature: -20.c~+70℃
Do not block the ventilation-window of projector
If the projector interior temperature is too hot, the machine will be shut off automatically. This is
hot - protected system.
So please clean the filter of projector monthly. It is very important. Do not let the dust cover the
filter.
▲
▲▲
▲About Opening and closing the pro ector
when open the projector ,connect the power cable and press the power" key on the panel .the
projector will work ,and the LED lamp will be bright immediately as well.
when close the projector , press the power key again . And then the lamp shut off.

6
Appearance instruction
▲
▲▲
▲Top view
▲
▲▲
▲Bottom view
Note: Please remove the high-feet adjustment(A and B) when ceiling the projector, and the length of the
screw rod in position A B C D should not exceed 10mm, to avoid an electric shock when the plastic enclosure is
broken and the rod touched the high-tension electricity inside the machine.
②
②②
②
①
①①
①
③
③③
③
②
②②
②
③
③③
③
⑤
⑤⑤
⑤
①
①①
①
1. Panel key-press
2. Speaker Bulb
3. compartment cover
1. Holes for ceiling mount;
2. Ventilation window;
3. Bottom Cover;
4. Ventilation window
5. Supporting feet

7
▲
▲▲
▲Front view
Note: 1) When use the remote control, please point this receiver directly;
2) Adjust the lens focus to improve the image quality;
3) Adjustable supporting feet can support the projection angle to 15℃, but for the best image quality,
you would better adjust the angle less than 8℃or no angle.
▲
▲▲
▲Back view
②
②②
②
①
①①
①
③
③③
③
②
②②
②
①
①①
①
1. Remote sensor;
2. Lens;
3. Adjustable supporting feet
1. Air outlet
2. Power socket

8
▲
▲▲
▲Left side view
▲
▲▲
▲Right side view
Note: This air inlet is very important, do not block it, otherwise, it will burn the projector.
①
①①
①
①
①①
①
③
③③
③
②
②②
②
⑤
⑤⑤
⑤
⑥
⑥⑥
⑥
⑧
⑧⑧
⑧
②
②②
②
③
③③
③
④
④④
④
⑦
⑦⑦
⑦
1. Air outlet
1. Air inlet
2. Keystone
3. Signal interface
①
①①
①HDMI1 HDMI2 Ports
②
②②
②Audio out L/R
③
③③
③Audio in L/R
④
④④
④Y/Pb/Pr
⑤
⑤⑤
⑤USB1 USB2 Ports
⑥
⑥⑥
⑥TV input (only for TV function projector)
–Analog TV or Digital TV
⑦
⑦⑦
⑦S-video input
⑧
⑧⑧
⑧VGA input

9
Installation
▲
▲▲
▲FULL SETTING
Please use the setup instruction below:
Projector Installation
In order to get good image quality, do not let the sunlight shine the screen directly .If you
use the projector in the day time.

10
▲
▲▲
▲Standard setting -Front
pro ection
Please refer to the following sheet , adjust your picture
size
and distance (from the lens to
screen
)
Size 4:3 16:9
50" 2.38m 2.61m
72" 3.41m 3.74m
100" 4.73m
5.15m
The data maybe have 3% error, due to the image size according to the distance between projector and
screen. Distances may vary from setup to setup, please only use these measurements as a guide and
always measure the throw distance before mounting. If the distance is less 2m or over 5m, the image
maybe not clear.
Warning: Please check the following picture to show the trapezoid adjustment.
.

11
Pro ector installation
▲Installation method:
Contact a professional service Technical staff to mount this projector to a ceiling. Follow the Instructions
below for the correct projector positions:
Warning:
1) To avoid damaging beyond repair or bodily injury, secure projector mounts firmly to the ceiling or a
stable surface.
2)This projector can only be used in an environment with a temperature not exceeding the range
of 0- 35 ℃.The projector may malfunction if temperatures vary outside the normal operating
Range.
3)The sharpness of the screen might be interrupted when the projector is being used in a dusty,
wet, moist or smoke filled environment. The projector might malfunction in a moist or wet
Environment.
4)Take care of sufficient ventilation around the projector. Otherwise this projector might
overheat and cause life threatening situations

12
Pro ector Installation
▲
▲▲
▲Signal connection instruction
CL312A/CL317A(CL312D/CL317D) will have the TV(digital TV) input more.
Notice: Before opening the projector, please complete the connection of the external devices (With PC,
DVD, etc.) If any device has the power open, may result in equipment damaged.

13
Basic Operation
▲
▲▲
▲Open operation
Notice:
If the projector
is the
new
one
please
read
projector “install
chapter”
placed the
projector
connect the signal wire and the power wire,
the
operation as
follow:
Before opening the projector, please complete the connection of the external devices (With PC,
DVD, etc.)
1, Before use the remote. Put in two 7 size batter
Put in two 7 size battery in it
2, Plug the power cable into the power socket.
The power indicator shows red light.
Open the lens gap.
、
3, press the power key on the remote control or panel
the indicator light turn light
4, After 2 seconds the projector begin work.
5, For the new projector. When the first time to use maybe will appear image
unclear or trapezoid distortion, please read image adjustment chapter
6, After the image is clear then you can watch program during watching
you also can setup the system parameter, please read menu setting chapter

14
▲
▲▲
▲Close operation
1. During use the projector, press power key can let the projector switch to turn-off. In the meantime, the fan
stops and the projector is completely switched off.
If the projector is not to be used for a long time, please proceed to the fol-
lowing procedure.
2. Unplug the projector from the power socket.
3. Reattach the lens cap to the lens
Panel key-press instruction
Panel key-press sketch map
1. Power Key
It can open or close the projector, its function same as the “power” in the remote control.
2. Sources Key
It can choose the input signal (such asAV, YPBPR, HDMI1, HDMI2, USB1, USB2, PC or TV)
3. Menu Key
MENU key to display the main menu or return to superior menu, CH + / - key to move up and down options,
V + / - keys to select or enter the option to move around.
4. Indicator light
5.The “TOP↑” and “DOWN↓” key on the remote controller corresponds to the “CH+” and
“CH-” key on the operating panel. They are used to move the cursor to up or down in the “Function menu
window” and in the sub-menus.
6. The “LEFT-” and “RIGHT+” key on the remote controller corresponds to the “V- ” and “V+” key on the
operating panel. They are used to move the cursor to left or right or to decrease or increase the volume of
sound.
②
②②
②⑥
⑥⑥
⑥
①
①①
①
③
③③
③
⑤
⑤⑤
⑤
④
④④
④

15
▲
▲▲
▲The remote control keys instruction:
::
:
Warning:
Do not expose the remote con-
trol to shocks, liquid or high
humidity. Do not expose it to
direct sunlight or other intense
light source when you operate.

16
▲
▲▲
▲Image trapezoid ad ustment
The new projector, using it first
time, commonly will ap-
peared with image
faintness and the image is trapezoid,
it is
course
that
not adjust well of the lens focus and the
trapezoid.
Following the step to adjust focus
▲
▲▲
▲Focus ad ustment
1、T
urn the lens into the
projector
then turn
itout slowly at
the same
time
looking
at
the
resolution point Carefully
when the image
is
very clearly (take the middle area
of
the image),it
isthe best
situation
of
the
lens.
NOTE: When you replace the projector from a cold to a warm environment water vapour
might occur. Don't turn the projector on when this occurs but wait until the vapour has disappeared.
▲
▲▲
▲Trapezoid ad ustment
If a projected picture has keystone distortion, correct image with Keystone adjustment. The image becomes
trapezoid shape when the screen or project is not level. Please reposition, the projector to improve its angle
to the screen. However, the circumference of the image may not be focused.
If not able to use the Keystone correction function to correct the trapezoid distortion, please reduce of the
projector to centre the screen vertically.

17
Menu setting
▲
▲▲
▲System function operation
Menu basic operation
MENU key to display the main menu or return to superior menu, CH + / - key to move up and down options, V
+ / - keys to select or enter the option to move around.
Source choice
When the selected signal path without signal input screen displays "NO SYNC":
Press “Source” key to display the signal source selection menu:
CL312/CL317 CL312A/CL317A CL312D/CL317D

18
▲Analog TV Menu
Function
Channel Auto Turning
Analog Manual Turning
Program Edit Favorite, Skip, Delete, Move, Re-
name
In the other mode, TV is automatically hide
Notice: Only CL312A/CL317A model has TV input.

19
Picture Menu
▲
▲▲
▲Picture Mode Standard
You can adjust the picture display mode, according to personal preference settings, including standard, vivid,
movies and user mode
▲Color Temperature Medium
User normal, cold color temperature, warm temperature
▲Aspect Ratio 16:9
Includes eight screen zoom and 16:9 display
▲Noise Reduction Middle
Image background noise reduction
▲PC Setup
In VGA mode, picture mode only contrast and brightness can be adjust

20
▲
▲▲
▲Option Menu
You can adjust the OSD language, transparency, menu display time.
Memory recall: the machine can be set back to factory settings
▲
▲▲
▲Audio Menu
When playing, press V + / - adjust the volume directly.
▲Sound Mode Standard
Select the sound playing mold
Balance
Left, right sound channel Equilibrium
Auto Volume Off
According ambient noise a just the
Volume
Surround Sound Off
Sound accompaniment surround
SPDIF MODE PCM
Sound accompaniment surround
EQ
Select the accompanying sound effect
This manual suits for next models
1
Table of contents
Other Cheerlux Projector manuals


