Chelsio N210 User manual

Copyright 2005 Chelsio Communications, Inc. All rights reserved.
370 San Aleso Ave, Suite 100, Sunnyvale, CA 94085
This document and related products are distributed under licenses restricting their use, copying, distribution, and reverse-
engineering. No part of this document may be reproduced in any form or by any means without prior written permission by
Chelsio Communications.
N210 and N110 are trademarks of Chelsio Communications, Inc.
Sun, Solaris, and SPARC are trademarks, or registered trademarks of Sun Microsystems, Inc.
THIS DOCUMENTATION IS PROVIDED “AS IS” AND WITHOUT ANY EXPRESS OR IMPLIED WARRANTIES,
INCLUDING, WITHOUT LIMITATION, THE IMPLIED WARRANTIES OF MERCHANTABILITY AND FITNESS FOR A
PARTICULAR PURPOSE.
THE USE OF THE SOFTWARE AND ANY ASSOCIATED MATERIALS (COLLECTIVELY THE “SOFTWARE”) IS
SUBJECT TO THE SOFTWARE LICENSE TERMS OF CHELSIO COMMUNICATIONS, INC.
Chelsio N210/N110 Installation and User Guide for Solaris Release 10, April 2005. ii

Contents
Introduction.................................................................................................................................... 1
Hardware and Software Requirements........................................................................................ 1
Hardware Installation .................................................................................................................... 1
Software Installation ..................................................................................................................... 2
Installing the i386 driver............................................................................................................... 2
Installing the SPARC driver ......................................................................................................... 2
Uninstalling the i386 driver........................................................................................................... 2
Uninstalling the SPARC driver..................................................................................................... 3
Network Configuration.................................................................................................................. 3
Configuring the Network Host Files............................................................................................. 3
Device Driver Parameters............................................................................................................. 5
Driver Configuration..................................................................................................................... 5
Driver Parameter Details.............................................................................................................. 6
Setting Driver Parameters............................................................................................................ 8
Device Driver Limitations ............................................................................................................. 8
Customer Support......................................................................................................................... 8
Chelsio N210/N110 Installation and User Guide for Solaris Release 10, April 2005. iii

Introduction
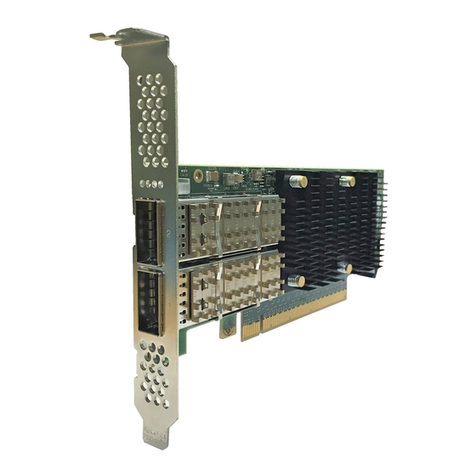
This document describes the Chelsio N210 and N110 10Gb Ethernet Adapter driver for Solaris
Release 10.
Hardware and Software Requirements
The N210/N110 driver supports the following architectures.
•All Sun SPARC architectures supporting PCI*/PCI-X (133, 100, or 66Mhz) adapters.
•All x86 (i386) architectures supporting PCI*/PCI-X (133, 100, or 66Mhz) adapters.
oAMD CPUs, 32-bit and 64-bit (x86/x86_64/amd64)
oIntel CPUs, 32-bit and 64-bit (x86/x86_64)
*The N210/N110 10Gb Ethernet adapter supports 3.3v PCI bus only. Running a 10Gb
adapter on a PCI (32-bit) bus is not recommended as throughput performance will be
significantly reduced by the limitations of PCI.
Hardware Installation
1. Halt and power off your system.
2. Power off all remaining peripherals attached to your system.
3. Unpack the 10Gb Ethernet adapter and place it on an anti-static surface.
4. Remove the system case cover according to the system manufacturer’s instructions.
5. Remove the PCI filler plate from the slot where you will install the 10Gb Ethernet adapter.
For maximum performance, it is highly recommended to install the adapter into a PCI-X
slot running at 133Mhz. Avoid installing more than one device per PCI segment as this
will revert the bus to 100Mhz operation.
6. Holding the 10Gb Ethernet adapter by the edges, align the edge connector with the PCI
connector on the motherboard. Apply even pressure on both edges until the card is firmly
seated. It may be necessary to remove the XFP (optics) modules prior to inserting the
adapter.
7. Secure the 10Gb Ethernet adapter with a screw, or other securing mechanism, as
described by the system manufacturer’s instructions. Replace the case cover.
8. Connect a fiber cable, multi-mode for short range (SR) optics or single-mode for long
range (LR) optics, to the 10Gb Ethernet adapter.
Chelsio N210/N110 Installation and User Guide for Solaris Release 10, April 2005. 1

Software Installation
The Chelsio N210/N110 10Gb Ethernet adapter driver software may be downloaded via our
support website at http://www.chelsio.com. The driver may also be distributed on CD-ROM.
In either case, the driver file will be named chxge-2.1.1-s10.tar.gz. Copy this file to a location on
your system where you have read/write access and enough space to un-tar the package.
Using the gunzip and tar utilities, unpack the driver file. This will create a new directory named
chxge-2.1.1-s10.
# gunzip -d < chxge-2.1.1-s10.tar.gz | tar xf -
Use the cd command to change to the newly created chxge-2.1.1-s10 directory
Installing the i386 driver
Use the pkgadd utility to install the CHLSchxgei package.
# pkgadd –d .
At the prompt, select the number for the CHLSchxgei driver and answer ‘y’ to install the
driver.
Installing the SPARC driver
Use the pkgadd utility to install the CHLSchxges package.
# pkgadd –d .
At the prompt, select the number for the CHLSchxges driver and answer ‘y’ to install the
driver.
Uninstalling the i386 driver
Unplump and unload the driver prior to removal, use ifconfig <interface> down
unplumb to bring down the interface. Use modinfo | grep chxge to identify the module
ID and use modunload –i <module_ID> to unload the driver.
Use the pkgrm utility to remove the CHLSchxgei package.
# pkgrm CHLSchxgei
Answer ‘y’ to the interactive prompts to remove the driver from the system.
Chelsio N210/N110 Installation and User Guide for Solaris Release 10, April 2005. 2

Uninstalling the SPARC driver
Unplump and unload the driver prior to removal, use ifconfig <interface> down
unplumb to bring down the interface. Use modinfo | grep chxge to identify the module
ID and use modunload –i <module_ID> to unload the driver.
Use the pkgrm utility to remove the CHLSchxges package.
# pkgrm CHLSchxges
Answer ‘y’ to the interactive prompts to remove the driver from the system.
Network Configuration
This section describes how to configure your network after the 10Gb Ethernet adapter has been
installed.
Configuring the Network Host Files
After installing the 10Gb Ethernet driver you will need to create a file named
hostname.chxgeinstance for the interface. You may also need to edit the /etc/hosts
file if you wish to add a hostname for the IP address of the interface.
1. Locate the instance number for the chxge interface using the grep command.
# grep chxge /etc/path_to_inst
"/pci@0,0/pci8086,3595@2/pci8086,32a@0,2/pci1425,1@2" 0"chxge"
In the above example, the instance number of the adapter (in bold) is 0.
2. Use the ifconfig utility to configure the adapter interface.
# ifconfig chxge0 plump ipaddress netmask mask broadcast + up
Replace ipaddress with your desired network IP address, and mask with your desired
netmask. Refer to the ifconfig(1M) manpage for additional information.
To permanently add your configuration to the system, so that changes are not lost after
reboot, you will need to create an /etc/hostname.chxge0 configuration file.
1. Using the instance number found in the previous step 1, create a file in /etc named
hostname.chxge0, adding an ipaddress to the file. You could alternately create the
file using a hostname.
# echo 192.168.0.1 > /etc/hostname.chxge0
Chelsio N210/N110 Installation and User Guide for Solaris Release 10, April 2005. 3

2. Create an entry in /etc/hosts to map your hostname to ipaddress.
#
# Internet host table
#
127.0.0.1 localhost
192.168.0.1 chelsio_server
3. Create an entry in /etc/inet/netmasks and add the netmask.
# network-number netmask
192.168.0.1 255.255.255.0
Chelsio N210/N110 Installation and User Guide for Solaris Release 10, April 2005. 4

Device Driver Parameters
This section describes how to configure the Chelsio N210/N110 10Gb Ethernet adapter driver.
Configuring the driver parameters is the same between SPARC and x86 machines running
Solaris 10.
The chxge driver controls the Chelsio N110 and N210 Ethernet adapters. The chxge driver has a
PCI vendor ID of pci1425 and device ID’s of 0007 and 000a for the N110 and N210,
respectively.
Driver Configuration
Table 1: Driver parameters and descriptions
Driver Parameter Values Description
pci-burstsize
0
512
1024
2048
PCI Burst Size
= use system default
= 512 bytes
= 1024 bytes
= 2048 bytes
pci-split-transaction-cnt
0
1
2
3
4
8
12
16
32
PCI Split Transactions
= use system default
= 1 transaction
= 2 transactions
= 3 transactions
= 4 transactions
= 8 transactions
= 12 transactions
= 16 transactions
= 32 transactions
amd-bug-workaround
0
1
Workaround for the AMD-8131
PCI-X HyperTransport Tunnel
chipset.
= disabled
= enabled (default)
enable-latency-timer
0
1
PCI Latency Timer
= use system default
= set timer to 0xF8
accept-jumbo
0
1
Jumbo Frames
= disabled (default)
= enabled
enable-checksum-offload
0
1
Hardware Checksum Offload
= disabled
= enabled (default)
Chelsio N210/N110 Installation and User Guide for Solaris Release 10, April 2005. 5

Driver Parameter Details
Table 2: Driver parameter details.
Driver Parameter Description
pci-burstsize The PCI-X bus supports multiple data lengths (burst
size). Use the following values when adjusting this
parameter.
pci-burstsize = 0;
pci-burstsize = 512;
pci-burstsize = 1024;
pci-burstsize = 2048;
Setting pci-burstsize to 0will result in using the
system default burst size. Some systems do not
support burst sizes greater than 512 bytes. Setting
the burst size to more than 512 bytes on these
systems may result in problems such as PCI bus
hangs or data corruption.
*The AMD-8131 HyperTransport PCI-X chipset is
known to have issues on bus segments running at
133Mhz with large burst sizes and multiple split
transactions. It is recommended that the following
values be used for the PCI burst size and PCI split
transactions:
PCI Burst Size PCI Split Transactions
512 3
1024 2
2048 1
For additional information, please refer to the AMD-
8131 HyperTransport PCI-X Tunnel Revision Guide:
26310 Rev 3.08 August 2004, section 56.
pci-split-transaction-cnt
*see pci-burstsize for
important information regarding the
modification of this parameter.
The PCI-X bus supports multiple simultaneous data
transactions.
pci-split-transaction-cnt = 0;
pci-split-transaction-cnt = 1;
pci-split-transaction-cnt = 2;
pci-split-transaction-cnt = 3;
pci-split-transaction-cnt = 4;
pci-split-transaction-cnt = 8;
pci-split-transaction-cnt = 12;
pci-split-transaction-cnt = 16;
pci-split-transaction-cnt = 32;
Other values will generate a warning and the number
of split transactions will not be modified.
Setting pci-split-transaction-cnt to 0will
result in using the system default burst size.
Chelsio N210/N110 Installation and User Guide for Solaris Release 10, April 2005. 6

amd-bug-workaround The driver will automatically modify the PCI-X
settings (pci-split-transaction-cnt and
pci-burstsize) if it finds that the device is running
on an AMD-8131 HyperTransport Tunnel chipset and
running at 133Mhz.
When enabled, the workaround will set the pci-
split-transaction-cnt to 2 transactions and
the pci-burstsize to 1024 (1k) bytes.
Setting amd-bug-workaround to 0 will disable this
feature and allow the system to come up with the
default (system) settings. After modifying this value, it
is important to reload the driver and config file.
enable-latency-timer The driver modifies the PCI Latency Timer on the
PCI-X bus. This provides a large performance
increase on the PCI-X bus, especially for 10Gb
Ethernet adapters. This setting will affect all devices
on the same bus segment. By default, the latency
timer is set to 0xF8. This parameter can be disabled
by setting enable-latency-timer to 0.
enable-latency-timer=0;
accept-jumbo The 10Gb Ethernet adapter will support Jumbo
frames up to 9600 bytes (9582 data + 18 header).
Jumbo frames are only supported for Solaris 10
update 1 and later.
Use the following parameter to enable jumbo frame
support.
accept-jumbo = 1;
The default maximum MTU is 9198 bytes. The
maximum MTU size may be adjusted by changing
the value of the maximum-mtu parameter.
maximum-mtu = <value>;
MTU sizes may then be adjusted to a value smaller
than the maximum-mtu size by using the ifconfig
utility. Refer to the ifconfig(1M) manpage for
additional information.
enable-checksum-offload The N210 10Gb Ethernet adapter performs hardware
based checksum. The N110 does not support the
hardware checksum feature and will not use it
regardless of the parameter setting.
Hardware checksum is enabled by default. Use the
following parameter to disable this feature.
enable-checksum-offload = 0;
Chelsio N210/N110 Installation and User Guide for Solaris Release 10, April 2005. 7

Setting Driver Parameters
Driver parameters may be permanently set by creating a driver configuration file. Create a file
named /kernel/drv/chxge.conf and edit the file to include the driver parameters you
wish to set.
Add parameters to the file using the parameter-name=value syntax. Refer to the following
example for creating a config file.
# /kernel/drv/chxge.conf
# Global configuration file for Chelsio N210/N110 10Gb Ethernet
# adapter driver parameters.
# Enable Jumbo frames.
accept-jumbo = 1;
Device Driver Limitations
This driver release uses the GLD (Generic Link Device) API and some features are not yet
supported in Solaris Release 10 or Update 1.
•Large Segment Offload (LSO) is currently not supported.
•VLAN tagging is currently not supported.
•Jumbo frames are only supported in Solaris Release 10 Update 1.
Customer Support
If you have problems with the software or hardware, please contact our customer support team
Chelsio Communications, Inc.
370 San Aleso Ave.
Suite 100
Sunnyvale, CA 94085
http://www.chelsio.com
Copyright 2005 Chelsio Communications, Inc. All rights reserved.
Chelsio N210/N110 Installation and User Guide for Solaris Release 10, April 2005. 8
This manual suits for next models
1
Table of contents
Other Chelsio Adapter manuals
Popular Adapter manuals by other brands
Lake Shore Cryotronics
Lake Shore Cryotronics MeasureReady quick start guide

ZyXEL Communications
ZyXEL Communications NWD210N Specifications

Speaka Professional
Speaka Professional 1217947 operating instructions
Cisco
Cisco AIRONET CB21AG Installation and configuration guide

Fluke
Fluke ir3000 Quick reference guide

Hama
Hama Ultimate Adapter quick guide


