Cherry Audio: Surreal MG-1 Plus User Manual
Page 10
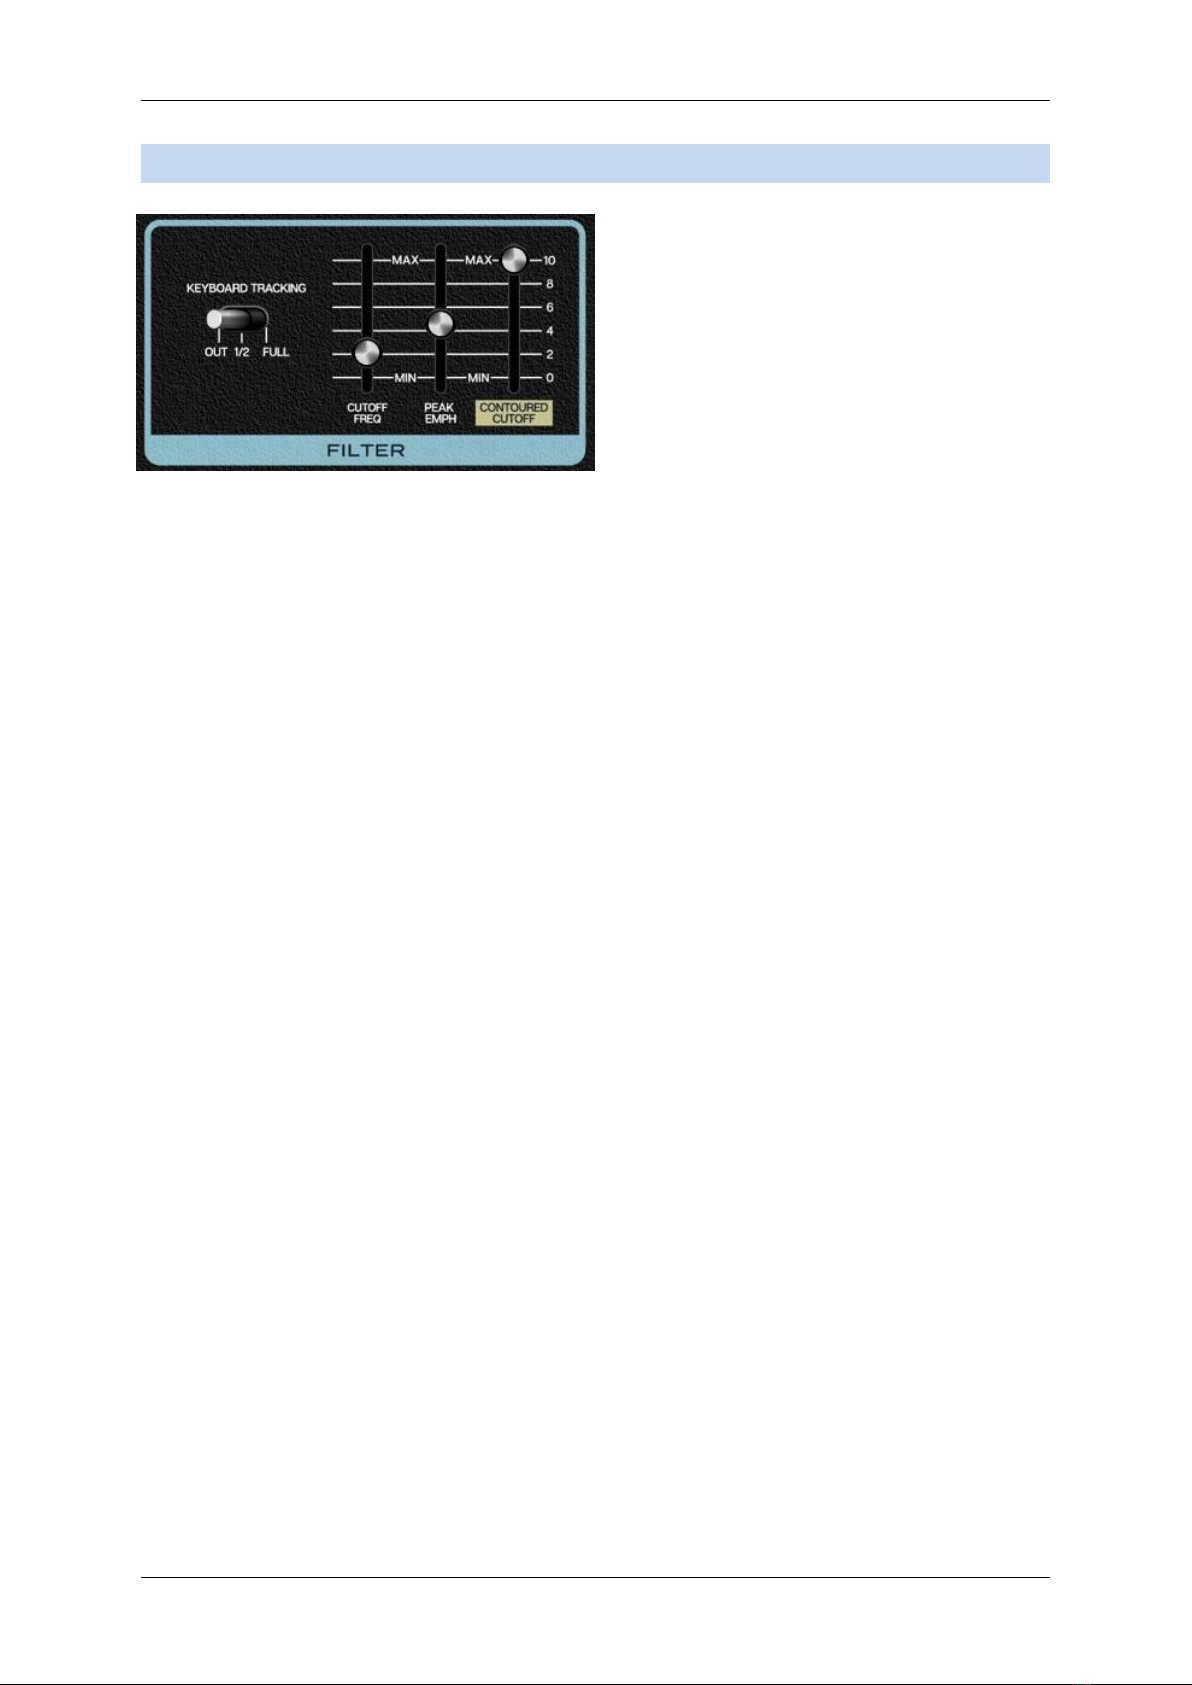
5Filter Section
The Filter section is a 24 db/oct lowpass
filter that removes high frequencies as its
cutoff frequency setting is decreased from
max, resulting in a dulling of sound. This a
version of the classic transistor "ladder"
filter, famously heard in the Moog
Minimoog synthesizer, and renowned for its
meaty, fat sound.
Keyboard Tracking- This causes the cutoff frequency to increase as ascending notes are
played on a keyboard. The idea behind this is, because actual note frequencies rise as higher
pitches are played, the Kybd slider adds a rising CV to the cutoff frequency in order to
maintain the brightness of notes as higher pitches are played.
Out- Cutoff frequency stays constant across the keyboard - i.e. no tracking.
1/2-Cutoff frequency tracks at half the keyboard CV voltage - i.e. the cutoff
frequency rises one octave for each two octaves played on the keyboard.
Full-Cutoff frequency tracks the same as the keyboard CV voltage - i.e. the cutoff
frequency rises one octave for each octave played on the keyboard.
Cutoff Freq- Sets the frequency where high-frequency attenuation begins, from 20 Hz up to
24,000 Hz. Though it seems odd to have a cutoff control that goes 4000 Hz above human
hearing threshold, remember that all filters have a "slope" to their response, so that extra
range guarantees you won't hear any filtering at maximum setting.
Peak Emph- The "emph" is short of for emphasis, commonly referred to as resonance. This
emphasizes sound energy at and around the current cutoff frequency by adding feedback
from the filter's output back to its input. At lower settings, this can be used to create mild
resonances such as those heard in acoustic instruments. MG-1 Plus’ implementation is fully
self-oscillating - at extreme settings, it can be used as a sine wave generator, but be careful
because high resonance settings can result in loud, screamy, dog-terrifying (and speaker
blowing) occurrences.
Contoured Cutoff- The Contoured Cutoff slider applies Contour envelope (i.e. envelope
generator) modulation to the cutoff frequency. This allows familiar auto filter sweeps. When
raising the Contoured Cutoff control, you'll generally want to lower the Cutoff Freq control,
as these work in conjunction with one another.