34 DeepMind 12 Quick Start Guide 35
DeepMind 12 Getting started
(EN) Step 3: Getting
started
(ES) Paso 3: Puesta en
marcha
DeepMind 12 Puesta en marcha
OVERVIEW
This ‘Getting Started Guide’ will help you set up the
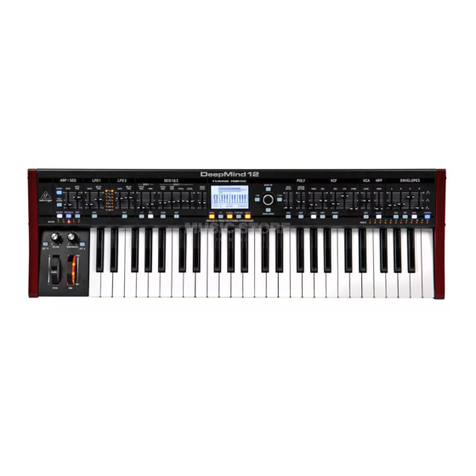
DeepMind 12 analog polyphonic synthesizer and
briey introduce its capabilities.
CONNECTION
To connect the DeepMind 12 to your system
please consult the connection guide earlier in
this document.
BROWSING PROGRAMS
To change programs, use the -NO and +/YES
switches. To access the program browser press and
hold the PROG switch, then press the GLOBAL switch,
or move the rotary knob. For more information
on program management please consult the
product manual.
PROGRAMMING
The DeepMind 12 programming techniques are
described in detail in the product manual.
RECORD, EDIT and PLAYBACK AUTOMATION
When using the analog engine of the synthesizer
with a Digital Audio Workstation (DAW) you can
record and playback any automatable parameter.
This allows you to record expressive automation and
playback or edit that automation in your DAW.
USING AS A CONTROLLER
When using the synthesizer features as a controller
you can control your virtual instruments and
Digital Audio Workstation (DAW) with the
accurate touch and feel of a high quality keyboard,
1 rotary potentiometer, 26 slide faders, and 33
backlit switches. For mapping please consult the
product manual.
SOFTWARE SET-UP
The DeepMind 12 is a USB Class Compliant MIDI
device, and so no driver installation is required.
The DeepMind 12 does not require any additional
drivers to work with Windows, Android, MacOS and
iOS devices.
HARDWARE SETUP
Make all the connections in your system.
Apply power to the DeepMind 12 using the supplied
power cable only. Ensure your sound system is
turned down. Turn on the power switch.
DAW SETTINGS
In your DAW, create a new channel and select the
DeepMind 12 as the MIDI input device. On the same
channel ensure that recorded MIDI is also sent back
by making the DeepMind 12 the same channel's MIDI
output device.
If you can't see the DeepMind 12 in your DAW
channel options please consult your DAW
documentation to ensure you have enabled the
DeepMind 12 as a MIDI device.
GLOBAL SETTINGS
The GLOBAL menus allow you to customize the
DeepMind 12 analog polyphonic synthesizer to
your specic workow / requirements. For more
information on the GLOBAL settings, please consult
the product manual.
FIRMWARE UPDATE
Check that the latest rmware in your unit is up to
date (see the GLOBAL/SYSTEM SETTINGS menu
of the display). If not, then updating the rmware
will give you the latest enhancements. Visit our
website behringer.com, and download the latest
rmware from the DeepMind 12 analog polyphonic
synthesizer product page.
IMPORTANT NOTE: Updating the
rmware may aect your programs,
please ensure you make a full back
up. For detailed instructions please
consult the product manual.
RESUMEN
Esta ‘Guía de puesta en marcha’ le ayudará a
congurar su sintetizador analógico polifónico
DeepMind 12 y le presentará brevemente
sus posibilidades.
CONEXIÓN
Para conectar el DeepMind 12 a su sistema, consulte
la guía de conexiones que encontrará un poco antes
en este documento.
BÚSQUEDA DE PROGRAMAS
Para cambiar de programa, use los interruptores -NO
y +/YES. Para acceder al buscador de programas,
mantenga pulsado el interruptor PROG y pulse
después el interruptor GLOBAL o gire el mando
giratorio. Para más información sobre la gestión de
los programas, consulte el manual de instrucciones
completo del producto.
PROGRAMACIÓN
Las técnicas de programación del DeepMind 12 son
descritas en detalle en el manual de instrucciones
completo del producto.
GRABACIÓN, EDICIÓN y AUTOMATIZACIÓN DE LA
REPRODUCCIÓN
Cuando use el núcleo analógico del sintetizador
con un workstation de audio digital (DAW),
podrá grabar y reproducir cualquier parámetro
automatizable. Esto le permitirá rabar y reproducir
una automatización expresiva o editar dicha
automatización en su DAW.
USO DE UN CONTROLADOR
Si va a usar las funciones de este sintetizador como
controlador, podrá controlar tanto instrumentos
virtuales como workstation de audio digital (DAW)
con el toque preciso y la sensibilidad de su teclado
de alta calidad, 1 potenciómetro giratorio, 26 faders
deslizantes y 33 interruptores retroiluminados. Para
saber las distintas opciones de asignación o mapeo,
consulte el manual de instrucciones completo del
producto.
CONFIGURACIÓN DEL SOFTWARE
El DeepMind 12 es un dispositivo USB compatible
con MIDI, por lo que no es necesario instalar ningún
driver. El DeepMind 12 no necesita ningún driver
adicional para funcionar con dispositivos Windows,
Android, MacOS e iOS.
CONFIGURACIÓN DEL HARDWARE
Realice todas las conexiones de su sistema. Conecte
a la corriente el DeepMind 12 usando únicamente el
cable de alimentación incluido. Asegúrese de que el
sistema de sonido esté apagado y entonces encienda
la unidad.
CONFIGURACIÓN DEL DAW
En su DAW, cree un nuevo canal y seleccione el
DeepMind 12 como el dispositivo de entrada MIDI. En
ese mismo canal, asegúrese de que el MIDI grabado
sea también re-emitido, haciendo que el DeepMind
12 sea el dispositivo de salida del mismo canal MIDI.
Si el DeepMind 12 no aparece en las opciones
de canal de su DAW, consulte la documentación
del DAW para asegurarse de que ha activado el
DeepMind 12 como un dispositivo MIDI.
AJUSTES GLOBALES
El menú GLOBAL le permite personalizar su
sintetizador analógico polifónico DeepMind 12
para adaptarlo a sus necesidades / ujo de trabajo
concretos. Para ver más información acerca de los
ajustes GLOBAL, consulte el manual de instrucciones
completo del producto.
ACTUALIZACIÓN DE FIRMWARE
Compruebe que el rmware de su unidad esté
actualizado a la última versión disponible (vea el
menú Global/SYSTEM SETTINGS de la pantalla). En
caso contrario, la actualización del rmware hará
que disponga de las últimas mejoras desarrolladas
para el producto. Visite nuestra web behringer.
com y descárguese la última actualización de
rmware disponible desde la página de producto del
sintetizador analógico polifónico DeepMind 12.
NOTA IMPORTANTE:
La actualización del rmware puede
afectar a sus programas, por lo que
asegúrese de hacer una copia de
seguridad completa. Para ver todos los detalles
sobre cómo hacer esto, consulte el manual de
instrucciones completo del producto.
