chicago brick oven CBO-500 User manual

Fire Up the Good Life.
®
Welcome to a whole new way of entertaining!
U S E R M A N U A L
C B O - 5 0 0

Table of Contents
2
Assembly Instructions ..............................................3-11
Customized Enclosure Designs .........................12
Wood-Fired 101
Curing Your Oven ..........................................................................13
Firing Your Oven .............................................................................14
How the Oven Works ........................................................... 15-16
Cooking in Your Oven ..................................................................17
Using Flavored Wood ..................................................................18
Maintaining Your Oven ................................................................19
Frequently Asked Questions .........................20-21
Recipes
Appetizers and Breads
Ciabatta ............................................................................................. 22
Empanada ......................................................................................... 22
English Mun Toasting Bread ................................................. 23
Focaccia ............................................................................................. 23
Fresh Herb Focaccia ..................................................................... 23
Homemade Chips with Salsa ................................................... 23
Peanut Sesame Flatbread...........................................................24
Pita Bread ...........................................................................................24
Pizza
Basic Pizza Dough ......................................................................... 25
Basic Tomato Sauce ..................................................................... 25
BBQ Chicken Pizza ....................................................................... 25
Bianca Pizza ..................................................................................... 25
Brier Hill Pizza .................................................................................26
Calzone ..............................................................................................26
Caramelized Onion and Smoked Gouda
Ciabatta Pizza ..............................................................................26
Chicago-Style Deep Dish Pizza .............................................. 27
Clam and Garlic Pizza ................................................................. 27
Escarole Calzone: Calzone di Ricotta
e Escarola Mario Batali’s Recipe ........................27-28
Kielbasa (Polish Sausage) and Egg Pizza ..............................28
Neapolitan-Style Pizza Dough ................................................28
Neapolitan Capasso Pizza .................................................28-29
Neapolitan Margherita Pizza ................................................... 29
Neapolitan Marinara Pizza ........................................................ 29
Neapolitan Quattro Stragione alla Pizzeria
Gorizia Pizza .........................................................................29-30
Neapolitan-Style Herb and Vegetable Sauce .................. 30
New York-Style Stone Baked Pizza .......................................30
Pizza Margherita ............................................................................ 30
Spinach-Stued Pizza ..................................................................31
Thai Chicken Pizza .........................................................................31
Wood-Grilled Chicken Pizza with Radicchio ....................31
Seafood
Cedar Planked Salmon ............................................................... 32
Chipotle Shrimp and Pineapple Kabobs ............................. 32
Valencia Paella ............................................................................... 33
Whole Roasted Fish with Celery, Lemon
and Orange Mario Batali’s Recipe ............................ 33
Main Dishes
Art Lee’s Korean Ribs ...................................................................34
Herb-Roasted Chicken Mario Batali’s Recipe ...........34
Italian Herb-Marinated Chicken ............................................34
Lasagna Bolognese Mario Batali’s Recipe .................. 35
Pork Tenderloin Wrapped in Bacon ...................................... 35
Stued Turkey .................................................................................36
Veggies
Apple Cider Roasted Sweet Potatoes and Yams ............ 36
Roasted Artichokes ......................................................................36
Roasted Zucchini ...........................................................................36
Desserts
Chocolate Almond Flourless Cake
with Cherry Compote ............................................................ 37
Crostata di Ciliegie: Cherry Jam Tart
Mario Batali’s Recipe ...................................................... 37
Maca Assada (baked apple) ....................................................... 38
Nutella and Banana Dessert Pizza ........................................ 38
‘Smores Dessert Pizza.................................................................38
Entertaining Ideas
Happy Halloween .......................................................................... 39
Thanksgiving Taste Treat ............................................................ 39
Wild Game Night ........................................................................... 39
Wine-Tasting Party ....................................................................... 39
Operating Instructions .................................................40
Limited Warranty .................................................................41

3
Support Base
The CBO-500 Oven Support Base must:
• be constructed of masonry or metal
• have at least the same area dimensions
as the external footprint of the Oven
You must check with your local Building
Department to determine the amount of
clearance required by local building codes
between the Oven and Decorative Cover.
CBO recommends you add at least 8" for the
width (4" per side) and 5" for the depth (on the
back side of the Oven) to accommodate the
Decorative Cover and Insulation.
CBO recommends that you not use any
combustible materials in the construction
of the covering (Shroud) of the Oven. All
building materials used near the Oven, Metal
Damper assembly and Flue Pipe should be
non-combustible and never made of wood.
Assembly Instructions
The Support Base surface must be flat, level
and strong enough to support the total
combined weight of the Oven (300 lbs.) and
the Decorative Cover design you choose.
The two vertical support feet of the Support
Base are typically made of concrete block.
The horizontal Support Base is typically made
of a 4"-thick, steel-reinforced concrete slab.
The standard height of the horizontal part of
the Support Base is 42."
Note: Imagine the Oven’s Support Base as a
table. The table’s legs are concrete blocks and
the tabletop is a 4"-thick concrete slab. To build
the Support Base, you build the support legs out
of concrete block, then on top of that leg base,
you build a frame to pour a concrete slab (the
tabletop). On the concrete slab (the tabletop),
you position the Sub-hearth Insulation Boards,
then the Hearth, then the Oven.
CBO-500 ovens should be installed by a professional
or suitably-qualified individual.

4
Hearth Insulation
Sub-hearth Insulation Board (supplied)
Your CBO-500 Oven comes with an Insulation Board
(shipped in three pieces) that is placed under both pieces
of the Hearth for insulation
Place the Insulation Board between the Oven and
Support Base. Do not use any materials (mortar, cement,
glue) to attach the Oven to the Insulation Board. It is
very important that the entire Oven Base come in contact
with the Insulation Board.
There should be no holes in the Insulation Board since
there is a gap inside the Oven, between the Hearth and the
Dome. Ash and embers should build up in this space and
not fall through under the Oven.
The Insulation Board must be cut so that it is flush or
slightly set back with the front end of the Hearth, the
Support Base and the two vertical support feet in order
for the final Decorative Cover to fit properly and protect
the Insulation Board from exposure to moisture. The
Insulation Board can be cut-to-size with a regular jigsaw.
The Oven's decorative finish should be built on top of
the Support Base, not on top of the Insulation Board.
Remember, the Insulation Board should not be exposed
to the elements and should not get wet.
Hearthstone (Hearth)
The two-piece CBO-500 Hearthstone (Hearth) should
be placed on top of the Insulation Board with the front
face of the Front Hearth lined up in front of the front
face of the Insulation Board, or slightly hang over the
Insulation Board. The Sub-hearth Insulation should not
be exposed to the elements and should never get wet.
Assembly Instructions
Convection Radiant Conduction
Note: The Hearth Insulation shown in this drawing is a concrete
base. Use the Sub-hearth Insulation Board (supplied) for your
Oven's Hearth Insulation. (The Oven pictured is our CBO-750,
but the concept is the same for the CBO-500.)

5
Assembly Instructions
Line the Front Hearth piece up with the
front of the Oven base. As you can see,
the Insulation Board is not exposed to the
elements and covers the entire Main Hearth.
1
1
Push the Main Hearth in place so there is a
tight fit with the Front Hearth. Once again, the
Insulation Board should be under the Main
Hearth and there should be nothing between
the Hearth and Insulation.
2
2
Lay the Insulating Blanket over the top of the
Oven. Cut out a hole for the Flue Pipe, and cut
the Insulation to line up with the front of the
Oven. If you have any extra insulation, put it
on the top of the Oven.
4
4
Remove the Front Hearth piece and place the
Dome over the top of the Main Hearth. Make
certain the front of the Oven is lined up, then
replace the Front Hearth. Attach the Flue
Adapter to the top of the Oven.
3
3

6
Assembly Instructions
Cut the back of the Insulation with a razor
blade and tuck it into place. Pull the sides of
the Insulation around the back of the Oven.
You can tie the Insulation with metal straps,
or aluminum tape, or just leave it in place.
5
5
In this picture, you will see we have a Metal
Shroud. If you are building a Stone or Brick
Shroud, it should follow the contour of the
Oven, but not rest on the Arch.
6
6
You don't need too much mortar, just enough
to make a seal. Place the mortar all the way
around the Arch and on the Hearth on both
sides under the Arch.
8
8
Your are now ready to mortar the Arch to the
Dome. Use the refractory mortar provided to
completely seal the space between the Arch
and Dome. You will also put some mortar on
the Front Hearth under the Arch.
7
7

7
Assembly Instructions
Be very careful to not get any mortar in the
mounting holes for the Arch and Door. If you
do get mortar in the holes, attempt to clean
it out immediately; the bolts will not go in all
the way if mortar is present.
9
9
Line up the Arch and put the two top bolts in
place. Tighten the bolts to hand-tight. Upon
completion of the install, you will tighten the
bolts more; at this time you just want to hold
the Arch in place.
10
10
Use some mortar to finish o the install. If the
Shroud is brick or stone, you should also use
mortar around the top of the Arch. If you are
using a Metal Shroud, use a high-temp silicone
on the top of the Arch to seal the joint with
the Shroud.
12
12
Attach the Metal Door and insert the bolts to
hold it in place. Once you have all four bolts
in place, you should tighten them, but do not
force it. You should create a nice seal between
the Arch and the Dome with the mortar
you used.
11
11
Note: Each year you will need to touch-up the mortar and/or silicone for cosmetic reasons.

8
Assembly Instructions
Chimney
When building the Chimney, it is important to
refer to your local building code standards.
Every CBO-500 Oven comes with a standard
Anchor Plate that works with a Simpson
Duravent Stainless Steel Double Wall Pipe
(Model #9405SS).
You can buy this pipe in 24" sections from any
local Simpson Duravent dealer.
One 24" pipe section is the minimum. You
can add additional 24" sections as required.
(The chimney pipe cannot have a total bend
of more than 360°. ) The taller the stack is, the
further away the exhaust is from the cook!
Note: Never use any combustible
materials near the Anchor Plate or Flue
Stack. We recommend a minimum 6" of
air space between the Anchor and Flue
and any combustible material.
Again, check with your local Building Department
to ensure you adhere to local building codes!
Arch Dome Insulation Blanket
Very important for correct functioning
and life of the CBO-500 Oven!
The Oven Dome must be covered with the
supplied Ceramic Fiber Insulation Blanket. The
Blanket, which withstands high temperatures,
should cover the entire surface area of the
Dome. You can cut the Ceramic Fiber to insulate
around the Metal Damper assembly. Since most
heat loss will occur at the Metal Damper and
top of the Oven, you should ensure these spots
are well-insulated. You can choose to insulate
the Oven further by packing Vermiculite or
other non-flammable insulating material above
the Blanket.
The better you insulate your Oven, the
better it will perform!

9
Operating Instructions
Please follow these instructions exactly
as written. Failure to follow instructions
may cause permanent damage to your
Oven and your warranty may be void.
Although your Oven may seem dry once
you complete the installation process, there
are small amounts of moisture pockets that
need to work their way out. If you build a large
fire in your Oven from the onset, you could
compromise your Oven's longevity and cooking
eciency, and can ultimately cause permanent
damage, which may void the manufacturer's
warranty.
When lighting the first fire, keep the
flames low so the moisture can be slowly
released from the Oven and surrounding
masonry work. This curing process should
be conducted at a temperature as close to
212°F (100°C) as possible (do not exceed that
temperature) over a 2- to 3-day period.
Assembly Instructions
A good suggestion is to build a fire in a
separate location and place the coals into
the Oven. You will generate heat without the
flame and the Oven will cure as required.
Due to thermal expansion, small cracks will
appear in the Dome or Hearth during the curing
and cooking process. Do not worry; this is
normal and the quality of your Oven will not
be compromised.
After you have cured your Oven and are ready
to start cooking, light a small fire and slowly
build it up. The interior Dome of the Oven
will at first turn black from the fire smoke, You
will know the Oven temperature has reached
700°F when the inner walls turn from black to
a whitish grey. This is a perfect temperature
for many types of cooking.

10
Assembly Instructions
Other Cautions
• CBO-500 Ovens are designed and
marketed for "outdoor residential
use" only. Local regulations about
wood-burning equipment should
be consulted.
• CBO-500 Ovens should be installed
by a professional or suitably qualified
individual.
• Do not throw chunks of wood violently
into the Oven.
• Each time you light a fire, make sure the
fire covers as much of the Hearth surface
as possible.
• Always use dry wood (dried for at least
two years)! If you see moisture coming
from the logs while they are on the fire,
the wood is not dry. Using wood that is
not dry will cause the Oven to throw o
a considerable amount of smoke and can
also cause damage to the Oven because
of the high moisture content.
• The first two times you cook in your new
Oven, cook something simple (for example,
a pizza shell) then throw it away without
actually eating what you have cooked. The
third time, you can begin enjoying what you
have cooked in your new Oven.
• Always pre-warm any cooking accessory
(the CBO grill, a cast iron pot, etc.) before
you put it in the Oven. If you place a cold
accessory on a hot Hearth, the thermal
shock may cause the Hearth to crack. You
can also add an Oven Rack so the pot or
pan doesn't sit directly on the Hearth.
• Please use extreme caution around the
Oven. The Oven Dome, Hearth, Arch and
Door will be extremely hot when in use
and for hours after use.
• Never allow anyone under the age of 18
to operate the Oven.
• The manufacturer is not responsible for
eventual environment damages, nuisance
or smoke and carbon particles.

11
Regular Maintenance
Your CBO-500 Oven will last years if
you follow these simple, regular
maintenance tips:
• Brush out the ash after each use with your
CBO Wire Brush.
• Never use any cleaning products inside the
Oven! Heat the Oven properly to clean it.
• The Decorative Door will occasionally show
wear. Take a piece of steel wool to the Door,
lightly, and repaint the door with black
Stove Pipe Spray Paint available at your
local hardware store.
• Lubricate the Decorative Door hinges on
a regular basis.
• Inspect the Flue Connection/Anchor Plate
on a regular basis. Make sure it is free from
any buildup. If you have buildup, you can
use a wire brush to clean it.
• Inspect the Flue Pipe on a regular basis.
Make sure it is in good repair and is seated
Assembly Instructions
securely into the Flue Connection/Anchor
Plate. If you are using a Single-Wall Pipe,
check for rust. If rust is found, replace the
Flue Pipe.
• Inspect your Flue Cap to ensure there is no
buildup blocking the flow of air. If you have
any buildup, you can use a wire brush to
clean it.
• Touch-up the mortar around the Arch to
maintain a nice finished look. You can use
any refractory mortar found at your local
hardware store.
• If you use the CBO Metal Shroud in your
install, cover the Shroud when not in use.
The Oven must be cool to the touch before
it can be covered.
If you have any questions about the use and
care of your CBO-500 Oven, please send us
an email to info@chicagobrickoven.com.

12
Customized Enclosure Designs
However you plan to install your CBO Oven—
as a stand-alone unit or as part of a complete
outdoor kitchen—and whatever your material
preference—stone, brick, stucco, etc.—your
design choices for creating a customized
enclosure are as limitless as your imagination.
Here are just a few examples of how other
homeowners have customized their CBO
wood-fired ovens and created their ultimate
outdoor cooking, dining and entertaining
spaces. Visit chicagobrickoven.com and
view our gallery for more inspiration.

13
Although your oven may seem dry once you
complete the installation process, there are
small amounts of moisture pockets that need
to work their way out.
The initial fire must be started slowly. When
lighting the first fire, keep the flames low so
the moisture can be slowly released from the
oven and the surrounding masonry work. If you
build a large fire in your oven from the onset,
you could compromise your oven’s longevity
and cooking eciency, and can ultimately
cause permanent damage, which may void the
manufacturer’s warranty.
This curing process should be conducted at
a temperature as close to 212°F (100°C) as
possible (do not exceed this temperature) for a
period of six hours on three consecutive days.
Exposing your new oven to this temperature
over a few days will cause all the moisture to
evaporate so that your oven properly “cures.”
Curing Your Oven
Note: Due to thermal expansion, small
cracks may appear in the dome or hearth
during the curing process. Don’t worry; this is
normal and the quality of your oven will not
be compromised.
Another method of curing your new oven is
to build a fire in a separate location. Then take
the coals and place them into the oven. You’ll
generate heat without the flame and the oven
will cure as required. Some new owners find
this method a much easier way to cure the
oven and ensure the temperature doesn’t
get too hot.

Firing Your Oven
14
A
B
C
D
E
AOnce you’ve properly cured your oven, you’re
ready to fire it for cooking.
BAlways start with dry kindling placed 10" from
the front of the oven. Never use chemicals or
starter fluids; you will not need them.
COnce the fire is going, add small pieces of
wood to build the fire. You want to raise the
temperature slowly, so avoid building a huge fire
that pours out of the mouth of the oven.
DWe recommend adding large chunks of wood to
the fire once it’s going strong. Add these chunks
and start moving the fire to the back of the
oven—about 20 minutes after the fire is going.
EYou’ll notice the oven dome turning black. As the
temperatures rise and more heat is stored in the
dome, it will turn a whitish grey. Your goal is to
heat the oven in a way that the entire dome turns
whitish grey.

Wood burning brick ovens are specially designed to take
full advantage of all three cooking methods—radiant heat,
convection and conduction.
FlameRoll™
Only our proprietary low-dome construction creates
the perfect FlameRoll™ from front to back. In this unique
cooking method, the vent pulls the flame horizontally
across the top of the dome and then vertically back down
the side. Not only does this “funnel eect” create higher
temperatures for superior cooking, the rolling flames
being drawn across the dome are aesthetically beautiful,
giving you a full wood-fired cooking experience. In
competitive high-dome brick ovens, the flames get
trapped in the upper portion of the dome, too far away
from the food to properly cook it.
Radiant Heat
Radiant heat comes from a direct source. In a wood-
fired oven, radiant heat can come from two direct
sources—the fire and the heat that’s stored in the oven
walls and hearth. Radiant heat is very even and will cook
food from all directions. The special shape of your CBO
oven reduces all cold spots and ensures that the stored
radiant heat is used eciently. By slowly building the
oven’s stored heat, you’ll be able to take advantage of
the radiant heat for longer periods of time. You’ll also be
able to use radiant heat by leaving a fire or hot coals in the
oven. Use this method of cooking if you want high heat
and a short cooking time, especially for pizzas.
15
How the Oven Works

Convection
Convection is heated air circulating in an oven. Cool air is
drawn into the oven through the access hole (when the
exterior door is closed) or the oven opening (when the
door is open). As the cool air is drawn into the oven, it’s
rapidly heated by the fire and the stored heat in the oven.
This heated air passes over the food evenly. As the air
continues to heat, it passes to the back of the oven and
rises. The heated air now again passes over the food on the
way out of the oven flue. This draw causes a steady flow of
heat to pass over the food, causing convection.
You can also take advantage of convection with closed-
door cooking. For example, when you add cool dough
to the hot oven, convection will take place through the
moisture in the dough. As the hot air comes in contact with
the dough, the heat is transferred. The air comes o the
dough cooler, and then is heated again by the oven.
Conduction
The third method of cooking in your wood-fired brick oven
is through conduction. Conduction occurs when a cooler
object comes in contact with a warmer object and heat is
transferred. The amount of conduction that takes place
depends on two things—the temperature dierence of the
two items and the material (if any) that’s between them.
For example, you may want to sear a steak by placing a cast
iron grill in a very hot oven. Make sure any cooking device
you put into your oven is at 75°F or above to avoid thermal
shock to the hearth. Once the grill is at temperature, you’ll
place room-temperature steaks on the grill. This contact
will cause conduction to take place and sear the steaks.
Another example of conduction is putting a pizza directly
on the oven’s heated hearth. The heat transferred from the
hearth to the pizza will cause an excellent crust to form.
16
How the Oven Works

Cooking in Your Oven
Once the oven has been heated to the point the entire dome
has turned a whitish grey, you’re ready to cook using either the
open-door or closed-door method.
Open-Door Cooking
Open-door cooking is used to cook pizzas, and other foods that
require medium to high temperatures. Keep the fire going in the
back of the oven. Sweep out the front of the hearth with a wire
brush and you’re ready to cook. The oven will become hot enough
and the small fire on top will generate radiant heat. For pizzas, the
purpose of the flame is to melt the cheese and crisp the top.
Closed-Door Cooking
Spread the fire throughout the oven. You will store heat in the
hearth and dome by burning your fire hot for at least one hour.
The longer you burn your fire, the more heat will be stored in the
hearth and dome and the longer you’ll be able to cook.
The entire dome of the oven should turn a whitish grey. Once the
fire has burned down, remove all coals and ashes into your ashbin.
Sweep the hearth and you’re ready to go. Load your oven with breads,
roasts or casseroles and seal the oven with the insulating door.
Note: For closed-door cooking, the quality of the wood isn’t a
concern; you’re mainly concerned with building heat and storing it
in the oven. However, never use treated woods. Save your flavored
woods for open-door cooking!
Maximize Your ‘Real Estate’
After you have fired your oven to the proper temperature, it’s
time to maximize your cooking “real estate.” Do this by removing
the ashes and keeping just enough of the embers to create a
small ember bed—about 4" wide by 8" long—on the hearth at
the very back of your oven.
17
4"
8"
Ember Bed

18
Using Flavored Wood
Just imagine the aroma and mouth-watering taste of
Apple Wood Turkey, Orange Wood Duck or Maple
Wood Steak!
To maximize your cooking experience, there’s nothing
better than using a fine cooking wood—alder, apple,
apricot, cherry, grape, hickory, lemon, maple, mesquite,
nectarine, orange, peach, pear, pecan, plum, white oak.
Which Kind of Wood to Use
Hard, dry, aged wood burns hotter and cooks faster. The
best burning hardwoods are arbor, ash, beech, bower,
maple and oak. Soft woods, such as linden or poplar, create
about 50% less heat than oak. The energy that comes from
combustion doesn’t depend on the type of wood you use,
but on its degree of dryness. The ideal stacking period for
wood is six months in the open and two years (up to three
years for oak) in a dry, protected spot. The wood can also
be dried in the oven after you make sure there are no coals
or embers left, so the wood will not ignite.
Which Wood Not to Use
Resinous and treated woods are not recommended and
can be dangerous to your health. Waste wood should
also not be used because your wood burning oven is a
cooking instrument.

Maintaining Your Oven
Following these maintenance and operating tips will help keep
your oven looking and performing at its best.
• The inside of the oven is self-cleaning. If cheese from a pizza
or sauce from a roast spills onto the bottom tiles, simply push
some glowing coals over the spills and they will disappear.
• When using any CBO accessory, please do not allow any type
of liquid to touch the hearth or dome. For example: When
cooking steak on the grill grate, you need to create a bed of coals
underneath the grill grate to “catch” the drippings. You could also
use the griddle as a “catch basin” underneath the grill grate.
• Sweeping the flue once a year is recommended and is an easy,
do-it-yourself project.
• Always use dry wood. If you see moisture coming from the logs
while they are on the fire, the wood is not dry. Using wood
that’s not dry will cause the oven to throw o smoke. The high
moisture content can also damage the oven.
• If the outdoor temperature is cold or below freezing, take extra
time to slowly heat your oven. The fire should be built-up over
at least one hour. Start with a small fire and carefully add more
firewood to gradually raise the temperature.
• Over time, the metal door may become discolored from oxidation.
Once a year, you can scrub it with steel wool to remove the
deposits and repaint the door using a high temperature-resistant
paint to restore its patina. For aesthetic reasons, some people
prefer an aged look to their oven. In that case, leave the door as is—
the oxidation will not harm it or aect the oven’s performance.
• For exposed metal hoods, you can buy an inexpensive grill cover
to help protect the oven from the elements when not in use.
19

What beside pizza can I cook in
my wood burning brick oven?
There is no limit to what you can cook in your CBO
wood-fired brick oven. Anything you can cook in your
home oven, you can cook in your CBO oven—whole
turkeys, bread, grinders, chicken, steaks, chops,
vegetables, stews, empanadas, desserts and more.
When using any CBO accessory, please do not allow
any type of liquid to touch the hearth or dome. For
example: When cooking steak on the grill grate, you
need to create a bed of coals underneath the grill grate
to “catch” the drippings. You could also use the griddle
as a “catch basin” underneath the grill grate.
Can the oven be used in
all climates?
Yes, you can use the oven year-round. The structure
you build around the oven must keep the elements
out and the oven dry.
Can I install my own oven?
Yes, it can be a do-it-yourself project. You’ll need to
have some skill in concrete and masonry in order to
keep your oven safe from the elements. (Check out
our Assembly Instructions section for more details.)
I see that CBO-750 ovens come
with two doors. Why?
Most of our competitors have either no doors or just
one. We think you should have one decorative door to
seal-o the oven and keep the elements out when it’s
not in use. We think you should also have an insulated
door for when you want to control the internal
temperature and hold it for long periods of time,
especially when you’re baking. (The CBO-500 model
does not have an insulating door.)
What accessories come with the
purchase of a CBO oven?
Every CBO oven comes with insulation, decorative
door and pizza peel. (The CBO-750 model also
includes an insulating door.)
What else will I need to do to
start using my oven?
The oven must be installed on a foundation with a
covering (dome or shelter) that will give it a finished
look and protect it from the elements.
How soon can I use the oven
after installation?
You should build a few small fires in your oven before
you cook in it. (See our Curing and Firing instructions.)
These small fires will cure the oven. A large fire in a
new oven may cause it to crack. Be patient! This is
the reason you bought a wood-fired brick oven in
the first place.
What kind of wood should I use
for my oven?
All kinds of hardwoods are suitable when they are
clean and dry. Resinous and treated woods are not
recommended and can be dangerous to your health.
Waste wood should not be used because your wood
burning oven is a cooking instrument, not an oven
for heating. When buying wood, ask for wood that’s
been aged for about two years, or that has less than
25% moisture content. Soft woods are easy to light,
but they produce less heat than hardwoods. We also
recommend trying dierent varieties of aromatic,
flavored wood to give dierent foods unique flavors.
Frequently Asked Questions
20
Other manuals for CBO-500
3
Table of contents
Other chicago brick oven Oven manuals

chicago brick oven
chicago brick oven CBO Americano Gas User manual

chicago brick oven
chicago brick oven CBO-500 User manual

chicago brick oven
chicago brick oven CBO-500 User manual
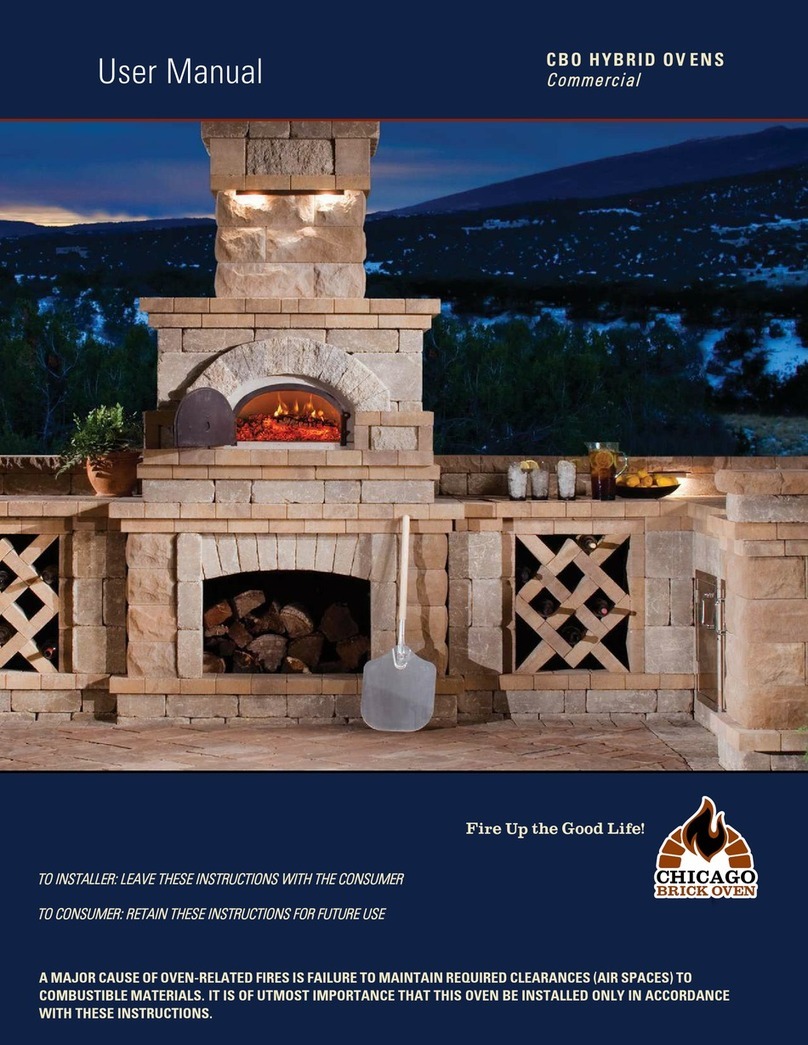
chicago brick oven
chicago brick oven CBO-750 HYBRID User manual

chicago brick oven
chicago brick oven CBO-500 User manual

chicago brick oven
chicago brick oven CBO-750 HYBRID User manual
Popular Oven manuals by other brands
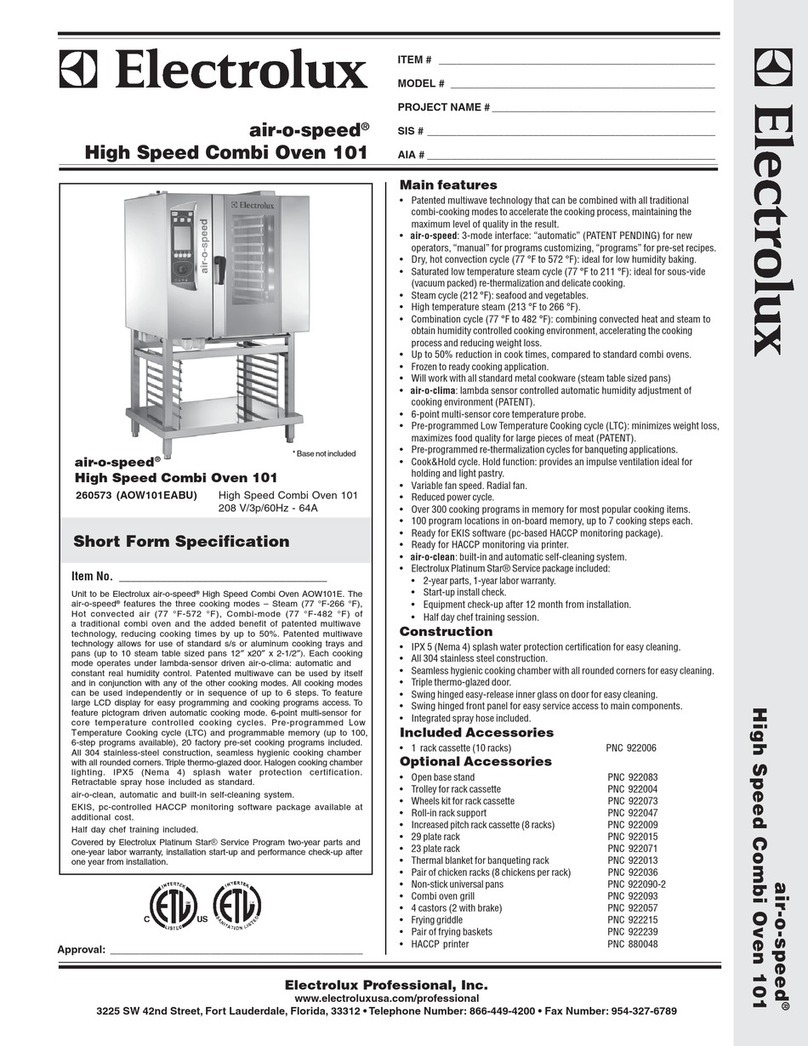
Electrolux
Electrolux Air-O-Speed 260573 (AOW101EABU) Specification sheet

Electrolux
Electrolux EBKGL6X user manual

sinmag
sinmag LBC LCR5 Installation, service & parts manual

Jenn-Air
Jenn-Air W27100 Guide

Electrolux
Electrolux COMPETENCE E 1000 operating instructions

Technika
Technika TO66PSS-5 Instructions for use

