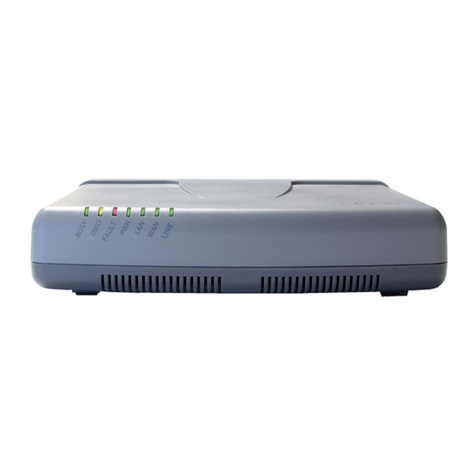
Chima SVX8016 GSM User manual

SVX8016 IP PBX System User Guide
陈泽科技有限公司
- 1 -
www.stephen-tele.com
SVX8016 GS IP PBX SYSTE USER ANUAL
Version 1.3
STEPHEN TECHNOLOGIES CO.,LI ITED
ALL RIGHTS RESERVED

SVX8016 IP PBX System User Guide
陈泽科技有限公司
- 2 -
www.stephen-tele.com
1. Introduction
1.1. Overview
SVX8016 is an all-in-one converged communications solution ideal for medium businesses. The product offers full PBX
functionality, including Voicemail, Auto Attendant, Hunt Group, Ring Group, Call Transfer, Call Forward, Call Park and much
more, which help businesses reduce communications costs and stay connected everywhere.
SVX8016 is a hybrid telephone system capable of handling both traditional telephone and Voice over IP calls. Using VoIP
allows calls from one location to be routed over the Internet to another location, eliminating long distance charges.
SVX8016 can also directly integrate with VoIP service provision networks.
SVX8016 is very easy to understand, configure, and deploy. The web interface is designed to provide a clean and
user-friendly configuration window so that users won’t get lost in complicated menus and maintenance. A fully working
system can be set up quickly and get ready to communicate.
1.2.
Capacity
Any combination of the following 3 module cards:
4 Analog lines+ 12 Analog extensions or
8 Analog lines + 8 analog extensions or
16 analog lines
2 GS lines
200 VoIP extensions
16 VOIP trunk
50 concurrent calls (G.723 or G.729)
1.3.
Features
Full Range of PBX Features
SVX8016 offers a full range of traditional PBX features like Call ID, Call Forward, Call Transfer, Call Waiting and more. All
such features are available to both analog and VoIP extensions.
uto ttendant
SVX8016 handles inbound calls with an auto attendant. Auto attendants answer all incoming calls. Play a recorded message
and route callers to their requested destinations. All voice prompts are fully customizable.

SVX8016 IP PBX System User Guide
陈泽科技有限公司
- 3 -
www.stephen-tele.com
Call Queue
Call Queue holds incoming calls when all members are busy assisting other callers. Calls wait in the call queue for the next
available member. While calls are waiting, they hear the music-on-hold. Calls are distributed out of the call queue on a first
in, first out basis, as members become available.
Voicemail
The voice mail feature allows messages to be recorded when a particular extension can not be answered. It is also possible
to send particular calls to a voice mail box directly. Voice mail messages are recorded in wav format and stored in the user’s
mailbox and optionally forwarded by email to the user.
utomatic Route Selection
SVX8016 gives you complete control over your phone lines and extensions. You can automatically place specific types of
calls on specific lines.
Line Hunt Group
Line Hunt Group consists of analog or VoIP lines that are associated so that calls to any line in the group are rolled over to
the next available line in the group when the line is busy. You can move lines within a line group to set the hunt order.
Extension Ring Group
Extension Ring Group is a collection of users. For example a group to handle all sales related calls. An incoming caller
wishing to speak to sales can be directed to that group, where the call can be answered by any member of the group who is
available.
1.4.
Software specifications
Protocol SIP RFC3261
SDP RFC2327
RTP/RTCP
Codec G.711/ G.723/G.726/G.729
Extension Analog Extension
IP Extension
Trunk PSTN Trunk
SIP Register
SIP Trunk
GS Trunk
Configuration WEB browser
IVR
Keypad
Console
Firmware Upgrade HTTP / FTP

SVX8016 IP PBX System User Guide
陈泽科技有限公司
- 4 -
www.stephen-tele.com
1.5.
Hardware specifications
Network Interface 1 WAN, 10/100 bps Auto-Negotiation RJ45 port
4 LAN, 10/100 bps Auto-Negotiation RJ45 port
nalog Interface 32 RJ11 analog ports( FXO or FXS)
GSM Interface 2 GS ports, 850/900/1800/1900 hz
Power AC Input: 100~240V AC, 50/60Hz
Environmental Conditions Operational temperature: 0~40
℃
Storage temperature: -10
℃
~60
℃
Operational humidity: 20%~90%, no coagulation
Storage humidity: 5%~95%, no coagulation
Dimensions Size: 435(W) x 300(D) x 44.5(H) mm 19’ 1U
2. Installation
2.1. Safety Precautions
Before using SVX8016, please review and ensure the following safety instructions are adhered to:
1)
Read, follow and retain instructions — All safety and operating instructions should be read, followed and retained for
future reference before operating the equipment.
2)
Heed warnings — All warnings on the equipment and in the operating instructions should be adhered to.
3)
Temperature — Do not operate in environments where the temperature is below 0°C or 32°F. If the product was
shipped in cold weather, please let the system warm up at room temperature for at least two hours before plugging it
in to a power outlet.
4)
oisture — Do not place SVX8016 in a high-humidity environment.
5)
Heat — Never place SVX8016 near heat sources such as radiators, floor registers or in direct sunlight. Do not stack units
on top of each other.
6)
Power supply — The equipment should only be connected to an approved power supply of the type described in the
operating instructions or marked on the equipment. Use only the power adapter supplied with SVX8016.
7)
Damage requiring service — Do not attempt to service the SVX8016 yourself. Unplug SVX8016 and refer servicing to a
licensed technician when:
The plug or power cord has been damaged.
SVX8016 has been exposed to moisture.
2.2. Check package contents
Each SVX8016 package should include the following:
Name Quantity
SVX8016 unit 1
CF card 1 GB
RJ-11 telephone cable 1 for each line port
RJ-45 Ethernet cable 1

SVX8016 IP PBX System User Guide
陈泽科技有限公司
- 5 -
www.stephen-tele.com
RJ45-DB9 RS232 cable 1
Power Cable 1
Quick installation guide 1
2.3. Ensure you have the following
One computer with Ethernet network interface
One analog telephone
2.4. Front Panel
The front panel consists of several lights and ports:
Eth0 Eth0 connector is RJ-45 port used for connected with the public internet. The lights on the up corner of the port is
used to indicates the connection status, the port is connected correctly if yellow light is lit and the flash green light indicate
that there are data in transmission.
Eth1 4 LAN connectors are RJ-45 port used for unit configuration via the PC, unit LAN networking, and VoIP
capability. The lights on the up corner of the LAN port is used to indicates the connection status, LAN is
connected correctly if yellow light is lit and the flash green light indicate that there are data in transmission.
Console An RS232 connector, used to access the CLI interface of the SVX8016.
Slot0/Slot1 Indicates the usage of the extensions. The light is lit when the extension is ringing or off-hook.
GSM Indicates the usage of the GS trunk. The light is lit when the GS trunk is occupied.
Status The flash status light indicates that the system is in the booting process. The light turns to solid green when
the system is successfully booted.
CF card slot You will need a CF in order to use CDR and voicemail functionality.
Caution:
Power off the device before plug in the CF card, otherwise, the device may be damaged.
2.5. Back Panel
Power The power connector for connecting with the AC power, with a power switch beside. The power range is
100~240V AC, 50/60 Hz
GSM1/GSM2 The antenna connector of the GS card.
Extension The “Extension” connectors are RJ-11 ports used for connecting phones and other analog devices.
Line The “Line” connectors are RJ-11 ports used for connecting incoming telephone lines.

SVX8016 IP PBX System User Guide
陈泽科技有限公司
- 6 -
www.stephen-tele.com
NOTE:
The first 4 FXS ports support power failure pass-through. In the event of a power failure or loss of power, those 4
extension ports are able to receive and make calls through the line ports directly. For the 8 FXS + 8 FXO model, all 8 FXS
ports support failure pass-through functionality.
2.6. Connect the device
2.6.1. Connect diagram
Front panel, connect with the computer and network
Back panel, connect with the phone, line and power
2.6.2. Connect the power
Plug one end of the provided power cord into the receptacle on the back of the SVX8016, and then plug the other end into
an available power outlet. Switch the power control which is located at the back panel of the SVX8016 to ON position and
then the power indicator will light up indicating the device is on.

SVX8016 IP PBX System User Guide
陈泽科技有限公司
- 7 -
www.stephen-tele.com
W RNING!
ake sure the output power voltage of the power outlet falls into the power range accepted by the SVX8016. You can see
the required power range value on the label beside the receptacle on the back of the SVX8016.
2.6.3. System Startup
The status lights on the front panel will flash for a few moments during boot-up, and then remain lit, indicating the device is
on.
2.6.4. Connect the network
Connect one end of a RJ-45 Ethernet cable to a LAN port located at the front of the SVX8016. Connect the other end to a
hub or switch. The corresponding LAN indicator on SVX8016 will flash indicating the connection is OK.
2.6.5. Connect the computer
Connect one end of a RJ-45 Ethernet cable to another LAN port located at the front of the SVX8016. Connect the other end
to a computer. The corresponding LAN indicator on SVX8016 will flash indicating the connection is OK.
2.6.6. Connect the telephone
Connect one end of the provided RJ-11 telephone cable to the phone jack and the other end to your phone. You can hear
some signal tones from the earpiece when you pick up the telephone handset.
NOTE:
The signal tone can not be heard from the handset before the booting process is completed. The status lights on the
front panel will flash for a few moments during boot-up and then remain lit, indicating the device is on.
2.6.7. Connect the PSTN line
Connect one end of the RJ-11 telephone cable to wall phone jack of an incoming phone line and the other end to the line
jack at the back of the SVX8016.
W RNING!
Never connect the line to the phone jack. Otherwise, the device may be damaged.
3. Configuration
3.1. Initial Configuration
3.1.1. Get the device IP address
The factory default IP address of SVX8016 is 192.168.88.86. There are two ways to get the IP address if you forgot it.

SVX8016 IP PBX System User Guide
陈泽科技有限公司
- 8 -
www.stephen-tele.com
Using FXS port:
Pickup the phone connected on the first Ext port, dial “*100#” to enter the administrative IVR, and then follow the voice
instruction, press “0” key to listen for the LAN port IP address of the device. The default password of the administrative IVR
is “8888”
Using console port:
Connect one end of the RS232 cable to the console port on the front panel of the device, the other end to the
computer’s RS232 port.
Open the HyperTerminal software on your computer. Change the baud rate to 115200 and leave other options
unchanged.
Use account “root” and password “*#@8016@#*” to login to the console.
Enter the command “ifconfig”. The device’s LAN port and WAN port IP addresses will be shown on the screen.
3.1.2. Login into the Web interface
ake sure your computer is in the same subnet with the device by modifying your computer’s IP address to match the
device’s IP address.
Start web browser. Enter the IP address of the device into the address bar. The login page will appear:
Enter the user name and password to login, the default user name is “admin”, and password is “admin” too.
3.1.3. Web interface overview
After successful login, the desktop screen will appear.

SVX8016 IP PBX System User Guide
陈泽科技有限公司
- 9 -
www.stephen-tele.com
Online Help center Click this icon to enter the online help center of SVX8016
pplication Manage Add, Remove or Update the application or software.
Control Panel Change password for the login account, modify system time and check the system information.
Network Settings Set the IP address and DNS server address of the system.
Return to desktop Click this button to return to the desktop at any time.
SVX8016 Click this icon will enter IP-PBX configuration interface.
Reboot Reboot the device.
Exit Logout from the desktop
System Time Shows the current time of the system.
3.1.4. Network Settings
This screen lets you configure the network connections.
3.1.4.1. Network Settings:
Click the L N icon, the LAN settings screen will appear. User can change the IP address and DNS server address for the LAN
port here.
Click the W N icon, the WAN settings screen will appear. User can change the IP address and DNS server address for the
WAN port here.

SVX8016 IP PBX System User Guide
陈泽科技有限公司
- 10 -
www.stephen-tele.com
3.1.4.2. VL N
This section is where user can setup the VLAN and the voice QoS.
VL N:
Support Uplink: Tick this option to enable the VLAN functionality. User must select a port as uplink port once this
option has been enabled.
Select Port: Select a port to be the uplink port.
The following is a sample connection diagram of SVX8016 using VLAN. The LAN port 4 has been selected as uplink port.
The voice traffic and data traffic goes to different port and will be tagged, and then finally go to higher level switcher via
uplink port. So the device can control the out going traffic to ensure the voice quality. However, the QoS of the incoming
traffic toward SVX8016 is depending on the higher level switch. The higher level switcher must support QoS too to perform
full QoS control.

SVX8016 IP PBX System User Guide
陈泽科技有限公司
- 11 -
www.stephen-tele.com
QoS:
Support 802.1Q: Select this option to enable the voice QoS functionality. Under this circumstance, the selected uplink
port must be connected with switch in higher level.
udio & Data VID: Those values are come from the higher layer. Please consult with your network administrator for the
detailed information.
Data Port: Define the behavior of the Data ports. Data ports are ports which have not been selected as uplink port.
Data tag: The incoming data from the uplink port are tagged, which may not be recognizable to the devices
connected to the data ports. Here, user can decide to remove the tag before sent out to the data ports or not.
Frame rate: The frame rate of the data ports will be limited to the value defined.
Frame type: Define what kind frame will be limited.
3.1.4.3. DHCP
Dynamic Host Configuration Protocol Server

SVX8016 IP PBX System User Guide
陈泽科技有限公司
- 12 -
www.stephen-tele.com
Enable DHCP Server: Tick the box to enable the DHCP server, the default setting is unticked.
Connection: Chose a port to use DHCPD service.
Start IP – End IP: Define the IP range that will be assigned to clients.
Tftp Server IP: The tftp server is used for auto provisioning propose.
Default Lease Time: Define the length of time that client can use a assigned IP address. Client need to ask DHCPD to assign
a new IP address or renew the old one when time expires.
M X Lease Time: Define the maximum lease time of the IP address.
ssign DNS server: Select the way to assign the DNS server address.
utomatically: DNS address acquired from the ISP will be assigned to clients.
Manually: Define a DNS address, and that DNS address will be assigned to clients.
3.1.4.4. DDNS
DDNS is a service that maps Internet domain names to IP addresses.
Status: Show the DDNS status, Disable, Offline or Online.
Enable Dynamic DNS: Activated the DDNS.
Connection: Chose a port to use DDNS service.
Provider: Select a DDNS service provider from the drag down list.
Host name, User account, Password: You need registered to the provider you selected and then you can obtain
information of those parameters from the provider.
3.1.5. Control Panel
This screen lets you change password for the login account, modify system time and check the system information.
Check the system information:
ITSPBX sounds language select: Select the language for the default system prompt. SVX8016 support
bilingual system prompt. Whenever a system prompt is played it will always play 1
st
language first and then
2
nd
language.

SVX8016 IP PBX System User Guide
陈泽科技有限公司
- 13 -
www.stephen-tele.com
Change the login password:
Set system Time:
There are two ways to set the system time:
Set as PC Time:
Click this button, the device will synchronize time with your PC immediately.
Through NTP Server:
Tick the option “Auto Synchronize with Internet NTP Server”. The device will automatically synchronize time with
the NTP server periodically. You should select the time zone where the device reside and input the address of the
NTP server. Click the button “synchronize now!” will let the device synchronize time with the server immediately.

SVX8016 IP PBX System User Guide
陈泽科技有限公司
- 14 -
www.stephen-tele.com
Edit system service parameters
In “System Services” section, you can edit the HTTP service parameters
Click link “thttpd”, following screen will appear. You can change the listen port and the login timeout of the HTTP server. If
there is no action performed after the timeout specified here, the Web screen will return to the login page.
Diagnostic
Ping: Enter a destination host’s IP address or domain name into the text area next to Ping button and click the Ping
button, device will try to ping that address and print the returned message in screen.
Netstat: Click to see the network status of the device.

SVX8016 IP PBX System User Guide
陈泽科技有限公司
- 15 -
www.stephen-tele.com
3.1.6. pplication Manage
This screen lets you add or remove application and update the system software.
To remove application, just click the “Delete” button under the application name which you want to remove.
New application can be added to system by installing from an installation package file.
The whole system, including the embedded Linux operation system, can be updated by reprogramming the flash. Just select
the appropriate binary file and click “Upgrade” to start.

SVX8016 IP PBX System User Guide
陈泽科技有限公司
- 16 -
www.stephen-tele.com
W RNING!
The updating process may take a long time. Never power off the device during the updating, otherwise the device
might be damaged permanently.
3.1.7. IP-PBX Configuration Interface
Click the “SVX8016” icon on the desktop, the IP-PBX configuration interface will appear. In this interface, you can do all the
configurations related to the IP-PBX functions.
In IP-PBX configuration interface, If you want to return to desktop screen or logout, just click the link at the top right of the
screen at any time.
After change the parameters of the device (not included network parameters), you can click the button “Activate Changes”
to reload the IP-PBX service. The changed parameter will take effect immediately. No reboot is required.
3.2. Status
3.2.1. System Status
Click “Status” menu and “System Status” submenu, the system status page will appear.

SVX8016 IP PBX System User Guide
陈泽科技有限公司
- 17 -
www.stephen-tele.com
User can obtain the basic information of the device such as software version, system status, and system up time here.
3.2.2. Extensions Status
Click “Status” menu and “Extensions Status” submenu, the extensions status page will appear.
Search User can enter extension number in the search filed to search for specific extensions.
Total Shows the total number of each kind extension.
More Point the mouse cursor to it and the static of different status of the extensions will appear.
Sort Click the cell in first row to sort the table by different criteria.
Extension The extension number of the extension.
IP ddress The IP address of the extension. N/A when extension is not registered to the system.
Port The port number used by the extension to register to the system if the extension is a VoIP extension, N/A
when extension is not registered to the system. If it is an onboard extension, the port number will be the
sequence number of the onboard extension.
Status Shows the status of the extensions. The status page will refresh itself automatically every 10 seconds.

SVX8016 IP PBX System User Guide
陈泽科技有限公司
- 18 -
www.stephen-tele.com
VoIP Extension:
Idle: The extension is registered and is currently unoccupied.
Unregistered: Extension has not registered to the system.
Ringing: Extension start a communication and wait for the remote user to answer.
Busy: Extension is occupied, either in a communication or waiting to be hangs up.
On hold: Communication is established and is currently on hold.
FXS Extension:
Idle: The onboard extension currently unoccupied.
Dialing: The handset of the phone connect to the onboard extension has been picked up.
Ring: The phone connected to the extension is ringing.
Ringback: Extension started a communication and waiting for the remote user to answer.
Busy: Extension is occupied, either in a communication or waiting to be hangs up.
Service Shows the activated service of this extension such as call waiting, follow me and etc. One small icon
represented each activated service. Stop the mouse on the icon will give you the detailed information about
that specific service.
3.2.3. Trunk Status
Click “Status” menu and “Trunk status” submenu, the trunk status page will appear.
Search User can enter trunk name in the search filed to search for specific trunks.
Total Shows the total number of each kind trunk.
More Point the mouse cursor to it and the static of different status of the extensions will appear.
Sort Click the cell in first row to sort the table by different criteria.
Trunk Name of the trunk.
Type Shows the type of the trunks.
ddress The IP address of the trunk. Dynamic if the trunk registers itself to the SVX8016.
Status Shows the status of the trunk.
VoIP Trunk:
Idle: The trunk is registered and is currently unoccupied.
Unregistered: Trunk has not registered to the system. Point the cursor to status and the reason why the
trunk cannot be resisted will appear:
Not found Register account is not found.
Reject The server refuse the registration, the password may be wrong.
Timeout Cannot reach the server. Server side may be down or the network is bad.
Ringing: Trunk start a communication and wait for the remote user to answer.

SVX8016 IP PBX System User Guide
陈泽科技有限公司
- 19 -
www.stephen-tele.com
Busy: Trunk is occupied, either in a communication or waiting to be hangs up.
On hold: Communication is established and is currently on hold.
PSTN Trunk:
Idle: The trunk is registered and is currently unoccupied.
Ringing: Trunk start a communication and wait for the remote user to answer.
Busy: Trunk is occupied, either in a communication or waiting to be hangs up.
3.2.4. gents Status
Click “Status” menu and “Agents status” submenu, the Agents status page will appear.
Search User can enter agent number in the search filed to search for specific agent.
Total Shows the total number of each kind agents.
Sort Click the cell in first row to sort the table by different criteria.
gent Agent number.
Status Shows the status of the agent. Logged in or logged off.
LoggedinChange The logged in extension of the agent number. An Agent number can be logged in by different extension
(channel).
Talking To What number from the queue does this agent number talking to currently.
3.2.5. ctive Call Status
Click “Status” menu and “Active Call Status” submenu, the Active call status page will appear.

SVX8016 IP PBX System User Guide
陈泽科技有限公司
- 20 -
www.stephen-tele.com
Search User can enter caller number in the search filed to search for specific call.
Total Shows the total number of current active calls.
Sort Click the cell in first row to sort the table by different criteria.
Caller The caller of this communication.
Callee The destination of the call or the trunk which the call takes if this is a outbound call.
Status Shows the status of the call, talking or ringing.
Duration The duration of the call.
ction User can force a call to hang up by clicking the Hangup button.
3.3. Extension
3.3.1. VoIP Extension
Click “Extension” menu and “VoIP extension” submenu, the add VoIP extension page will appear.
Extension: The extension number that will be associated with this particular extension.
Display Name: A description name for memorization.
uth Name: The name used for authorization proposes.
Password: The password of this extension.
dvanced: Expand the page to display the advanced feature settings. Click again to return to the basic setting.
Other manuals for SVX8016 GSM
1
Table of contents
Other Chima PBX manuals

