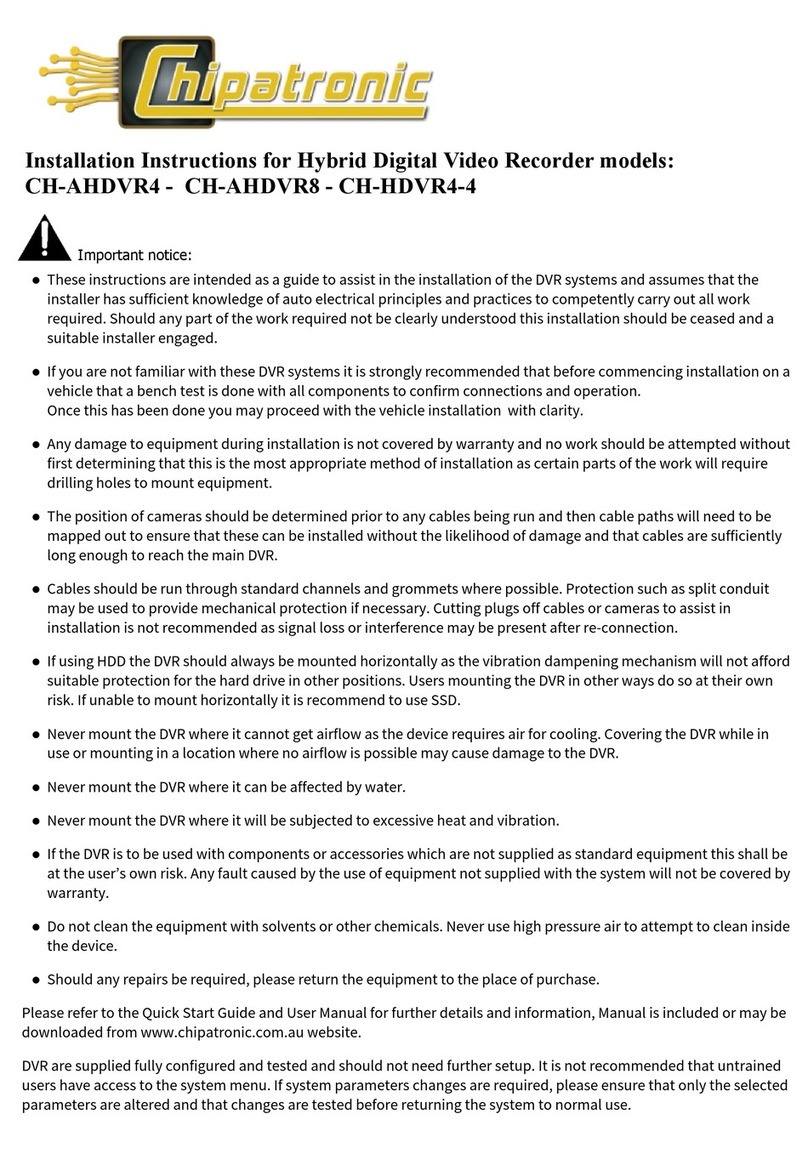
Chipatronic Hybrid Series User manual

DVR Quick Start Guide
4 Channel Hard Disk Hybrid DVR
This document pertains to CH-AHDVR4, CH-AHDVR8 and CH-HDVR4-4 models of Digital Video Recorders
installed in commercial or heavy vehicles and is intended as a guide to the basic use of these systems.
Please refer to the User Manuals supplied for more detailed information.
Please note that images are for illustration purposes and of different models and may not be identical to
the device you have received and are using.
Thank you for using our Mobile HDD Digital Video Recorder. This guide is applicable for 4ch and 8 ch Mobile HDD
Video Recorder, please read the User’s Manual carefully to ensure that you can use the device correctly and safely.
Other instructions are provided for software included, please ensure that this information is available for those
staff who are authorised to access recorded video files.
The contents of this guide and manuals are subject to be changed without notice.
Please retain all documentation for future reference.
Quick Start Guide Chipatronic Hybrid series DVR Ver. 1.1
ãChipatronic 2019

Quick Start Guide Chipatronic Hybrid series DVR Ver. 1.1
ãChipatronic 2019
1) Getting Started
a) Your DVR will have already been installed and the operating configuration applied and as such no changes
to the device settings should be needed. If special requirements for recording were requested, these should
have already been applied and the only action required for recording to begin is to start the vehicle.
b) Your DVR can record HD and/or Analogue video from one to nine cameras simultaneously (depending on
the model) and the required cameras will have been installed on the vehicle.
Take the time to ensure that all cameras have a clear field of view and will be able to pick up vision of the areas
required as equipment changes may have been made since the time of fitting.
c) In some cases a monitor may be fitted which may either show the DVR camera monitor screen or sometimes a
single camera image as a safety precaution, if no monitor is fitted this will not affect the DVR as the monitor is
not part of the recording process.
A monitor or test screen may be connected to check the camera images or for maintenance personnel to
access the system menu. If a monitor is required, please contact your installer. Only competent staff should
access the system menu as changes made can affect the operation and recordings.
d) This DVR will record audio from one or more cameras if cameras with audio have been fitted. In most
instances there will be just one audio camera fitted and this will be set as Channel 1 as a default. If there are
any questions in regard to audio recording, please consult with your supervisor, manager or the installer.
e) A USB mouse can be used to access the system menu providing the DVR Front Panel is accessible. In normal
operation the mouse should not be required as the system is automatic.
2) Standard Operation
a) As the DVR has been installed and configured, no special action is required to start the recording from the
cameras apart from turning the vehicle ignition to ON or the Accessory position, depending on the vehicle’s
electrical system and final installation.
Note that recording does not begin immediately with the ignition as the DVR system takes a short time to
completely start after it has shut down. Should recording of all driving be required, please allow a suitable
start-up time before moving off.
b) Recording will continue for a pre-set time after the vehicle ignition is turned off. As a default this will be 300
seconds to record the driver exiting the vehicle. This may be extended or reduced, please consult the installer
or maintenance staff if this needs to be changed.
c) The DVR has a key switch on the front panel but it is not recommended for the key to be left in the switch.
Please remove the key and store this safely, where it can be accessed when required. The key is only used to
shut down the DVR so the hard drive can be removed or if the vehicle is to be left, not working, for a longer
period. The DVR is fitted inside a tamperproof box so the device itself will not be accessible and a second key
will be required to open the box to access the DVR so this key should be stored with the other, DVR, key.
Two sets of keys are provided so that supervisors and maintenance personnel can have a set.
d) If using a model with wireless connectivity, please refer to Section 5: Wireless Connectivity for instructions on
the use of this system.
Please check regularly to ensure that cameras are not covered or blocked by objects which impede the view. If
any damage to cameras or visible cables is noted this should be reported to your supervisor and/or
maintenance staff.
e) It is strongly advised to check the storage media (Hard Drive or SD Card) regularly to ensure that video files are
up to date and recording correctly. Depending on the model and age of the system it may use HDD, SSD or SD
storage media and these may all be affected by vibration, heat and general operational wear and tear and
while all efforts are made to provide reliable storage, no absolute guarantees can be made in regard to these
devices. All storage products are covered by the manufacturer’s warranties which vary from device to device.
f) Special configurations for alarms, camera views and other functions may be applied where requested and in
these cases additional instructions and information will be provided in regard to this.
Should changes to the standard operation of this DVR be required after installation, please ensure that these
are fully understood before applying any changes and that this is done by a competent person.
Contact Chipatronic if further information is required in regard to special functionality.

3) Front Panel
Supervisors or other staff responsible for vehicle recordings and maintenance personnel should ensure
that they are familiar with the front panel of the DVR as this shows the status of the device and regular
checking should be done to ensure continuity of recordings.
The layout below is common to all current Hard Drive type DVRs.
1 USB Connector (Can connect with mouse)
2 SD Card Slot
3 Stop Button
4 4G/3G Indicator (only applicable for 4G/3G model)
5 SIM Card Eject Button (only applicable for 4G/3G model)
6 SIM Card Slot (only applicable for 4G/3G model)
7 Control Panel Connector
8 Light Indicator (1:power 2:run; 3:alarm 4:record; 5:system
9 Lock (also used as power switch)
10 Hard Disk Case
11 Network Connector (RJ45)
Get to know the status of DVR system by the indication of LED lights:
Quick Start Guide Chipatronic Hybrid series DVR Ver. 1.1
ãChipatronic 2019

a) If there is any beeping sound coming from the DVR, check the cameras and connections and hard
drive as this indicates that an alarm condition exists which may be that one or more cameras are not
connected or some other problem.
Any sign that the DVR is not functioning correctly, either from the status shown by the lights on the
front panel or by a beeping warning, should be referred to a supervisor and/or maintenance
personnel according to your company policy.
4) Viewing Recorded Video
a) The recommended method for viewing video recordings is by connecting the hard drive (HDD) to a PC
and viewing the files using the hPlayer software or VLC media player. Other media player software
may be suitable at the users’ discretion.
Note that this requires the DVR to be shut down by turning the key switch on the front panel Off. This
also allows the HDD to be removed as it is locked in place while the key is On.
b) Remove the HDD by pulling handle of the HDD Case and sliding out.
c) To connect the HDD to a computer requires a USB - SATA adaptor which allows the HDD to be
connected to a PC via USB port. All models use a direct SATA connection which is just plugged
directly to the HDD.
Cable Part No. CH-USBSATA
d) Files may be copied from the DVR hard drive to an SD card so that the hard drive does not need to be
removed. This is done with the DVR on and a mouse and monitor connected using the File menu.
Navigate to the hard drive (sata) and then the Video folder, find the day and time folder required by
double clicking and then additional folders which contain the video files.
Select the file/s required and right click to access the Copy to SD function. It is not possible to copy to a
USB drive as the mouse is required and will be connected to the USB port.
The SD card can now be removed and the files can be accessed from a computer at a later time.
e) Video files can be viewed directly when a monitor and mouse are connected .
Access the required files as per above and double click on a single file to play the video and view on the
connected monitor. This is normally carried out in the field as a means to confirm that files to be
copied are the ones required.
Accessing the DVR menu should never be attempted while the vehicle is in motion.
Only competent staff should carry out any menu operations of change settings.
Quick Start Guide Chipatronic Hybrid series DVR Ver. 1.1
ãChipatronic 2019

4) Maintenance
a) The DVR is not user serviceable and should not require maintenance but the system should
be checked regularly as cameras and cables can be damaged and hard drives may develop
problems related to vibration and temperature. Regular checking of the HDD/SSD as
described above should ensure that any issues are dealt with promptly so that continuity of
recording is maintained. Any maintenance or operating issues should be reported to the
appropriate person so that action can be taken if required.
5) Wireless Connectivity – 3G / 4G Models Only
a) There are different models of DVR which have all of the same features as the standard model
with the addition of mobile wireless connectivity.
These use an M2M (Machine to Machine) SIM card which connects the device to a cloud
server using the mobile network. As such this connectivity is only available in areas covered
by the mobile network. Should the vehicle be operating in an area not covered by the mobile
network or the network is unavailable at the time, the recording function of the DVR is not
affected and will work normally and videos will be available from the HDD.
b) M2M services can be provided by Chipatronic or your company can provide this.
If the service is provided by Chipatronic, this will be configured and tested before delivery. If
the service is provided by your company or others please check that the connectivity is
working correctly prior to the system going into service.
c) No further operator action is required as the connection is automatic. All required settings
for the wireless connection will have been applied prior to the final commissioning of the
DVR and wireless connection will have been tested.
d) The wireless connection may take some minutes before it can be seen as active in CMSv6 as
this is being updated from a cloud based server and is also dependent on the signal strength
in the region around the vehicle.
e) Log in to CMSv6 on an internet connected computer or smartphone using the account
details provided to view live video, check the position of the vehicle and other functions
available.
Note the password provided is a default and can be changed in the SYSTEM menu after initial
login.
Quick Start Guide Chipatronic Hybrid series DVR Ver. 1.1
ãChipatronic 2019

Appendix A CMSv6 for iOS and Android Devices
1. CMSv6 is available as a free App from the iTunes Store.
On you iPhone or iPad go to the store and search for CMSv6 and install the App on your
device.
2. The Android App is available from Play Store or available for download from Chipatronic.
3. Once installed, start the App and a login screen will be shown.
Enter the username you have been provided in the top section then your password provided
below that and in the bottom section enter the IP address for server which you should have
been provided, as per the example below.
4. After logging in you will have screen showing all vehicles with 3G/4G DVR systems allocated to
your account. At the bottom of the screen, click on Terminal to select the vehicle required and
then choose the vehicle ID and menu will be shown to choose the function to be displayed:
Map, Video, Track
.
a.
Map
Displays the vehicle position. Clicking on the “i” symbol will show further
information from the GPS system.
Quick Start Guide Chipatronic Hybrid series DVR Ver. 1.1
ãChipatronic 2019

b.
Video
Starts live video streaming from the DVR. Note that it may take longer for the all
video channels to begin on a mobile device. A series of rotating bars on the screen
indicates that the request is processing and will be displayed soon.
c.
Track
can be used to trace the route of the vehicle for a selected date and time. Note
that long journeys will take a significant time to display as the system downloads the
data required. The route tracked will be displayed on the map.
d. To change vehicle or function to view, go to
Terminal
, select a different vehicle or
function and then proceed as above.
e.
Sign Out
It is important that users sign out of the system so that a video session is not
left running inadvertently which could use large volumes of mobile data at significant
cost.
Always Sign Out of CMSv6 when finished by clicking on the
Setting
icon on the bottom
right of the screen and then click on
Sign Out
and this will return to the login screen.
Quick Start Guide Chipatronic Hybrid series DVR Ver. 1.1
ãChipatronic 2019
This manual suits for next models
3
Table of contents
Other Chipatronic DVR manuals
Popular DVR manuals by other brands

DW
DW VMAX D18/16 quick start guide
Logik
Logik L160STB11 instruction manual
KGuard Security
KGuard Security Aurora Series user manual
Samsung
Samsung SHR5160500 - Electronics Gvi - Dvr 16ch Mpeg4 120ips Real... user manual

ReplayTV
ReplayTV ReplayTV Guide
Seorim Technology
Seorim Technology AKR-200 quick guide
