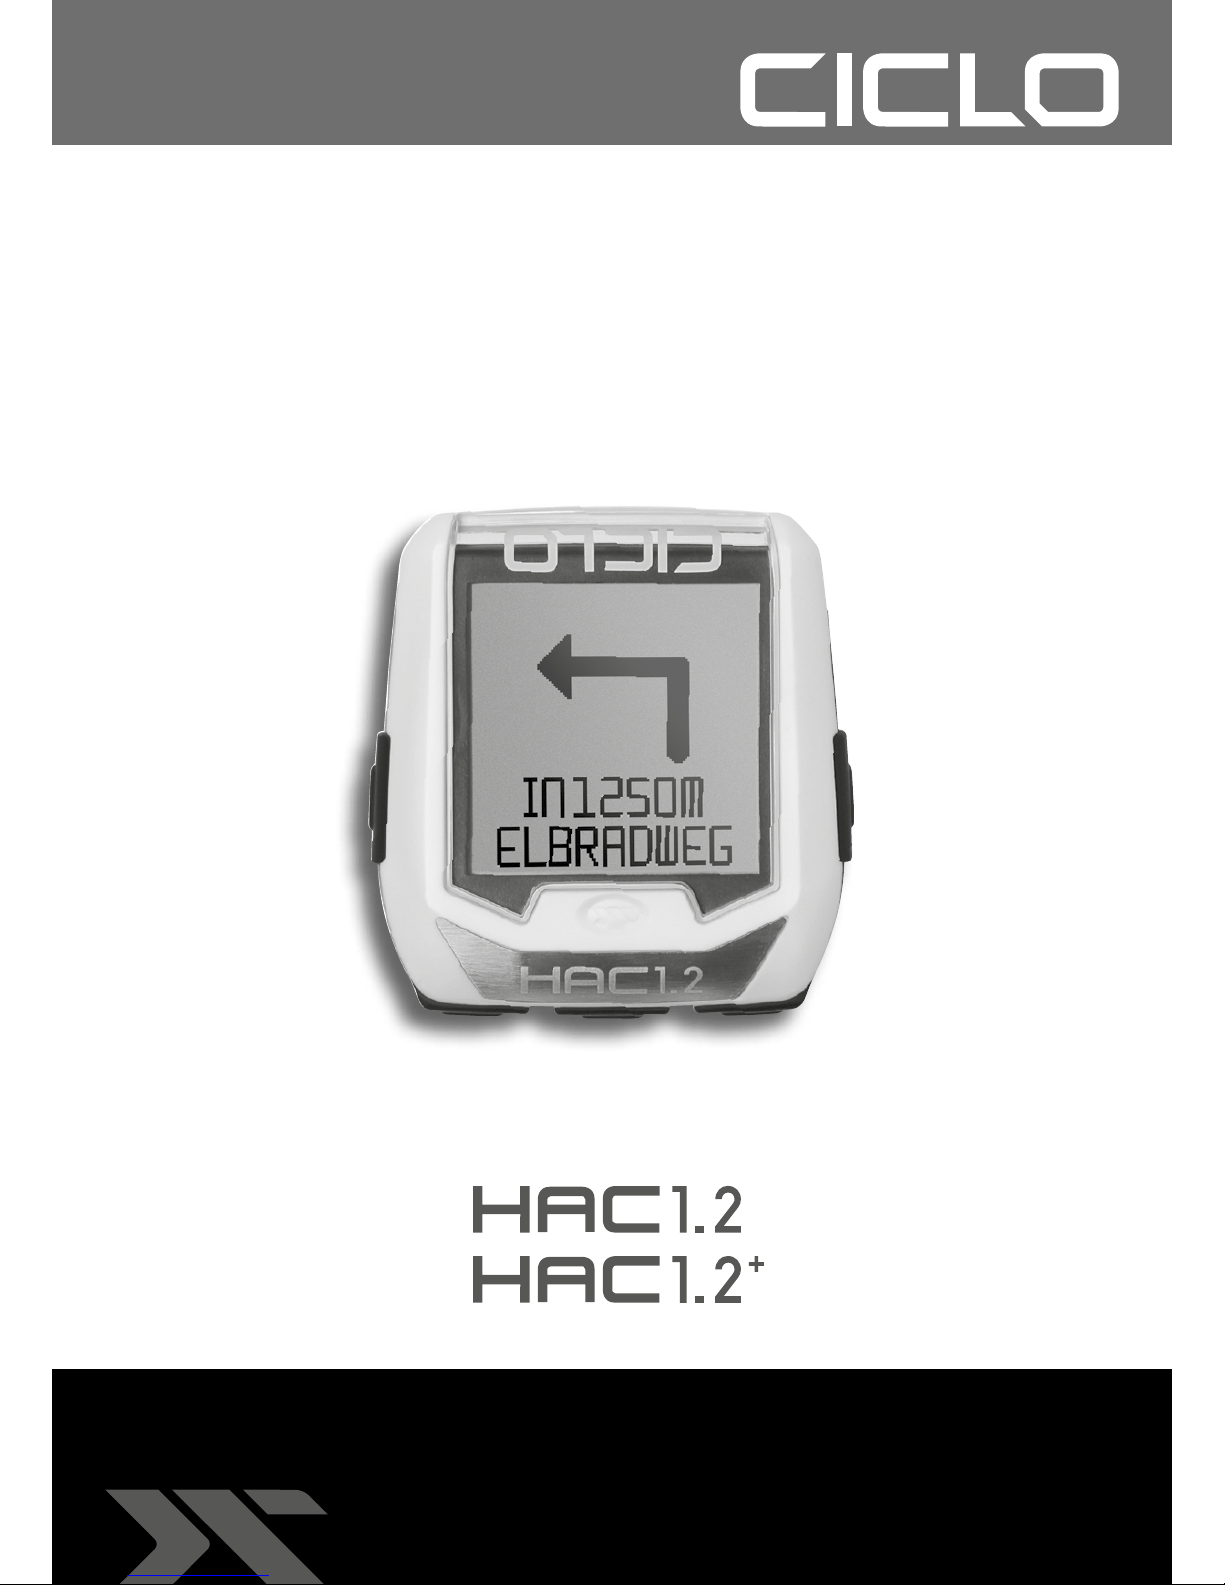
Ciclo HAC 1.2+ User manual
1
OPERATION MANUAL
2
TABLE OF CONTENTS
1. Foreword
2. First steps 3
2.1 Mounting 3
2.1.1 Cockpit handlebar bracket 3
2.1.2 Handlebar bracket 3
2.1.3 Adapter 3
2.1.4 Speedsensor 3
2.1.5 Cadence sensor 3
2.1.6 Spoke magnet 3
2.1.7 Cadence magnet 4
2.1.8 Heartrate belt 4
2.2 Before you start 4
2.2.1 Mounting of battery 4
2.2.2 Update 4
2.2.3 Connecting the sensors 4
2.2.4 Set the circumference 4
2.2.5 Go cycling 4
3. Operations 4
4. Menu 5
4.1 Start 5
4.2 Short menue 5
4.2.1 Profiles 5
4.2.2 Sensors 5
4.2.3 Altitude 5
4.2.3.1 Actual altitude 5
4.2.3.2 Home altitude 5
4.2.4 Cellphone connection 5
4.3 Historie 5
4.4 Setting 5
4.4.1 General 5
4.4.1.1 Language 5
4.4.1.2 Units 5
4.4.1.3 Intervall 5
4.4.1.4 Display 5
4.4.1.4.1 Contrast 5
4.4.1.4.2 Light MGR 5
4.4.1.5 Weight 5
4.4.1.6 Tones 5
4.4.1.7 Date 5
4.4.1.8 Time 5
4.4.2 Profiles 5
4.4.2.1 Name 5
4.4.2.2 Wheel circumference 6
4.4.2.3 Wheel weight 6
4.4.2.4 Zones 6
4.4.3 Display 6
4.4.4 Device 6
4.4.4.1 Version 6
4.4.4.2 Memory 6
4.4.4.3 Reset 6
4.4.4.4 Factory settings 6
5 CicloApp & Komoot 6
5.1 CicloApp 6
5.2 Komoot App 6
5.3 Android insert 6
6 Solving problems 7
6.1 Elimination of interferences 7
6.1.1 Wrong datas 7
6.1.2 No speed/cadence or heartrate 7
6.1.3 Speed is wrong 7
6.1.4 Altitude is wrong 7
6.1.5 Heartrate is wrong or not shown 7
6.1.6 Altitude changes although I am not moving 7
6.2 Sending the HAC 1.x for service/repair 7
6.3 Warranty 7
6.4 Warranty card 8
6.5 Technical datas 8
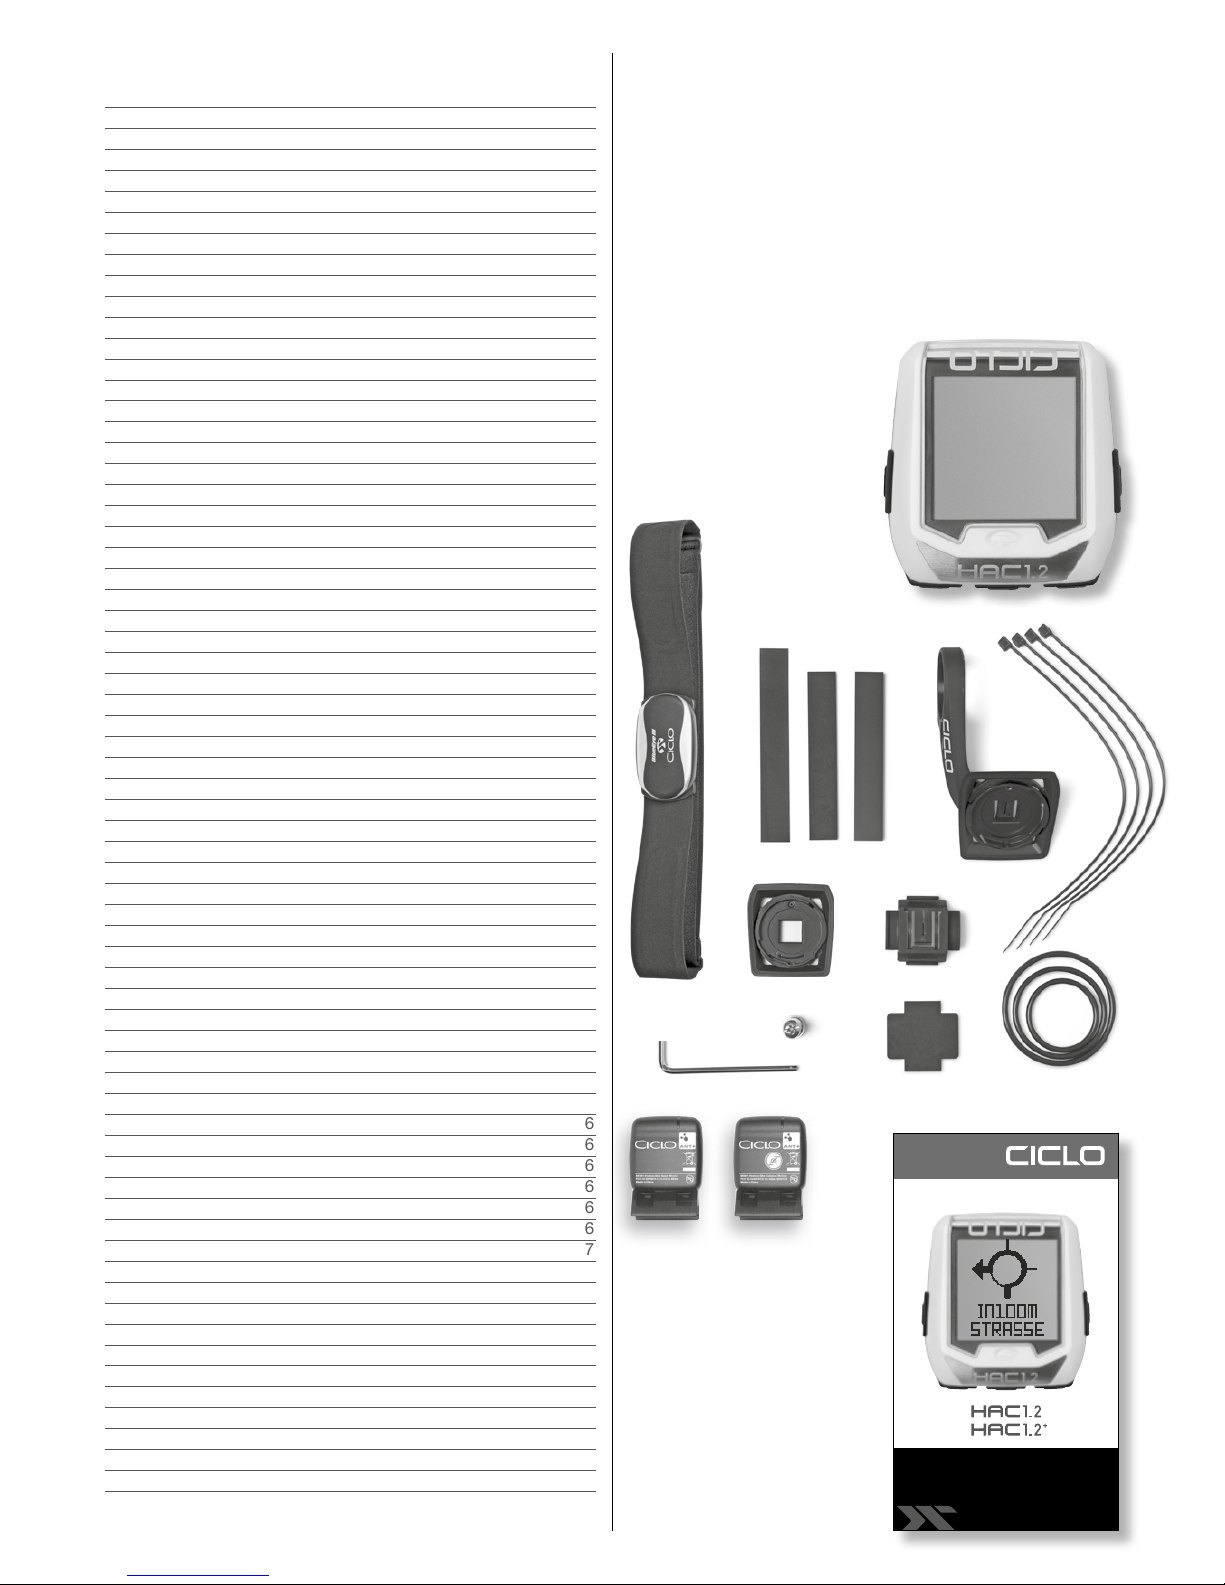
DELIVERY
HAC 1.2 / HAC 1.2+
1Hac 1.2 Cycling Computer
2Cockpit handlebar bracket
3Handlebar bracket
4Adapter
5Speedsensor
6Cadence sensor *
7Heartrate belt *
8Mounting material
9Quick start guide
JKomoot code (not shown)
*Only in HAC 1.2+
8
6
5
4
2
1
9
KURZANLEITUNG
SHORTMANUAL
KA_HAC_65x115_240518.indd 1 24.05.18 17:17
8
8
3
7
8

3
1.FOREWORD
Thank you for buying the HAC1.2/HAC1.2+ from Ciclo-
sports.
A modern cycling computer provides more than showing
speed or altitude.
The HAC1.2/HAC1.2+ offers more than a normal cycling
computer – an intuitive user friendliness.
It is distinguished by a navigation app which was realized
by Komoot. The navigation can be paired and synchro-
nized with the Komoot App from your Smartphone. This
can make your cycling exciting and eventful.
2. FIRST STEPS
2.1 MOUNTING
2.1.1 COCKPIT HANDLEBAR BRACKET
Loosen the screw of the bracket with the allen key. Be
careful not to lose a part. Take one of the rubbers and
place it on the handlebar. Open the cockpit handlebar
bracket and fix it at the desired place. Tighten the screw
with the allen key hand tight.
2.1.2 HANDLEBAR BRACKET
You can mount the handlebar bracket at the handlebar
or stem. Pull off the adhesive protection and fix the
rubber on the bottom side of the handlebar bracket.
Pass the cable ties through the eyelets of the handlebar
bracket and place it on the handlebar or stem. Press the
handlebar bracket down and tighten the cable ties.
You can cut the over standing cable ties with a scissor
or a side cutter. If you like to mount the with the rubber
o-rings you have to fix those at the holding noses.
2.1.3 ADAPTER
Please press the adapter into the holder of the handle-
bar- or cockpit handlebar bracket.
You can also mount the adapter if It is turned around in
90 ° to fix the handlebar bracket to the stem.
2.1.4 SPEEDSENSOR
Attach the transmitter to the fork or the left chain stay.
Pull the cable ties through the eyelets of the transmitter,
place it in the desired location and tighten the cable ties.
The ends of the cable ties can be cut off with a clipper or
scissors.
2.1.5 CADENCE SENSOR
Attach the cadence sensor on the chain stay towards
the middle of the crank (please do not tighten the cable
ties at once). Fix the cadence Magnet on the crank with
a distance of a maximum of 3 mm to the cadence sen-
sor. After you have initialised/ paired the cadence sensor
to the HAC1.x you can tighten the cable ties.
2.1.6 SPOKE MAGNET
Attach the magnet to a spoke on the opposing of the
transmitter.
Please note that the distance between the sensor and
the magnet shall not be more than 3mm.
Please make sure to align the magnet on the markings
on the sensor.
2.1.7 CADENCE MAGNET
The cadence magnet can be mounted with a cable ties
to the crank. The distance to the Cadence sensor can
be up to 3mm. Please make sure to align the magnet on
the markings on the sensor.
4
2.1.8 HEARTRATE BELT
Every person who carries out sport should have a
general medical checkup on his/her general state of
health Especially beginners, persons older than 35 years
of age and anyone who has suffered from illnesses or
injuries in the past. It is recommended that a doctor is
consulted in case of risk factors, such as smoking, high
blood pressure, high cholesterol values, diabetes, lack
of exercise and excess weight.
Pacemaker wearers should consult their doctor before
using any heart rate measurement device!
Moisten the contacts on the harness and attach the
transmitter belt. The chest strap should be worn cen-
tered just below the nipples.
A measurement of the heartbeat is possible if
- the heartrate belt is worn correctly
- the battery is full
- the heartrate sensor is paired/initialiced correctly
2.2 BEFORE YOU START
2.2.1 INSTALLATION OF THE BATTERY
Please open the battery cover with a coin. Insert the
battery CR2450, positive pole upwards.
Now you can close the battery cover.
2.2.2 UPDATE
As we improve our products continuously (you can
send suggestions to us) we recommend to update your
device before the first usage. This also helps you to find
out the basic functions of the product.
Please follow the steps for an update:
- please download the CicloApp (QR-Code)
- open the app and follow the instructions
- to connect a device to the CicloApp please choose
“device”( left side ) and activate “searching”
- open the short menu in the HAC1.2, choose “cell
phone connection “ and press the middle button
- both devices are in the mode “searching”
- as soon as both devices have recognized each other
you can see the Smartphone name in the HAC1.2 and
the HAC 1.2 named in the CicloApp
- now you can do the update
- as soon as both devices have recognized each other
you can see the Smartphone named in the HAC1.2
and the HAC 1.2 named in the CicloApp
- now you can do the update
2.2.3 CONNECT SENSORS
To connect the sensors please go to the short menu
and choose the sensors you want to initialize/pair. For
example choose the speedsensor, press the middle but-
ton and turn your front wheel. As soon as the signal is
received by the HAC1.x ( the speedsensor is initialized)
you will get a confirmation on the device.
2.2.4 SETTING CIRCUMFERENCE
Set the circumference of you wheel at “Settings”
“Profile” “Circumference”
2.2.5 START CYCLING
Choose “Start” in the main menu and enjoy the first ride
with the HAC1.x
3 INSTRUCTIONS
LO = button top left
RO = button top right
LT = left button
MT = middle button
RT = right button
Important instructions
Switch on/off press LO for 4 seconds
Start recording press LO for 1 second
(out of functional view)
Change to functional view press LO for short
Back to last view press RO for short
Change to main menu v press RO for 3 seconds
LT = step down in menu
RT = step up in menu
MT = choose the menu point
LO RO
LT
MT
RT

5
4 MENU
In the following part every point of the menu will be
explained
4.1 START
Via the “Start menu” you get to the cycling mode. Here you
can see the “Function view” and the “Navigation view”
4.2 SHORT MENU
In the short menu you can do the most important settings
in a short time
4.2.1 PROFILE
Here you can change the actual profiles. Please be
aware that your computer knows the used profile by
checking the used sensors (for an automatical recogni-
tion of a profil a sensor for each profile must be paired)
This does not apply for heartrate sensors.
4.2.2 SENSOREN
Here you can pair/initialize sensors with your HAC1.x.
You can choose a sensor like “speedsensor” or you
can choose a search for “all” sensors. As you choose
“all” the HAC1.x will search for all sensors which can be
found.
You can pair the following sensors to the HAC1.x:
- Speedsensor
- Cadence sensor
- Heartrate belt
- Combined speed/cadence sensor
- Power measurement sensor
4.2.3 ALTITUDE
4.2.3.1 ALTITUTE
Here you can set the actual altitude
4.2.3.2 HOME ALTITUDE
Here you can store the altitude of the normal starting
point of your training sessions.
4.2.4 CELLPHONE CONNECTION
Here you can connect you´re Smartphone (with BLE,
Bluetooth Low Energy) to the HAC1.x. This has to be
done if you like to use your HAC 1.x together with the
Komoot or CicloApp.
4.3 HISTORIE
Here you can see an overview of your recording.
You can choose a recording to see basic data.
You can transfer your recording to the CicloApp and then
get a link to download the tour.
If you possess an account at Ciclosport your recording can
be stored on the CicloApp.
4.4 SETTING
4.4.1 GENERAL
Here you can make the general settings that are not
profile-related.
4.4.1.1 LANGUAGE
Here you can change the system language of the
device.
4.4.1.2 UNITS
Here you can set the unit of measurement to be used
in the computer.
4.4.1.3 INTERVALL
Here you can define the interval for recording the val-
ues.
If you choose a smaller interval time the recording size will
be bigger which means the memory will be full faster!
Intervals in seconds:
1 – 2 – 5 – 10 – 30 – 1min
4.4.1.4 DISPLAY
4.4.1.4.1 CONTRAST
Here you can set the display contrast.
4.4.1.4.2 LIGHT MGR
Here you can set the light manager.
Off - light never goes on
Auto - light goes on when the middle, left or
right button is pressed for 3 sec, light stays on
5 seconds on.
On - always on
Attention! Lighting significantly reduces battery life
4.4.1.5 WEIGHT
Here you can set your current weight. (Necessary for
the calculation of the calculated power measurement)
4.4.1.6 TONES
Here you can activate the tones during navigation.
If the tones are activated, you will hear a signal tone
before each navigation change.
4.4.1.7 DATE
Here you can set the date.
4.4.1.8 TIME
Here you can set the time.
4.4.2 PROFILES
Here you can choose which profile you would like to
change. The changed values are saved per profile.
4.4.2.1 NAME
Here you can change the name of the profile. e.g.
MTB or road bike

6
4.4.2.2 WHEEL CIRCUMFERENCE
Here you can adjust the wheel circumference. Circum-
ference mm” appears in the display Set with the left
and right buttons. Press the middle button to confirm
the setting and the unit switches to the next menu
item.
Note: The wheel circumference can be taken from the
table or measured by yourself.
Tire-size Circumferance
40-559 26 x 1,5 2026 mm
44-559 26 x 1,6 2051 mm
47-559 26 x 1,75 2070 mm
50-559 26 x 1,9 2026 mm
54-559 26 x 2,00 2089 mm
57-559 26 x 2,125 2114 mm
37-590 26 x 1 3/8 2133 mm
32-620 27 x 1 1/4 2199 mm
40-622 28 x 1,5 2224 mm
47-622 28 x 1,75 2268 mm
40-635 28 x 1 1/2 2265 mm
37-622 28 x 1 3/8 2205 mm
20-622 700 x 20C 2114 mm
23-622 700 x 23C 2133 mm
25-622 700 x 25C 2146 mm
28-622 700 x 28C 2149 mm
32-622 700 x 32C 2174 mm
If you want to measure the wheel circumference yourself,
place a mark on the front tyre (e.g. with chalk) on the
ground. Then go straight ahead with your bike, exactly
one turn of the wheel (with the correct air pressure and
rider weight) and mark the spot on the ground. Now the
exact wheel circumference between the two markings on
the ground can be measured (in mm).
4.4.2.3 WHEEL WEIGHT
Here you can enter your bike weight, this helps in the
power measurement calculation.
4.4.2.4 ZONES
Here you can change the values for the lower, upper
and maximum heart rate limit.
4.4.3 DISPLAY
In this menu you can change the function views. Up to
8 views can be configured.
For each display you can determine how many functions
(1 to 8) you would like to display. Now you can select
the individual windows and select the desired function
from the list.
4.4.4 DEVICE
4.4.4.1 VERSION
Here you can see the current software version of your
device.
4.4.4.2 MEMORY
Here you can see the current memory allocation on
the device.
4.4.4.3 RESET
Here you can set all stored values to 0. Records and
settings are saved.
4.4.4.4 FACTORY SETTINGS
Here you can reset the device to factory settings.
5 CICLOAPP & KOMOOT
5.1 CICLO APP
- Install the Ciclo App
- You can use the app with or without registration, but
without registration your routes will not be taken save
- Activate Bluetooth on your smartphone
- Synchronize switch HAC 1.2 on short menü
Telefon
- Automatic connection visible HAC in the Select App
- Latest version select on app visible HAC update
NFC Function:
You can also use the NFC technologie in your device to
connect your HAC to the CicloApp. For this please go to
the shortmenu and search for a telephone. Then put the
HAC onto the display of your NFC compatible smartphone
while the CicloApp is open.
The CicloApp will automatically connect your HAC to the
Phone.
5.2 KOMOOT APP
- Install the Komoot app on your smartphone and log in
- Go to your profile to Settings to activate Bluetooth con-
nect
- Turn on the HAC press and hold LO for 4 seconds
- In the main menu first RT to “Short menu”, then MT
- Establish connection with App press RT, at “Press
“Telephone” MT
- Start route on the app in the main menu bar on
“tarpaulins” below
- enter your starting position and your destination and go
to the click on “Start Navigation”
- your bike computer automatically shows the direction
and your route can begin
5.3 ANDROID & KOMOOT
- Download the Kommot App and Komoot Connect from
PlayStore and install them on your smartphone
- please open the app “Komoot Connect”
- for HAC 1.x, the telephone connection in the active
“profile” enable
- in the “Komoot Connect” app and wait until the connec-
tion is established (green tick appears)
- Now you can open the Komoot App and start your tours
project
- In HAC 1.x – after the tour has started – the turn-by-turn
instructions are displayed by arrow navigation

7
6 SERVICE &
TROUBLESHOOTING
Do you have questions or a problem with HAC 1.2 /
HAC 1.2 +?
You can contact us from Monday to Thursday from
9:00 to 16:00
by telephone on +49 (0) 89 - 89 52 70 61.
You can also send us an e-mail to:
6.1 TROUBLESHOOTING
6.1.1 FAULTY DISPLAY
Check the battery for the following points:
- Voltage > 3.0V
- High quality battery
- If the battery fits correctly
6.1.2 NO SPEED / CADENCE / HEART RATE
- Transmitter not correctly initialized.
- Check that the transmitter is correctly installed
- Check whether the distance between the transmitter
and the magnet is 3mm maximum.
- Battery in transmitter reversed for 10 seconds to reset
the transmitter to the factory setting. Then repeat the
initialization.
6.1.3 SPEED IS NOT DISPLAYED CORRECTLY
- Check adjusted wheel circumference
- Check unit of measurement
6.1.4 HEIGHT SHOWS WRONG VALUES
- Air pressure has changed, here you have to adjust the
height manually.
- Home height incorrectly adjusted
6.1.5 HEART RATE NOT DISPLAYED CORRECTLY
OR NO DISPLAY
- Check the battery in the chest strap, replace if
necessary
- Moisten the contacts on the chest strap
6.1.6 THE HEIGHT CHANGES EVEN THOUGH I AM
IN THE SAME PLACE
The height measurement of the HAC 1.2 is barometric,
which means that the height is measured above the air
pressure. If the air pressure changes due to the weather,
the height in the computer also changes. Here you can
adjust the height via the short menu.
6.2 SENDING IN A DEVICE FOR
REPAIR
If you wish to return your device for repair, please com-
plete the warranty certificate at the end of the operating
instructions. Please always send in the complete product.
If the device is sent in for repair or if a warranty claim is
not accepted, repair will be carried out up to Euro 30 with-
out consultation.
Please enclose the following with the package:
- Copy of invoice
- warranty certificate
- widget
Please make sure to prepay the return shipment.
We regret that we cannot accept freight collect shipments.
Our service address:
Ciclosport
Service
Lohenstrasse 11
DE - 82166 Graefelfing
Germany
6.3 WARRANTY
We grant the original purchaser of this product a warran-
ty of 2 years from the date of purchase according to the
conditions below.
Within this warranty period, we will rectify defects on the
device free of charge which can be proven to be due to
a material and / or manufacturing defect. Excluded from
the warranty are damages caused by improper handling,
commercial use or accident / fall.
Wear parts and broken housings of the device and the
transmitter are also excluded from the warranty.
The guarantee is provided, at our discretion, by repair or
replacement of defective parts.
The warranty does not cover direct or indirect damage or
consequential damage in connection with the product.
In case of warranty, please contact your dealer or your
local distributor or send the computer with the proof of
purchase and all accessories sufficiently stamped directly
to us.
Ciclosport
Service
Lohenstrasse 11
DE - 82166 Gräfelfing
Germany
E-Mail: [email protected]
Please read the operating instructions carefully again be-
fore sending in the device and check the battery.
If the warranty claims are justified, the repaired device or
a replacement device will be returned free of charge.
Repair:
If the device is sent in for repair or if a warranty claim is
not accepted, repair will be carried out up to Euro 30 with-
out consultation.

8
6.4 WARRANTY CERTIFICATE
Sender:
Name:
First name:
Street / No:
Postcode / City:
E-Mail:
Product type:
With accessories sent in:
Error description / reason for submission:
After the warranty has expired, repairs should be carried
out up to _____________ Euro.
Disposal of used electrical and electronic equip-
ment (applicable in the countries of the European
Union and other European countries with a
separate collection system for these devices). The
symbol on the product or its packaging indicates that this
product is not to be treated as normal household waste
but must be disposed of at a collection point for the
recycling of electrical or electronic equipment. By contrib-
uting to the correct disposal of this product, you protect
the environment and the health of your fellow human
beings. The environment and health are endangered by
incorrect disposal. Material recycling helps to reduce the
consumption of raw materials. For more information on
how to recycle this product, contact your local authority,
municipal waste management company or the store
where you purchased this product.
6.5 TECHNICAL DATA
Operating temperature: 0°C to50°C
Battery: CR2450 Lithium
Transmission frequency
Bluetooth: 2402MHz -2480MHz
ANT+: 2457MHz
Max power:
BLE : <6dBm , ANT+ :< 0dBm
FCC ID: O4GHAC
Model: HAC1.2
FCC STATEMENT
This device complies with Part 15 of the FCC Rules.
Operation is subject to the following two conditions: (1)
This device may not cause harmful interference, and (2)
This device must accept any interference received, includ-
ing interference that may cause undesired operation.
The grantee is not responsible for any changes or modifi-
cations not expressly approved by the party responsible
for compliance. Such modifications could void the user’s
authority to operate the equipment.
The RF Exposure Compliance distance is 20 millimeters
NOTE: This equipment has been tested and found to
comply with the limits for a Class B digital device, pursu-
ant to part 15 of the FCC Rules. These limits are designed
to provide reasonable protection against harmful interfer-
ence in a residential installation. This equipment gener-
ates, uses and can radiate radio frequency energy and, if
not installed and used in accordance with the instructions,
may cause harmful interference to radio communications.
However, there is no guarantee that interference will not
occur in a particular installation. If this equipment does
cause harmful interference to radio or television reception,
which can be determined by turning the equipment off
and on, the user is encouraged to try to correct the inter-
ference by one or more of the following measures:
- Reorient or relocate the receiving antenna.
- Increase the separation between the equipment and
receiver.
- Connect the equipment into an outlet on a circuit differ-
ent from that to which the receiver is connected.
- Consult the dealer or an experienced radio/TV techni-
cian for help.
Subject to errors and technical changes.
Caution: If any changes or modifications
not expressly approved by the party responsible
for compliance could void the user’s
authority to operate the equipment.
NFC(receiver): 13.56MHz
This manual suits for next models
1
Table of contents
Other Ciclo Bicycle Accessories manuals


