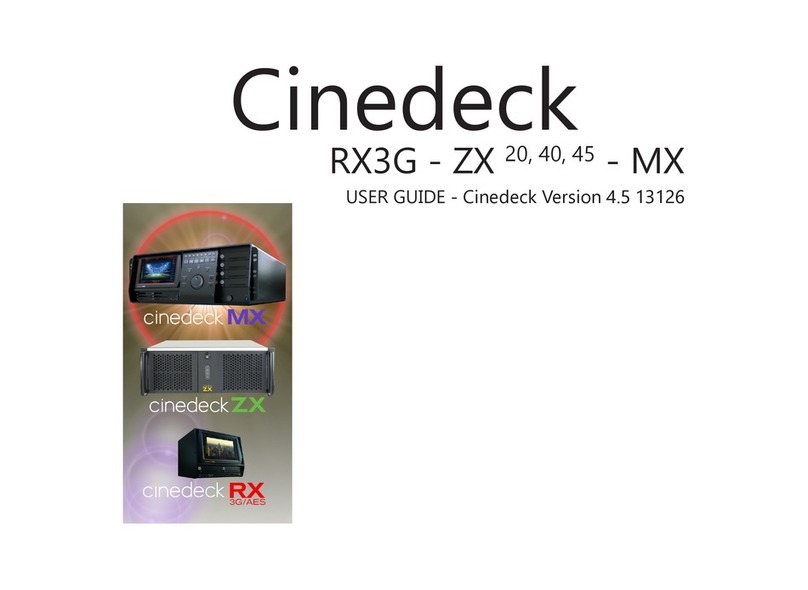
Cinedeck Extreme User manual

110 Leroy St Floor 8
New York NY 10014
T +1 646.747.0734
F +1 212.366.1362
www.cinedeck.com
suppor[email protected]
CDK–E3R1DOC-Ø1
USER GUIDE

Welcome to Cinedeck EXTREME.
Let’s get started.
To begin, check that you have all the components that are included with your Cinedeck EXTREME kit:
More inforMation is available at www.cinedeck.coM/warranty
Breakout Cable for Analog
Video, Analog Audio
Cinedeck Power Supply and
LEMO Connector
(Localized)
Stylus 1 Mini-to-Mini HDMI
Cable
USB Cable
System Restore
USB Thumb Drive
Pelican Case ESATA/USB SSD Dock ESATA CableESATA/USB SSD
Dock Power Supply
2 Single-Channel Analog
Audio Breakout Cable
Cinedeck EXTREME
tour the cinedeck extreMe at www.cinedeck.coM/overview
WARNING: The Cinedeck EXTREME needs ventilation for safe operation. DO NOT block
the fan at the rear of the unit. DO NOT lay the unit down on its back, thereby blocking
the fan. Blocking the fan will damage the unit, causing it to overheat, and it will void
the warranty.
WARNING: Take care of your Cinedeck EXTREME as you would your cameras or other
electronic equipment. Take care especially to keep water and moisture away from the
unit. Getting your Cinedeck EXTREME wet will void the warranty.
– 1 –
– 2 –

video at www.cinedeck.coM/inout
POWERING UP LOADING THE SSD MEDIA
To safely disconnect the LEMO connector from
the device, you must slide the sleeve of the
connector and then gently tug to remove the
connector from the Cinedeck EXTREME.
On the i/o panel on the right side of the Cinedeck EXTREME, you will see the slot for the SSD media. Slide the SSD into the slot
with the SSD connectors facing towards you.
NOTE: An SSD is not included in the Cinedeck EXTREME kit. It must be purchased separately. Please email us at
Once the Cinedeck EXTREME recognizes the SSD, media information will appear in the upper right hand corner of the screen.
We recommend powering up your Cinedeck EXTREME via the AC adapter the rst time. Conrm that your AC Adapter is
set to 19 Volts. Then connect the AC adapter to the LEMO connector which connects to the Cinedeck EXTREME.
NOTE: It is possible to switch between the AC
Adapter and the batteries without turning off
the Cinedeck EXTREME.
IMPORTANT: There is a SAFETY LOCK on
the LEMO connector to prevent it being
accidentally removed from the Cinedeck
EXTREME. DO NOT pull any part of the AC
Adapter other than the sleeve.
TURNING THE CINEDECK EXTREME ON:
The POWER BUTTON is located on the i/o panel on
the left side of the Cinedeck EXTREME.
Press the POWER button and a green light will appear
indicating it is ON. A blue light on the bottom right hand
corner on the front of the Cinedeck EXTREME will
also be illuminated.
The Cinedeck EXTREME boots in approximately 30 seconds.
Dual link/3G HDSDI
in and out
ESATA with port multiplier
and RAID support
Digital/analog audio, component
video, composite video, and RS 422
deck control* via breakout cable
Headphone jack for audio monitoring
Tethered remote record *
USB ports for eld restore and
peripheral support
Removable 2.5" SSD
LAN port networked storage, LAN camera
input and Internet
INPUTS AND OUTPUTS
WARNING: Only SSD media purchased from Cinedeck are ready to use. Other SSDs must be
prepared following the directions on page 9 to prevent error and data loss.
Timecode sync port
(optional feature)
SD TV for UI clone on
NTSC/PAL monitor
Wi antenna connector
Per-channel line/mic and phantom
power switches for on-board
audio input
2 channel audio input
12–28V wide input DC jack
AUX 5/12V 500MA DC output
for accessories
RS-232/422 COM port
POWER SWITCH
HDMI record in and monitor out
VGA for UI/preview clone on external VGA monitor
*PLANNED
– 3 –
– 4 –

Tap safe to toggle safe frame display on and off. Touch
and hold safe to bring up and select alternate safe frame
aspect ratios.
Tap grid to toggle grid display on and off. Touch and hold
grid to bring up and select alternate grids.
Tap 100% to toggle display zoom. This toggles between
displaying the full frame of the source image and zoom-
ing to display the actual pixels of the source signal with-
out scaling. This is useful for focus and detail verication.
When zoomed in, use the touchscreen to drag anywhere
in the display image. Other image analysis tools such
as edge detection and clipping may be activated while
zoomed in.
Tap edge to toggle displaying the input image with edge
detection activated. This tool is used to verify focus.
Tap analysis to toggle the most recently used image
analysis tool on and off. Touch and hold analysis to bring
up and select between histogram, scope, and waveform
tools. When selected, these tools display channel options
on the left side of the screen, and below these, an overlay
button appears to allow toggling between overlay and
full-screen analysis image.
Tap clipping to toggle displaying the input image with
clipping display activated. This tool is used to verify expo-
sure. See PREFERENCES on page 7 to adjust clipping gamut.
Touch and hold fullscreen to toggle displaying the RECORD
screen user interface as a frame around the input image
and lling the Cinedeck EXTREME display with the input
image. In fullscreen mode, touchscreen buttons are
hidden when no touch is detected for a few moments.
Touch the adjacent hardware button to exit fullscreen.
CAMERA SyNC & SETUP (SETUP SCREEN)
After booting up, the Cinedeck EXTREME will load the main (RECORD) screen. Locate and tap
the setup button on the lower right of the touchscreen. This launches the Cinedeck SETUP
screen, shown below.
Be sure your camera is connected to the Cinedeck EXTREME and is sending a signal to the
appropriate output. Verify the resolution and framerate of the signal in order to sync the
camera with the Cinedeck EXTREME and record.
NOTE:
The bright green square indicates
a successful sync with your camera
or other input source.
NOTE:
Selecting back will return to the
main (RECORD) screen. If the
camera or other input is properly
synced and the green indicator has
lit, an input image will appear on
the RECORD screen.
WARNING: On some cameras, the record settings DO NOT
indicate the actual signal being sent. In some cases a
signal is always sent at 1080i and 59.94 fps, despite
camera settings such as 24F or 30F, due to camera sensor
and circuitry design. Please be sure you are familiar with
your camera and check all settings against the manual and
technical specications. Input settings on the Cinedeck
EXTREME must match the true signal provided.
WARNING: The record button on the touch-
screen does not respond to a quick tap, but
requires a brief, stable touch to activate. This
is to prevent accidentally starting or stop-
ping a take. The hardware buttons on the unit
enclosure mirror the features of the adjacent
touchscreen controls on the RECORD screen;
the hardware record button responds instantly.
The SETUP screen is organized into tabs,
which are selected by touching the titles along
the top of the screen. Select the input tab at
the top left of the SETUP screen.
Using the touchscreen, select the resolution of
the signal being sent to the Cinedeck EXTREME.
The adjacent options for fps will repopulate with
all possible framerates for a given resolution.
In the next column, under the heading fps
select the framerate of the signal being sent to
the Cinedeck EXTREME.
Next, select the colorspace
to be recorded.
Select the video
input in use.
Select the audio
input in use.
Select the desired
recording codec
and quality.
SHOOTING TOOLS (RECORD SCREEN)
The RECORD screen is the main interface for shooting with the Cinedeck EXTREME. It displays the current input image and surrounds it with all key information and shooting tools, includ-
ing Cinedeck EXTREME system info, input settings, project, scene, and take names, media available, audio levels, timecode info, and all image composition, analysis, and focus tools.
NOTE: In addition to setting options by navigating the tabbed menus in the SETUP screen, the RECORD screen offers direct access to frequently used options, simply by tapping the
related information display. For example, tapping the timecode display at the lower center of the RECORD screen brings you directly to the timecode tab of the SETUP screen.
Display of current input resolution,
colorspace, framerate, and codec,
including current bitrates. Tap to jump
directly to the input tab of the SETUP
screen for conguration.
Display of system info, including
temperature in centigrade.
Display of audio input levels. If no audio
appears, re-check audio connections and
settings in the SETUP screen. Use the
headphone jack on the right i/o panel to
monitor audio.
Tap play to exit the RECORD screen and
switch to the playback screen. This will
cue up the most recently recorded take for
immediate playback.
Tap lock to lock the touchscreen and
prevent accidental inputs. To unlock, tap
and slide the unlock button to the right.
Tap reset to set the current timecode to 00.00.00.00.
Once tapped, tap again and slide to the right to
conrm and perform the reset.
Display of current timecode. Tap to
jump directly to the timecode tab
of the SETUP screen to congure
timecode options.
Tap setup to exit the
RECORD screen and return
to the SETUP screen.
Display of current project name, and le-
name, in the format: scene_takenumber.ext.
Between takes, “next:” indicates the name
of the next take to be recorded. Tap to
congure project and scene names.
Display of media loaded,
free space, and time
remaining at current
recording settings.
video at www.cinedeck.coM/sync
video at www.cinedeck.coM/tools
– 5 –
– 6 –

Tap back to return
to the RECORD screen.
Tap back to exit the playback le manager
and return to the PLAYBACK screen.
When you enter the PLAYBACK screen the most recent take recorded is cued for review.
Display of current take’s resolution, colorspace, framerate, and
codec, including bitrates. In playback mode these options are
not congurable.
Display of current project and lename, in the format: scene_takenumber.ext
Tap to congure project or scene names or to load an alternate take
into PLAYBACK.
Image analysis, focus, and composition tools used in the RECORD screen
are available while playing back takes, allowing the review of safe
frames, grids, 100% zoom, edge detection, waveform, scope, histogram
and clipping. Fullscreen is available in combination with these features
at playback, allowing detailed inspection of takes during the shoot. See
RECORD screen on page 6 for details of use.
Tap open to load an alternate take into PLAYBACK.
in/out on (orange) brings up in and out points on the timeline,
allowing selection of a portion of the take for review and playback.
Slide the two vertical lines to the desired range.
Tap to toggle play mode to ping pong, playing the take forward
and backwards. Can be used in combination with in/out points.
Tap to toggle play mode to looping,
playing the take repeatedly. Can be
used in combination with in/out points.
restart reinitializes the Cinedeck EXTREME software. This option
is provided to clear memory during extremely long recording
sessions. To preserve current project timecode during the restart,
ensure that save tc (left) is enabled.
Displays the build number of your Cinedeck
EXTREME software. This number will be an
important reference for any support issues.
Tap main to display main preferences page (shown here).
Tap grid to display grid customization preferences page. This allows user control of shade
and opacity of the grid and safe frame overlays on the RECORD and PLAYBACK screens.
Tap clip to display clipping customization preferences page. This allows user setting of
the luma value that activates the red warning areas when clipping is enabled on the
RECORD and PLAYBACK screens. Higher values show only pixels that approach clipping.
Tap to exit to OS for access to functionality not directly supported via the Cinedeck
EXTREME user interface.
Fan control defaults to off. Fan control reduces fan speed during active recording in order
to reduce noise when needed for quiet takes. Tap fan ctrl to turn fan control on, and select
a fan speed to step down to during takes. Fan control reduces noise at the expense of
allowing the system to heat up. At 90 degrees C, the fan will return to full speed regardless
of this setting.
Display of current
take’s timecode.
Tap back to exit the PLAYBACK screen and
return to the RECORD screen.
Playback transport controls. From left to right: jump to beginning of
take, rewind, play/pause, fast forward, and jump to end of take.
Transport controls can be activated in conjunction with image
composition, analysis, and focus tools.
loss stop on (orange) indicates that the unit will stop
recording when loss of signal is detected. Default is on.
gps on (orange) enables writing GPS data from Garmin
USB GPS devices to le metadata. Currently the Garmin
18x GPS antenna is the only tested device.
save TC on (orange) sets the unit to record the current time-
code after each take so that it can be restored if the software
is restarted, allowing consistent project timecode between
recording sessions. Framerate settings must be consistent to
ensure consistent timecode between sessions.
drop stop on (orange) indicates that the unit will stop
recording when dropped frames are detected. Default is
on, except in cases where input signal is known to be
unreliable but it is desirable to continue recording regardless.
thumbs on (orange) indicates that le manager in
PLAYBACK mode will display thumbnails for each take.
Default is on, making navigation and selection easier.
FILE MANAGEMENT IN RECORD
FILE MANAGEMENT IN PLAyBACK
TIMECODE
Displays project name. Tap once to switch to a different project. Tap again to access a touchscreen keyboard to
edit the project name. Tap Xand slide the conrmation bar to the right in order to delete the project and all scenes
and takes contained within it.
Displays the next take number to be recorded.
Take numbers auto-increment.
Tap back to exit the SETUP screen and
les tab and return to the RECORD
screen.
Displays takes within the current project
and scene, displaying thumbnail images
if preferences are set to display them.
Tap on a take to cue it on the PLAYBACK
screen for review.
Displays project name. Tap once to switch to a different project. Tap again to access a touchscreen
keyboard to edit the project name. Tap Xand slide the conrmation bar to the right in order to delete the project
and all scenes and takes contained within it.
Displays scene name. Tap once to switch to a different scene. Tap again to access a touchscreen keyboard to
edit the scene name. Tap Xand slide the conrmation bar to the right in order to delete the scene and all takes
contained within it.
Displays scene name.Tap once to switch to a different scene.Tap again to access a touchscreen keyboard to edit the scene
name. Tap Xand slide the conrmation bar to the right in order to delete the scene and all takes contained within it.
Tap new project to create a new project.
Tap new scene to create a new scene.
New projects and scenes appear in the
browser above with a numerical name
generated by auto-incrementing. Tap them,
as above, to rename.
source indicates the timecode source. When gen is active (orange) the Cinedeck
unit generates timecode internally.When SDI is active (orange) the unit is set to
receive timecode over the SDI input. Be sure your camera or other device is capable
of generating timecode and is congured to do so in SDI mode.
mode indicates timecode mode when gen is active. There are three options. record
run starts timecode when recording is active and pauses it between takes.
The timecode for each new take begins where the previous take left off.
per take starts timecode when recording is active, but resets the timecode to
00:00:00:00 for each new take. free run keeps timecode running continuously
at all times, regardless or recording or take activity.
auto rec may be used to automate recording on the Cinedeck EXTREME when the
source for timecode is set to SDI and the timecode being received is in record run
mode. When the timecode being received by the Cinedeck EXTREME changes value,
recording begins. Tap generic to enable.
Projects and scenes other than the currently selected ones are displayed in blue. Tap to select them as current.
Tap new project to create a new project. Tap new scene to create a new scene. New projects and scenes appear in
the browser above with a numerical name generated by auto-incrementing. Tap them, as above, to rename.
Tap Xto enter delete mode, which allows
you to delete individual takes. In delete mode,
each take has an Xon it. Tap on an Xand
slide to conrm to delete an individual take.
Tap start under the deltas heading to set an arbitrary time as the start point for
internally generated timecode. This can be used to differentiate between media
units (SSDs) as was traditionally done with tapes.
Tap show UTC to change the timecode display on RECORD and PLAYBACK
screens to show universal time (GMT) in place of timecode. This data as well
as normal SMPTE timecode is written to take metadata.
Tap show loc to change the timecode display on RECORD and PLAYBACK
screens to show local time in place of timecode. This data as well as normal
SMPTE timecode is written to take metadata.
PLAyBACK TOOLS (PLAyBACK SCREEN)
PREFERENCES
video at www.cinedeck.coM/files
video at www.cinedeck.coM/files
video at www.cinedeck.coM/tiMecode
– 7 –
– 8 –

RESTORING THE CINEDECK EXTREME TO FACTORy SETTINGS
REGISTER YOUR CINEDECK EXTREME: www.cinedeck.com/registration
Power the unit down. Remove any media, including SSD drives. Insert the provided system restore thumb drive into a USB slot.
Power up the Cinedeck EXTREME. Auto-restore will run. Do not power off the unit during the restore. When the restore is done, the unit will automatically restart.
Remove the thumb drive immediately on restart. The system will boot as usual, and you will be prompted to accept the End User License Agreement.
Any updates will need to be reinstalled following the “update software” instructions.
SSD media purchased from any other vendor must be prepared before use with the Cinedeck EXTREME to disable write caching on the device and to format it using the correct file system.
All data on the SSD will be lost in preparation for use with the Cinedeck EXTREME. Perform these functions on the Cinedeck EXTREME itself, rather than attempting to perform them on a
computer; this is necessary to ensure proper functionality.
Boot up the Cinedeck EXTREME, quit to the OS by tapping exit in the main PREFERENCES page. (See PREFERENCES on page 7 for details.) Insert the new SSD to prepare, and follow the
instructions below. In order to context-click using the touchscreen, hold down on one spot. (This is equivalent to right-clicking with a mouse.)
NOTE: A USB mouse can be connected to the Cinedeck EXTREME to perform these functions without using the touchscreen.
Follow these steps to prepare a new SSD:
SETTING UP NEW SSD MEDIA FOR USE WITH THE CINEDECK EXTREME
WARNING: Failure to follow these procedures
will result in improper operation and may
cause future data loss in operation.
16. In the context menu that appears, click
Format.
17. In the window that appears conrm that
File system is set to NTFS, and check the box
for Perform a quick format.
WARNING: This is not optional for SSD drives.
You must perform a quick format.
18. With Perform a quick format checked,
click OK to conrm.
19. In the window that appears, click OK again to
format the SSD. Formatting the SSD will be rapid.
The SSD is now set for proper operation and
formatted for use with the Cinedeck EXTREME.
You may close all windows and relaunch the
Cinedeck software by double tapping on the
cinedeck.exe application on the desktop, or
by restarting the unit.
11. In the window that appears, click the
Policies tab.
12. On the Policies page, UNCHECK Enable
write caching on the disk.
13. With Enable write caching on the disk
now UNCHECKED, click OK on the bottom of
the window to conrm.
14. Click OK on the bottom of the Hardware
page to conrm.
15. Context-click again on Disk 1 (NOT Disk 0),
your new SSD. Conrm that size of the device
to make sure it is the SSD and not the onboard
unit storage.
1. Click start.2. Click My Computer.3. On the window that appears, click the large
button labeled Folders.
4. In the window below, context-click (by hold-
ing in place on the touchscreen or right clicking
with an attached mouse) on My Computer.
5. In the context menu that appears, click
Manage.
6. In the window that appears, click Disk
Management.
7. In the pane that appears, context-click on
Disk 1 (NOT Disk 0), your new SSD. Conrm
that size of the device to make sure it is the
SSD and not the onboard unit storage.
8. In the context menu that appears, click
Properties.
9. In the window that appears, click the Hard-
ware tab.
10. At the bottom of the Hardware tab, click
Properties.
UPDATING THE CINEDECK EXTREME (SETUP SCREEN)
Registered users will receive email notices regarding important software updates to the Cinedeck platform. On a separate computer, follow the link provided, and download the software update
le. It will be in a .zip format. Copy the update le to the top level of a USB thumb drive. Do not put it in a folder or sub folder. Remove any other media, including SSD drives, from your Cinedeck
EXTREME. You are now ready to perform the software update.
Insert the thumb drive into a USB port on the
Cinedeck EXTREME, as shown.
From the Cinedeck interface, go to the SETUP page,
and tap the update tab. Tap “update” in the center
of the screen. Do not power off the unit during the
update.
The software will restart, completing the software update.
Remove the thumb drive from the Cinedeck EXTREME.
The update can be conrmed by checking the software
build number in the prefs tab of the SETUP screen.
WARNING: Do not use the USB thumb drive that
came with the Cinedeck EXTREME. This is for
restoring the unit only.
– 9 –
– 10 –

110 Leroy St Floor 8
New York NY 10014
T +1 646.747.0734
F +1 212.366.1362
www.cinedeck.com
CDK–E3R1DOC-Ø1
USER GUIDE
Other manuals for Extreme
2
Table of contents
Other Cinedeck DVR manuals
