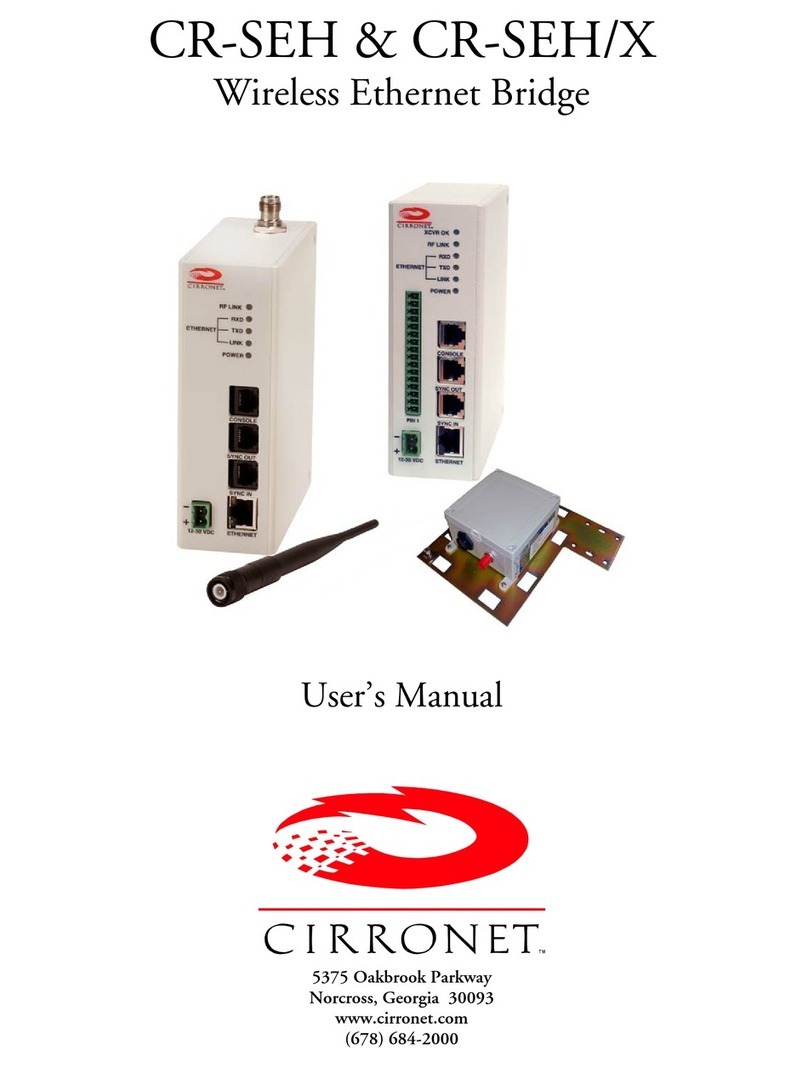
Cirronet CR-SEB User manual

CR-SEB & CR-SEB/X
Wireless Ethernet Bridge
User’s Manual
5375 Oakbrook Parkway
Norcross, Georgia 30093
www.cirronet.com
(678) 684-2000

Important Regulatory Information
Cirronet Product FCC ID: HSW-2410
IC 4492A-2410
Note: This unit has been tested and found to comply with the limits for a Class A digital device, pursuant to
p
art 15 of the FCC Rules. These limits are designed to provide reasonable protection against harmful
interference when the equipment is operated in a commercial environment. This equipment generates,
uses, and can radiate radio frequency energy and, if not installed and used in accordance with the
instruction manual, may cause harmful interference to radio communications. Operation of this equipment
in a residential area is likely to cause harmful interference in which case the user will be required to correct
the interference at their expense.
FCC s MPE Requirements
Information to user/installer regarding FCC s Maximum Permissible Exposure (MPE) limits.
Notice to users/installers using the 24 dBi parabolic dish antenna in conjunction with all Cirronet
RF products.
FCC rules limit the use of this antenna, when connected to Cirronet RF products for point-to-point
applications only. It is the responsibility of the installer to ensure that the system is prohibited from
being used in point-to-multipoint applications, omni-directional applications, and applications where there
are multiple co-located intentional radiators transmitting the same information. Any other mode of
operation using this antenna is forbidden.
Notice to users/installers using the following fixed antennas, with Cirronet RF products:
Andrews 24dBi parabolic dish
Andrews 18dBi parabolic dish
Cushcraft 15dBi Yagi,
Mobile Mark 14dBi Corner Reflector,
Mobile Mark 9dBi Corner Reflector
The field strength radiated by any one of these
antennas, when connected to Cirronet RF
products, may exceed FCC mandated RF
exposure limits. FCC rules require
professional installation of these antennas in
such a way that the general public will not be
closer than 2 m from the radiating aperture of
any of these antennas. End users of these
systems must also be informed that RF
exposure limits may be exceeded if personnel
come closer than 2 m to the apertures of any of
these antennas.
Notice to users/installers using the following mobile antennas, with Cirronet RF products:
Mobile Mark 12dBi omni-directional,
Mobile Mark 9dBi omni-directional,
MaxRad 5dBi whip,
Cirronet Patch antenna,
Ace 2dBi dipole,
Mobile Mark 2dBi Stub
The field strength radiated by any one of these
antennas, when connected to Cirronet RF
products, may exceed FCC mandated RF
exposure limits. FCC rules require professional
installation of these antennas in such a way
that the general public will not be closer than
20 cm from the radiating aperture of any of
these antennas. End users of these systems
must also be informed that RF exposure limits
may be exceeded if personnel come closer
than 20 cm to the apertures of any of these
antennas.

Declaration of Conformity
Warning! The RLAN transceiver within this device uses a band of frequencies that are not completely harmonized within the
European Community. Before using, please read the European Operation Section of the Products User’s Guide for limitations.
0889 is the identification number of RADIO FREQUENCY INVESTIGATION LTD - Ewhurst Park, Ramsdell RG26 5RQ
Basingstoke, United Kingdom – the Notified Body having performed part or all of the conformity assessment on the product.
The WIT2410 to which this declaration relates is in conformity with the essential requirements
of the R&TTE directive 1999/5/EC and complies with the following standards and/or other
normative documents:
For Interfaces For RLAN Transceiver
EN 55022
EN 55024
EN 300 328
EN 301 489 -1, -17
EN 60950
Canadian Department of Communications Industry Canada (IC) Notice
This apparatus complies with Health Canada’s Safety Code 6 / IC RSS 102.
"To prevent radio interference to the licensed service, this device is intended to be operated indoors and away from
windows to provide maximum shielding. Equipment (or its transmit antenna) that is installed outdoors may be
subject to licensing."
ICES-003
This digital apparatus does not exceed the Class B limits for radio noise emissions from
digital apparatus as set out in the radio interference regulations of Industry Canada.
Le présent appareil numérique n'émet pas de bruits radioélectriques dépassant les limites applicables aux appareils
numériques de Classe B prescrites dans le règlement sur le brouillage radioélectrique édicté par Industrie Canada.

WARNING!!
≡≡≡≡≡≡≡≡≡≡≡≡≡≡≡≡≡≡≡≡≡≡≡≡≡≡≡≡≡≡≡≡≡≡≡≡≡≡≡≡≡≡≡
For our Customers who wish to use this product in hazardous locations.
This CR-SEB, CR-SEBX has been tested by Underwriters Laboratories Inc. for use in Class I,
Division 2, Groups A, B, C, and D Hazardous Locations as specified in UL1604 and UL/C-
UL/Zones(UL2279).
Such areas may have Explosive Gases.
To install this radio in this environment the following steps must be implemented.
1) The power supply used with the product must be a UL Class 2 rated device.
2) Contract a Qualified Licensed Electrician to install and run the power wiring from a
screw type, hard wired 12 VDC 1A Class 2 Output power supply in a UL Listed Box
and route a conduit to the radio which must be installed in a UL Listed Plastic Box
suitable for the environment. The conduit must be gas tight so no gases can flow
through conduit.
3) Any Cirronet products with outdoor radio transceivers (tower mounted) marked for
Hazardous Locations must have the interconnecting multi-conductor cable run in
approved conduit for the location. The cable must be in the conduit until out of the
Hazardous Location and the conduit must be gas tight so no gases can flow through
conduit.
4) Do NOT remove the power connector to the device while circuit is live. Disconnect
power only while circuit is dead, or the location is known to be non-hazardous.
Failure to do so, may result in a “Risk of Fire or Explosion”
Only then is the unit suitable for a hazardous location.
For more information on Hazardous Locations contact UL and ask for UL1604 requirements.
www.ul.com
RF Exposure
WARNING: End Users of these systems must be informed that RF exposure limits
may be exceeded if personnel come closer than 45 cm to the antenna aperture when
exceeding 9 dBi of gain in conjunction with the transceiver.
Repairs
Cirronet does not recommend field repairs of the radio equipment. Surface Mount
Technology (SMT) has been used in the production of the transceiver module, which
requires specialized training and equipment for proper servicing. The equipment
should be returned to the factory for any repair.

Table of Contents
Introduction ................................................................................................................................................... 0
Getting Started .............................................................................................................................................. 1
CR-SEB......................................................................................................................................................... 2
Connectors.................................................................................................................................................... 2
Status Indicators ........................................................................................................................................... 3
CR-SEBX ...................................................................................................................................................... 4
Connectors.................................................................................................................................................... 5
Status Indicators ........................................................................................................................................... 6
Configuring the CR-SEB ............................................................................................................................... 7
Setting IP Addresses..................................................................................................................................... 7
IP Hunter Utility ............................................................................................................................................. 7
HTML Setup ................................................................................................................................................ 10
Console Port ............................................................................................................................................... 13
Filtering........................................................................................................................................................ 14
DHCP .......................................................................................................................................................... 14
CR-SEB Operation...................................................................................................................................... 15
Overview ..................................................................................................................................................... 15
Security Modes ........................................................................................................................................... 15
Point-to-Point Mode .................................................................................................................................... 15
Point-to-Multipoint Mode ............................................................................................................................. 16
Co-located Networks................................................................................................................................... 16
CR-SEB Command Set............................................................................................................................... 18
System Commands..................................................................................................................................... 18
Bridge Commands ...................................................................................................................................... 20
CR-SEB Security Commands ..................................................................................................................... 21
Radio Commands ....................................................................................................................................... 22
Specifications .............................................................................................................................................. 26
Connectors.................................................................................................................................................. 26
Indicators..................................................................................................................................................... 26
Power .......................................................................................................................................................... 26
Troubleshooting .......................................................................................................................................... 27
Technical Support ....................................................................................................................................... 27
Warranty...................................................................................................................................................... 28

CR-SEB
Introduction
The CR-SEB family of products from CirronetIncorporated provides wireless Ethernet connectivity
between networks located more than 5 miles apart. Built around the WIT2410 frequency hopping spread
spectrum data modem, CR-SEB products provide a 10/100BaseT connection to Ethernet networks. CR-
SEB products operate in a point-to-point mode or a point-to-multipoint mode using a star configuration.
The center of the “star” is the Master device and the remote CR-SEBs are Slave devices. Peer-to-peer
communication is accomplished by using the master CR-SEB device to relay datagrams from one slave
CR-SEB device to another slave CR-SEB device.
Contained in a DIN Rail enclosure, CR-SEB is designed for factory and industrial applications. The CR-
SEBX features a remote radio in a NEMA 4X/IP66 rated enclosure that can be mounted outdoors up to
300 feet from the network connection. Communication between CR-SEB products is performed using the
Cirronet over-the-air protocol. Thus the CR-SEB products are 802.3 compatible but not 802.11
compatible and provide 400Kbps data throughput. Certified by the FCC and ETSI, and CE marked, CR-
SEB products can be deployed license-free around the world.
The CR-SEBs enjoy the benefits of frequency-hopping spread spectrum technology. Namely, the
immunity to multipath fading and resistance to jamming that is provided by changing frequency every
few milliseconds. Operating in the 2.4GHz ISM band, CR-SEBs can be used license-free worldwide.
The radios in CR-SEB products include a robust over-the-air protocol. This protocol insures error-free
data through the use of a 24-bit CRC and ARQ to detect errors and to automatically request a
retransmission. All of this is transparent to the network which just sees complete error-free data.
2000- 2004 CirronetInc 0 M-2410-0025 Rev A

CR-SEB
Getting Started
The CR-SEB family of wireless Ethernet modems is easy to install and operate. In most instances, the
only installation steps will be setting IP addresses, configuring one CR-SEB as the master and connecting
the antenna, power and Ethernet cable. While the operation of the CR-SEB and CR-SEBX is the same,
the installation and connection is slightly different. Please refer to the appropriate section below for
connection and installation of your product.
Setting up a pair of CR-SEBs requires the following steps:
•Enter IP addresses into each CR-SEB
•Configure one CR-SEB as the Master
The default settings in the CR-SEBs are sufficient to allow connection to Ethernet networks and to have
the slave CR-SEB connect with the master. Other steps you may want to take include:
•Enter a default route IP address if data is to be sent off the CR-SEB’s subnetwork (See Ethernet
Commands)
•Enable one or more of the security features of the CR-SEB (See Security Commands)
•Adjust the RF bandwidth allocation (See Radio Commands)
•Filter out broadcast and multicast packets (See Bridge Commands)
•Change the network number (See Radio Commands)
Instructions on setting up the CR-SEBs are detailed in the Configuring the CR-SEB section of this
manual. Details on the various operating modes and configurations can be found the CR-SEB Operation
section.
2000- 2004 CirronetInc 1 M-2410-0025 Rev A

CR-SEB
CR-SEB
Figure 1 identifies the various connectors and LEDs of the CR-SEB.
Figure 1. CR-SEB Front Panel Diagram
The RF connection on the CR-SEB is the antenna connector on the top of the CR-SEB. The antenna
connector is a reverse TNC type connector. An antenna may be connected directly to this connector.
Alternatively, an antenna may be located away from the CR-SEB using RF cable to connect the CR-SEB
to the antenna. Cirronet does not recommend using RF cables longer than 5 feet. If more distance is
required between the CR-SEB and the antenna Cirronet recommends using the CR-SEBX. If the CR-
SEBX is not used, high-quality, low-loss RF feed line must be used.
Connectors
The 10/100BaseT Ethernet connector is the standard RJ-45 connector and is located on the bottom front
of the CR-SEB. The CR-SEB is set up to use a straight through cable to connect to a PC. If a straight
through cable is used to connect the CR-SEB to other devices through a hub, the CR-SEB must be
connected to the uplink port on the hub. A cross over Ethernet cable is also provided to connect to
downlink ports on a hub.
The SYNC IN and SYNC OUT signals are provided for special applications where multiple master CR-
SEBs are co-located. The synchronizing signals are RS-485 levels and may be connected using an RJ-11
connector. If the sync signals are required, one of the master CR-SEBs must be designated as the sync
master. See the section CR-SEB/Radio Commands for details. If there are no co-located master CR-
SEBs, sync should be left disabled.
2000- 2004 CirronetInc 2 M-2410-0025 Rev A

CR-SEB
The Console port is an RS-232 serial port that may be used to configure the CR-SEB. Connection to this
port is made with the 9-pinD to RJ-11 serial cable included with the CR-SEB. This is useful when the
default IP address of the CR-SEB cannot be used with the existing network preventing configuration
through the IPHunter utility. See the section Configuring the CR-SEB for details of using this port.
The power connector is a 2-pin terminal block connector. The provided AC adapter provides a 12 volt
power level to the CR-SEB. The CR-SEB can accept DC voltages ranging between 12VDC and 30VDC
if alternative power supplies are to be used.
Status Indicators
The PWR indicator on the front panel indicates that power is applied to the CR-SEB. The CR-SEB does
not have a power switch. Power is applied and removed to the CR-SEB by connecting and disconnecting
the power connector.
The Ethernet LEDs include LINK, TXD and RXD. The LINK LED lights when a valid Ethernet
connection is made. The CR-SEB is set up to use a straight through cable to connect to a PC. If a straight
through cable is used to connect the CR-SEB to other devices through a hub, the CR-SEB must be
connected to the uplink port on the hub or the crossover Ethernet cable must be used. TXD and RXD are
indicators of Ethernet data activity. They indicate the transmission and reception of data over the Ethernet
connection. Note that these LEDs can be active even when the CR-SEB is not communicating with
another CR-SEB. When on, the XCVR LED on the CR-SEBX indicates the remote radio of the
CR-SEBX is operating properly.
On a slave CR-SEB, the RF Link LED indicates the CR-SEB has established a connection with the
master CR-SEB. When a slave CR-SEB is powered on, it will take a few seconds for this LED to turn on.
On a master CR-SEB the RF Link LED is on as long as any one Slave is linked.
Figure 2. CR-SEB RF Indicators
2000- 2004 CirronetInc 3 M-2410-0025 Rev A

CR-SEB
CR-SEBX
Figure 2 shows the various connectors and LEDs of the CR-SEBX. Figure 3 illustrates the remote radio
assembly. Connection between the CR-SEBX enclosure and the remote radio assembly is made through
the 16-pin remote radio connector on the front of the CR-SEBX. Digital signals, rather than RF signals
are sent over the connecting cable which may be up to 300 feet in length. These cables may be ordered
from Cirronet in lengths of 100 feet to 300 feet in 100-foot increments.
Figure 3. CR-SEBX Front Panel Diagram
The remote radio assembly has mounting holes to secure the antenna. The antenna is attached to the
remote radio through the included 24-inch RF cable. If the antenna is not to be mounted on the remote
radio assembly, connection between the remote radio and the antenna must be made with high-quality ,
loww-loss RF cable. Cirronet recommends limiting the length of the RF cable to 5 feet to minimize RF
signal loss.
2000- 2004 CirronetInc 4 M-2410-0025 Rev A

CR-SEB
Figure 4. Remote Radio Assembly
Note that the remote radio assembly should be mounted on a tower or building top oriented as in Figure 4.
It is important that the RF connector on the remote radio assembly point to the ground to avoid any issues
with rain water.
Important Note:
If an alternate source of power is used with the CR-SEBX, it must be limited to
+12VDC +/-10%. Failure to meet this specification can result in damage to the
remote radio assembly.
Connectors
The 10/100BaseT Ethernet connector is the standard RJ-45 connector and is located on the bottom front
of the CR-SEBX. The CR-SEBX is set up to use a straight through cable to connect to a PC. If a straight
through cable is used to connect the CR-SEB to other devices through a hub, the CR-SEBX must be
connected to the uplink port on the hub. (See SEB Section)
The SYNC IN and SYNC OUT signals are provided for special applications where multiple master CR-
SEBs are co-located. The synchronizing signals are RS-485 levels and may be connected using an RJ-11
connector. If the sync signals are required, one of the master CR-SEBXs must be designated as the sync
master. See the section CR-SEB/Radio Commands for details. If there are no co-located master CR-
SEBXs, sync should be left disabled.
The Console port is an RS-232 serial port that may be used to configure the CR-SEBX. Connection to this
port is made with the 9-pinD to RJ-11 serial cable included with the CR-SEBX. This is useful when the
default IP address of the CR-SEBX cannot be used with the existing network preventing configuration
through the IPHunter utility. See the section Configuring the CR-SEB for details of using this port.
The power connector is a 2-pin DIN type connector. The provided AC adapter provides a 12 volt power
level to the CR-SEBX. The CR-SEBX must have a DC voltage of 12VDC +/- 10% alternative power
supplies are to be used.
2000- 2004 CirronetInc 5 M-2410-0025 Rev A

CR-SEB
Status Indicators
The PWR indicator on the front panel indicates that power is applied to the CR-SEBX. The CR-SEBX
does not have a power switch. Power is applied and removed to the CR-SEBX by connecting and
disconnecting the power connector.
The Ethernet LEDs include LINK, TXD and RXD. The LINK LED lights when a valid Ethernet
connection is made. The CR-SEB is set up to use a straight through cable to connect to a PC. If a straight
through cable is used to connect the CR-SEB to other devices through a hub, the CR-SEB must be
connected to the uplink port on the hub. TXD and RXD are indicators of Ethernet data activity. They
indicate the transmission and reception of data over the Ethernet connection. Note that these LEDs can be
active even when the CR-SEB is not communicating with another CR-SEB.
The RF indicators include LINK and XCVR. On a slave CR-SEB, the RF Link LED indicates
the CR-SEB has established a connection with the master CR-SEB. When a slave CR-SEB is
powered on, it will take a few seconds for this LED to turn on. On a master CR-SEB the RF Link
LED is on as long as any one Slave is linked. The XCVR OK LED on the CR-SEBX when on
indicates the remote radio of the CR-SEBX is operating properly.
Figure 5. RF Indicators
2000- 2004 CirronetInc 6 M-2410-0025 Rev A

CR-SEB
Configuring the CR-SEB
The network that the CR-SEB is connected to must be compatible with 10/100BaseT products. Before
connecting a default configured CR-SEB to an active network that does not have a BOOTP or DHCP
server, ask the network system administrator for an IP address for the CR-SEB that will not cause any
problems on the network.
Setting IP Addresses
CR-SEBs are shipped from the factory with default settings that include a default IP address of 0.0.0.0
and a default configuration as a slave bridge. In order to set up a wireless link, alternate IP addresses need
to be assigned and one of the CR-SEBs must be configured as a master device. If a BOOTP or DHCP
server is not present a different IP address must be assigned to the CR-SEB. If a DHCP server is present
on the network, the IP address can be set up through it.
The Master CR-SEB can obtain its IP address through a DHCP server residing on the Master CR-SEB’s
local network. The slave CR-SEBs receive their IP address through the Master CR-SEB from the DHCP
server on the Master CR-SEB’s local network. If the slave CR-SEB cannot establish a link with the
master CR-SEB (due to different network numbers or some other configuration setting), the slave CR-
SEB will need to have its IP address entered manually unless it will be configured through the console
port. If it is desired to configure the slave CR-SEB through a browser session instead of the console port
but use a DHCP server to provide the IP address after initial setup, a temporary IP address can be
assigned manually but the IP address will need to be reset to 0.0.0.0 to have the slave CR-SEB obtain its
IP address from the DHCP server.
IP Hunter Utility
The CR-SEB CD has a device detection and IP setting utility named IP Hunter. This utility will detect all
Cirronet Ethernet devices on the local network, even those with no IP address. For those units without an
IP address, IP Hunter can set the IP address and then open a browser session with that device to allow for
further configuration. The IP Hunter will display devices that already have IP addresses and will open
browser sessions with those units, but will not change the IP address already set.
2000- 2004 CirronetInc 7 M-2410-0025 Rev A

CR-SEB
Open IP Hunter by double-clicking on the file iphunter.exe on the CR-SEB CD. The following screen
will appear.
Click on the Search button to begin the search for Cirronet devices. Only Cirronet Ethernet devices will
be displayed as shown below.
Ethernet devices from other manufacturers will not be displayed, even if they have no IP address. Any
devices found will be displayed on the screen along with the IP address (if any), the netmask the MAC
address and the DHCP host name.
2000- 2004 CirronetInc 8 M-2410-0025 Rev A

CR-SEB
Double-clicking on a device with an IP address of 0.0.0.0 will bring up the following dialog box.
Enter the desired IP address and the default netmask will automatically be entered as shown below. A
new Host Name may be entered if desired; however, the MAC Address cannot be changed.
Click OK and the IP address will be entered in the CR-SEB and will be displayed in the IP Hunter
window as shown below.
2000- 2004 CirronetInc 9 M-2410-0025 Rev A

CR-SEB
HTML Setup
Once an address has been assigned, double-click on the IP number to launch an HTML setup session in a
browser window. The login screen will display as shown below.
Enter the default Username, “admin” and the default Password, “Cirronet” (case sensitive).
(The password will be displayed as dots only for security purposes.)
Click on OK and the main browser window is displayed.
2000- 2004 CirronetInc 10 M-2410-0025 Rev A

CR-SEB
System Status
This dialog shows the Mode (Master or Slave) and Link (Up/Down) status of each device. (Clicking on
Refresh should be used when System Settings have been adjusted to display current status.)
System Settings
This dialog allows the user to change the Hostname, set the Default Route, enter DNS entries or change
the Outmax (upload/download ratio for the radio) setting. If the CR-SEB is to transmit data to devices not
on its subnet, a default router must be specified. To set the default routing address, enter it in the Default
Route field. Click on Apply to invoke changes, click on Cancel to discard.
System Ethernet Stats
This dialog displays statistics related to the transmission and reception of wired Ethernet data.
2000- 2004 CirronetInc 11 M-2410-0025 Rev A

CR-SEB
Radio Settings
This dialog identifies the radio and current operating mode. It also allows the user to configure radio
parameters for the Network, SPID, Master Bandwidth, Max Slaves, HopSet, Power, Sync and Retries.
Details on these settings are provided in the section on Radio Commands.
Bridge Settings
This dialog allows the user to set the Mode, (Master or Slave), any Filtering (see the section on Filtering
below) and whether or not a Login is required. Selecting “No” grays out the Username/Access-code,
Password and (Password) Verify fields. Selecting “Yes” allows entries to be entered into the fields.
Details on these settings are provided in the section on Bridge Commands.
Bridge (Connection) Status
This dialog displays statistics related to the connected radios including UserName (if no username is
assigned, N/A will display), IP Address, Radio ID and Packet/Error Information.
Access Control Settings
This dialog allows the setting of login preference, “admin” (default), “enable” or “guest”. Setting “admin”
allows the user rights to change parameters; setting “guest” limits the access to RF Tools only. After
changing the Console setting, click Apply to invoke the changes. Click on Cancel to discard any changes.
2000- 2004 CirronetInc 12 M-2410-0025 Rev A

CR-SEB
Clicking on Enable IP address control and then Apply brings up the dialog below.
Enable IP address Control
This dialog is used to designate the Allowed IP addresses from which the SEB will accept a telnet session
request. Simply enter an IP address in the “Allowed IP address” field and click “Add IP address. Only IP
addresses designated by this dialog can access the device when IP address control is Enabled.
Access Control Users
This dialog allows the modification of logins and the ability to add new users.
Note: Click on Save Settings to store the system configuration changes in non-volatile FLASH
memory. The user may either click on “Reset” to reboot the processor, click on “Logout” to end the
browser session or simply close the browser window.
Console Port
The CR-SEB can be configured in two other ways. The first is through the console port. The settings for
the console port are 38400 baud, 8 data bits, 1 stop bit, and no parity. The WinSEM program can be used
to set up the CR-SEB through the Console port. The appropriate serial port must be selected in WinSEM,
but the program will automatically set up the serial port. After a few seconds the CR-SEB firmware
version is displayed followed by the SEM> prompt.
To set the IP number of the CR-SEB, use the ip command.
ip <xxx.xxx.xxx.xxx> {yyy.yyy.yyy.yyy}
Where x is the new IP address, and y is the optional netmask number.
Once a valid IP address has been entered in the CR-SEB, a second method to configure the CR-SEB is
through a telnet session. Most telnet programs work with the CR-SEB. Windows 95/98/NT/2000/ME
have a telnet program that works with the CR-SEB. A telnet session can be started by clicking on Start-
>Run if you have Windows 95/98/NT/2000 and the TCP/IP client has been installed. For a CR-SEB with
an IP address of 192.168.0.254, enter the following information in the dialog box:
telnet 192.168.0.254
Note: If IP Address control has been enabled, the telnet session must be initiated from an IP
Address that is on the Allowed IP Address list.
2000- 2004 CirronetInc 13 M-2410-0025 Rev A

CR-SEB
A telnet window will open up. The first line is the version of the CR-SEB firmware followed by the
prompt:
SEM>
If the CR-SEB is to transmit data to devices not on its subnet, a default router must be specified. To enter
the default routing address use the route command.
route add default <xxx.xxx.xxx.xxx> {yyy.yyy.yyy.yyy}
Where x is the IP address of the gateway device and y is the optional netmask number.
To configure a CR-SEB as a master device, use the bridge command:
bridge master<CR>
Store the changed configuration parameters in non-volatile memory with the save command:
save<CR>
The CR-SEB will report back the time it took to the save the information. Reset the CR-SEB by typing:
reset<CR>
The CR-SEB can also be reset by cycling power. Whenever a reset is executed on the CR-SEB, the telnet
session will be lost. It will take the CR-SEB about 30 seconds to reinitialize after a reset or after cycling
power.
Note: Failure to save and reset will result in the factory defaults being used.
Filtering
The CR-SEB includes provision for filtering of multicast and broadcast packets. In many networks, there
is sufficient multicast and/or broadcast packets to slow the overall performance of the CR-SEB. Based on
the number of broadcast and multicast packets, they can consume a substantial amount of the RF
bandwidth. By turning filtering on, the CR-SEB will ignore these packets and limit transmission to
packets with specific device addresses. In some instances, it will be desired to have the CR-SEB transmit
the multicast and broadcast packets; in this instance filtering should be disabled. Note that filtering
broadcast packets also filters multicast packets but filtering multicast packets does not filter broadcast
packets. To filter broadcast and multicast packets use the bridge filter command:
bridge filter bcast<CR>
Refer to the section Bridge Commands for details of the filter commands.
DHCP
A DHCP server can set the CR-SEB IP address as well as the default route IP address. This is
accomplished by setting the desired default route IP address in the DHCP server using Option 3. A DHCP
server will not overwrite a previously entered default router IP address in the CR-SEB. If a DHCP server
is not used to set the default router IP address, one must be entered using the route command. See the
previous section for details of the route command. If an IP address has previously been entered into the
CR-SEB but a DHCP server is to be used to assign an IP address, it will be necessary to set the IP address
in the CR-SEB to 0.0.0.0 using the ip command.
2000- 2004 CirronetInc 14 M-2410-0025 Rev A
This manual suits for next models
1
Table of contents
Other Cirronet Network Router manuals
Popular Network Router manuals by other brands
W-Link
W-Link WL-R320 Series user manual
ZyXEL Communications
ZyXEL Communications P-2802HW(L)-IX quick start guide
Unitronics
Unitronics Vision OPLC VV570-57-T20B-J quick start guide
TP-Link
TP-Link AC1900 Specifications

EnGenius
EnGenius ECB300 Quick installation guide
Patton
Patton IPLink 2603 Series user guide

Xpelair
Xpelair WAC6 Installation and operating instructions
NETGEAR
NETGEAR MBR1515 user manual
Edgewater Networks
Edgewater Networks 200EW/E quick start guide
Senztek
Senztek SolaStat-Plus-ET installation guide
US Robotics
US Robotics Wireless Cable/DSL Router reference guide
TP-Link
TP-Link TL-R480T user guide
