manuals.online logo
Brands
  1. Home
  2. •
  3. Brands
  4. •
  5. Siemens
  6. •
  7. Network Router
  8. •
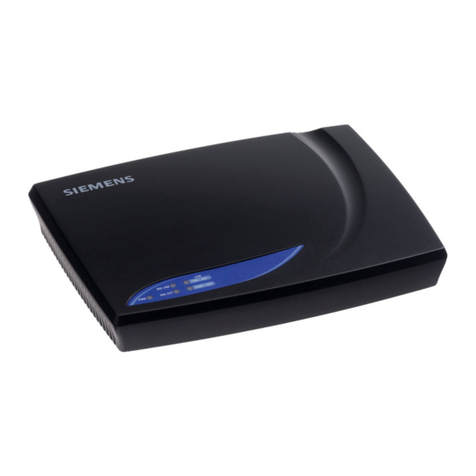
  9. Siemens 73 82 851 Manual

Siemens 73 82 851 Manual

6LHPHQV5HPRWH6HUYLFHV
&2
+DUGZDUH,QVWDOODWLRQ*XLGH
5',$*5RXWHU$QDORJ,36(&
3DUWQXPEHU 
Print No.: COIT-000.812.06.02.02
Replaces: COIT-000.812.06.01.02
© Siemens AG 2002
The reproduction, transmission or
use of this document or its contents
is not permitted without express
written authority. Offenders will be
liable for damages. All rights,
including rights created by patent
grant or registration of a utility model
orr_ design,,_aree_ reserved.
English
Doc. Gen. Date: 01-02
Installation instruction
Siemens Remote Service COIT-000.812.06.022.02 Seite 2/13 Siemens AG
Rev. 02 02-02 CO SGK Medical Solutions
5HYLVLRQKLVWRU\
&KDSWHU 3DJHV 5HYLVLRQ
all all 01
all all 02
Installation instruction
Siemens Remote Service COIT-000.812.06.022.02 Seite 3/13 Siemens AG
Rev. 02 02-02 CO SGK Medical Solutions
1. 813$&.7+(%2; 
 %()25(,167$//$7,21 
 &211(&7,1*32:(5$1'7851,1*7+(5287(521 
 &211(&7,1*7+(5287(5727+(/$1 
 &211(&7,1*7+(&,6&2727+(:$1
 ),1$/&21),*85$7,21 
$33(1',; 
Installation instruction
Siemens Remote Service COIT-000.812.06.022.02 Seite 4/13 Siemens AG
Rev. 02 02-02 CO SGK Medical Solutions
8QSDFNWKH%R[
%HIRUH,QVWDOODWLRQ
Cisco 800 series routers are shipped to you ready for desktop mounting. Before connecting the router
to the network and power supply, simply set the router on a desktop, shelf, or other flat surface. The
router you got is preconfigured by SIEMENS Medical Solutions. The router package includes power
cords for the US and Europe. You need to provide a power cord for other countries. You need to
provide a modem as specified in Appendix B. Pay attention to the Maximum Cable Distances (see
Appendix A).
The following figure shows the router ports. These ports and the cables are color-coded to help you
connect the cables correctly. The figures in the following chapter may differ in some details from your
router.
Installation instruction
Siemens Remote Service COIT-000.812.06.022.02 Seite 5/13 Siemens AG
Rev. 02 02-02 CO SGK Medical Solutions
&RQQHFWLQJ3RZHUDQG7XUQLQJWKH5RXWHU2Q
You can verify your installation by checking the appropriate LEDs during the installation process if you
switch the router on before making any network connections.
Follow these steps to connect the router to power and turn it on:
6WHS Make sure the router power is off.
6WHS Connect the power supply cable to the 6-pin connector on the rear panel of the router
6WHS Connect the female end of the power cable to the desktop power supply
6WHS Connect the male end of the power cable to an electrical outlet
6WHS In order to switch the router on, set the power switch (I/0) to I.
6WHS Check the following LEDs:
•The OK LED (front panel)---On if power is being supplied to router.
)LJXUH
Installation instruction
Siemens Remote Service COIT-000.812.06.022.02 Seite 6/13 Siemens AG
Rev. 02 02-02 CO SGK Medical Solutions
&RQQHFWLQJWKH5RXWHUWRWKH/$1
The yellow straight-through RJ-45-to-RJ-45 cable (contained in the package) is necessary for this
connection. Follow these steps to connect the router to a 10BaseT Ethernet LAN (Figure 2):
6WHS Connect one end of the yellow cable to the yellow Ethernet port (10BASE T) on your Cisco
805.
6WHS Connect the other end of the cable to one of the ports on the 10BaseT hub, switch or network
walljack. If you want to connect the router directly to a PC, Server or Workstation you will need
to set the router HUB/NO HUB Button to OUT (the default setting is IN).
6WHS Check the following LEDs:
•The LINK LED (rear panel, next to 10BaseT port) --- On, if the connection is working
properly
•If the LINK LED is not on, press the HUB/NO HUB button
)LJXUH
Installation instruction
Siemens Remote Service COIT-000.812.06.022.02 Seite 7/13 Siemens AG
Rev. 02 02-02 CO SGK Medical Solutions
&RQQHFWLQJWKH&LVFRWRWKH:$1
Depending on where the Cisco 805 is used, the serial connection may be different. Follow these steps
to connect the Cisco 805 to the WAN:
6WHS Use the blue serial cable and connect one end of the cable to the serial port of the router.
6WHS Connect the other end of the cable to the asynchronous modem that you provide
6WHS Connect the modem to the telephone line
In case the modem you want to use was formerly connected directly to a system/modality, the modem
needs to be reset to factory defaults before it can be used. For Multitech modems, this procedure is
described in $SSHQL[), for other modems, refer to their instruction guide.
)LJXUH
Installation instruction
Siemens Remote Service COIT-000.812.06.022.02 Seite 8/13 Siemens AG
Rev. 02 02-02 CO SGK Medical Solutions
)LQDO&RQILJXUDWLRQ±SHUIRUPHGE\6,(0(16
5HPRWH6HUYLFHV
The router hardware configuration is finished. The final configuration will be carried out by SIEMENS
Remote Service. This service is free-of-charge. '2127 start to configure the router by yourself
In order to use the central service of remote final configuration, fill out the checklist which can be found
either in the router box or in the internet at the following address:
http://www-td.med.siemens.de/router/checklist.doc
,WLVLPSRUWDQWWKDW\RXGRQRWXQGHUWDNHDQ\DGGLWLRQDOFRQILJXUDWLRQVRQ\RXURZQVLQFHWKH
FRQILJXUDWLRQQHHGVWRFRPSO\ZLWKFHUWDLQVWDQGDUGVLQRUGHUIRUWKHURXWHUWRIXQFWLRQ
SURSHUO\
The final configuration includes registering the medical systems by the remote diagnostic server at
SIEMENS Remote Services.
Installation instruction
Siemens Remote Service COIT-000.812.06.022.02 Seite 9/13 Siemens AG
Rev. 02 02-02 CO SGK Medical Solutions
$SSHQGL[
$SSHQGL[$0D[LPXP&DEOH/HQJWKV
&DEOH 0D[LPXP/HQJWK
Ethernet 100 metres
ISDN S/T 10 metres
Telephone cable 152 metres
$SSHQGL[%5HFRPPHQGHG0RGHPV
&RXQWU\ 0RGHP7\S 6,(0(163DUW
Germany Multitech MT2834ZDXIe-33-DE 5533356
Japan Multitech MT 2834 ZDXI-33-JP 5533364
Switzerland Multitech MT2834ZDXIe-33-CH 5533372
Sweden Multitech MT2834ZDXIe-33-SE 5533380
Norway Multitech MT2834ZDXIe-33-NO 5533398
Netherlands Multitech MT2834ZDXIe-33-NL 5533406
Italy Multitech MT2834ZDXIe-33-IT 5533414
Belgium Multitech MT2834ZDXIe-33-BE 5533422
United Kingdom Multitech MT2834ZDXIe-33-GB 5533430
USA/Canada Multitech MT2834ZDXB-SC 5533463
France Multitech MT2834ZDXIe-33-FR 5533448
Austria Multitech MT2834ZDXIe-33-AT 5533455
Other Multitech MT2834ZDX+ country specific adapter obtain modem locally
$SSHQGL[&&RQQHFWLQJWKH&RQVROH3RUW
The cable and adapters required for this connection are included with the router. Follow these steps to
connect the router to a terminal or PC:
6WHS Connect one end of the light-blue console cable to the light-blue CONSOLE port on the router
(Figure 4).
6WHS Use the correct adapter to connect the other end of the cable to your terminal or PC (serial
interface).
1RWH If your terminal or PC has a console port that does not match any of the adapters, you must
provide the correct adapter for that port.
Installation instruction
Siemens Remote Service COIT-000.812.06.022.02 Seite 10/13 Siemens AG
Rev. 02 02-02 CO SGK Medical Solutions
)LJXUH
$SSHQGL['3DVVZRUGV
The enable password – used to get into the enable modus of the router – is SUHVHF.
$SSHQGL[(&RQILJXUH3&HJ+\SHUWHUPLQDOIRUFRPPXQLFDWLRQ
Once your router is correctly connected to your PC, you can start building your configuration. The
Windows Hyperterminal emulation is the interface to your Cisco 805 router.
6WHS Start Hyperterminal from the „Programs – Accessories – Hyperterminal“ menu in the start
panel. If you do not find the program there or anywhere else on your computer, you will have
to install it first.
6WHS In the „Connection Description“ dialogue box
•enter a name for the connection and choose an icon. If you want to save the connection
settings, click „OK“
•RU click „Cancel“
Installation instruction
Siemens Remote Service COIT-000.812.06.022.02 Seite 11/13 Siemens AG
Rev. 02 02-02 CO SGK Medical Solutions
6WHS Choose „Properties“ from the „File“ menu. On the „Connect to“ tab, check, if the port (e. g.
COM1) to which your router is connected is selected.
6WHS Click „Configure“ and make sure that the settings have the following values: Bits per second:
9600, Data bits: 8, Stop bits: 1, Flow control: Hardware. Click „OK“ twice to leave configuration
mode.
6WHS Choose „Connect“ from the „Call“ menu to establish a connection to the router.
Installation instruction
Siemens Remote Service COIT-000.812.06.022.02 Seite 12/13 Siemens AG
Rev. 02 02-02 CO SGK Medical Solutions
$SSHQL[)&RQFHUQLQJPRGHPVIRUPHUO\GLUHFWO\FRQQHFWHGWRV\VWHPV
In case you ordered a new analog SRS router (Cisco 805 or Cisco 1603 Analog), and the router is
supposed to be connected to a modem which was formerly connected directly to a system/modality, it
is absolutely necessary to reset the modem to factory defaults. Otherwise the modem cannot be used
along with a SRS router.
The procedure to configure the modem via the router is called ‚reverse telnet‘. In order to carry out this
procedure, please follow the steps below. This is RQO\ the procedure for 0XOWLWHFK Modems. If you
have a different type of modem, you will have to consult the instruction manual in order to reset the
modem to factory defaults.
6WHS Connect the light blue console cable to the router and to the 9 pin serial connector on the PC.
[Refer to in the HW installation guide.]
6WHS Ensure that the router is connected to Ethernet.
6WHS Start Hyperterminal (click Start – Programs – Accessories – Hyperterminal – Hyperterminal).
[Refer to $SSHQGL[( in the HW installation guide.]
6WHS Enter a name for this connection and click „OK“.
6WHS In the drop-down-box choose the COM port the console cable is connected to.
6WHS In the properties dialogue box click „OK“.
6WHS Hit ‚Enter‘ until you see the router prompt, e. g. jac0356323qc828>
You have now established a connection to the router and will enter the following commands on the
router itself:
Installation instruction
Siemens Remote Service COIT-000.812.06.022.02 Seite 13/13 Siemens AG
Rev. 02 02-02 CO SGK Medical Solutions
GHVFULSWLRQ 5RXWHUSURPSW FRPPDQG
6WHS Enter into the enable modus of the
router
jac0356323qc828> HQDEOH
6WHS Enter the password to get into the
enable modus (this entry is not
visible)
password: SUHVHF
6WHS Enter into the configuration modus
of the router
jac0356323qc828# FRQILJXUHWHUPLQDO
The following output will appear Enter configuration
commands, one per line.
End with CNTL/Z.
6WHS set the ip for modem1 jac0356323qc828(config)# LSKRVWPRGHP

6WHS Enter ctrl-z jac0356323qc828(config)# A]
The following output will appear 3d22h: %SYS-5-CONFIG_I:
Configured from console
by console
6WHS log onto the modem jac0356323qc828# PRGHP
The following output will appear Trying modem1
(10.6.254.2, 2001)...
Open
User Access Verification
6WHS Enter the username username SUHUGLDJ
6WHS Enter the password (not visible) password SUHVHW
The following output will appear Password OK
6WHS Echo on DWH
The following output will appear OK
6WHS Reset to factory settings.
1RWH: 0 is „zero“
DWIZ
The following output will appear OK
6WHS Press ctrl-shift-6 A>VKLIW@
6WHS [
6WHS Disconnect from the modem jac0356323qc828# GLVFRQQHFW
6WHS Confirm that the connection to
modem1 shall be closed
Closing connection to
modem1 [confirm]
FU!
6WHS H[LW
Now your modem and your router are ready to be remotely configured by SIEMENS Remote Services.
$SSHQGL[*,6'1XVHRIWKHDQDORJURXWHU
1RWH Should it become necessary to switch from the analog connection to an ISDN connection, the
configuration can be done via the analog interface of the router.

Other Siemens Network Router manuals

Siemens Santis ADSL 50 User manual

Siemens

Siemens Santis ADSL 50 User manual

Siemens RUGGEDCOM RS900G User manual

Siemens

Siemens RUGGEDCOM RS900G User manual

Siemens SIMATIC NET RUGGEDCOM APE1808 Instruction sheet

Siemens

Siemens SIMATIC NET RUGGEDCOM APE1808 Instruction sheet

Siemens SL2-141 User manual

Siemens

Siemens SL2-141 User manual
Siemens RUGGEDCOM RS900 User manual

Siemens

Siemens RUGGEDCOM RS900 User manual

Siemens RUGGEDCOM RX5000 User manual

Siemens

Siemens RUGGEDCOM RX5000 User manual

Siemens RUGGEDCOM RS900G User manual

Siemens

Siemens RUGGEDCOM RS900G User manual

Siemens RUGGEDCOM RM1224 User manual

Siemens

Siemens RUGGEDCOM RM1224 User manual

Siemens FN2012-A1 Guide

Siemens

Siemens FN2012-A1 Guide

Siemens Gigaset SX541 WLAN dsl User manual

Siemens

Siemens Gigaset SX541 WLAN dsl User manual

Siemens RUGGEDCOM RX1100 User manual

Siemens

Siemens RUGGEDCOM RX1100 User manual

Siemens SIMATIC NET SCALANCE XR-300M EEC Series Administrator guide

Siemens

Siemens SIMATIC NET SCALANCE XR-300M EEC Series Administrator guide

Siemens E-110 User manual

Siemens

Siemens E-110 User manual
Siemens C2-010 User manual

Siemens

Siemens C2-010 User manual

Siemens RUGGEDCOM RSG2288 User manual

Siemens

Siemens RUGGEDCOM RSG2288 User manual

Siemens RUGGEDCOM M2200 User manual

Siemens

Siemens RUGGEDCOM M2200 User manual

Siemens SCALANCE M800 User manual

Siemens

Siemens SCALANCE M800 User manual

Siemens N 146 Service manual

Siemens

Siemens N 146 Service manual

Siemens SCALANCE M874 User manual

Siemens

Siemens SCALANCE M874 User manual

Siemens SCALANCE XB-200 User manual

Siemens

Siemens SCALANCE XB-200 User manual

Siemens SCALANCE XM-400 Instruction sheet

Siemens

Siemens SCALANCE XM-400 Instruction sheet

Siemens SIMATIC NET SCALANCE S615 Instruction sheet

Siemens

Siemens SIMATIC NET SCALANCE S615 Instruction sheet

Siemens SX763 User manual

Siemens

Siemens SX763 User manual

Siemens SCALANCE S615 User manual

Siemens

Siemens SCALANCE S615 User manual

Popular Network Router manuals by other brands

Draytek Vigor2760Vn quick start guide

Draytek

Draytek Vigor2760Vn quick start guide

NetComm N3G002W Firmware Upgrade Instructions

NetComm

NetComm N3G002W Firmware Upgrade Instructions

Airlinkplus ASW-2402 user guide

Airlinkplus

Airlinkplus ASW-2402 user guide

D-Link Air Premier DAP-2695 user guide

D-Link

D-Link Air Premier DAP-2695 user guide

Avaya ERS 8600 Technical configuration guide

Avaya

Avaya ERS 8600 Technical configuration guide

Cisco 1700 series manual

Cisco

Cisco 1700 series manual

Sandberg Wireless G54 Router manual

Sandberg

Sandberg Wireless G54 Router manual

Patton electronics SMARTNODE 4900 Getting started guide

Patton electronics

Patton electronics SMARTNODE 4900 Getting started guide

LEGRAND Wattstopper LMBR-650 installation instructions

LEGRAND

LEGRAND Wattstopper LMBR-650 installation instructions

Planet Networking & Communication igs-801m user manual

Planet Networking & Communication

Planet Networking & Communication igs-801m user manual

SMC Networks 7004VBR quick start guide

SMC Networks

SMC Networks 7004VBR quick start guide

D-Link DIR-853/EE Quick installation guide

D-Link

D-Link DIR-853/EE Quick installation guide

TP-Link TL-R480T installation guide

TP-Link

TP-Link TL-R480T installation guide

Matrix Switch Corporation MSC-5-3232 product manual

Matrix Switch Corporation

Matrix Switch Corporation MSC-5-3232 product manual

Xpress Ethernet Bridge XEB09-C product manual

Xpress

Xpress Ethernet Bridge XEB09-C product manual

Huawei S3700 Series quick start guide

Huawei

Huawei S3700 Series quick start guide

BEC MX-1200 quick start guide

BEC

BEC MX-1200 quick start guide

Cayman Systems 3220-H Series Getting started guide

Cayman Systems

Cayman Systems 3220-H Series Getting started guide

manuals.online logo
manuals.online logoBrands
  • About & Mission
  • Contact us
  • Privacy Policy
  • Terms and Conditions

Copyright 2025 Manuals.Online. All Rights Reserved.