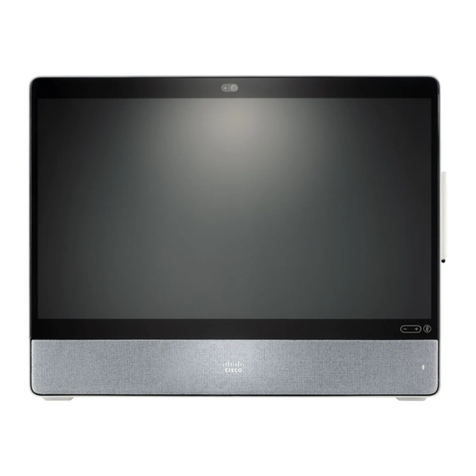
Cisco Webex DX70 Service manual

D15362.16 DX70 and DX80 Administrator Guide CE9.13, JUNE 2020. www.cisco.com — Copyright © 2020 Cisco Systems, Inc. All rights reserved.
1
Cisco Webex DX70 and DX80 Administrator Guide
Collaboration Endpoint software version 9.13
JUNE 2020
Administrator guide
for Cisco Webex DX70 and DX80
Introduction
Configuration
Peripherals
Maintenance
Device settings
Appendices

D15362.16 DX70 and DX80 Administrator Guide CE9.13, JUNE 2020. www.cisco.com — Copyright © 2020 Cisco Systems, Inc. All rights reserved.
2
Cisco Webex DX70 and DX80 Administrator Guide
Table of contents
Introduction....................................................................................................................... 4
User documentation and software ....................................................................................... 5
What’s new in CE9................................................................................................................ 6
DX70 and DX80 at a glance................................................................................................ 45
Power On and Off ............................................................................................................... 46
LED indicators ..................................................................................................................... 48
How to administer the video conferencing device ............................................................. 49
Configuration .................................................................................................................. 53
User administration ............................................................................................................. 54
Change the device passphrase .......................................................................................... 55
Restrict the access to the Settings menu........................................................................... 56
Device configuration ........................................................................................................... 57
Add a sign in banner ........................................................................................................... 58
Add a welcome banner....................................................................................................... 59
Manage the service certificates of the device ................................................................... 60
Manage the lists of trusted certificate authorities - CAs.................................................... 61
Set up secure audit logging................................................................................................ 65
Delete CUCM trust lists....................................................................................................... 66
Change the persistency mode............................................................................................ 67
Set up ad hoc multipoint conferences................................................................................ 68
Set up Intelligent Proximity for content sharing .................................................................. 70
Adjust the video quality to call rate ratio............................................................................. 75
Add corporate branding to the screen ............................................................................... 76
Add a custom wallpaper ..................................................................................................... 78
Choose a ringtone and set the ringtone volume ................................................................ 79
Manage the Favorites list .................................................................................................... 80
Set up accessibility features............................................................................................... 81
Provisioning of product specific configurations from CUCM.............................................. 82
Peripherals...................................................................................................................... 84
Connect a computer ........................................................................................................... 85
Extend the number of input sources................................................................................... 86
Bluetooth headset............................................................................................................... 87
Connect the ISDN Link........................................................................................................ 88
Maintenance ................................................................................................................... 89
Installing new software ....................................................................................................... 90
Add option keys .................................................................................................................. 93
Device status ...................................................................................................................... 94
Thank you for choosing Cisco!
Your Cisco product has been designed to give you many
years of safe, reliable operation.
This part of the product documentation is aimed at
administrators working with the setup and configuration of
the video conferencing device.
Our main objective with this Administrator guide is to
address your goals and needs. Please let us know how
well we succeeded!
May we recommend that you visit the Cisco web site
regularly for updated versions of this guide.
The user documentation can be found on
► https://www.cisco.com/go/desk-docs
How to use this guide
The top menu bar and the entries in the Table of contents
are all hyperlinks. You can click on them to go to the topic.
Introduction
Configuration
Peripherals
Maintenance
Device settings
Appendices

D15362.16 DX70 and DX80 Administrator Guide CE9.13, JUNE 2020. www.cisco.com — Copyright © 2020 Cisco Systems, Inc. All rights reserved.
3
Cisco Webex DX70 and DX80 Administrator Guide
Run diagnostics................................................................................................................... 95
Download log files............................................................................................................... 96
Create a remote support user ............................................................................................ 97
Backup and restore configurations and custom elements ................................................. 98
CUCM provisioning of custom elements ............................................................................ 99
TMS provisioning of custom elements.............................................................................. 100
Revert to the previously used software image ..................................................................101
Factory reset the video conferencing device ................................................................... 102
Capture user interface screenshots ................................................................................. 106
Device settings ............................................................................................................. 107
Overview of the device settings ....................................................................................... 108
Audio settings ....................................................................................................................113
Bluetooth settings ..............................................................................................................115
CallHistory settings ............................................................................................................116
Cameras settings...............................................................................................................117
Conference settings ..........................................................................................................118
FacilityService settings ..................................................................................................... 122
H323 settings.................................................................................................................... 123
HttpClient settings ............................................................................................................ 126
HttpFeedback settings.......................................................................................................127
Logging settings ............................................................................................................... 128
Macros settings ................................................................................................................ 130
Network settings................................................................................................................131
NetworkPort settings ........................................................................................................ 139
NetworkServices settings................................................................................................. 140
Peripherals settings .......................................................................................................... 148
Phonebook settings .......................................................................................................... 149
Provisioning settings..........................................................................................................151
Proximity settings.............................................................................................................. 154
RoomReset settings.......................................................................................................... 156
RTP settings...................................................................................................................... 157
Security settings ............................................................................................................... 158
SerialPort settings..............................................................................................................161
SIP settings ....................................................................................................................... 162
Standby settings ............................................................................................................... 167
SystemUnit settings.......................................................................................................... 168
Time settings .................................................................................................................... 169
UserInterface settings........................................................................................................172
UserManagement settings.................................................................................................178
Video settings ................................................................................................................... 182
Experimental settings ....................................................................................................... 189
Appendices................................................................................................................... 190
The user interface..............................................................................................................191
Set up remote monitoring ................................................................................................. 192
Access call information and answer a call while using the web interface........................ 193
Place a call using the web interface ................................................................................. 194
Share content using the web interface............................................................................. 196
Local layout control........................................................................................................... 197
Control a far end camera .................................................................................................. 198
Customize the video conferencing device's user interface.............................................. 199
Customize the video conferencing device's behavior using macros .............................. 201
Remove default buttons from the user interface .............................................................. 202
Use of a third-party USB input device.............................................................................. 203
Sending HTTP(S) requests .............................................................................................. 204
Manage startup scripts ..................................................................................................... 205
Access the device’s XML files ......................................................................................... 206
Execute API commands and configurations from the web interface ............................... 207
About Ethernet ports......................................................................................................... 208
Serial interface.................................................................................................................. 209
Open TCP Ports.................................................................................................................210
HTTPFeedback address from TMS....................................................................................212
Link an on-premises registered device to Cisco Webex Edge for Devices ......................213
Register a device to the Cisco Webex cloud service ........................................................214
Supported RFCs ................................................................................................................215
Technical specification.......................................................................................................216
User documentation on the Cisco web site.......................................................................218
Cisco contacts ...................................................................................................................219
Introduction
Configuration
Peripherals
Maintenance
Device settings
Appendices

D15362.16 DX70 and DX80 Administrator Guide CE9.13, JUNE 2020. www.cisco.com — Copyright © 2020 Cisco Systems, Inc. All rights reserved.
5
Cisco Webex DX70 and DX80 Administrator Guide
Products covered in this guide
• Cisco TelePresence DX70
• Cisco TelePresence DX80
From Collaboration Software version 8.2 (CE8.2) all DX80
and DX70 units can run CE software, which is the same
software that runs on the Cisco TelePresence SX and MX
Series.
Note that Cisco DX650 is not, and will not be, supported
by CE software.
User documentation
This guide provides you with the information required to
administrate the video conferencing device.
The guide primarily addresses capabilities and
configurations of on-premise registered devices (CUCM,
VCS), but a sub-set of the capabilities and configurations
also applies to devices that are registered to our cloud
service (Cisco Webex).
Refer to the ► User documentation on the Cisco web site
appendix for more information about the guides for this
product.
Documentation on the Cisco web site
Visit the Cisco web site regularly for updated versions of
the guides:
► https://www.cisco.com/go/desk-docs
Documentation for cloud registered devices
For more information about devices that are registered to
the Cisco Webex cloud service, visit:
► https://help.webex.com
Cisco Project Workplace
Explore the Cisco Project Workplace to find inspiration
and guidelines when preparing an office or meeting room
for video conferencing:
► https://www.cisco.com/go/projectworkplace
Software
Download software for the endpoint from the Cisco web
site:
► https://software.cisco.com/download/home
We recommend reading the Software release notes
(CE9):
► https://www.cisco.com/c/en/us/support/
collaboration-endpoints/desktop-collaboration-
experience-dx600-series/tsd-products-support-
series-home.html
Converting to CE software
Until September 2016 DX80 and DX70 were shipped
with Android based software. Before converting to
CE software, it is important to carefully consider the
conversion requirements and the functionality changes
compared to Android based software; otherwise migration
can leave you with a non-functional deployment that
requires you to convert back.
Refer to the software release notes, and the ►Upgrade
the device software chapter.
User documentation and software
Introduction
Configuration
Peripherals
Maintenance
Device settings
Appendices
Introduction

D15362.16 DX70 and DX80 Administrator Guide CE9.13, JUNE 2020. www.cisco.com — Copyright © 2020 Cisco Systems, Inc. All rights reserved.
6
Cisco Webex DX70 and DX80 Administrator Guide
This chapter provides an overview of the new and changed
device settings (configurations), and the new features and
improvements in the Cisco Collaboration Endpoint software
version 9 (CE9) compared to CE8.
The following Webex products are new in CE9:
• CE9.0 - RoomKit
• CE9.1 - CodecPlus, and Room55
• CE9.2 - Room70
• CE9.4 - CodecPro, Room70G2, and Room55Dual
• CE9.6 - Room Kit Mini
• CE9.8 - Board 55/55S, Board 70/70S, and Board 85S
• CE9.12 - Desk Pro
• CE9.13 - Room Panorama, Room 70 Panorama
For more details, we recommend reading the Software release
notes:
► https://www.cisco.com/c/en/us/support/collaboration-
endpoints/desktop-collaboration-experience-dx600-series/tsd-
products-support-series-home.html
What’s new in CE9
New features and improvements in CE9.13
New products
• Cisco Webex Room Panorama
• Cisco Webex Room 70 Panorama
Support for Cisco Webex Control Hub
Configuration Management (All Products)
Cisco Webex Control Hub has been extended to
allow more control over devices that are registered
on premises and linked to Webex Edge for Devices.
The new configuration management feature, disabled
by default, will allow write-access to many device
configurations. This can be enabled through Control
Hub.
Easy-join Webex Personal Meeting Rooms
(All Products)
Devices linked to Webex Edge for Devices can now
search directly for users in the Webex organization.
A button to join their Personal Meeting Room (PMR)
will be displayed in the search result next to the user’s
name.
Real-time media metrics when joining
Webex meetings (All Products)
Devices linked to Webex Edge for Devices will be
visible in the media troubleshooting section in Control
Hub in the same way fully Webex registered devices
are today. This will make it easier to troubleshoot
media quality issues.
In-call touch forwarding (Boards)
Touch forwarding has been enabled for use while
in-call and can be activated and deactivated using a
floating toolbar.
Support for virtual backgrounds (Desk Pro)
You can upload your own virtual backgrounds. Images
are uploaded via the web interface. You can then
select from one of the images via the GUI.
You can also use the content from an input device,
such as a computer, as a virtual background.
Far End Cameral Control when dialing into
CMS Meetings (All Products)
When you dial into a CMS meeting you can control
the camera of the active speaker. Just open the
participant list to find the button for “Remote Camera”
control.
Note: If the active speaker is frequently changing from
person to person, it may be challenging to control
the camera of the intended participant. You cannot
manually select a specific participant for the FECC;
it’s always the current active speaker.
Custom text to video stream
(Codec Plus, Codec Pro, Room 70 G2, Room Kit, Room Kit Mini, Room
55 Dual, Room 70)
You can add time, date, and/or a custom text string
to a video stream (
xCommand Video Graphics Text
Display
). You can add this text to the main video
stream, the presentation stream, or to the local video
output.
Introduction
Configuration
Peripherals
Maintenance
Device settings
Appendices
Introduction

D15362.16 DX70 and DX80 Administrator Guide CE9.13, JUNE 2020. www.cisco.com — Copyright © 2020 Cisco Systems, Inc. All rights reserved.
7
Cisco Webex DX70 and DX80 Administrator Guide
New features and improvements in CE9.12
New products
• Cisco Webex Room USB
• Cisco Webex Desk Pro
DX Series renamed to Desk Series
The new Desk Series contains the DX70, DX80, and Desk
Pro products.
Support for using Room Kit Mini with Samsung
Flip (Room Kit Mini)
The Room Kit Mini can be connected with a Samsung Flip
device to get a touch interface. Then, you can also use
the whiteboard feature. You can easily switch between
the Samsung Flip and the Room Kit Mini user interfaces
by pressing the Flip button.
One-way whiteboard sharing in-call (Boards)
You can now share the whiteboard while in-call. To initiate
this, click the Home button followed by the Whiteboard
button. Enter Editing mode and the sharing will begin.
To stop the whiteboard sharing, press the Done button,
followed by Stop sharing.
Note that the whiteboard share is one-way. Only
the device sharing the whiteboard can draw on the
whiteboard. Remote participants can only observe.
Webex Join support for Personal Meeting
Room IDs (All Products)
The Webex Join button now supports dialing Personal
Meeting Room (PMR) IDs. You can address them by
entering the full URL or a short path (i.e., username.
sitename); as well as, by entering the meeting number.
PMRs from your recent calls list will be suggested as you
type.
HTTP proxy support for Webex Edge for
Devices (All products)
HTTP Proxy support has been enhanced to include
devices linked to Webex Edge for Devices.
Webx Edge for Devices can select the HTTP Proxy
services for the HttpClient, HttpFeedback, and/or the
WebEngine.
If so enabled, all HTTP requests to the Webex Cloud will
use the configured HTTP Proxy. However, regardless of
the Proxy Mode, the device will never communicate with
the Cisco Unified Communication Manager (CUCM), MRA
(CUCM via Expressway), or TMS (phonebook) via proxy.
In addition, the following new settings allow you to enable/
disable use of the HTTP Proxy:
• HttpClient UseHttpProxy
• HttpFeedback UseHttpProxy
• WebEngine UseHttpProxy
Hide Proximity notifications (All products)
You can now hide the Proximity notifications. This
includes the Proximity icon that is visible on-screen when
someone is paired with Proximity and the notification that
appears when someone has just paired.
This can be configured via the API or the web interface of
the device, or it can be provisioned (e.g., via TMS).
Hide scheduled meeting titles (All products)
A setting has been added to hide/show the scheduled
meeting titles. When hidden, the words “Scheduled
meeting” will be displayed instead of the meeting
information.
Increased manual zoom range
(Room Kit Mini, Room Kit and Room 55)
The manual zoom range is increased from 2x (Room Kit
Mini)/ 3x (Room Kit, Room 55) to 5x. The automatic best
overview or speaker track zoom range is not changed.
Introduction
Configuration
Peripherals
Maintenance
Device settings
Appendices
Introduction

D15362.16 DX70 and DX80 Administrator Guide CE9.13, JUNE 2020. www.cisco.com — Copyright © 2020 Cisco Systems, Inc. All rights reserved.
8
Cisco Webex DX70 and DX80 Administrator Guide
Improvements for the Call Control page in the
web interface of the device (All products)
• On a SpeakerTrack-enabled device, a button can be
used to alter the current SpeakerTrack status. Click
the button to disable or enable SpeakerTrack.
• The Mute button will correctly reflect the mute status
of the microphones.
• When a preset is selected and accepted by the video
device, it will be highlighted in blue. This includes
selection from other devices, such as the Touch 10
controller. Note that preset highlighting and detection
occurs only if the Camera Positions window is open.
• On devices where PresenterTrack is configured, it can
be enabled from the Camera Positions window.
• For cases where the main video consists of a
composited image of more than one input source, the
DefaultMainVideo source will be displayed. By default,
this is the main camera. This requires the remote
monitoring option key.
• Regarding the display of directory entries, recent
calls, and favorite entries, the maximum number that
can be displayed at one time is increased from 50 to
100. The search field can be used to narrow down the
list.
Introduction
Configuration
Peripherals
Maintenance
Device settings
Appendices
Introduction

D15362.16 DX70 and DX80 Administrator Guide CE9.13, JUNE 2020. www.cisco.com — Copyright © 2020 Cisco Systems, Inc. All rights reserved.
9
Cisco Webex DX70 and DX80 Administrator Guide
New features and improvements in CE9.10
Webex Edge for Devices (All products)
Devices running CE9.10 are ready for Webex Edge for
Devices. You can use Webex Edge for Devices to link your
on-premises devices to the Cisco Webex cloud service.
This gives you access to select cloud features, while
your registration, device management, calling, and media
services remain on-premises. You can manage cloud
services and get device diagnostics from them in Webex
Control Hub.
You need the Device Connector tool to get started. Read
the Release Notes on Webex Help Center to find out
when the tool is available.
Easier to join Webex meetings (All products)
We have added a Join Webex button in the user interface.
The button is shown by default.
The Join Webex button allows users to join meetings
by entering the meeting number without a domain.
This information is available in the Webex email invite.
The infrastructure must allow calls to be routed to
*@webex.com.
New procedure for defining a password policy
All products)
In earlier CE software versions, the password policy was
defined using the systemtools securitysettings command.
This command has now been replaced by configurations
(
UserManagement PasswordPolicy *
). Some of the
previous restrictions are discontinued.
When upgrading a device from an earlier CE software
version, the values previously stored through the
systemtools securitysettings command are preserved.
The ones that are no longer reflected by configurations
are deleted. The previous defaults were all 0, so on
upgrade, if no changes had been made, the new defaults
are also all 0.
SNMP is switched off by default (All products)
SNMP (Simple Network Management Protocol) is
switched off by default. Also, we no longer provide a
default community name.
When upgrading a device from an earlier CE software
version, the values that were previously stored are
preserved.
Introduction
Configuration
Peripherals
Maintenance
Device settings
Appendices
Introduction

D15362.16 DX70 and DX80 Administrator Guide CE9.13, JUNE 2020. www.cisco.com — Copyright © 2020 Cisco Systems, Inc. All rights reserved.
10
Cisco Webex DX70 and DX80 Administrator Guide
New features and improvements in CE9.9
Updates to the UI Extensions editor
(All products)
The In-room control editor has been renamed to UI
Extensions editor to reflect the additional features that
are available. You can launch the editor by going to
Integration> UI Extension Editor on the web interface. In
addition, the editor’s UI has been updated.
For more information, see the Customization guide for
CE9.9 at ►https://www.cisco.com/go/in-room-control-
docs
Web apps (Boards)
You can use the UI Extensions editor to create web apps.
This way you can access apps such as Jira, Miro, Office
365, and Google docs directly from a board.
Digital signage
(Codec Pro, Codec Plus, Room Kit, Room Kit Mini, Room 55, Room 55D,
Room 70, Room 70 G2, Boards)
Digital signage allows you to display custom content,
such as company news, building maps, or emergency
information, when the device is in half-wake mode.
Users can interact with the signage content only on
Webex Boards.
Fetch branding images and custom wallpaper
from an external URL (All products)
You can use the
xCommand UserInterface Branding
Fetch
API command to download branding images or a
custom wallpaper from an external URL.
Custom wallpaper is not available for Webex Boards.
Changes to the Network Settings menu
(All products)
The Network connection page on the device’s user
interface has changed. First you see an overview of the
current network set-up, then you can open the Ethernet
or Wi-Fi settings if you want to change them. A few
settings, which were not available from the GUI before,
are now added.
Changes to the ultrasound settings (All products)
All products now has the same default value for the Audio
Ultrasound MaxVolume setting. Also the volume range is
aligned between the different products. Product specific
differences are handled internally and no longer reflected
in the range of values and the default value. We have not
made any changes to the sound level that is played out
from a device.
TLS configuration changes (All products)
For security reasons we have made some changes to
the TLS configuration on HTTPS client, syslog, and SIP
connections:
• You must explicitly turn off certificate verification if you
don’t want to perform a certificate check. By default,
certificates are checked on all TLS connections.
• The minimum TLS version is increased from version
1.0 to 1.1 (exceptions for CUCM and SIP, which still
allow version 1.0). Also note that the Webex cloud is
using TLS version 1.2.
• You can configure certificate verification for
provisioning, phone book, and other HTTP servers
separately. The former NetworkServices HTTPS
VerifyServerCertificate setting, which covered all
these server types, are replaced by three settings:
Provisioning TLSVerify, Phonebook Server [1] TlsVerify,
and HTTPFeedback TlsVerify.
• You can configure certificate verification for external
logging (both audit logging and regular logging).
• For SIP, the certificates are verified against the
Custom CA list, which is uploaded to the device
manually using the web interface or API. For other
connections, the certificates are verified against either
the Pre-installed CA list on the device, or the Custom
CA list.
Introduction
Configuration
Peripherals
Maintenance
Device settings
Appendices
Introduction

D15362.16 DX70 and DX80 Administrator Guide CE9.13, JUNE 2020. www.cisco.com — Copyright © 2020 Cisco Systems, Inc. All rights reserved.
11
Cisco Webex DX70 and DX80 Administrator Guide
Updates to whiteboarding and annotations
(Boards)
• Create, edit, and move stickies on your whiteboard
and annotations.
• Choose between three different pen sizes when
whiteboarding and annotating.
• Create copies of whiteboards and annotations. The
whiteboard or annotated snapshot of a presentation is
stored in the Whiteboard menu. You can go back to it
and continue work on the copy as you would on any
other whiteboard or snapshot.
Wired touch redirect (Boards)
Touch redirect enables you to control your laptop from a
Webex Board screen. You must connect the laptop to the
Webex Board with an HDMI cable (wired sharing) and a
USB-C cable.
Touch redirect only works outside of call.
This feature is only available on the second generation of
boards (Webex Board 55S, 70S, and 85S).
Introduction
Configuration
Peripherals
Maintenance
Device settings
Appendices
Introduction

D15362.16 DX70 and DX80 Administrator Guide CE9.13, JUNE 2020. www.cisco.com — Copyright © 2020 Cisco Systems, Inc. All rights reserved.
12
Cisco Webex DX70 and DX80 Administrator Guide
New features and improvements in CE9.8
New products
The Cisco Webex Boards, which previously have been
available only for cloud registration, are now also available
for on-premises registration:
• Cisco Webex Board 55/55S
• Cisco Webex Board 70/70S
• Cisco Webex Board 85S
Support for USB headsets
(Room Kit, Room Kit Mini, Room 55)
You can connect a USB Headset, Handset or USB
Bluetooth dongle to the USB-A port on the devices. This
is similar to the DX series.
Extended support for HTTP requests (All products)
Since CE9.6 a device has been able to send arbitrary
HTTP(S) Post and Put requests to an HTTP(S) server.
This feature is extended to support more request types
(Get, Patch, and Delete), and also to handle data that is
returned from the server (response headers and body).
Improved USB-C experience (Room Kit Mini)
The Room Kit Mini is in USB camera mode only when it is
streaming media to a computer over the USB-C port. In
previous releases it was sufficient that at computer was
connected to the USB-C port.
Add participant to CMS conference from the
device UI (All products)
Any user can add another participant to an ongoing CMS
conference using the user interface of the device. This
also includes PSTN calls. When the participant accepts
the call, the participant will be added to the same CMS
conference.
In this case the device will tell the CMS to dial the
participant using the Active Control mechanism. Then the
CMS will dial directly to the participant you want to add.
For this feature to work, Active Control must be
enabled on the device, the call protocol must be
SIP, and the CMS must be on version 2.4 or higher.
The feature doesn't work if multipoint mode is set to
CUCMMediaResourceGroupList.
Register a device to Cisco Webex using API or
local web Interface (All products)
You can register a device to Cisco Webex remotely, so
you don’t have to be in the same room as the device. You
can do this programmatically from the API or use the local
web interface. In earlier releases you had to use the on-
screen setup assistant.
From the web interface, you can only start Webex
registering if the device is not currently registered
anywhere. If you are using the API, you can start Webex
registering even if the device is currently registered to an
on-premise system (CUCM or VCS).
Pre-installed list of Certificate Authorities -
CAs (All products)
A list of commonly used CA certificates are pre-installed
on the video conferencing device. The device uses this
list when validating certificates from external servers that
it communicates with:
• HTTP servers that host content used by the HttpClient
API or macros
• SMTP mail servers (only relevant for Webex Boards)
A factory reset does not delete the list.
xAPI over WebSocket: Authentication using
auth protocol header (All products)
Authentication using an auth protocol header is
supported. This comes in addition to Basic authentication
using an HTTP header field.
This means that browser-based clients, which don’t have
direct control over HTTP headers, can authenticate to a
device directly from the browser using Javascript.
More device settings can be provisioned from
Cisco UCM than before (All products)
If the device is registered to Cisco UCM 12.5(1)SU1 more
settings and parameters can be provisioned from UCM
than before (Device > Product Specific Configuration
Layout). Also, if these settings are changed locally on the
device, the new value can be written back to the UCM.
Most of the device’s public settings (xConfiguration), are
included. Exceptions are made for Network, Provisioning
and SIP settings.
See the Video Endpoints Management Overview section
in the ►Release Notes for Cisco Unified ommunications
Manager and the IM and Presence Service, Release
12.5(1)SU1 for more information.
Introduction
Configuration
Peripherals
Maintenance
Device settings
Appendices
Introduction

D15362.16 DX70 and DX80 Administrator Guide CE9.13, JUNE 2020. www.cisco.com — Copyright © 2020 Cisco Systems, Inc. All rights reserved.
13
Cisco Webex DX70 and DX80 Administrator Guide
New features and improvements in CE9.7
Connect to xAPI over a WebSocket
(All products)
You can now connect to the xAPI over WebSocket. The
communication channel over WebSocket is open both
ways until it is explicitly closed. This means that the server
can send data to the client as soon as the new data is
available, and there is no need for re-authentication
for every request. This improves speed significantly
compared to HTTP.
Each message contains a complete JSON document and
nothing else. Many programming languages have good
library support for WebSocket and JSON-RPC.
WebSocket is not enabled by default. Note that
WebSocket is tied to HTTP and HTTP or HTTPS must be
enabled before you can use WebSocket.
For more information, see ►xAPI over WebSocket guide.
Graphical sound mixer available on Audio
Console
(Codec Pro, MX700, MX800, Room 70 G2, Room 70D G2, SX80)
The Audio Console now has a graphical sound mixer.
It has 8 user-definable parametric equalizer settings. A
setting consists of up to 6 sections, each of which has
its own filter type, gain, center/crossover frequency and
Q value. Each section is shown with its own color and
the effect of altering any of the parameters immediately
becomes visible in the graph.
For more information, see the Customization guide for
CE9.7 at ►https://www.cisco.com/go/in-room-control-
docs
Ambient noise reporting
(Codec Plus, Codec Pro, Room 55, Room 55 Dual, Room 70, Room 70 G2,
Room Kit, Room Kit Mini)
The Room series devices can be configured to report the
stationary ambient noise level in the room. The reported
value is an A-weighted decibel value (dBA), which reflects
the response of the human ear. Based on reported noise,
facility management or a building manager can intervene
to troubleshoot the issue.
All signal processing related to this feature is local and the
only data transmitted is the calculated noise level.
Support for multiple SRG-120DH/PTZ-12
cameras (Codec Plus)
You can now connect up to three SRG-120DH/PTZ-12
cameras to a Codec Plus using an HDMI and an Ethernet
switch.
Other updates
• 1080p support for Room Kit Mini when it is used as a
USB camera. (Room Kit Mini)
• You can turn video off and on during calls. (All products)
• A system administrator can prevent the use of HTTP
and only allow HTTPS Post and HTTPS Put requests.
(All products)
Introduction
Configuration
Peripherals
Maintenance
Device settings
Appendices
Introduction

D15362.16 DX70 and DX80 Administrator Guide CE9.13, JUNE 2020. www.cisco.com — Copyright © 2020 Cisco Systems, Inc. All rights reserved.
14
Cisco Webex DX70 and DX80 Administrator Guide
New features and improvements in CE9.6
New product
• Cisco Webex RoomKitMini
HDCP support
(Codec Plus, Codec Pro, Room 55 Dual, Room 70, Room 70 G2)
One of the device's HDMI inputs can be configured
to support HDCP (High-bandwidth Digital Content
Protection) protected content. This allows customers to
re-purpose the screen by connecting devices such as a
Google Chromecast, an Apple TV, or an HDTV decoder.
This type of content cannot be shared while in a call.
When the connector is configured to support HDCP, it
is reserved for this type of content. This means that you
cannot share any content from this specific connector
while in a call, not even non-protected content from a
laptop.
Remove default buttons from the user interface
(All products)
If you don’t need all of the default buttons on the user
interface, you can remove the ones that you don’t
need. This makes it possible to fully customize the user
interface. The configuration only removes the buttons, not
the functionality as such, and the custom In-Room Control
panels can still be exposed.
For more information, see the Customization guide at
►https://www.cisco.com/go/in-room-control-docs
HTTP Post and Put requests (All products)
This feature makes it possible to send arbitrary HTTP(S)
Post and Put requests from a device to an HTTP(S)
server.
By using macros, you can send data to an HTTP(S) server
whenever you want. You can choose what data to send,
and structure them as you like. This way you can adapt
the data to an already established service.
Security measures:
• The HTTP(S) Post/Put feature is disabled by default.
• The system administrator can specify a list of HTTP(S)
servers that the device is allowed to send data to.
• The number of concurrent Post and Put requests is
limited.
Support for 3rd party USB controllers
(Codec Plus, Codec Pro, DX70, DX80, Room 55, Room 55 Dual, Room 70,
Room 70 G2, Room Kit)
You can use a 3rd party USB input device to control
certain functions on a room device. A Bluetooth remote
control with a USB dongle and a USB keyboard are
examples of such input devices. You can setup the
desired features through macros.
This feature is meant to complement the functionality of
the Touch 10 or the DX user interfaces. It is not meant to
replace the Touch 10 and DX user interfaces.
For more information, see the Customization guide at
►https://www.cisco.com/go/in-room-control-docs
Content priority (All products)
You can now configure your device to prioritize bandwidth
usage for either Main Video Channel or Presentation
Channel.
xConfiguration Video Presentation Priority:
<Equal, High>
Equal is the default configuration and means 50 /
50 bandwidth division. Selecting “High” divides the
bandwidth 25 / 75 in favor of the presentation channel.
Other updates (All products)
• You can start and control recording meetings from
the device’s user interface, provided that recording is
supported by your infrastructure.
• Edit contact’s information on UIs.
• SIP calls now display the SIP Session ID field in the
logs to help identify calls.
• Ability to use ICE over MRA to locate the best path for
media.
Introduction
Configuration
Peripherals
Maintenance
Device settings
Appendices
Introduction

D15362.16 DX70 and DX80 Administrator Guide CE9.13, JUNE 2020. www.cisco.com — Copyright © 2020 Cisco Systems, Inc. All rights reserved.
15
Cisco Webex DX70 and DX80 Administrator Guide
New features and improvements in CE9.5
Presentation source composition
(All products except SX10, DX70, DX80)
With using two or more content sources and sending
them as one image, you can create a new experience for
sharing in meetings.
This gives users more flexibility with what they present
to remote sites. You can configure the presentation
composition through in-room controls together with
macros or an external controller.
The maximum number of different sources is determined
by the device in use:
• SX20, MX200G2, MX300G2, and RoomKit: two
sources
• CodecPlus, Room55, Room55Dual, and Room70:
three sources
• SX80, MX700, MX800, CodecPro, and Room70G2:
four sources
You can only compose content that has been shared
through a cable.
Audio Console on the web interface
(SX80, CodecPro)
The new Audio Console is natively available on the web
interface. The audio console gives you simplified tools to
route audio from an input to an output. The Audio Console
replaces the old java-based CE Console that is no longer
maintained.
When you access the Audio Console for the first time
you will see the default system audio routes. The Audio
Console is controlled by an underlying macro, which is
saved and started once you select Choose to overwrite
the current device configurations.
For more information, see the Customization guide at
►https://www.cisco.com/go/in-room-control-docs
Classroom set-up
(SX80, MX700, MX800, CodecPlus, CodecPro, Room55Dual, Room70,
Room70G2)
The Classroom template uses macros to tailor a room set-
up that works well for presenting and teaching scenarios.
The template provides easy setup, management, and use
of the room.
The Classroom set-up works similarly to the Briefing
Room set-up (which is available for SX80, CodecPro,
MX700, MX800, and Room70G2), but it doesn’t require
three screens.
Support for Korean keyboard (All products)
Korean keyboard input is supported on Touch 10 when
the user interface language is set to Korean.
Remote monitoring of screen status (SX20, SX80)
The remote monitoring of screen status that has been
available for the Webex Room series and SX10, is now
available for SX20 and SX80.
The codec can wake up the screen from standby
mode, or put the screen to standby when the codec
enters standby. The input source can also be changed
automatically when a call is received.
CEC is disabled on the device by default and must be
enabled in the Video Output Connector [n] CEC Mode
setting. Your screen must support CEC for remote
monitoring to work.
Welcome banner (All products)
You can set up a welcome banner that users see after
they sign in to the device's web interface or command line
interface. The banner can for example contain information
you need in order to get started, or things you must be
aware of when setting up the device.
Introduction
Configuration
Peripherals
Maintenance
Device settings
Appendices
Introduction

D15362.16 DX70 and DX80 Administrator Guide CE9.13, JUNE 2020. www.cisco.com — Copyright © 2020 Cisco Systems, Inc. All rights reserved.
16
Cisco Webex DX70 and DX80 Administrator Guide
New features and improvements in CE9.4
New products
• Cisco Webex CodecPro
• Cisco Webex Room55Dual
• Cisco Webex Room70G2
Rebranding from Cisco Spark to Cisco Webex
(All products)
Cisco Spark has changed its name to Cisco Webex, and
the user interface elements that displayed Spark are
changed to Webex. In the activation flow you now see
Cisco Webex as a registration option instead of Cisco
Spark.
The following products have gotten new names:
• Cisco Spark RoomKit is now Cisco Webex RoomKit
• Cisco Spark RoomKit Plus is now Cisco Webex
RoomKit Plus
• Cisco Spark CodecPlus is now Cisco Webex
CodecPlus
• Cisco Spark QuadCamera is now Cisco QuadCamera
• Cisco Spark Room55 are now Cisco Webex Room55
• Cisco Spark Room70 are now Cisco Webex Room70
• Cisco DX70 is now Cisco Webex DX70
• Cisco DX80 is now Cisco Webex DX80
The maximum number of Proximity clients is
increased
(CodecPlus, CodecPro, RoomKit, Room55, Room55Dual, Room70,
Room70G2)
A Cisco Webex Room Series device can have up to 30
paired clients simultaneously when the Proximity service
ContentShare ToClients is disabled. If ContentShare
ToClients is enabled, the limit of paired clients is 7 which
is the same as in earlier software versions.
Support for content sharing using H.263 in a
call between Cisco Webex Room Series and
legacy MXP devices
(CodecPlus, CodecPro, RoomKit, Room55, Room55Dual, Room70,
Room70G2)
Support for H.263 content sharing between MXP and
Cisco Webex Room Series is now available. The Room
Series previously had a limitation where it could not
receive or share content in a separate content channel.
Sharing content from a Room Series device to an MXP
device would in earlier versions compose the presentation
into the main video stream.
This is only supported in certain scenarios:
• Direct H.323 calls (IP dialing) between a Room Series
device and an MXP device.
• MXP registered on VCS on H.323 and a Room Series
device registered to the same VCS on either SIP
or H.323. Note that making an H.323 to SIP call on
a VCS requires that an interworking option key is
installed on the VCS.
See the CE9 release notes for information on other
limitations related to this feature.
CUCM provisioning of the admin settings
lockdown configuration (All products)
The admin settings lockdown configuration, that was
introduced in CE9.2.1, can now be provisioned from
CUCM. You can lock a selection of the settings on the
settings menu on all of your devices simultaneously when
you configure them through CUCM.
Your CUCM may require a new device package in order to
expose the new fields for this configuration.
Enable backlight compensation from the user
interface (DX70, DX80)
A new setting on the DX70 and DX80 main menu enables
and disables backlight compensation. This is a fixed
setting that increases (on) or decreases (off) the sensors
brightness levels in order to compensate for sunlight or
other bright light sources behind the user. The backlight
compensation sets the sensor to a fixed level and it is not
auto adjusted to the backlight.
Changed default HTTP mode from
HTTP+HTTPS to HTTPS (All products)
The default value of NetworkServices HTTP Mode
is changed from HTTP+HTTPS to HTTPS. This is to
increase the security of the room devices on default
configuration. Upgrading from earlier software versions
will not automatically change the default value and it will
stay on HTTP+HTTPS to avoid breaking current HTTP
implementations.
The change is seen on new devices running CE9.4.0 or
later, or if the device is factory reset on CE9.4.0. The
HTTP requests are redirect to HTTPS and on the first
visit to the device’s web interface, the device displays
an “Insecure connection warning”. To proceed to the
web interface, you need to create an exception in your
browser. This is a one-time operation unless you access
the web interface with a different browser that has never
visited the device web interface or if the device is factory
reset.
In-Room Control update (All products)
You can add buttons for as many panels as you want on
the home screen as well as on the in-call screen of the
user interface.
Introduction
Configuration
Peripherals
Maintenance
Device settings
Appendices
Introduction

D15362.16 DX70 and DX80 Administrator Guide CE9.13, JUNE 2020. www.cisco.com — Copyright © 2020 Cisco Systems, Inc. All rights reserved.
17
Cisco Webex DX70 and DX80 Administrator Guide
New features and improvements in CE9.3
Backup and restore settings and custom
elements (All products)
You can include custom elements as well as
configurations in a backup file bundle (zip). You can
choose which of the following elements to include in the
bundle:
• Branding images
• Macros
• Favorites
• Sign-in banner
• In-room control panels
• Configurations (all or a sub-set)
In previous software versions, you could only backup the
configurations.
The backup file can either be restored manually from the
device’s web interface, or you can generalize the backup
bundle so that it can be provisioned across multiple
devices, for example using Cisco UCM or TMS.
You will find the backup and restore functionality under
Maintenance > Backup and Restore on the device’s web
interface.
Provisioning of custom elements (All products)
The backup bundle, as described above, can be
provisioned to many devices using Cisco UCM or TMS. It
is important that device specific information is removed
when creating a backup bundle intended for multiple
devices. If you include device specific information in
such a bundle, you may end up with multiple devices that
cannot be reached.
By provisioning a non-device specific backup bundle,
you can for example, copy a device’s setup with macros,
branding elements, and in-room control panels across
multiple devices.
Currently, provisioning via Cisco UCM will not restore any
configurations, only the other custom elements; TMS will
restore everything that is included in the backup bundle.
See the release note for more details about provisioning.
In-Room Control updates (All products)
The following functionality is added to the in-room control
feature:
• You can add buttons for up to 20 panels in total. The
buttons appear on the home screen or the in-call
screen of the user interface depending on the panel
type.
• As before, there are three types of in-room control
panels: global panels (always available), in-call panels
(available only when in call), and out-of-call panels
(only available when not in a call). The entry point for
the global panel has been removed from the status
bar (top right corner of the user interface). Buttons
to open global panels are added to both the home
screen and the in-call screen instead, together with
the buttons for the out-of-call only and in-call only
panels, respectively.
• You can make standalone trigger-buttons, which are
buttons that trigger an event directly, without opening
a panel on the user interface.
Also the following features are added in the in-room
control editor:
• Some new icons are available.
• A set of colors to choose from for the in-room-control
buttons.
• Double click text elements to edit text directly.
• Drag and drop in-room control XML files into the
editor.
For a full description of in-room controls, see the
Customization guide at ►https://www.cisco.com/go/in-
room-control-docs
Introduction
Configuration
Peripherals
Maintenance
Device settings
Appendices
Introduction

D15362.16 DX70 and DX80 Administrator Guide CE9.13, JUNE 2020. www.cisco.com — Copyright © 2020 Cisco Systems, Inc. All rights reserved.
18
Cisco Webex DX70 and DX80 Administrator Guide
Support for ISDN Link (All products)
ISDN Link with software version IL1.1.7 is supported for all
devices that supports CE9.3.0.
As before, when using automatic pairing (which allows
the ISDN Link to be automatically discovered by the video
conferencing device) IPv6 must be enabled on the video
conferencing device.
One Button to Push snooze (All products)
You are able to snooze an One Button to Push (OBTP)
meeting reminder for 5 minutes. The snooze time cannot
be changed. The reminder typically appears if you are in
a call and a scheduled meeting is about to start. You can
snooze the reminder for 5 minutes each time it appears
until the meeting has ended.
Adjust the call rate before making a call
(All products)
As soon as you start typing in the Search or dial field, you
can open a dialog and select a custom call rate. In earlier
releases this was available only when selecting an entry
from the Directory.
If you don’t select a custom call rate, you get the rate set
in the Conference DefaultCall Rate setting.
Select ring-tone and adjust ring-tone volume
(All products)
You can select a ring-tone and adjust the ring-tone
volume from the settings menu on the user interface.
In the previous releases this was done from the web
interface.
Resume a postponed upgrade (All products)
When you get a notification about software upgrade, you
can choose Upgrade now or Postpone. If you postpone
the upgrade, you can resume the upgrade from the
Settings > About this device menu on the user interface
when you are ready; you don’t have to wait for 6 hours
like you had to before.
If you don’t manually resume the upgrade, the upgrade
will start automatically after 6 hours.
Prevent device information from being exposed
in the user interface (All products)
You can prevent important device information from being
exposed in the user interface, for example:
• IP addresses (video conferencing device, touch
controller, UCM/VCS registrar)
• MAC address
• Serial number
• Software version
To enable this feature the following must be done:
• A passphrase must be set for all users with
administrator rights
• UserInterface SettingsMenu Mode must be set to
Locked
• UserInterface Security Mode must be set to Strong
This feature also means that the IP address is not
displayed on the screen when you disconnect a Touch
controller.
Mirrored self-view (DX70, DX80)
You can configure the device to show the self-view
image the way other people see you, or as you would
see yourself in a mirror. Use the Video Selfview Mirrored
setting. Mirrored self-view used to be available only for
Cisco DX devices running Android software.
Mirroring only applies to the self-view image, and has no
effect on the video that is sent to the far end.
Accessibility: Flashing screen on incoming calls
(All products)
You can configure the device so that the screen and
Touch controller flashes red / light grey when the device
receives an incoming call. This feature is mainly targeting
hearing impaired users, making it easier for them to notice
an incoming call.
The feature is disabled by default, and must be enabled
by the Accessibility IncomingCallNotification setting.
Screen status monitoring and control (SX10)
SX10 now has the same CEC (Consumer Electronics
Control) behavior as the devices in the Room series.
The device will use CEC to set the screen in standby
when the device itself enters standby, and wake up the
screen and select the correct video input when the device
itself wakes up from standby. CEC information from the
screen is included in the device’s status. Of course, the
screen must also support CEC and send the relevant
information to the device.
CEC is disabled on the device by default, and must be
enabled in the Video Output Connector [1] CEC Mode
setting.
One common API guide (All products)
We have gathered all API information in one API guide,
that covers all products. This is in contrast to earlier
releases were we have had one API guide per product.
Introduction
Configuration
Peripherals
Maintenance
Device settings
Appendices
Introduction

D15362.16 DX70 and DX80 Administrator Guide CE9.13, JUNE 2020. www.cisco.com — Copyright © 2020 Cisco Systems, Inc. All rights reserved.
19
Cisco Webex DX70 and DX80 Administrator Guide
New features and improvements in CE9.2
New product
• Cisco Webex Room70 (formerly Cisco Spark Room70)
Macro framework (All products except SX10)
The macro framework allows users and integrators to
write JavaScript macros in order to automate scenarios
and customize endpoint behavior so that it suites an
individual customer’s requirements.
The combination of macros and powerful features such as
listening for events/status changes, automating execution
of commands and configurations, and providing local
control functionality for the In-Room control feature,
provides many possibilities for custom setups.
Minor behavioral changes, such as having the device in
Do Not Disturb for an infinite amount of time, can be easily
realized by macros. Some other examples are: Reset
configurations automatically, make a call at a certain time
of the day, and issue alert or help messages depending
on status changes.
The macro editor, which also provides several example
macros, is available from the device’s web interface.
HDCP support (Room55)
The device’s second HDMI input (Connector 3) can
be configured to support HDCP (High-bandwidth
Digital Content Protection) protected content. This
allows customers to re-purpose the device’s screen
by connecting devices such as a Google ChromeCast,
an AppleTV, or an HDTV decoder. This type of content
cannot be shared while in a call.
When the connector is configured to support HDCP, it
is reserved for this type of content. This means that you
cannot share any content from this specific connector
while in a call, not even non-protected content from a
laptop.
Branding and halfwake customization
(All products except SX10)
You can upload your own text and images to customize
the appearance of the screen and user interface in both
the halfwake state and the awake state.
In the Halfwake state you can:
• Add a background brand image to the screen and
user interface.
• Add a small logo in the bottom right corner of the
screen and user interface.
In the Awake state you can:
• Add a small logo in the bottom right corner of the
screen and user interface.
• Add a label or message in the bottom left corner of
the screen (not the user interface).
Source composition (All products except SX10, DX70, DX80)
You can compose up to four input sources (depending on
how many input sources are available on the codec) into
one image. This is the image that will be sent in the main
video stream to the far end in a call. Source composition
can only be enabled via the API, so we recommend
creating a user interface extension combined with a
macro to control the compositions on demand.
This feature replaces some of the functionality that was
provided by the TC Console application for TC software.
HTTP Proxy support (All products)
You can set up the device to go through a HTTP Proxy
when registering it to Cisco’s cloud service, Cisco Spark.
User interface features (All products)
• The Settings panel is restructured.
• The Settings panel in the user interface can be
protected by the device’s admin password. If the
password is blank, anyone can access the Settings
and factory reset the device.
• If you select the Russian language on the user
interface, you can choose between a Russian
keyboard and a keyboard with a Latin character set.
• Arabic and Hebrew languages are added to the user
interface. Also localized keyboards are included.
• Basic IEEE 802.1x settings are added to the Settings
panel in the user interface.
Cisco TelePresence Precision 60 Camera
support (CodecPlus, Room70)
You can connect Cisco TelePresence Precision 60
cameras to CodecPlus. Note that you need a switch for
the camera control cables if you have more than one
camera. The People Count feature is not supported if
Precision 60 is the only camera type connected to the
codec.
Cisco Spark QuadCamera support (SX80)
You can connect a Cisco Spark QuadCamera to the
SX80. Note that the QuadCamera uses only one of the
codec’s HDMI inputs, while the SpeakerTrack 60 camera
uses two. The People Count feature (in call) is also
available when using the QuadCamera.
Introduction
Configuration
Peripherals
Maintenance
Device settings
Appendices
Introduction

D15362.16 DX70 and DX80 Administrator Guide CE9.13, JUNE 2020. www.cisco.com — Copyright © 2020 Cisco Systems, Inc. All rights reserved.
20
Cisco Webex DX70 and DX80 Administrator Guide
Support for the Snap to Whiteboard feature
(SX80, MX700, MX800, CodecPlus, RoomKit, Room55, Room70)
The Snap to Whiteboard feature is now available for
all products that have a camera with speaker track
functionality: SX80 with Cisco TelePresence Speaker
Track 60 camera or Cisco Spark QuadCamera, MX700/
MX800 with dual camera, RoomKit, RoomKit Plus,
Room55 and Room70.
When the device detects a person that is speaking close
to the whiteboard, the camera view will switch to the
whiteboard area. The wizard in the Settings panel on the
Touch 10 user interface helps you to set up the feature
and define where the whiteboard area is.
Briefing Room mode (SX80, MX700, MX800)
The Briefing Room feature, which was introduced already
in TC software, has been reworked. The in-room control
framework is used for creating the associated user
interface elements.
For MX700 and MX800, Briefing Room is supported only
for dual camera devices. Also, you need a Precision 60
camera, and a total of three screens.
For SX80, Briefing Room is supported when a speaker
track camera, a Precision 60 camera, and three screens
are connected. The speaker track camera can be either
Cisco TelePresence SpeakerTrack 60 or Cisco Spark
QuadCamera.
USB to Serial port support
(CodecPlus, RoomKit, Room55, Room70)
You can connect a USB (Type A) to serial (D-sub 9)
adapter to access the device's API. Cisco recommends
the UC232R-10 USB to RS232 (FTDI) adapter.
Mute and unmute remote participants in a CMS
hosted conference - Active Control (All products)
When a device is enabled for Active Control in a CMS (2.1
or later) conference you can mute and unmute remote
participants from the participant list on the user interface
(the feature must also be enabled on the CMS).
A device that is running software version CE9.2 will not
be unmuted directly. When you try to unmute such a
device remotely, a message will show up on its screen
requesting the user to unmute the audio locally.
API commands for Custom input prompt
(All products)
API commands are introduced to allow for an input prompt
in the user interface:
xCommand UserInterface Message
TextInput *
. When issuing the display command a
prompt with your custom text, a text input field for
the user, and a submit button, shows up on the user
interface. For example, you can prompt a user to leave
feedback after an ended call. You can specify what type
of input you want from the user: single line text, numeric,
password, or PIN code.
The prompt can only be enabled via the API, so it is
recommended to combine it with macros and either a
custom user interface panel or an auto-triggered event.
Certificate upload via API (All products)
ASCII PEM formatted certificates can be installed
directly using multiline API commands (
xCommand
Security Certificates CA Add
, or
xCommand Security
Certificates Services Add
). You can also upload
certificates to a device from its web interface, as before.
API commands for user management (All products)
You can create and manage user accounts directly using
API commands (
xCommand UserManagement User *
).
As before, you can also do this from the device’s user
interface.
Preview mode for In-Room Controls (All products)
The In-Room Control editor has a new preview mode.
A virtual touch interface shows how the design looks.
The user interface is interactive so that you can test the
functionality. It produces real events on the device, which
can trigger any functionality you have created with a third-
party control system. A console in the right pane displays
both the widget values when interacted with, and control
system feedback messages.
Intelligent Proximity changes (All products)
A Proximity indicator is displayed on the screen (middle
right) to inform that one or more clients are paired to the
device with Cisco Proximity. The old indicator (top left),
which was always shown when Proximity was enabled,
has been removed.
You can no longer disable the Proximity services from the
user interface.
The ultrasound settings have moved from Peripherals
Pairing Ultrasound to Audio Ultrasound.
Introduction
Configuration
Peripherals
Maintenance
Device settings
Appendices
Introduction
Other manuals for Webex DX70
2
This manual suits for next models
1
Table of contents
Other Cisco Monitor manuals

Cisco
Cisco Webex Desk Pro User manual

Cisco
Cisco Webex Desk Pro User manual

Cisco
Cisco LCD-100L-PRO-32N User manual

Cisco
Cisco SCH-7IN-TS-B/W User manual

Cisco
Cisco LCD 110L Professional Series User manual

Cisco
Cisco LCD-110-Pro-52S User manual

Cisco
Cisco TelePresence DX70 User manual

Cisco
Cisco Webex Desk Pro User manual

Cisco
Cisco FS-S5501F User manual