Citel C4110 User manual
1
Installation and User Guide

2
Table of Contents
Citel IP Phone C4110 ......................................................................................................................4
Installation and User Guide...............................................................................................................4
Citel IP Phone C4110 Installation .....................................................................................................5
Connecting your C4110 Phone .........................................................................................................6
1. Initialization ..................................................................................................................................7
1.1 To set Network setting ................................................................................................................7
1.2 To set SIP setting....................................................................................................................... 11
1.3 Customizing your C4110 IP Phone...........................................................................................15
1.3.1 To set Ringer Type .................................................................................................................15
1.3.2 To set screen setting sublist....................................................................................................15
1.3.3 To set Volume Control sublist ................................................................................................15
1.3.4 To change the display Language ............................................................................................16
1.3.5 To set Greeting Message ........................................................................................................16
1.3.6 To set Memory key setting.....................................................................................................17
1.3.7 To Model Information Sublist ................................................................................................17
1.3.8 To reboot system ....................................................................................................................17
2. Configuration with web browser.................................................................................................18
2.1 User verification........................................................................................................................18
2.2 Basic Status...............................................................................................................................19
2.2.1 Running Status .......................................................................................................................19
2.2.2 Wizard ....................................................................................................................................19
2.3 Network configuration ..............................................................................................................21
2.3.1 Wide area network (WAN).....................................................................................................21
2.3.2 LAN Configuration ................................................................................................................22
2.4 VOIP Configuration ..................................................................................................................24
2.4.1SIP Line advanced configuration ............................................................................................25
2.4.2 IAX2 configuration................................................................................................................27
2.4.3STUN Set ................................................................................................................................28
2.4.4 Dial peer configuration ..........................................................................................................29
2.5 DSP configuration.....................................................................................................................31
2.5.1 Call Service configuration......................................................................................................32
2.5.2 Digital Map configuration......................................................................................................33
2.5.3 Phone Book configuration .....................................................................................................34
2.5.4 Function Key configuration ...................................................................................................34
2.6 Phone Maintenance ...................................................................................................................36
2.6.1 Auto Update configuration.....................................................................................................36
2.6.2 Syslog configuration ..............................................................................................................37
2.6.3 Save Config............................................................................................................................38

3
2.6.4 Upload WEB page..................................................................................................................38
2.6.5 FTP download ........................................................................................................................39
2.6.7 Account management .............................................................................................................40
2.6.8 Reboot ....................................................................................................................................41
2.7 Security .....................................................................................................................................42
2.7.1 MMI Filter configuration.......................................................................................................42
2.7.2 Firewall configuration............................................................................................................42
2.7.3 VPN Tunnel configuration .....................................................................................................44
2.8 Logout.......................................................................................................................................44
3. Citel IP Phone C4110 Basic Operation .......................................................................................45
3.1 Making a call.............................................................................................................................45
3.2 Answering a call........................................................................................................................45
3.3 Using Hold and Mute................................................................................................................45
3.4 Volume adjustment....................................................................................................................45
3.5 Redial ........................................................................................................................................45
3.6 Call lists ....................................................................................................................................46
3.7 Auto dial/Feature.......................................................................................................................46
3.8 Auto dial/Feature Access...........................................................................................................46
3.9 Voice mail .................................................................................................................................46
3.10 N’pad(Note Pad) .....................................................................................................................46
3.11 Call transfer (Blind and Consult) ............................................................................................47
3.12 Call waiting.............................................................................................................................47
3.13 Conference calling ..................................................................................................................47
3.14 Directory /Phone Book............................................................................................................47
3.15 Auto dial/Feature Access.........................................................................................................48
4 Trouble shooting ..........................................................................................................................49

4
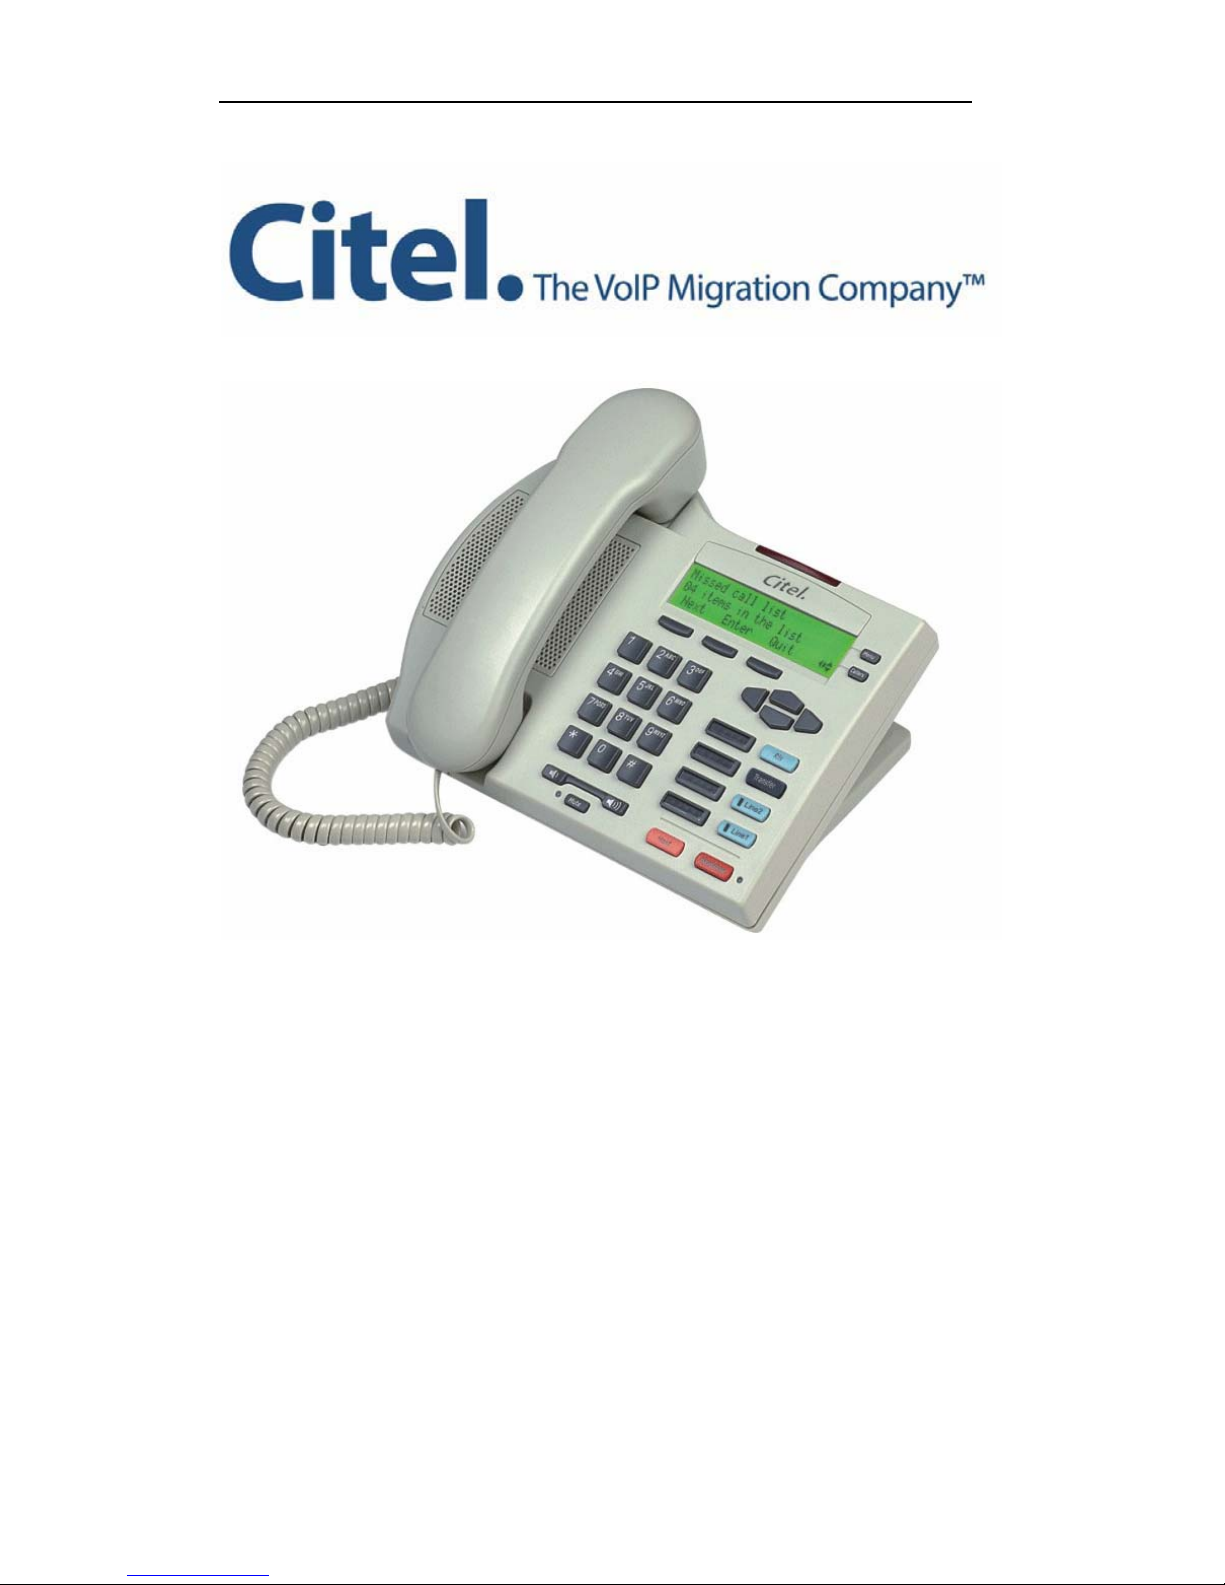
Citel IPPhone C4110
Installation and User Guide
Citel IP Phone C4110 Introduction
Internet Protocol (IP) telephone is the next generation of telecommunication services
that integrates voice and data capabilities to enhance everyday communications and
increase productivity, it takes advantage of new high-bandwidth central office
technologies to provide service, anywhere, at anytime instantly.
Today, many small, medium and large businesses in the world are deploying IP
telephone systems to reduce the cost of operations and increase productivity of
workers.
The design of the C4110 IP Phone includes one-button access to features like
Speakerphone, Phonebook, Call history, Transfer, Conference, Auto dial, etc. And
supports the unique requirements of various users.
Additional features and functionality of C4110 IP Phone includes a display screen,
soft keys, Note Pad (N’pad), etc.
Citel IP Phone C4110 Features
zSIP & IAX2 Support
zWide ranges of codec supported G.729, G..723, Wideband G..722 & G.711
a/ulaw.
zThree-line display screen with backlight and adjustable contrast
zTwo lines supported with corresponding LED indicators
zThree screen-driven soft keys
z4 programmable buttons for auto dial and specific function access
zHigh quality Full-duplex speaker phone for hands free calls
zTwo port 10/100M Ethernet switch for shared PC access
z8 button memory key expansion model (Option)
zRJ9 headset connection jack
zHearing Aid Compatibility(HAC)
zIn line power support (PoE/802,3af), which eliminates power adapters

5
Figure 1 Features and Keys
Citel IP Phone C4110 Installation
The C4110 IP Phone must be set up and configured prior to its first use. If your
system administrator has not already set up your C4110 Phone, please refer to the
C4110 User Guide for basic installation and physical set up configuration information.
Please contact your service provider or regional distributor.
Caution:1. Use your IP Phone C4110with the supplier approved AC adapter
for this model of phone only.
Caution:2 . Severe damage to your IP Phone will occur if this phone is
plugged into PSTN telephone line and an ISDN connection. Consult your
system administrator to ensure that you are plugging your IP Phone into a
10/100 Base-T Ethernet Jack.
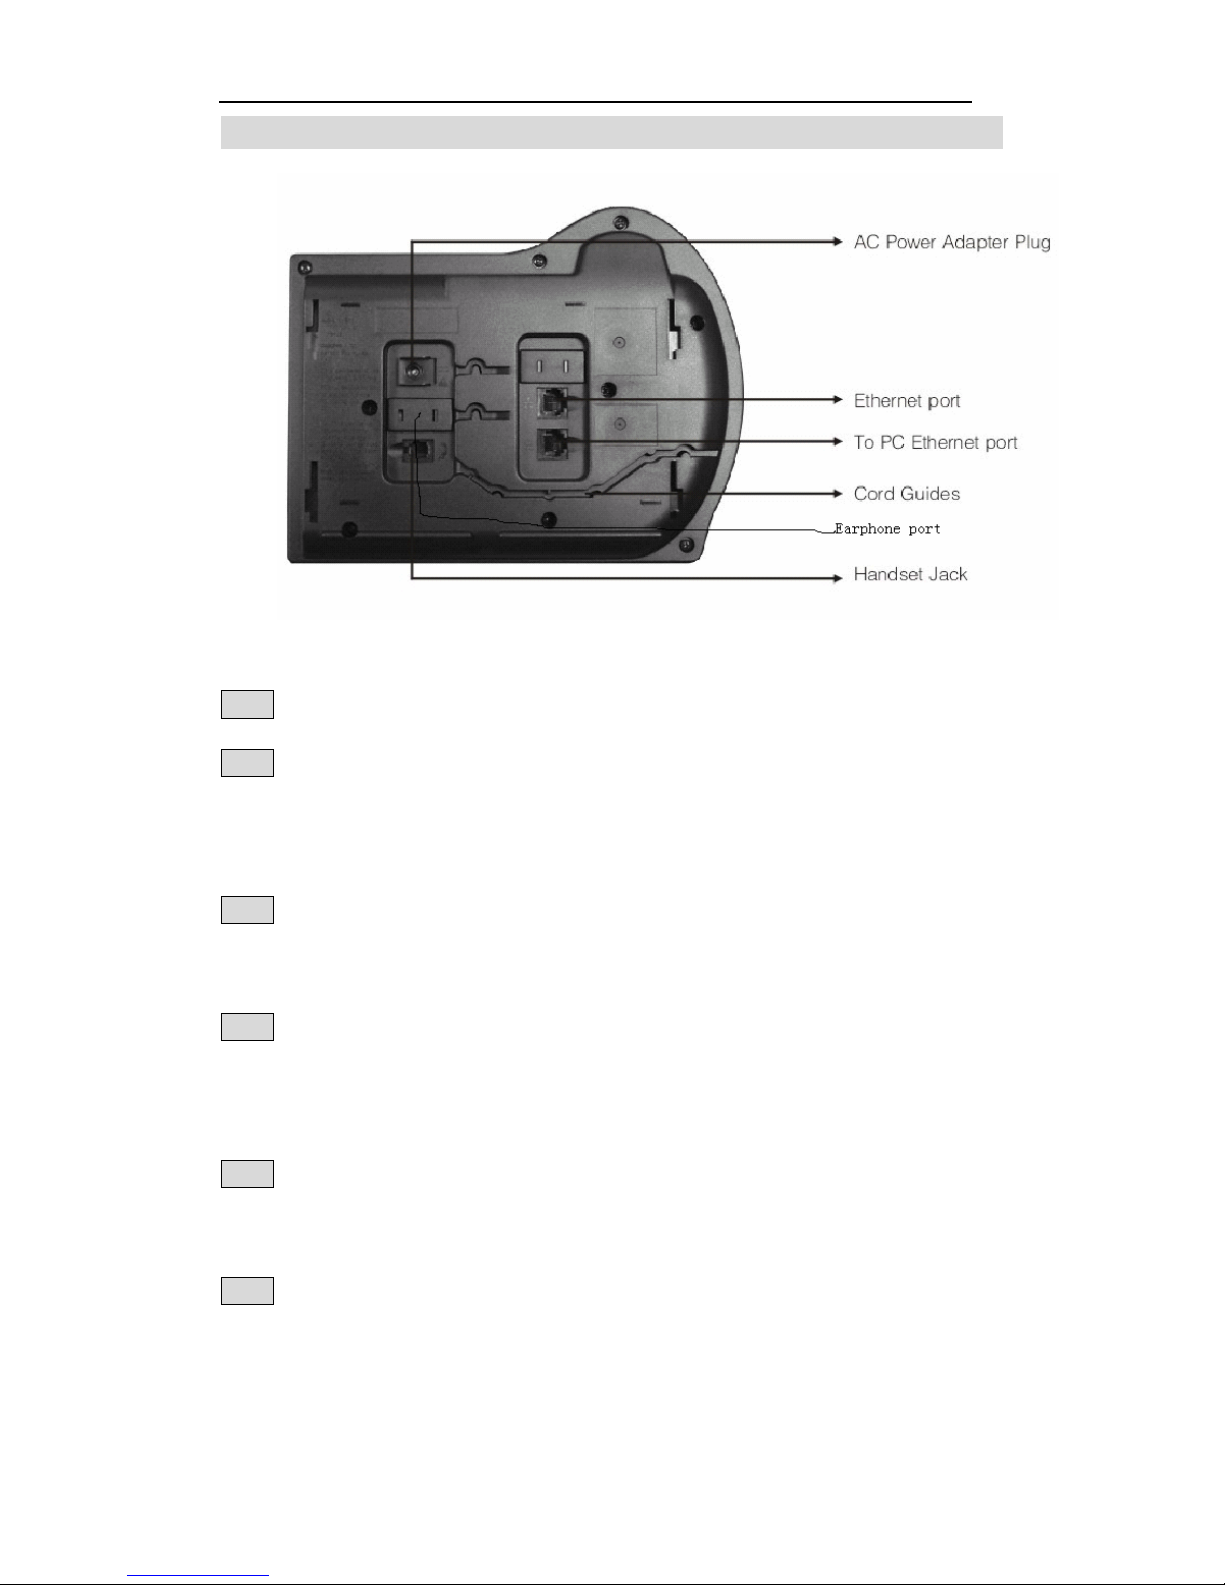
6
Connecting your C4110 Phone
Follow the following steps to connect the C4110 IP Phone
Step1: Pull upward the stand through the slots on the base, remove the stand.
Step2: Connect one end of the handset cord to the handset jack with symbol on the
telephone base and connect the other end of the handset cord to the handset. Route the
cord through the cord guide channel.
Slide the stand back until it clicks into the lock position.
Step3: Connect one end of the supplied Ethernet cable with RJ45 connector to the
Ethernet port on the telephone base and connect the other end of the cable to an IP
voice network jack through the catch on the telephone stand.
Step4: If you are connecting your PC Ethernet through the phone, connect one end of
the PC Ethernet cable to your phone using the RJ45 connector marked with the
symbol on the telephone base, and thread it through the catch on the stand. Connect
the other end to the LAN port on your PC.
Step5: Plug AC power adapter into the base of the telephone, and plug the adapter
into the nearest AC power outlet. If you are using PoE (Power over Ethernet), the AC
power adapter is not needed.
Step6: To wall mount the C4110 IP Phone, you need to remove the stand and reverse
it, then slide it back. Use the wall mounting holes on the stand to attach the IP Phone
on the wall.

7
1. Initialization
1.1 To set Network setting
C4110 can provide web setting mode and phone setting mode.
1. Setting through phone setting
Use the following procedure to configure the Network setting.
1. Press“Menu”i nto main menu, and use Up and Down navigation key or Next key to select
user mode to“A dvanced Sublist ”M ode.
2. Press “Enter ”into ‘Advanced Sublist’ menu.
3. Input the default password:1 2 3
4. Press use Up and Down navigation key or Next key to select user mode to“Network Setting ”
Mode
TosettheNetMode
1. Press Edit use Left and Right key to select IP type as Static, DHCP or PPPOE.
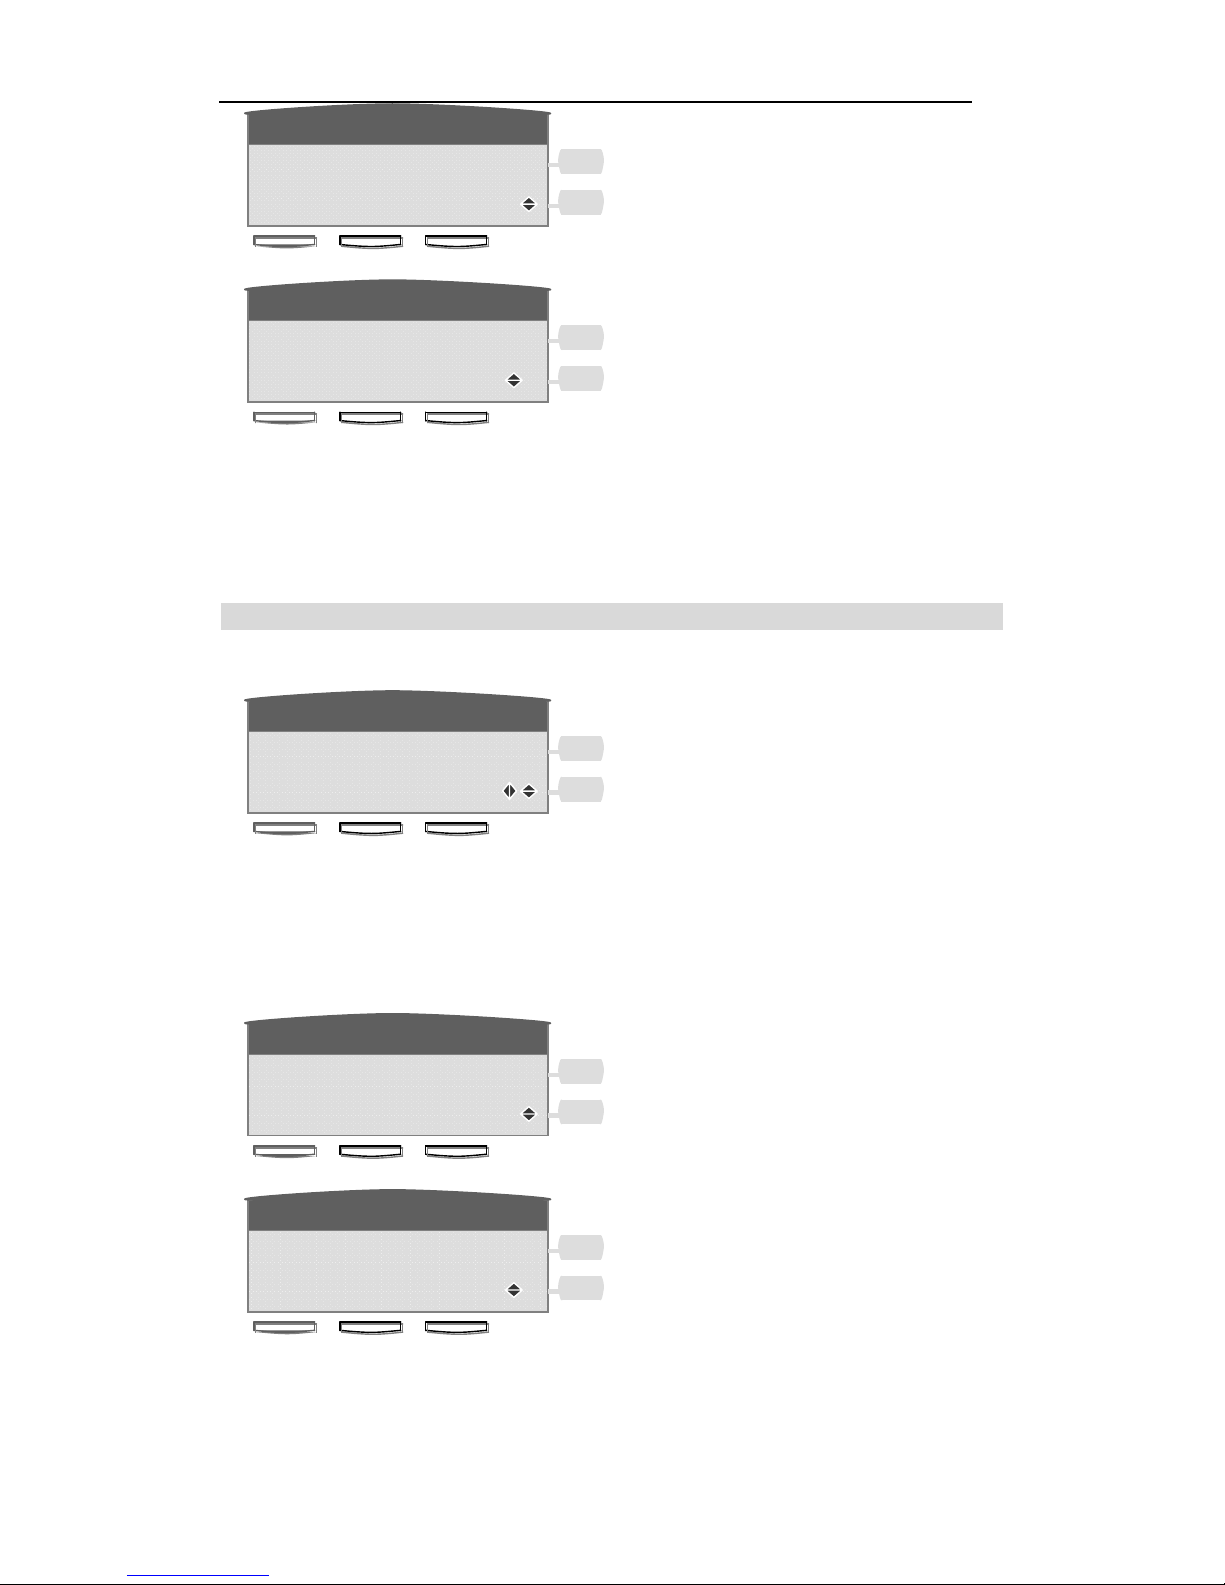
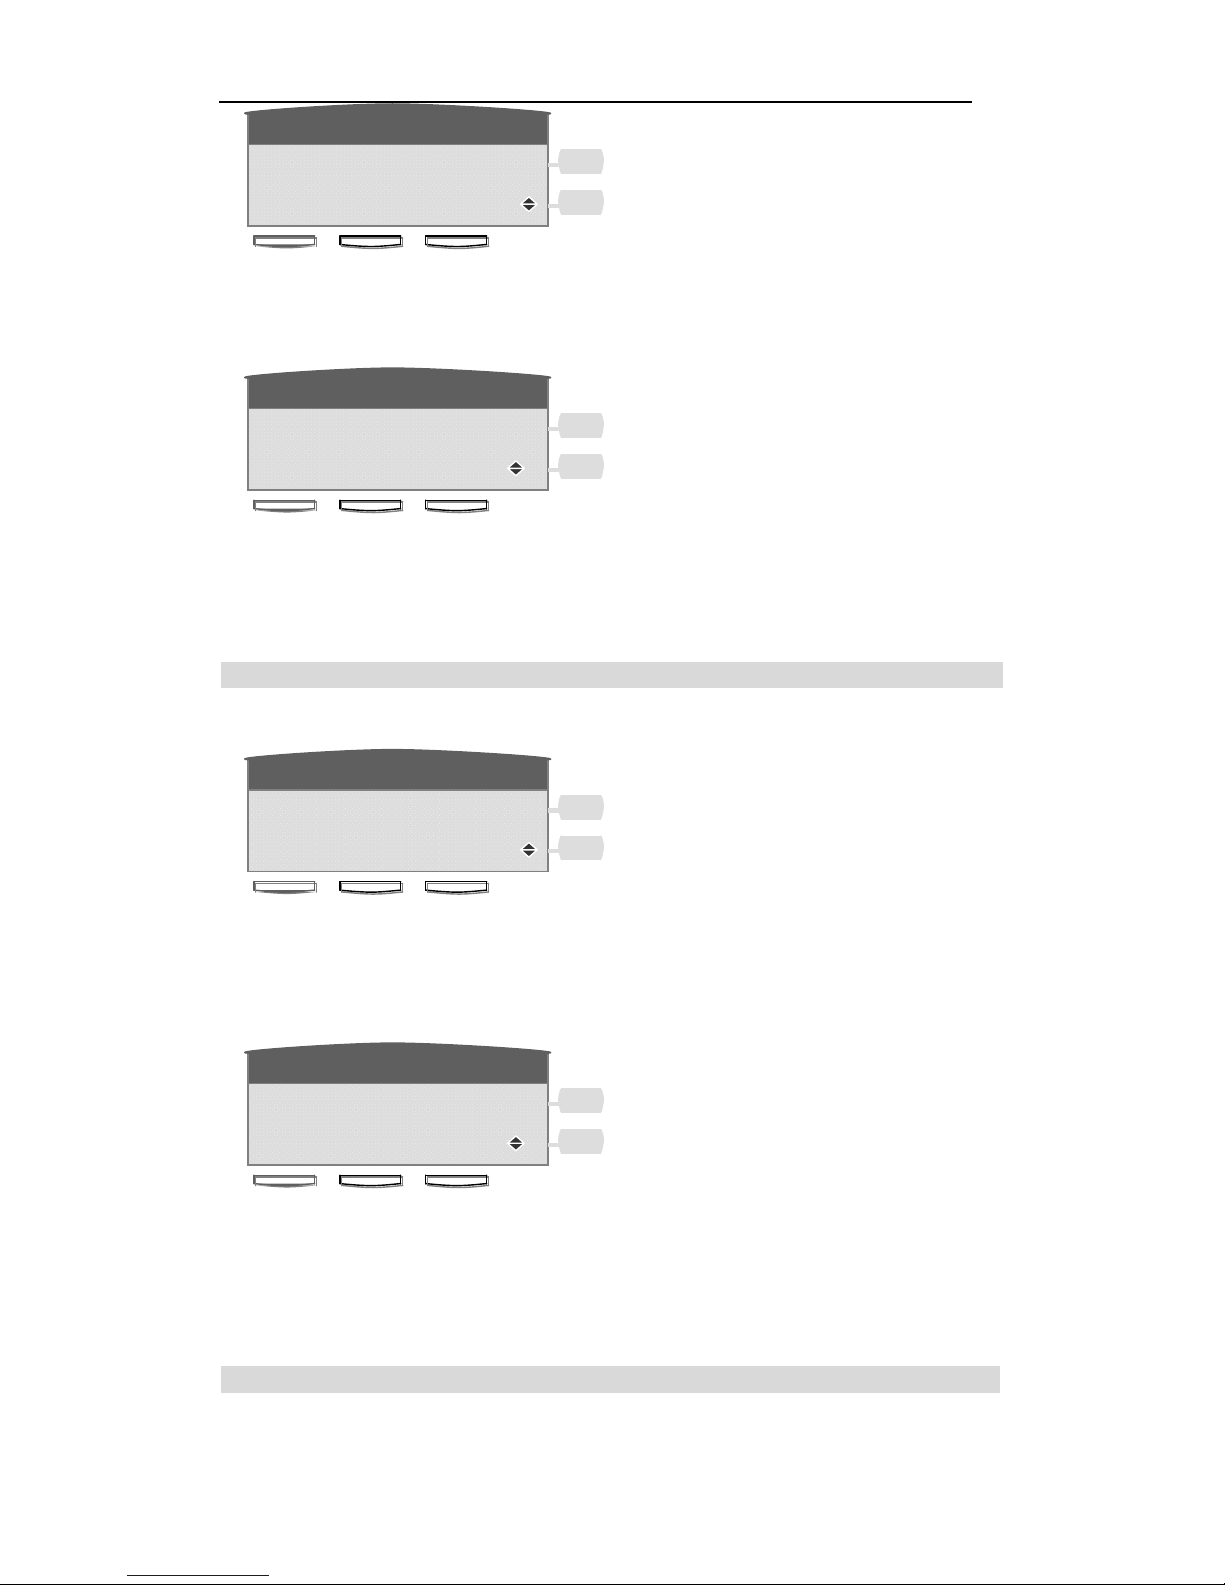
Citel
Menu
Ca
ll
e
r
s
02 Network
Sublist
Next Enter Quit
Citel
Menu
Ca
ll
e
r
s
01 Set Password
Next Edit Quit
Citel
Menu
Ca
ll
e
r
s
02
Ad
vance
d
Sublist
Next Enter Quit
Citel
Menu
Ca
ll
e
r
s
Enter Password
* * *
Del Enter Quit

8
2. Press Save to save your setting.
3. Press Quit key back to last menu and non-save.
Remark:
If “DHCP” mode is selected,Serve will use static distribution IP address, and it means the
networking setting is done.
If “PPPoE” mode is selected,you need access “PPPoE Setting” mode and set account No#,
Passwords and related information.
If “Static” mode is selected,you need access “Static Setting” mode and set related information.
TosettheStaticsetting
1. Press Enter into Static IP editing menu.
2. Press Next or Up and Down key to switch between “Static IP ”、“ StaticNetmask ”、
“Staticgateway ”“ S tatic DNS ”menu.
3. Press “Quit”B ack to last menu.
Static IPediting
1. Press Edit into Static IP editing menu.
2. Input the Static IP address in the IP editing line, the ‘*’ means ‘.’.
3. Press “Delete ”to delete character in the editing line.
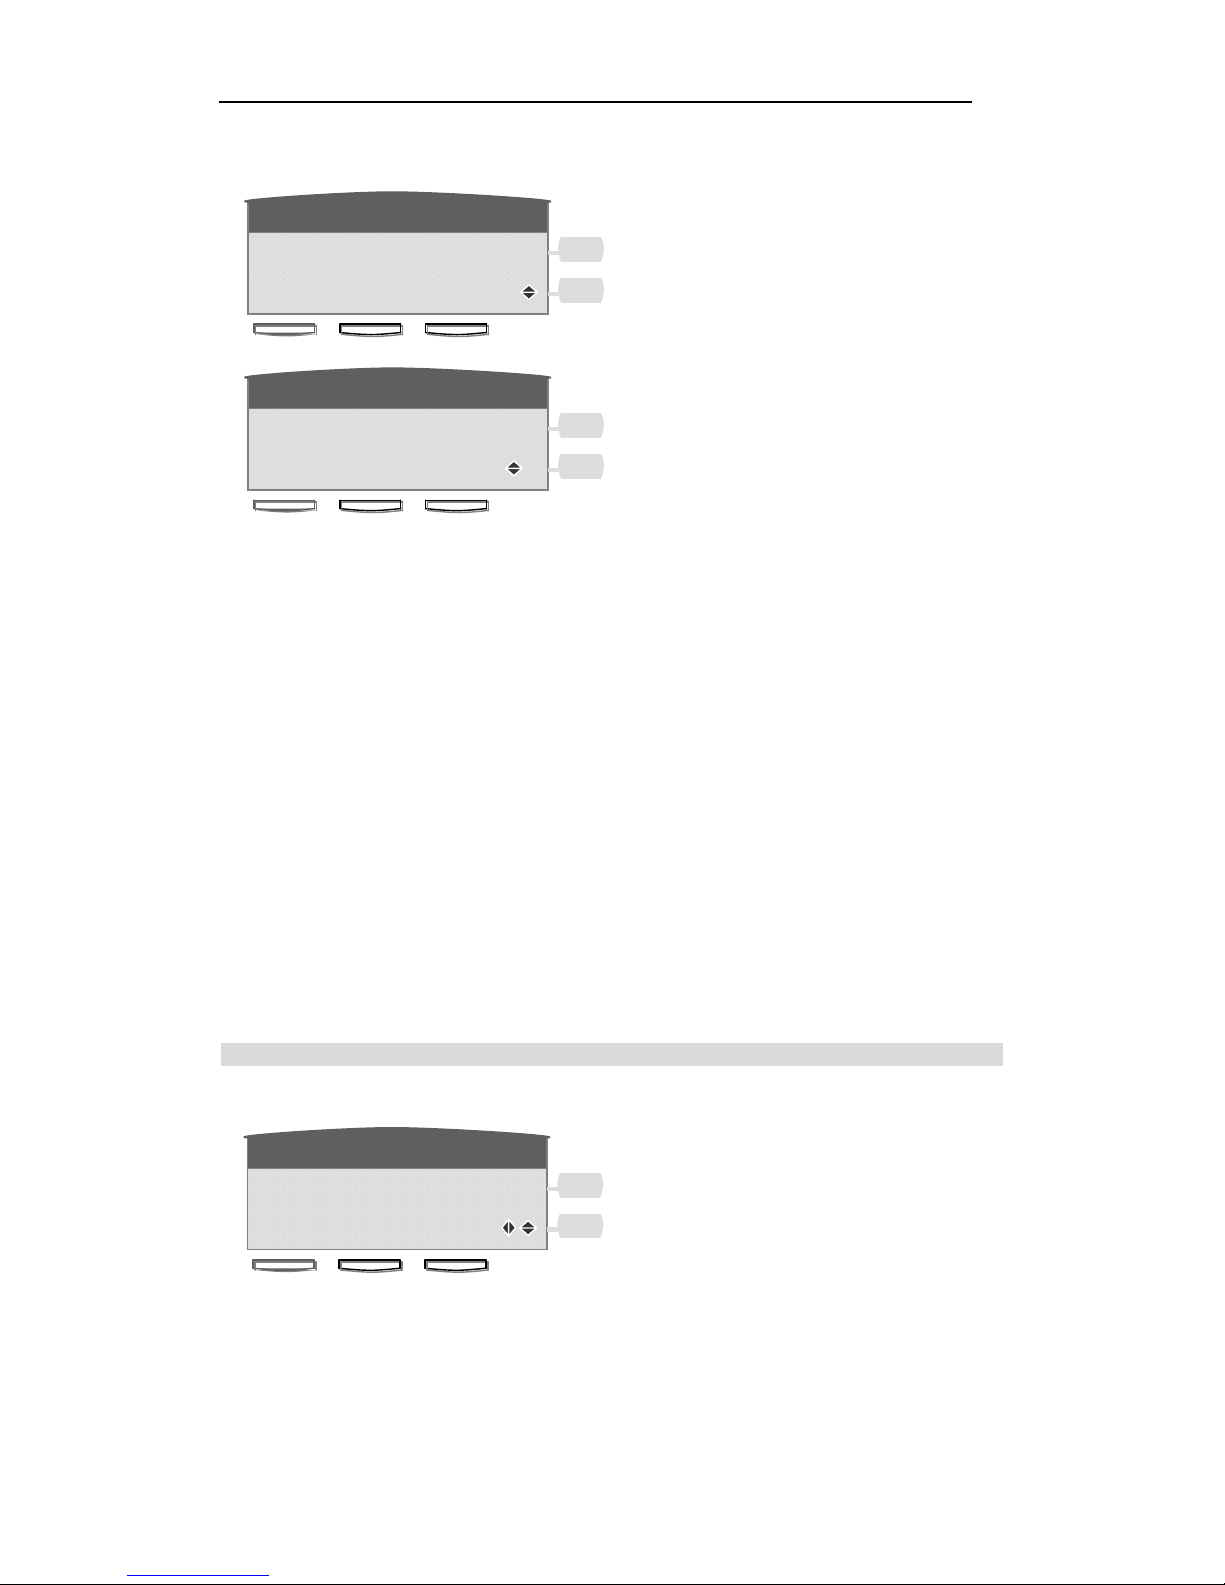
Citel
Menu
Ca
ll
e
r
s
01
IP
192.168.1.179
Next Edit
Q
uit
Citel
Menu
Ca
ll
e
r
s
N
ew
P
arame
t
er
192.168.1.1_
Delete Save
Q
uit
Citel
Menu
Ca
ll
e
r
s
01
N
e
t
M
o
d
e
〈〉Static
Next Edit
Q
uit
Citel
Menu
Ca
ll
e
r
s
02
St
a
ti
c
S
e
tti
ng
Sublist
Next Enter
Q
uit

9
4. Press “Save” to save the IP address you input.
5. Press “Quit”b ack to last menu and non-save.
Static Netmask editing
1. Press Edit into StaticNetmask editing menu.
2. Input the Static Netmask in the editing line, the ‘*’ means ‘.’.
3. Press “Delete ”to delete character in the editing line.
4. Press “Save” to save the IP address you input.
5. Press “Quit”b ack to last menu and non-save.
Static Gateway editing
1. Press Edit into Static Gateway editing menu.
2. Input the Static Gateway in the editing line, the ‘*’ means ‘.’.
3. Press “Delete ”to delete character in the editing line.
4. Press “Save” to save the Gateway you input.
5. Press “Quit”b ack to last menu and non-save.
Static DNS editing
1. Press Edit into Static DNS editing menu.
Citel
Menu
Ca
ll
e
r
s
02
G
a
t
eway
192.168.1.1
Next Edit
Q
uit
Citel
Menu
Ca
ll
e
r
s
N
ew
P
arame
t
er
192.168.1._
Delete Save
Q
uit
Citel
Menu
Ca
ll
e
r
s
02
N
e
t
mas
k
255.255.255.0
Next Edit
Q
uit
Citel
Menu
Ca
ll
e
r
s
N
ew
P
arame
t
er
255.255.255.0_
Delete Save
Q
uit
10
2. Input the Static DNS the editing line, the ‘*’ means ‘.’.
3. Press “Delete ”to delete character in the editing line.
4. Press “Save” to save the DNS you input.
5. Press “Quit”b ack to last menu and non-save.
TosetthePPPoEsetting
1. Press Enter into PPPoE Setting editing menu.
2. Press Next or Up and Down key to switch between “Account” and “Password” menu.
3. Press “Quit”B ack to last menu.
Account editing
1. Press Edit into Account editing menu.
2. Input the Acount in the editing line.
3. Press “Delete ”to delete character in the editing line.
4. Press “Save” to save the Account you input.
5. Press “Quit”b ack to last menu and non-save.
Citel
Menu
Ca
ll
e
r
s
01
A
ccoun
t
User1
Next Edit
Q
uit
Citel
Menu
Ca
ll
e
r
s
N
ew
P
arame
t
er
User1_
Delete Save
Q
uit
Citel
Menu
Ca
ll
e
r
s
03
PP
P
o
E
S
e
tti
ng
Sublist
Next Enter
Q
uit
Citel
Menu
Ca
ll
e
r
s
02
D
NS
202.96.134.133
Next Edit
Q
uit
Citel
Menu
Ca
ll
e
r
s
N
ew
P
arame
t
er
202.193.134.1_
Delete Save
Q
uit
11
Password editing
1. Press Edit into Account editing menu.
2. Input the Password in the editing line.
3. Press “Delete ”to delete character in the editing line.
4. Press “Save” to save the Password you input.
5. Press “Quit”b ack to last menu and non-save.
1.2 To set SIP setting
Use the following procedure to configure the SIP setting sublist.
For example:
SIP server (Register Server Add): 10.10.10.1 (is your ip pbx address or provided by
your local telecomm company)
SIP Number(Register Phone number): 622 (provided by your ip pbx or your local
telecomm company)
SIP Account(Register Number): 622 (provided by your ip pbx or your local telecomm
company)
SIP Password (Register password): 261972 (provided by your ip pbx or your local
telecomm company)
ToenterSIPsettingmode
1. Press “Menu ”and using Up, Down or “Next ”key into “SIP setting”mode.
2. Press “Next” and Up, Down to select “SIP1 ”or “SIP2”mode.
3. Press “Quit”b ack to last menu.
4. Press “Enter” into SIP1 menu
Citel
Menu
Ca
ll
e
r
s
02
P
asswor
d
******
Next Edit
Q
uit
Citel
Menu
Ca
ll
e
r
s
N
ew
P
arame
t
er
123456_
Delete Save
Q
uit
Citel
Menu
Ca
ll
e
r
s
06
SIP
S
e
tti
ng
Sublist
Next Enter
Q
uit

12
5. Press Enter into select “SIP1 Name” menu, and use Next or Up, Down button to switch
between “SIP1 Name”,“ SIP1 Sever ”,“SIP1 Number”,“S IP1 Account ”,
“SIP1 password”and “S IP1 Register” menu
Enter SIP1 Server menu
TosettheSIP1Sever
Enter SIP1 Server menu
1. Press Edit into SIP1 Server editing menu.
2. Press Quit back to last menu.
3. Press Next into SIP Number menu.
4. Press “Delete ”to delete
5. Press “Save”to saveasdiag.3,Back to diag.2-1
6. Press “Quit”b ack to last menu and non-save.
SIP1 editing
1. Input SIP1 Server address 10.10.10.1 in the SIP Server editing line, the ‘*’ means ‘.’. The
server address can be a web address or a IP address.
2. Press “Delete ”to delete character in the SIP Server editing line.
3. Press “Save” to save the SIP Name you input.
4. Press “Quit”b ack to last menu and non-save.
To set the SIP1 Number
Enter SIP1 Number menu
1. Press Edit into SIP1 Number editing menu
Citel
Menu
Ca
ll
e
r
s
01
Si
p
1
Sublist
Next Enter
Q
uit
Citel
Menu
Ca
ll
e
r
s
01
SIP1
S
erver
Next Edit
Q
uit
Citel
Menu
C
a
ll
e
r
s
N
ew
P
arame
t
er
10.10.10.1_
Delete Save
Q
uit
13
2. Press Quit back to last menu.
3. Press Next into SIP Account menu.
SIP1 Number editing
1. Input SIP1 Number 622 in the SIP Number editing line
2. Press “Delete ”to delete character in the SIP Number editing line.
3. Press “Save” to save the SIP Number you input.
4. Press “Quit”b ack to last menu and non-save.
TosettheSIP1Account
Enter SIP1Account menu
1. Press Edit into SIP1 Account editing menu
2. Press Quit back to last menu.
3. Press Next into SIP Account menu.
SIP1 Account editing
1. Input SIP1 Account 622 in the SIP Account editing line.
2. Press “Delete ”to delete character in the SIP Account editing line.
3. Press “Save” to save the SIP Account you input.
4. Press “Quit”b ack to last menu and non-save.
TosettheSIP1Password
Enter SIP1 Password menu
1. Press Edit into SIP1 Password editing menu.
Citel
Menu
Ca
ll
e
r
s
02
SIP1
N
um
b
er
Next Edit
Q
uit
Citel
Menu
Ca
ll
e
r
s
E
n
t
er
N
um
b
er
622_
Delete Save
Q
uit
Citel
Menu
Ca
ll
e
r
s
03
SIP1
A
ccoun
t
Next Edit
Q
uit
Citel
Menu
Ca
ll
e
r
s
N
ew
P
arame
t
er
622
Delete Save
Q
uit

14
2. Press Quit back to last menu.
3. Press Next into SIP1 Register menu.
SIP1 Password editing
1. Input SIP1 Password 261972 in the SIP Password editing line.
2. Press “Delete ”to delete character in the SIP Account editing line.
3. Press “Save” to save the SIP Account you input.
4. Press “Quit”b ack to last menu and non-save.
TosettheSIP1ServerPort
Enter SIP1 Server Port menu
1.Press Edit into SIP1 Server Port editing menu.Default Port:5060
2.Press Quit back to last menu.
3.Press Next into SIP1 Register menu.
TosettheSIP1Register
1. Press Left, Right key to ON/OFF the SIP1.
2. Press “Save”t o save and quit.
3. Press “Quit”b ack to last menu and non-save.
Citel
Menu
Ca
ll
e
r
s
05
SIP1
S
erver
P
or
t
5060
Next Edit
Q
uit
Citel
Menu
Ca
ll
e
r
s
04
SIP1
P
asswor
d
******
Next Edit
Q
uit
Citel
Menu
Ca
ll
e
r
s
N
ew
P
arame
t
er
261972_
Delete Save
Q
uit
Citel
Menu
Ca
ll
e
r
s
06
SIP1
R
eg
i
s
t
er
□ON ■OFF
Next Save
Q
uit

15
1.3 Customizing your C4110 IP Phone
1.3.1 To set Ringer Type
You can select different ringer type to match your preferences and distinguish
between calls on lines.
-To change the ringer type
1. Press key and select “User preferences” item
2. If two lines are used, first select which line to change.
3. Press keyto select desired rings , then press Save soft key to save your
settings.
1.3.2 To set screen setting sublist
1. Press and go into “User Preferences Sublist” press “Enter”
2.
Either press or Next softkey to scroll. “Screen Setting”
3.
Press Enter soft key and select Contrast or Brightness function.
To set Contrast
zEnter into Contrast menu.
zfind desired setting using.
zPress Save softkey to save your setting
To set Brightness
zEnter into Brightness menu.
zSelect one of three kinds of brightness: Off, Low or High as you like using
zPress Save softkey to save and quit or Next softkey directly to save and go to the next.
1.3.3 To set Volume Control sublist
1.Press and go into “User Preferences Sublist” press “Enter”
2.Either press or Next softkey to scroll. “Volume Control sublist ”
3.Press Enter soft key and select Ringer volume or Mic Volume function
To set Ringer volume:
zEnter the Ringer volume menu.
zPress to adjust and reach the desired ringer volume.
zPress Save softkey to save your setting
M
Me
en
nu
u
M
Me
en
nu
u

16
You have 2 other ways to adjust your ringer volume:
To adjust ringer volume directly when a call is coming:
You can press left or right side of volume bar directly to adjust ringer volume while a
call is coming and the telephone is ring before you pick up the call.
To adjust ringer volume anytime
You can press left or right side of volume bar directly to adjust ringer volume
anytime if you like. But please don’t press or lift the handset.
To set Mic volume:
zEnter the Mic volume menu.
zPress to adjust and reach the desired Mic volume.
zPress Save softkey to save your setting
1.3.4 To change the display Language
For changing business requirements, you may wish to change the language of your display
messages and prompts.
1. Press . and go into “User Preferences Sublist” press “Enter”
2. Either press or Next softkey to scroll. “Language Set”
3. “English is in use” is the default setting.
4. There are 2 kinds of language for your choice: English, Chinese. Use to select your
display language.
5. Press Save softkey to store your setting and quit, or press Quit softkey to give up the setting
and go back up level.
1.3.5 To set Greeting Message
Greeting Message function lets your C4110 IP Phone display owner’s phone number
or name on the phone
1. Press and go into “User Preferences Sublist” press “Enter”
2. Either press or Next softkey to scrol “Greeting Message ”
3. Press Edit soft key to enter this setting, use dial /pad to input your desired
information, then press Save soft key.
M
Me
en
nu
u
M
M
e
en
nu
u
H
H
a
an
nd
d
s
s
f
f
r
r
e
ee
e

17
1.3.6 To set Memory key setting
You can save the numbers of your customers, business associates, or anyone you call frequently
and phone systems’ feature access code in C4110’s four memory keys.
To save numbers in memory keys
1. select one of the four memory keys by one you want to store the number or feature code as the
instructions on the display and enter the title ,number or feature code.
2. Press Save softkey to store your setting or press Quit softkey to give up the setting and return
back up level.
3. You can delete the number stored in one memory key and save a new one in it or let it empty.
1.3.7 To Model Information Sublist
1. Press
2. Either press or Next softkey to scroll “Model Information Sublist”.
3. Press Enter soft key and select “Model Number , “Mac Address”or “Software Version”
1.3.8 To reboot system
Press and use key or Next to select “reboot system” Press “reboot” button
to reboot the device
M
Me
en
nu
u
M
Me
en
nu
u
18
2. Configurationwithwebbrowser
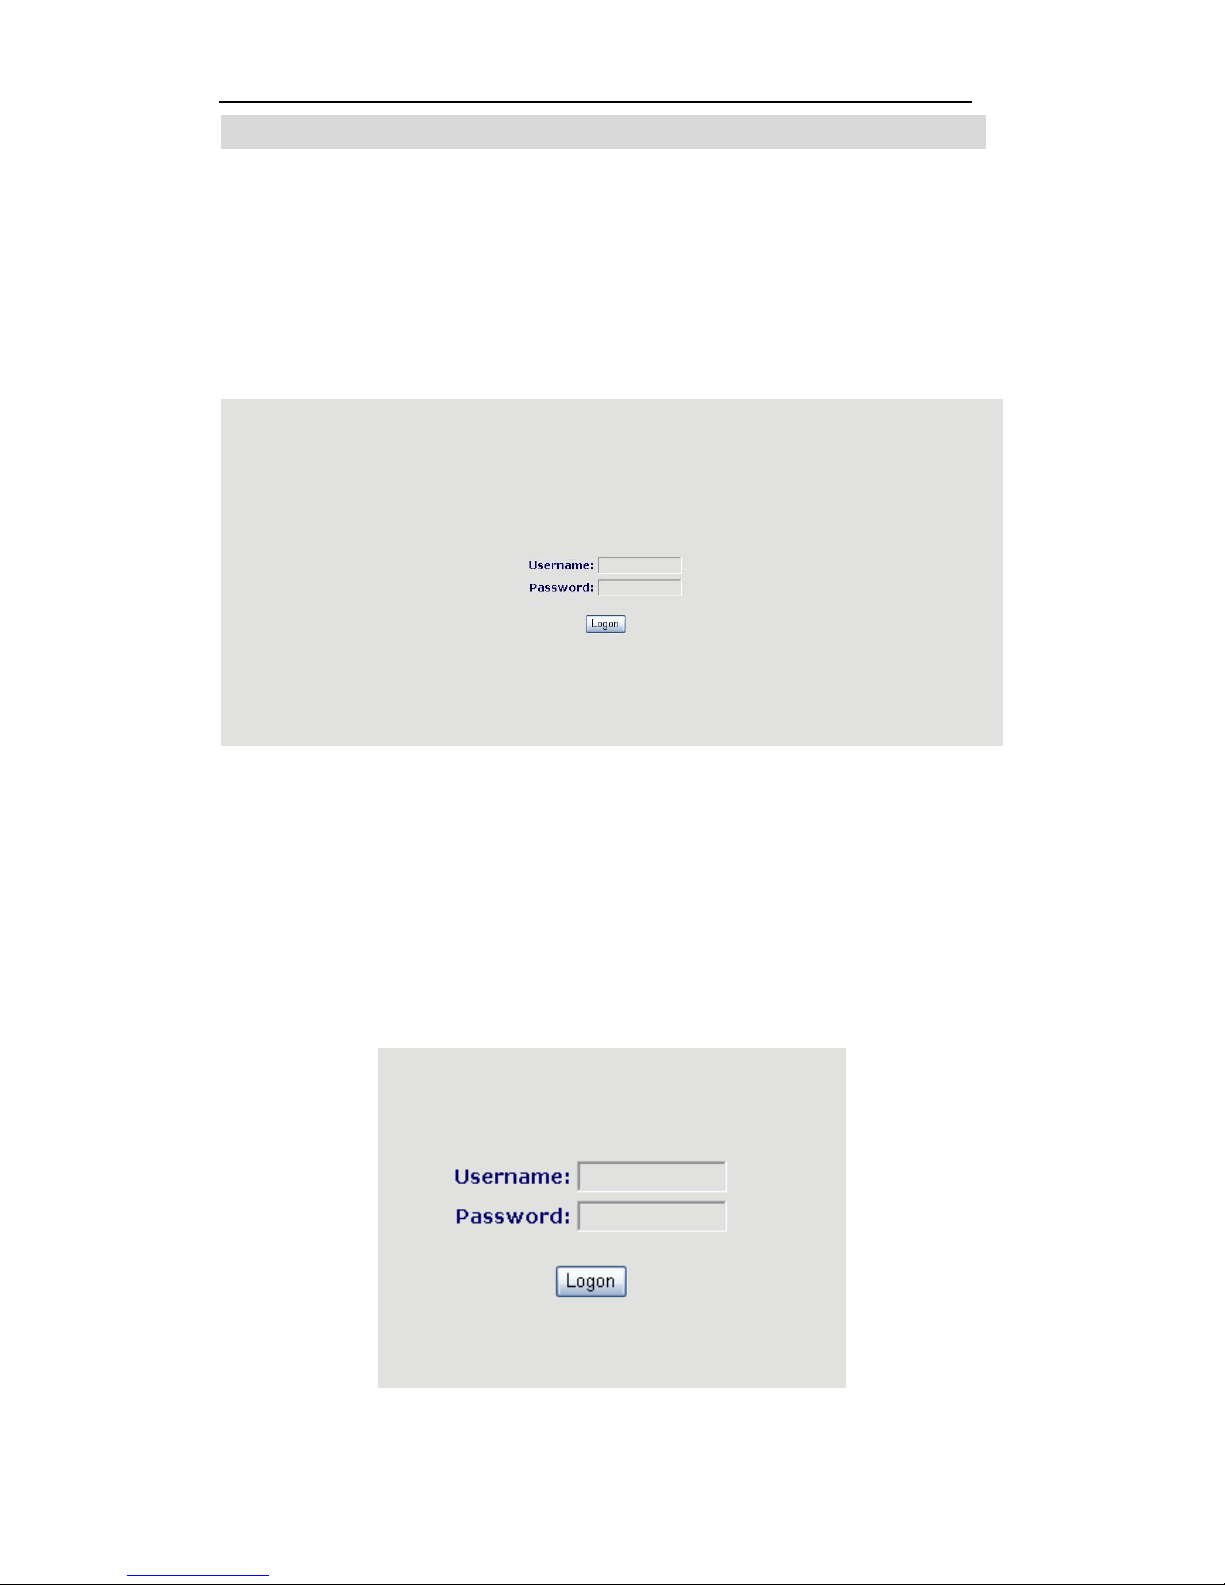
The IP Phone Web Configuration Menu can be accessed by the following URL:
http:// "Phone-IP-Address". e.g. http://20.20.20.119. The default LAN IP address is
"192.168.1.179".If the web login port of the gateway is configured as non-80 standard
port, the user need to input http://xxx.xxx.xxx.xxx:PORT/, otherwise the web will
show that no server has been found, and it will be shown as follows:
2.1 User verification
Users should login before configuring dialogue machine. Guest account: the default
username and password are both "admin" can have a browse of system.
Note: after inputting username and password, user press carriage return directly to
enter the page.

19
2.2 Basic Status
2.2.1 Running Status
On this page user can gather information of each commonly-used parameter of the
phone, it is shown as the following figure: the network section shows the current
WAN, LAN configurations of the phone: including connect mode of WAN IP and
IP( static state, DHCP, PPPoE), MAC address, WAN IP address of the gateway, LAN
IP address of the gateway, the state of LAN DHCP server.
The Phone Number section show the current registered phone number that work with
sip server. The phone can register (two) number on the same server or different sip
server.
The version number and date of issue have been shown at the end of the page.
2.2.2 Wizard
In order to make user easier set C4110’s parameters, C4110 provides a wizard flow to
set step by step.
First step is selecting network mode
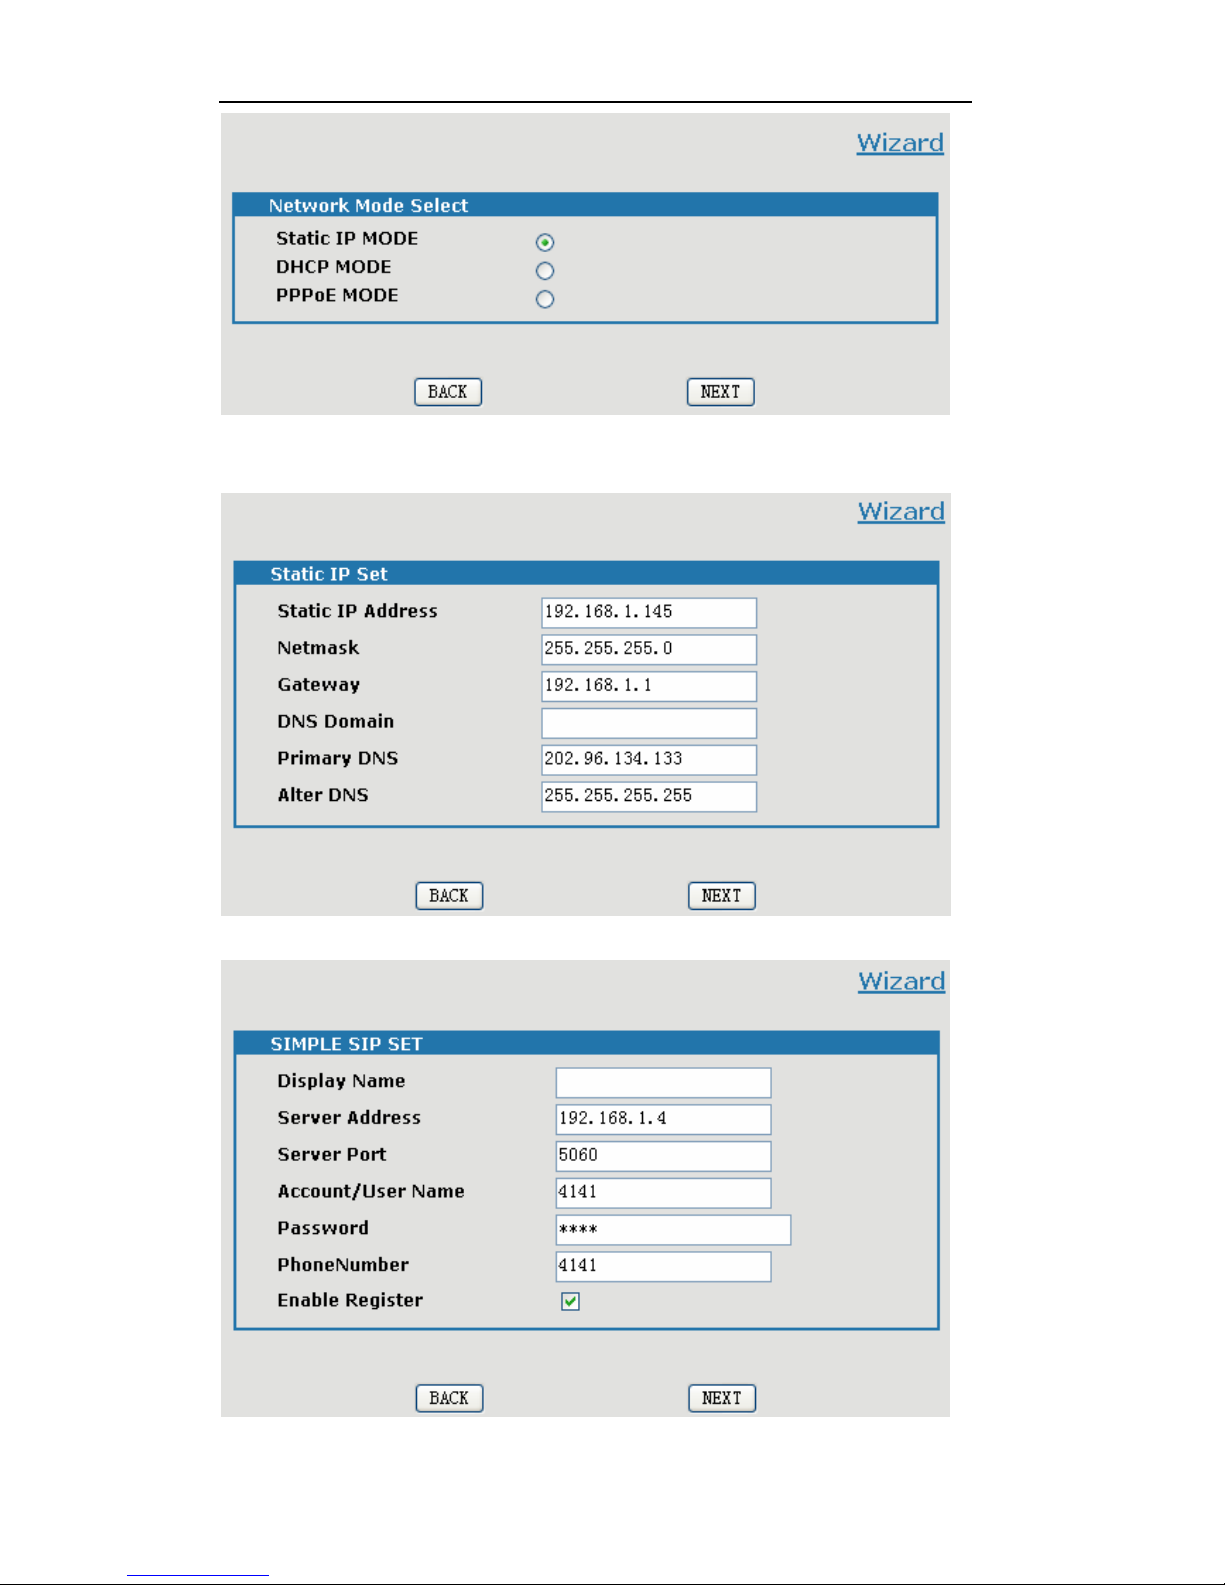
20
Second step is setting network parameters if user uses static or PPP0E, else jump to
step 3 directly
Third step is setting SIP
The last step is show the result of wizard. If user makes mistakes during the wizard,
Table of contents


