Clark Synthesis TACTILE SOUND AQ339 Aquasonic User manual

Table of Contents
Important Product Information
Warranty
Product Overview
Installation Overview Diagrams
Speaker Images
Mounting Hardware
In-Wall Installation
Drop-In Installation
Stainless Steel Screen Installation
Isolation Transformer Installation
Troubleshooting
Diluvio Placement
2
3
4
5
6
7
8
12
13
14
16
18
Clark Synthesis, Inc.
Phone:303.797.7500
www.clarksynthesis.com
AQ339 Installation Guide
Diluvio™

www.clarksynthesis.comDiluvio™ Underwater Speaker
!IMPORTANT PRODUCT INFORMATION
1. DO NOT DROP SPEAKER- The speaker can be damaged both internally and externally if dropped. Damage caused by
dropping the speaker is not covered by the warranty.
2. DO NOT EXPOSE SPEAKER TO HIGH DISTORTION LEVELS- Exposing the speaker to high levels of distortion may
damage the speaker. This type of damage is not covered by the warranty. If the speaker stops playing, it is likely that
the built-in protection circuit has activated. In the event this happens, turn the amplier o for approximately 60
seconds to allow the circuit to reset. Turn down the volume on the stereo system and amplier. Operate the system at
lower volume levels to avoid overloading the speaker.
3. USE A GROUND FAULT INTERRUPTER (GFI)- A GFI outlet or extension cable on the stereo system will help prevent
electrical shock in the event of a malfunction. The audio amplier that powers this speaker MUST be plugged into
a GFI outlet. GFI outlets are available at most hardware or home improvement stores. GFI outlets are easy to install,
provide a safer operating environment for your pool users, and help protect your electronic equipment.
4. PLACE SPEAKER AWAY FROM HIGH TRAFFIC AREAS- If using this speaker as a drop-in speaker, ensure the speaker
is located away from diving or high-activity areas. Severe personal injury may result if a swimmer/diver makes contact
with the speaker when diving/jumping into the water.
5. CABLE PLACEMENT- Use caution when running the cable from the speaker to the amplier. Do not lay the cable
in high-trac areas where tripping or entanglement may occur. When used as a drop-in speaker, remove as much
slack as possible from the speaker wire that runs through the water to avoid entanglement. Avoid laying the cable in
areas where pets may possibly become tangled in, or damage, the cable. If pulling the cable through conduit, do not
attempt to pull splices through the conduit. Utilize junction boxes if splices are required.
6. DO NOT HANG SPEAKER BY SPEAKER CABLE- If using the speaker as a drop-in speaker, do not raise and lower the
speaker into the water using the speaker wire. Instead, tie a rope (not included) to the eyelet on the speaker’s rubber
ring and use the rope to raise and lower the speaker. Never carry or lift the speaker by the cable.
7. IN WALL INSTALLATION - AVOID CABLE DAMAGE- Use caution when pulling the speaker cable through the
conduit to avoid pinching the cable, removing wanted excess cable from the niche, or damaging the strain relief on
the speaker. Failure to follow these instructions can result in damage to the speaker which are not covered by the
warranty.
8. DO NOT DRAG SPEAKER ON POOL DECK, BOTTOM OR SIDE OF POOL- Dragging the speaker along any surface can
cause internal and external damage. This type of damage is not covered by the warranty.
9. DO NOT REMOVE STRAIN RELIEF- Removing or altering the strain relief tting connecting the cable to the speaker
will permanently damage the speaker. This tting is carefully installed at the factory and is designed to provide a
watertight seal. Any alteration or adjustment of this tting will void the warranty.
10. WINTER STORAGE- Do not allow the speaker(s) to become encased in ice. Always install speaker below the freeze
line. If speaker is installed above freeze line, take the speaker out of the niche and allow it to rest on the bottom of
the pool before freezing occurs. If there is not enough speaker cable to do this, place a crate on the bottom of the
pool and allow the speaker to rest on the crate; do not let the speaker hang by the speaker cable, in water or out.
11. VOLUME CONTROLS- Do not use with external volume controls rated at less than 150 watts.

www.clarksynthesis.com Diluvio™ Underwater Speaker
WARRANTY
United States Warranty and Return Policy
THE DILUVIO™ WARRANTY
Clark Synthesis, Inc. warranties the Diluvio™ to be free from defects and workmanship under normal use for a period of six (6) years
from date of original purchase.
Should warranty service be necessary, Clark Synthesis, Inc. will (at its discretion) repair or replace the defective merchandise with
equivalent merchandise at no charge.
This warranty is valid for the original purchaser and is not extended to subsequent owners. Any applicable implied warranties are
limited in duration to a period of the express warranty as provided herein beginning with the date of the original purchase at retail,
and no warranties, whether expressed or implied, shall apply to this product thereafter. Some states do not allow limitations on
implied warranties; therefore these exclusions may not apply to you. This warranty gives you specic legal rights; however, you may
have other rights that vary from state to state.
WHAT IS NOT COVERED
This warranty is valid only if the product is used for the purpose for which it was designed. It does not cover the following:
• Damage caused by excessive heat
• Damage through negligence, misuse, accident, or abuse
• Damage caused by incorrectly mounting the speaker
• Damage due to not using an appropriate amplier
• Freight damage
• Items repaired by an unauthorized repair facility
• Items damaged due to amplier clipping and/or distortion
• Items purchased from unauthorized individuals or dealers
• Cost of shipping product to Clark Synthesis, Inc.
• Return shipping on non-defective items
RETURN POLICY
New, unused items purchased from us may be returned within 7 days of the purchase date. Please note: Clark Synthesis will only
accept returns for items that are received in their original packaging, in undamaged and re-sellable (new) condition. Manuals,
accessories, warranty cards, and everything else that came with the unit must be included as well. If your return does not meet these
conditions, you will be charged a 15% restocking fee or have the merchandise returned to you at your expense. Non-defective
merchandise can also be returned for a 15% restocking fee. Shipping charges for all non-defective returns or exchanges are not
refundable.
WHAT TO DO IF YOU NEED WARRANTY OR SERVICE
If it becomes necessary for you to return defective merchandise, call Clark Synthesis Customer Service at (303) 797-7500 and you will
be given a Return Authorization Number and shipping instructions. Follow the instructions provided by our customer service sta,
use suitable packing materials (preferably the original shipping boxes), and make sure to write your Return Authorization Number
on the outside of your box when sending your return to us. Orders that are returned without an Return Authorization Number
may be refused by our returns department. Remember to include a dated proof of purchase from an authorized dealer. Return
freight must be prepaid by the customer: items received freight collect will be refused. If the returned product is found to contain a
manufacturing defect not caused by the customer and a replacement product is sent to the customer, Clark Synthesis, Inc. will pay to
ship the replacement product to a domestic location (within the USA) via ground shipping methods. Costs associated with a) shipping
replacement products intended to replace defective merchandise not caused by a manufacturing defect, b) replacement products
shipped outside the USA, or c) replacement products shipped via shipping methods other than ground shipping will be paid for by the
customer.
Make sure the following is included in your package:
• Product to be returned (repacked in original shipping containers)
• Return Authorization Number printed on the outside of the box
• Copy of original invoice with Return Authorization Number printed on it
INTERNATIONAL WARRANTY
Contact your International Clark Synthesis dealer or distributor concerning specic procedures for your country’s warranty policies.

www.clarksynthesis.comDiluvio™ Underwater Speaker
PRODUCT OVERVIEW
The Diluvio™ is perfect for:
PRODUCT FEATURES:
TECHNICAL FEATURES:
• Swimming Pools
• Lap Pools
• Resorts and Hotels
• Synchronized Swimming
• Swim Team Training
• Marine Animal Training
The Diluvio™ is the only full-frequency, full-delity underwater swimming pool speaker in the world.
The Diluvio™ works in both fresh and salt water pools and can be permanently mounted in a large
(standard) light niche or used as a drop-in speaker (see gures 1 and 2 on the following page). The
Diluvio™ comes with 100 feet (33 meters) of attached underwater speaker cable and can be installed
at any depth up to 10 feet (3 meters). Custom cable length available. This makes the Diluvio™ perfect
for use in the deep end, shallow end, or any place in between.
• It is generally recommended that one Diluvio™ speaker be used for every 20-foot x 20-foot (6
meter x 6 meter) section of the pool to provide the best sound coverage.
• The Diluvio™ has been designed to be fully RoHS compliant.
• The Diluvio™ contains an internal “early warning” circuit that takes it oine when the speaker is
being overdriven.
• A power amplier rated between 125 and 150 watts @ 4 ohms is required to run the Diluvio™.
• In-wall mounting hardware is available through Clark Synthesis, Inc. Please contact us for more
information.
www.clarksynthesis.com Diluvio™ Underwater Speaker
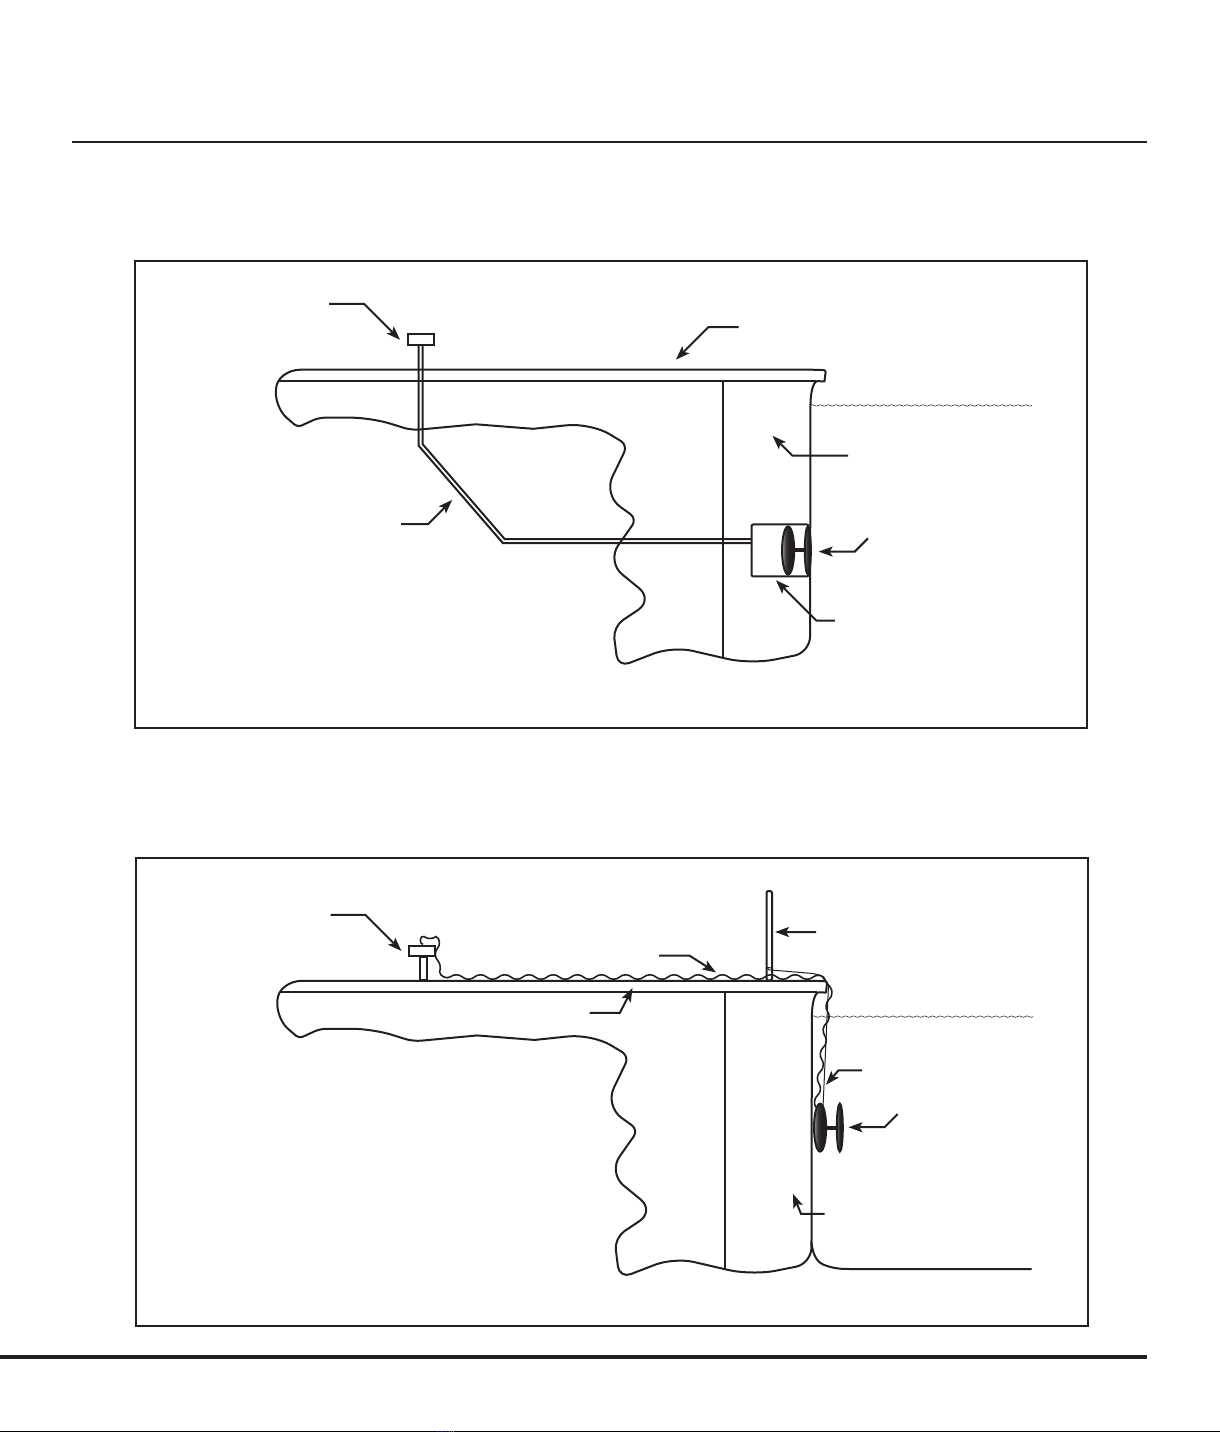
INSTALLATION OVERVIEW DIAGRAMS
Junction Box
Junction Box
to
Audio System
Wall of Pool
Wall of Pool
Rope
Sturdy Object
to Attach Rope
Light Niche
Speaker in Niche
Speaker
Conduit
Pool Deck
Figure 1. Side view of in-wall installation.
Figure 2. Side view of drop-in installation.
Pool Deck
Speaker Cable
www.clarksynthesis.comDiluvio™ Underwater Speaker
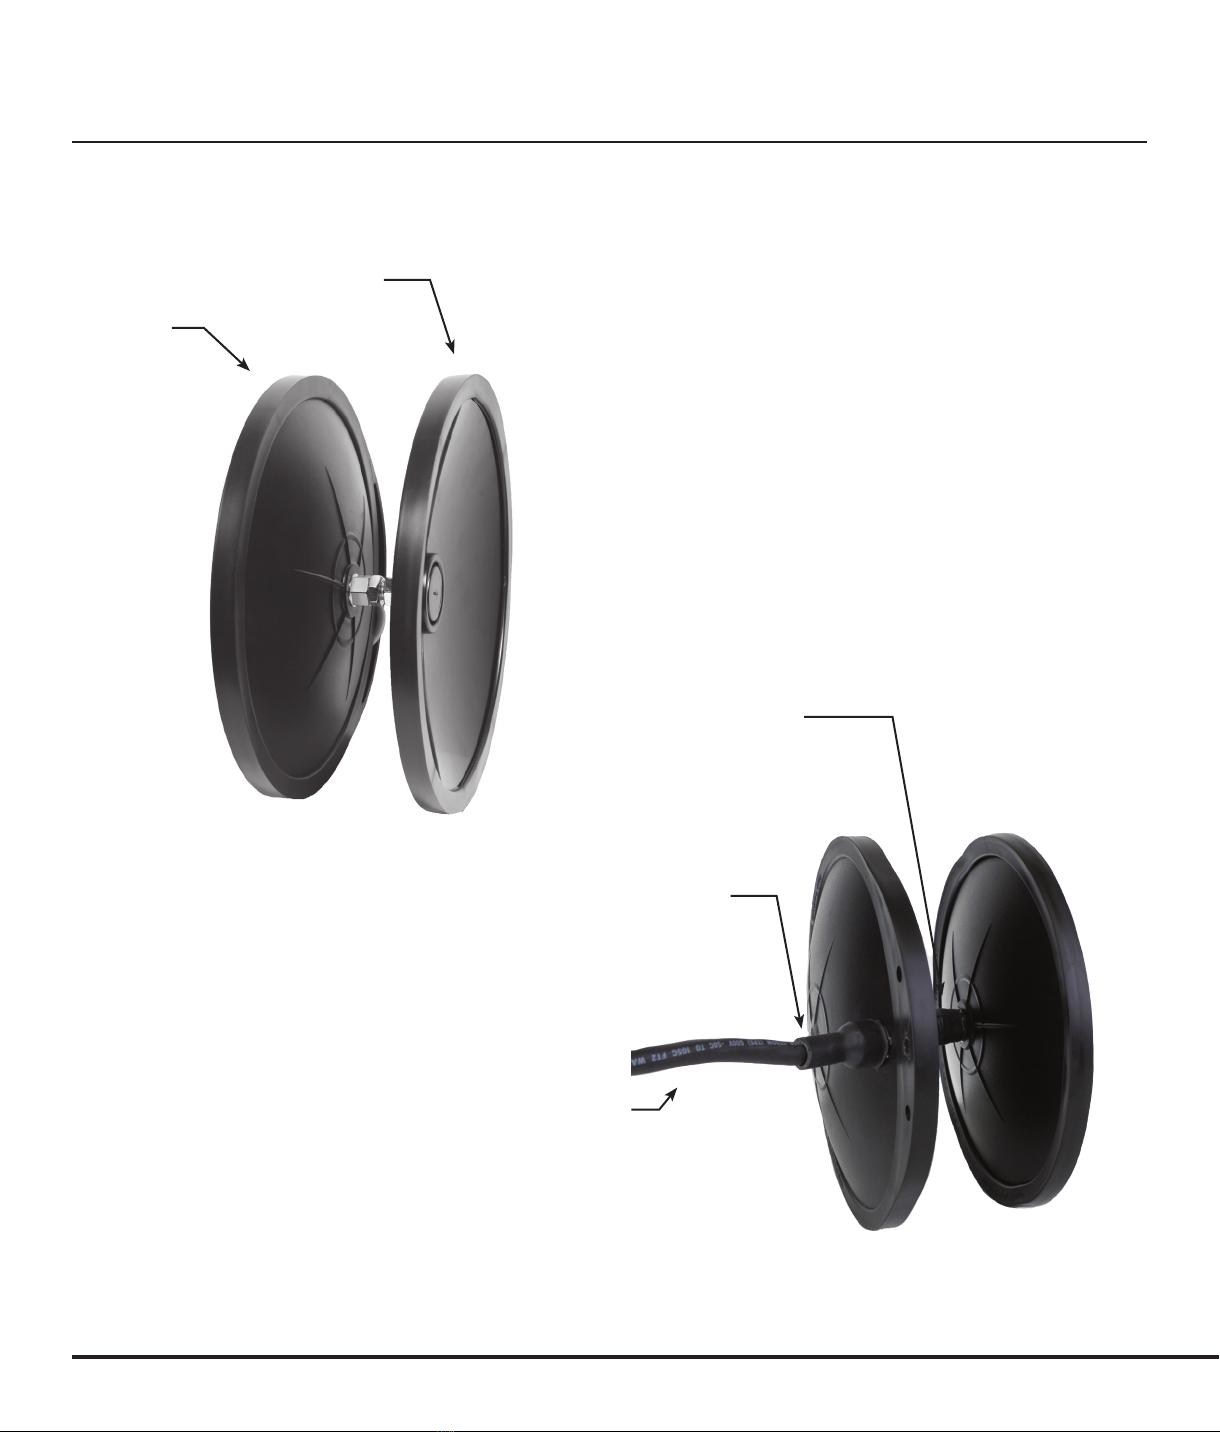
SPEAKER IMAGES
The Diluvio™
Acoustic Sound Lens
Speaker body
Speaker Cable
Strain Relief
Threaded Stud, Brass Mounting Nuts, Jam Nuts

www.clarksynthesis.com Diluvio™ Underwater Speaker
MOUNTING HARDWARE
In-Wall Mounting Hardware (Purchased Separately)
Face ViewBack View
Mounting Gasket
Large Light NicheWire Clamp Diluvio™ Screen
Clamp
Tabs
Lock Tab
Threaded
Receiving
Hole
Face Ring
Lock Tab
Receiving
Plate
Screw & Rubber
Washer

www.clarksynthesis.comDiluvio™ Underwater Speaker
Carefully remove the speaker from its box and set aside. Remove the black o-ring from inside the
red gasket and dispose.
NOTE: The Face Ring Kit, Stainless Steel Screen, Niche and Isolation Transformer are not included and
may be purchased from Clark Synthesis.
Install the mounting gasket around the rubber ring of the sound lens. The gasket’s at side will
go towards the face ring. The grooved side faces the speaker body. Insure the mounting gasket is
installed evenly and is rmly seated against the entire circumference of the sound lens.
Flat side
Grooved Side
IN-WALL INSTALLATION
1
2

www.clarksynthesis.com Diluvio™ Underwater Speaker
Loosen the nut on the wire clamp. With the mounting gasket facing up, place the wire clamp over
the speaker. The screw & nut should be facing down towards the speaker not the sound lens.
Place the speaker on a non-abrasive surface with the sound lens facing up. Hold the face ring
above the sound lens, allowing the clamp tabs to fall open. Set the face ring against the mounting
gasket, insuring each clamp tab is on the outside of the mounting gasket. While placing the face
ring on the gasket tuck the gasket in so no red shows. Hold the entire assembly together and ip
it over, place it on the non-abrasive surface as shown in the third picture below. Carefully position
the face ring so it is centered over the sound lens.
Nut
Wire Clamp
NOTE: If using the Stainless Steel Screen, install now. See page 13 for Screen Installation.
IN-WALL INSTALLATION
3
4

www.clarksynthesis.comDiluvio™ Underwater Speaker
Place the wire clamp under each clamp tab, verifying the nut and bolt adjuster is accessible when
the clamp is placed under the tabs. Insure the mounting gasket and face ring are still evenly
centered. Use a wrench and a Phillips screwdriver to tighten the wire clamp. When fully tightened,
the wire clamp should be rmly seated in each clamp tab and the speaker should be secure. Pick
up the assembly and insure it is still properly centered in the face ring. If not, loosen the wire
clamp and adjust.
Take the end of the speaker wire and pull it through the conduit hole in the back of the niche. For
future speaker servicing, leave enough speaker wire in the niche to allow the speaker to be placed
on the pool deck.
Note: In actual applications, the niche will already be mounted in the wall of the pool.
IN-WALL INSTALLATION
5
6

www.clarksynthesis.com Diluvio™ Underwater Speaker
Carefully set the lock tab located on the bottom of the face ring behind the receiving plate located
on the bottom of the niche. Align the bolt/rubber washer on the face ring with the threaded
receiving hole on the niche. Attach the trim ring securely to the niche by gently tightening the bolt.
You are now ready to connect the speaker to your audio system.
Screw
IN-WALL INSTALLATION
7
www.clarksynthesis.comDiluvio™ Underwater Speaker
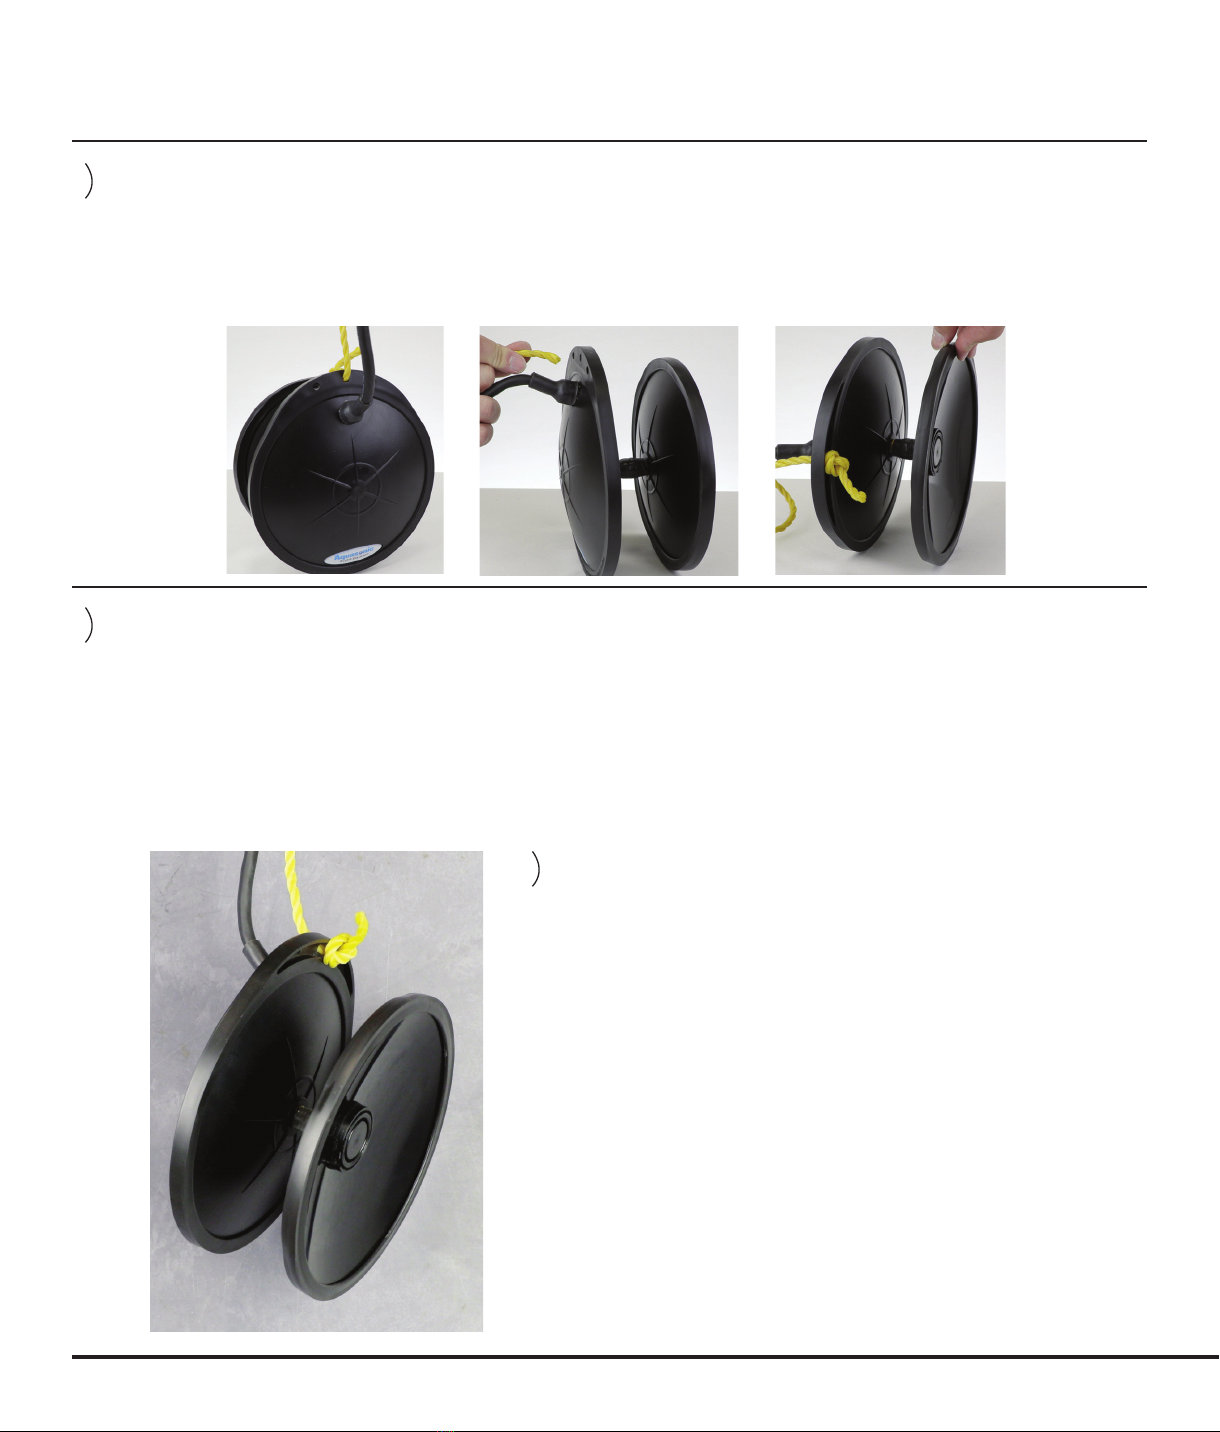
DROP-IN INSTALLATION
Find a length of rope (1/4” (6mm) outside diameter) that will allow you to place the speaker in the
area of the pool where you would like sound (see General Information section at the beginning of this
manual for precautions when using this type of application). Carefully remove the speaker from its
box. Locate the open hole on the speaker’s rubber ring (next to the interlaced speaker wire). Thread
the rope through the hole. Tie a knot that will not come undone or slip through the hole.
Connect the speaker to your audio system with the attached speaker wire. Carry the speaker to the
pool using the rope (NEVER CARRY THE SPEAKER BY THE SPEAKER WIRE! THIS WILL DAMAGE THE
SPEAKER!). Gently lower the speaker into the pool, insuring the speaker and wire are not scratching
along the wall of the pool (NEVER THROW THE SPEAKER INTO THE WATER. THIS WILL DAMAGE
THE SPEAKER AND MAY CAUSE PERSONAL INJURY). When the speaker is under the water at the
desired depth, insure the sound lens is facing away from the wall and allow the speaker to rest against
the wall. Tie the rope to a sturdy object (noting the precautions listed in the front of this manual).
When you are ready to remove the speaker from the water,
slowly raise the speaker to the surface of the water using
the rope (insure the speaker does not rub against the wall of
the pool). Use caution when the speaker reaches the water’s
surface because the surface tension of the water increases
the drag on the speaker and could cause the rubber ring
to pull free from the speaker. Roll up the speaker wire
and rope. Use the rope to carry the speaker to its storage
location (NEVER CARRY THE SPEAKER BY THE SPEAKER
WIRE! THIS WILL DAMAGE THE SPEAKER!).
1
2
3

www.clarksynthesis.com Diluvio™ Underwater Speaker
STAINLESS STEEL SCREEN INSTALLATION
Carefully remove the rubber
ring from face ring screw.
Save the rubber ring.
Place the bottom of the screen
into the face ring aligning the
feet around the tab. Note that
the smooth beveled side of the
screen should face outward
toward the front of the face
ring.
Remove the screw from the
face ring. Save the screw.
Push the screen all the way
into the face ring. You may
need to ex the screen in a
little to ensure a secure t.
Carefully place the rubber
ring onto the face ring
screw.
Put on a pair of work gloves
to avoid being cut by the
screen’s sharp edges.
Insert the screw through the
face ring. There is a small
hole cut out for the screw in
the screen.
1 2 3
65
7
4
www.clarksynthesis.comDiluvio™ Underwater Speaker
ISOLATION TRANSFORMER INSTALLATION
Place the Isolation
Transform
er
in a dry, indoor, location.
The transformer is not
designed to be mounted
outdoors.
Locate the speaker cable
from the amplier. Remove
.75 in. (20 mm) of the cable’s
outer jacket.
Insert the positive wire
(usually white or red) to the
1+ terminal, and the negative
wire (usually black) to the 1-
connection. Tighten the 1+
and 1- screws.
Transformer may be mounted
to a wall using mounting
tabs. (The transformer is
heavy and must be securely
mounted to the wall.)
Remove .3 in. (8 mm) of
insulation from each wire.
Push the gray ring down
until it locks on the
connector’s body.
Locate the Neutrik Speakon
connector. Remove the
connector from the bag.
Place the Speakon
connector’s blue bushing on
the amplier cable.
Screw the blue bushing onto
the connector’s body. The
connector is now assembled.
1
4
7
2
5
8
3
6
9
www.clarksynthesis.com Diluvio™ Underwater Speaker
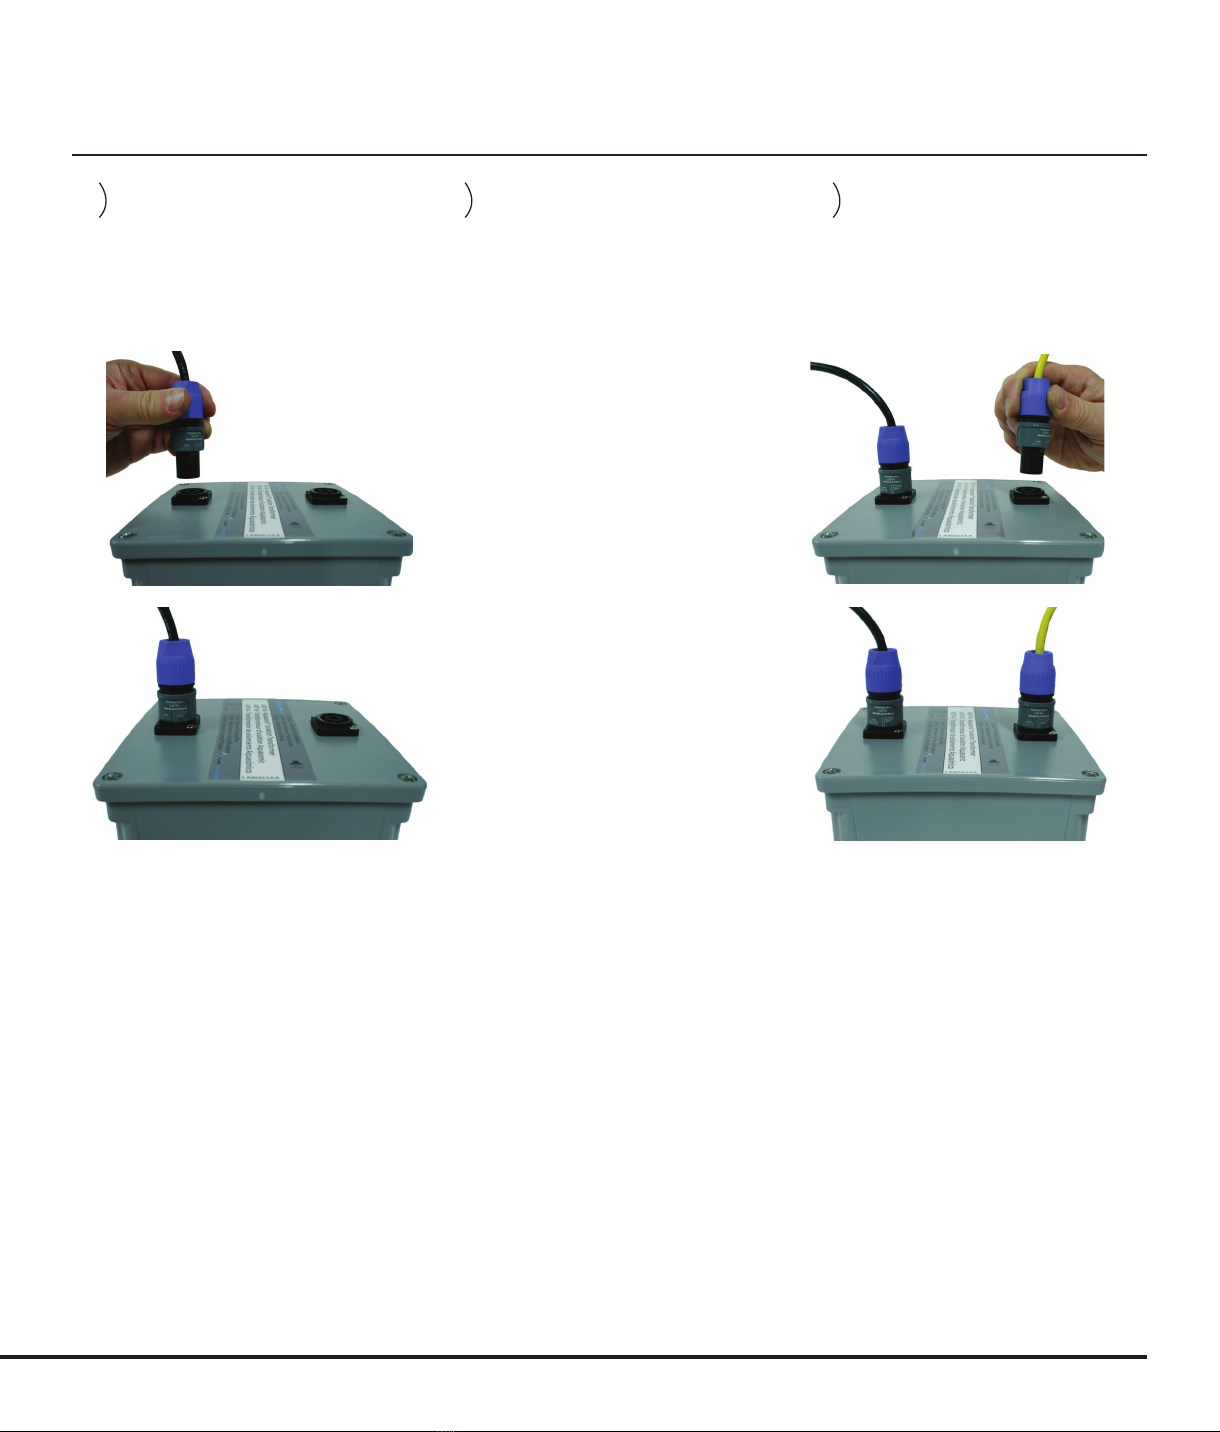
ISOLATION TRANSFORMER INSTALLATION
Plug the amplier cable
connector into the
transformer input. Make
sure to turn the connector
until it locks in place.
Repeat steps 3 - 9 to attach
the Speakon connector to
the Diluvio Speaker cable.
Connect the positive wire
(white) to the 1+ connection,
and the negative wire (black)
to the 1- connection.
Plug the Diluvio Speaker
cable connector into the
transformer output. Make
sure to turn the connector
until it locks in place.
1 0 11 12
www.clarksynthesis.comDiluvio™ Underwater Speaker
Install an amplifier rated
between 125 and 150 watts
into 4 ohms.
The speaker only reproduces the
audio sent to it by the amplifier. If
no sound is playing, but there is a
noise coming from the speaker, the
amplifier may be defective.
Turn on the audio source. Turn
the amplifier on. Listen underwater.
Congratulations.
You’ve successfully
fixed the problem.
Make sure the tab fits tightly.
You may have to add a smaller
filler to the tab so it fits tightly
in the niche
Check the sound system
wiring for ground loops.
Turn on the amplifier. Turn off the audio source.
Yes
Yes
My Underwater Speaker does not sound very good.
Does the speaker make a
humming sound when playing
no music?
Does the speaker make a noise
when no music is playing?
No
No
Yes
Remove the face ring and speaker assembly from
the niche. Hold the speaker assembly away from the
niche. Listen underwater.
Does the face ring tab fit
tightly in the niche’s slot?
YesNo
No
No
Is the amplifier rated between
125 and 150 watts into 4 ohms?
Is the sound distorted?
Yes
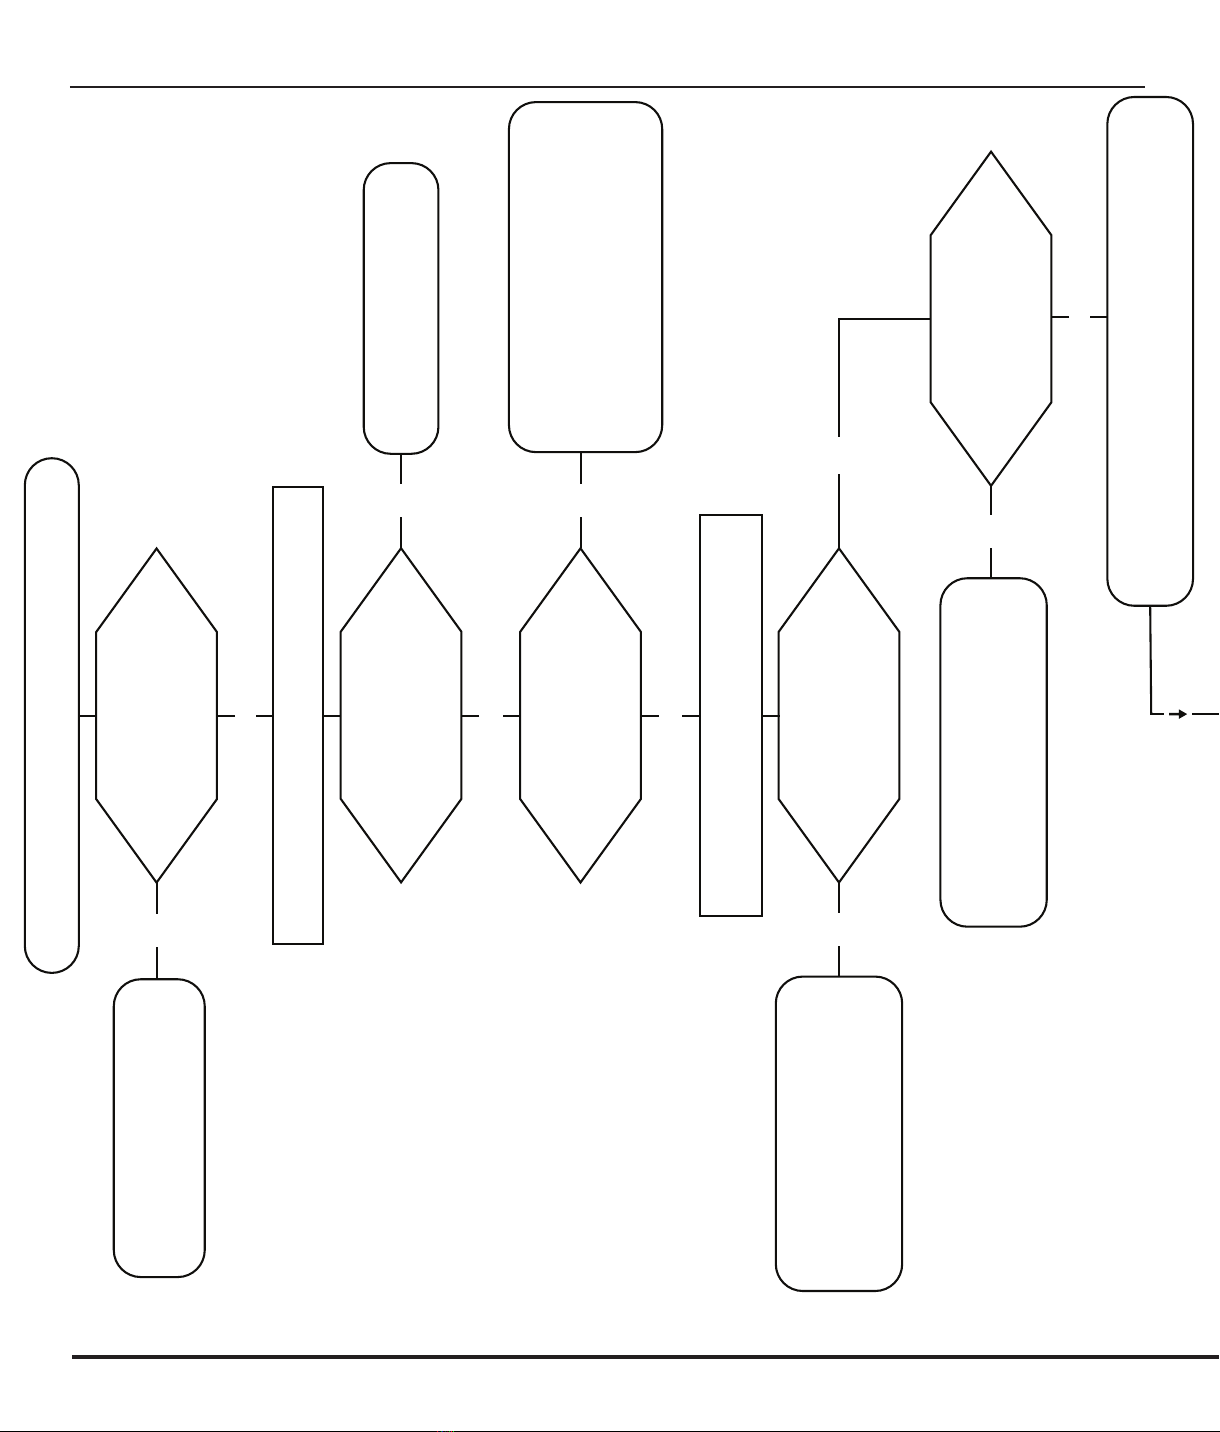
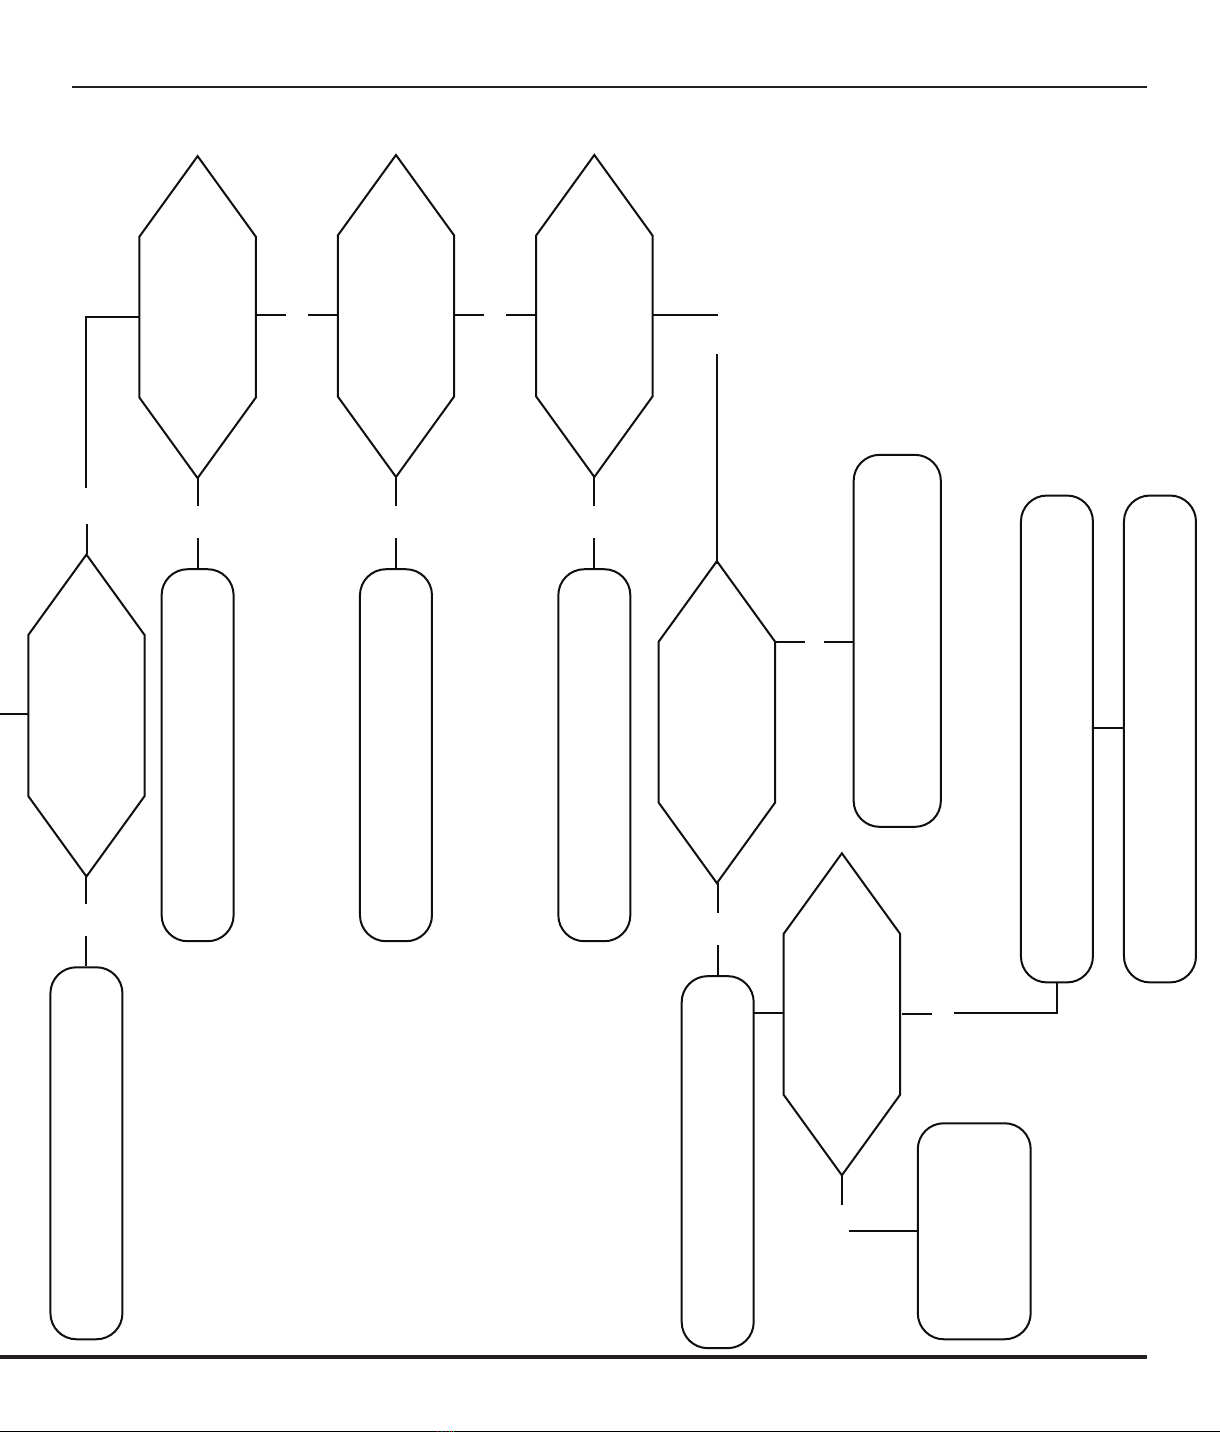
TROUBLESHOOTING
www.clarksynthesis.com Diluvio™ Underwater Speaker
Install an amplifier rated
between 125 and 150 watts
into 4 ohms.
The speaker only reproduces the
audio sent to it by the amplifier. If
no sound is playing, but there is a
noise coming from the speaker, the
amplifier may be defective.
Turn on the audio source. Turn
the amplifier on. Listen underwater.
Congratulations.
You’ve successfully
fixed the problem.
Make sure the tab fits tightly.
You may have to add a smaller
filler to the tab so it fits tightly
in the niche
Check the sound system
wiring for ground loops.
Turn on the amplifier. Turn off the audio source.
Yes
Yes
My Underwater Speaker does not sound very good.
Does the speaker make a
humming sound when playing
no music?
Does the speaker make a noise
when no music is playing?
No
No
Yes
Remove the face ring and speaker assembly from
the niche. Hold the speaker assembly away from the
niche. Listen underwater.
Does the face ring tab fit
tightly in the niche’s slot?
YesNo
No
No
Is the amplifier rated between
125 and 150 watts into 4 ohms?
Is the sound distorted?
Yes
Yes
Yes
Is the white gasket installed on
the speaker sound lens?
Is the tensioning wire inserted
into all of the face ring hooks?
Yes
Congratulations. You’ve successfully
fixed the problem. No
Reinstall the speaker in the niche.
Listen underwater.
Is the sound distorted?
Check the niche. Verify that it doesn’t have any loose
parts, like the ground nut and the conduit connector.
Try a diffrent sound source and/ or amplifier.
If the sound is still distored, contact Clark Synthesis.
Tighten the jam nuts on the stud
that connects the sound lens to
the speaker body.
No
Install the white gasket. No
Reinstall the tensioning wire into all
of the face ring hooks. No
Tighten the tension wire. No
Yes
Is the sound still distorted?
Yes
Is the tensioning wire
tightened down?
Holding the speaker body,
can the sound lens be easily
rotated?
Yes
Congratulations.
You’ve successfully
fixed the problem.
No
TROUBLESHOOTING
www.clarksynthesis.comDiluvio™ Underwater Speaker
When planning the placement of your Diluvio™ Underwater Loudpeaker(s), there are a few key
points to consider. The following suggestions address these points and are intended to help
you maximize the performance and enjoyment of your speakers.
First, you will want to determine the number of speakers needed to deliver an adequate
level of sound coverage throughout the pool. The general rule of thumb here is that one (1)
Diluvio™ will provide sufficient sound coverage for a 20 ft. by 20 ft. (6m by 6m) area of pool. For
example, if you have a 20 x 40 ft. pool (6 x 12m), you will need a minimum of two (2) Diluvio™
speakers to properly activate that pool (see diagram A).
However, for lap pools, or pools with long, narrow segments, it is better to place one speaker
for every 20 linear feet (6 linear meters), rather than one for every 400 ft2(36m2). For example, if
you have a lap pool that is 10 ft. by 60 ft. (3m by 18m), (600 ft2/54m2), it would be best to space
out three (3) speakers down the length of the pool, rather than install only two (2) speakers, as
determined by using the one speaker for every 400 ft2(36m2) rule (see diagram B).
Second, you need to choose the placement of the speakers in respect to the overall layout of
the pool. It is usually recommended that the speakers are placed in such a way as to allow for
the greatest area to be covered (see the Sound Coverage Areas in the diagrams above). Much
like pool lighting, you want to place the speakers in a location that directs the speaker across
the largest area where sound is desired. One final note in relation to speaker placement; it is
best to avoid placing the speakers on walls where there is a high possibility the sound lens will
be repeatedly kicked by swimmers turning and pushing off of the walls. Therefore, we suggest
that you avoid placing speakers on the ends of lap pools.
Third, although there are no minimum depth requirements for the Diluvio™, insure the light
niches that will house your speakers are placed at a depth so the speakers will be completely
submerged in summer and below the freeze line in winter. A depth of approximately 18 inches
(45cm) below the water’s surface is common, but may need to be adjusted based on the climate
and pool owner preferences.
Finally, for custom, non-symmetrical pools, one should still implement the general principles
mentioned above. If a question remains as to the best placement after reading this document,
the professionals at Clark Synthesis are happy to assist you in determining the best placement
for your speakers. You can either fax or email a blueprint of the pool design to us and our staff
will work with you to pinpoint the best speaker locations.
DILUVIO™ PLACEMENT
60 ft. (18m)
10 ft.
(3m)
Speaker- 10 ft. (3m) Speaker- 50 ft. (15m)
Speaker- 30 ft. (9m)
Sound
Coverage
Area
Sound
Coverage
Area
Sound
Coverage
Area
40 ft. (12m)
20 ft. (6m)
Speaker
Speaker
Sound
Coverage
Area
Sound
Coverage
Area
A) B)

www.clarksynthesis.com Diluvio™ Underwater Speaker
CHECK OUT THESE AMAZING CLARK SYTHESIS PRODUCTS!
The TST429 Platinum Professional Transducer is the most powerful audio transducer
on the market today. Available only from Clark Synthesis, the TST429 provides the
ultimate performance and output of full-delity, full-frequency sound with a fre-
quency response from 5hz to 17kHz. This premium transducer is designed to meet
the demands of audio applications such as high-end home theater furniture, theater
risers and platforms, oors (including dance oors), simulators, gaming systems,
and ProSound equipment.
TST429
The TST329 Gold Transducer has a proven record of superb performance, sound
delity and eciency. Available only from Clark Synthesis, the TST329 is one of our
ProSound products and provides superb, reliable performance. The Gold Profes-
sional Transducer is a great choice in many audio/video applications such home
theater furniture and commercial/military vehicle simulators.
TST329
The TST239 Silver Transducer is an excellent choice for most entry-level audio ap-
plications. This product is widely used in the game chair market, providing solid per-
formance at an aordable price.
TST239
The AW339 All-Weather Transducer is the weather-resistant version of the TST329
Gold. Specically designed to withstand rain and humidity, the AW339 can handle
many adverse conditions that would damage ordinary speakers or transducers. The
AW329 can turn a deck, hot tub, or boat hull into a full- frequency speaker, and pro-
duce full-delity sound in a variety of climates and environments.
AW339
The ProSound429 Platinum Thumper is the most powerful thumper available from
Clark Synthesis. It is the rst choice for many professional touring musicians.
ProSound429

© 2019 Clark Synthesis, Inc.
All Rights Reserved.
Clark Synthesis, Inc.
Phone:303.797.7500
Fax: 303.797.7501
www.clarksynthesis.com
MAN004 REV A
There is more helpful information at
www.clarksynthesis.com
VIDEOS
Underwater Speaker Placement Essentials Video
How do Underwater Loudspeakers Work?
Diluvio Install, Pentair Face Ring, with screen
Diluvio Install, Pentair Face Ring, without screen
FAQ’s
PHOTOS
& MORE!
Other manuals for TACTILE SOUND AQ339 Aquasonic
7
Table of contents
Other Clark Synthesis Speakers manuals

Clark Synthesis
Clark Synthesis TACTILE SOUND AQ339 Aquasonic User manual

Clark Synthesis
Clark Synthesis Diluvio User manual

Clark Synthesis
Clark Synthesis TACTILE SOUND AQ339 Aquasonic User manual

Clark Synthesis
Clark Synthesis TACTILE SOUND AQ339 Aquasonic User manual

Clark Synthesis
Clark Synthesis TACTILE SOUND AQ339 Aquasonic User manual

Clark Synthesis
Clark Synthesis TACTILE SOUND AQ339 Aquasonic User manual

Clark Synthesis
Clark Synthesis TACTILE SOUND AQ339 Aquasonic User manual

Clark Synthesis
Clark Synthesis TACTILE SOUND AQ339 Aquasonic User manual


