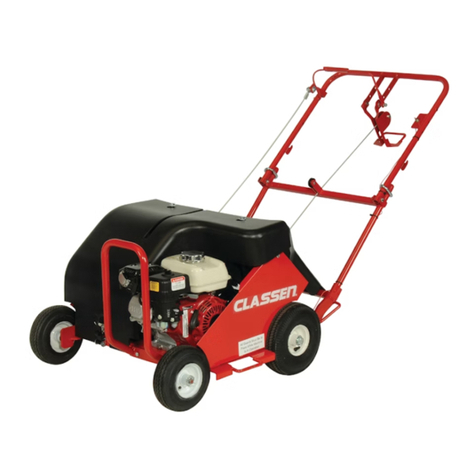
Classen TA-25DE User manual

1028 Street Road • P.O. Box 38
Southampton, PA 18966 U.S.A.
Ph. (877)596-6337
OPERATOR’S MANUAL
AERATOR MODEL:
TA-25DE
POWERSTEER AERATORS
(S.N 1140064404 and Above)
C100583 REV B 10-2014

TABLE OF CONTENTS
INTRODUCTION ..........................................................1
Thank You ..............................................................1
Read This Manual ..................................................1
Warranty ................................................................1
Measurements........................................................1
Serial Numbers.......................................................1
Ordering Part ..........................................................1
Directions................................................................1
OWNERS RECORD.......................................................1
PRE-DELIVERY CHECK LIST.......................................1
DELIVERY CHECK LIST................................................1
SAFETY PRECAUTIONS...............................................2
Training...................................................................2
Preparation Safety..................................................2
Engine Safety..........................................................2
Operational Safety..................................................2
OPERATION...................................................................3
Preparation .............................................................3
Starting Engine .......................................................3
Transporting Aerator ...............................................3
To Operate Aerator..................................................3
GENERAL MAINTENANCE...........................................4
Aerator Maintenance...............................................4
Engine Maintenance ..............................................5
AERATOR STORAGE....................................................5
Storing Aerator........................................................5
Operation After Extended Storage..........................5
SAFETY DECALS..........................................................5
DECLARATION OF CONFORMITY...............................6
TWO YEAR LIMITED WARRANTY................Rear Cover

PRE-DELIVERY CHECK LIST
DELIVERY CHECK LIST
INTRODUCTION
OWNER’S RECORD
THANK YOU
Thank you for purchasing a CLASSEN Aerator
READ THIS MANUAL
Read this manual carefully in its entirety. It contains safety,
operating, maintenance, and adjustment instructions for your
Aerator. By following the operating and maintenance instruc-
tions you will prolong the life of your equipment and maintain
its maximum efciency. Failure to do so could result in per-
sonal injury or equipment damage.
This manual should be considered a permanent part of your
Aerator and should remain with it if you sell it.
WARRANTY
Refer to last page.
MEASUREMENTS
U.S. Units of measure are used in this manual.
SERIAL NUMBERS
Write frame and engine serial numbers, plus model numbers
in “Owner’s Record” section below. You may need these
numbers when you order parts. The serial number stick plate
is located on the right rear of the Aerator frame.
ORDERING PARTS
When ordering parts, always give the serial number and
model of your Aerator as well as the quantity, part number and
description of the part needed.
DIRECTIONS
“Right Hand” and “Left Hand” sides of the Aerator are deter-
mined by facing the “back” of the Aerator as you would oper-
ate the machine.
DATE PURCHASED _________________________________
AERATOR MODEL NUMBER_________________________
AERATOR SERIAL NUMBER _________________________
ENGINE MODEL NUMBER __________________________
ENGINE SERIAL NUMBER___________________________
Check the following before you deliver the Aerator to the
customer.
1. Guards and shields fastened in place.
2. Decals fastened and legible.
3. Weight bar installed.
4. Gas lever on engine turned on.
5. All lubrication points greased.
6. 6:1 gearbox oil level.
7. Engine oil level.
8. Air cleaner.
9. Touch up scratches. 10. Chain(s) tight.
11. Lowering handle working properly.
12. Control handle(s) working to tighten V-belt(s).
13. Add fuel, start engine, test run.
DATE SET UP __________/__________/__________
Review the operators manual with the customer.
1. Schiller Grounds Care, Inc. warranty.
2. Safe operation and service.
3. How to use controls.
4. Operating the machine correctly.
5. Transporting the Aerator.
6. Correct fuel and lubricants.
7. Daily and periodic inspections.
8. Changing oil after break-in period.
9. Servicing the Aerator regularly and correctly.
10.Schiller Grounds Care, Inc. parts and service.
11. Give the customer the operators manual and encourage
customer to read it.
DATE DELIVERED __________/__________/__________
SIGNATURE _______________________________________
1

SAFETY PRECAUTIONS
WARNING
DO NOT FILL TANK COMPLETELY FULL. DO NOT
SMOKE WHILE YOU FILL FUEL TANK. DO NOT
REMOVE GAS CAP IF ENGINE
IS RUNNING.
DO NOT OPERATE ENGINE IN A CONFINED
SPACE WHERE DANGEROUS CARBON MONOX-
IDE FUMES CAN COLLECT.
TRAINING
1. Regard the unit as a piece of power equipment and teach
this regard to all who operate this unit.
2. Read the instructions carefully. Be familiar with the controls
and the proper use of the equipment.
3. Never allow children, teenagers or people unfamiliar with
these instructions to use this piece of equipment.
4.Avoid operating unit while people, especially children or pets,
are nearby. Keep in mind that the operator or user is respon-
sible for accidents or hazards occurring to other people or
their property.
5. Be sure you know how to stop the Aerator at a moments
notice.
PREPARATION SAFETY
1. The use of personal protective equipment, such as (but not
limited to) protection for the eyes, ears, feet and head is rec-
ommended.
2. While operating, always wear substantial foot wear and long
trousers. Do not operate the equipment when barefoot or
wearing open sandals.
3. Area should be free of all obstacles and debris.
ENGINE SAFETY
1. Handle gasoline with care; it is highly ammable.
2. Use an approved gasoline container.
3. Always add fuel before starting the engine.
4. Fill the fuel tank outdoors.
5. If fuel is spilled, do not attempt to start the engine. Move
away from the area of the spill and avoid creating any source
of ignition until fuel vapors have dissipated.
2
OPERATIONAL SAFETY
1. Carefully read and follow all caution decals. (See Pg. 5.)
2. Operate only in daylight or good articial light.
3. Do not operate machine unless all guards, shields and
covers are in place and in proper working condition.
4. It is essential all operator safety mechanisms be connected
and in operating condition prior to use.
5. Do not change the engine governor settings or over-speed
the engine. Operating an engine at excessive speed may
increase the hazard of personal injury.
6. Disengage the drive control(s) and tine lowering handle
before starting. (See Pg. 3, Fig 1.)
7. Start the engine carefully with feet well away from the tines.
8. Do not put hands, feet or clothing near rotating parts while
the unit is being operated.
9. Travel up and down slopes at a 45 degree angle rather
than across, to prevent unit from tipping over.
10. Exercise extreme caution when changing direction on
slopes. Do not get too close to sharp drop-offs or operate
unit on excessively steep slopes. DO NOT release control
handle(s) on a slope, this will cause free wheeling, allowing
unit to roll back down the slope. Make sure to leave
yourself room to correct the problem if one arises.
11. Use caution when pulling the unit towards you.
12. Always stop the tines if unit has to be tilted for
transportation or when crossing surfaces (i.e. sidewalks,
driveways, stepping stones, etc.).
13. Never pick up or carry an Aerator while the engine is
running.
14. Stop the engine and disconnect the spark plug wire: a)
before checking, cleaning or working on unit, and b) after
striking a foreign object (inspect the unit for damage and
make repairs before restarting and operating).
15. Stop the engine: a) whenever you leave the unit, b) before
refueling, and c) before clearing blockages.
16. Reduce the throttle setting during engine run-out and, if
the engine is provided with shut-off valve, turn the fuel off
at the conclusion of operating.

OPERATION
WARNING
CAUTION: TO AVOID INJURY, DO NOT PLACE
YOUR FEET OR OTHER BODY PARTS UNDER
THE TINES WHILE STARTING THE ENGINE.
WARNING
CAUTION: TO AVOID INJURY, DO NOT PLACE
FEET OR OTHER BODY PARTS UNDER TINES
WHILE STARTING THE ENGINE.
Lowering Handle
PREPARATION
1. Carefully read this manual and operate Aerator correctly.
2. Always check machine on level ground.
3. Visually check all moving parts and all fasteners, if loose or
broken, tighten or replace. Check for broken or bent tines,
replace if necessary.
4. Lubricate all ttings after every four hours of using machine,
using a pressurized gun with standard lithium base lubricant
(see “General Maintenance” section). Wipe off ttings before
and after lubricating.
5. Check engine crankcase and gear reduction case oil levels
with engine resting in a level position. Add oil if necessary.
(Refer to engine manufacturer’s owners manual for the cor-
rect type and amount of oil.)
6. Fill the fuel tank according to engine manufacturer specica-
tions.
7. For best performance and maximum tine penetration, thor-
oughly water lawn the day before aeration.
8. Police lawn area for obstacles and debris (i.e.
sprinklers, hoses, toys, etc.)
9. Mark underground sprinkler heads and other hidden
obstacles to prevent damage.
STARTING ENGINE
1. Turn fuel cock to the “open” position.
2. Turn choke on (closed).
3. Turn ignition switch to “on”.
4. Pull recoil starter rope until engine starts.
5. After engine is warm, turn off choke (open).
6. Allow engine to run one minute before operating.
7. Check engine rpm setting before operating.
DO NOT exceed 3600 rpm.
TRANSPORTING AERATOR
1. Raise tines before transporting unit across surfaces or before
transporting from one work area to another by lifting up on
lowering handle (see Fig. 1).
2. Aerator can be transported with the engine running or
with the engine off.
TO OPERATE AERATOR
1. Start engine. (See “Starting Engine” section.)
2. Make sure the rear tires are in the down position (tines not
touching ground). Slowly pull back on control handle(s).
(See Fig. 1.)
Fig. 1
3. Move Aerator to the work area. (See “TransportingAerator”
section.)
4. Upon reaching the work area, release control handle(s) and
push down on lowering handle (see Fig. 1) putting tines in the
turf.
5. Pull back slowly on the control handle(s) to begin aerating.
6. For maximum tine penetration into turf, apply downward pres-
sure on handle.
7.Model TA-25:These models have two control handles de-
signed so it can be steered around corners, obstacles, etc. By
pulling back only the left control handle, the Aerator will turn
left, by pulling back only the right control handle, unit will turn
right. Pull both control handles back to go straight.
8. When nished aerating, lift up on lowering handle to move
wheels into transport position. (See “Transporting Aerator”
section.)
9. To stop engine, take hands off control handle(s).
10. Turn off ignition switch.
3
Control Handle (Left Side)

GENERAL MAINTENANCE
Fig. 2
Pulley Guard
Main Frame Top Flat (Left Side)
Main Frame (Left Side)
AERATOR MAINTENANCE
TO KEEP THE AERATOR IN GOOD
OPERATING CONDITION, PERFORM THE
FOLLOWING:
• When replacement parts are required, use genuine Classen
parts or parts with equivalent characteristics including type,
strength, and material. Failure to do so may result in product
malfunction and possible injury to the operator and/or bystand-
ers.
• Any warning decal that becomes illegible should be replaced
immediately. (See Pg. 5.)
• Do not operate equipment without shield(s) in place. Do not
make any adjustments or perform any maintenance while the
engine is running.
• Thoroughly clean all tines inside and out when aerating is com-
pleted and apply a light coat of oil to prevent rust on tines.
• Always lubricate Aerator each time it is put into service. Wipe off
lubrication ttings before and after each lubrication. The num-
ber of lubrication ttings vary depending on model of Aerator.
TA-25DE - Qty. 4, one in each wheel assembly and one in each
idler/clutch arm pivot bearing. (See Fig. 2.)
Idler Clutch Arm
(Right Side)
• Keep drive belt(s) free of oil and dirt.
Model TA-25DE - If belts slip due to normal belt stretch, engine
can be adjusted forward within slotted holes to tighten belts.
• Check roller chain(s) for wear. Apply a light coat of No. 30 oil or
penetrating chain lubricant to keep the chain(s) clean and in
proper running order.
• Check roller chain(s) for tightness. Follow these steps:
4
Model TA-25DE (See Fig. 3.)
1. Disconnect spark plug.
2. Take off pulley guard (see Fig. 2) by removing bolts, etc. which
attach it to the frame.
3. Loosen the bolts, nuts, lock washers, and at washers (Key 4) to
allow movement of the pillow block bearings only (Key 5). Loosen
nuts only, do not remove.
4. Loosen and unthread the two 5/16’’ nuts (Key 2) down to top of
chain tightening bracket (Key 3).
5. Turn the tap bolts (Key 1) evenly clockwise so jack shaft stays
level with frame until chain(s) is/are tight.
6. When adjustment is complete, retighten the bolts (Key 4) on the
pillow block bearings (Key 5) and replace the pulley guard and
fasteners.
NOTE: Excessive roller chain tightness will shorten the life of the
bearings. Chain(s) should have movement of 0.18 in./4mm free play
back and forth at center point between front drive sprocket and rear
tine assembly sprocket.
Fig.4
ENGINE MAINTENANCE
(Refer to engine manufacturer’s owners manual) Check engine
and gear reduction case oil level with engine resting in a level
position. Inspect air lter element and replace if necessary.

SAFETY DECALS
AERATOR STORAGE
WARNING
SAFETY WARNING: TO PREVENT POSSIBLE EX-
PLOSION OR IGNITION OF VAPORIZED FUEL,
DO NOT STORE EQUIPMENT WITH FUEL IN TANK
OR CARBURETOR OR NEAR OPEN FLAME (I.E.
FURNACE, WATER HEATER, PILOT LIGHT).
STORAGE INSTRUCTIONS
Before the Aerator is put into storage for any period exceeding
30 days, the following steps should be taken.
1. Drain all fuel from fuel tank and fuel lines.
2. Start engine and run until all fuel is used from carburetor
oat bowl.
3. While engine is still warm, drain the crankcase oil and
replace with the proper weight oil corresponding to the
season the Aerator will next be used.
4. Remove the spark plug and squirt a small quantity of engine
oil into the cylinder. Turn the engine over a few times to
distribute that oil.
5. Lubricate all lubrication ttings.
To put Aerator into operation after an extended storage:
1. Check for loose parts and tighten if necessary.
2. Check for cracked or broken tines and replace.
3. Fill fuel tank.
4. Check engine and gear reduction case oil levels (with en-
gine in a level position).
5. Start engine.
6. Check for fuel leaks.
7. Check operation of control handle(s) to make sure unit
stops when lever is released forward.
8. Aerator is equipped with fuel shut-off valve, close valve
before transporting.
5
4168759

The Undersigned Manufacturer:
Schiller Grounds Care, Inc.
1401 Logan Street
Norfolk, NE 68701
EU Authorized Representative:
Earlsmere Limited
Unit 18 Valley Road
Station Road Industrial Estate
Wombwell, Barnsley, South Yorkshire, S73 OBS UK
Declare that the machine described below:
Make & Type………………………………………….Classen Self Propelled Aerator
Category………………………………………… Aerator
Series……………………………………………. TA-17DE, TA-25DE
Engine……………………………………………Honda
Speed…………………………………………….High idle governor setting 3600 rpm ±100rpm
Net installed power……………………………..3.6KW (4.8 HP) and 5.3KW (7.0 HP)
Complies with the provisions of the following European directives and Amendments and the Regulations transposing
it into national law.
Machinery Directive………………………………….. 2006/42/EC
EMC Directive………………………………………….2004/108/EC
Noise in the Environment Directive………………….2000/14/EC
Vibration Directive……………………………………..2002/44/EC
Non Road Emissions………………………………….2002/88/EC
Sound:
Sound levels were determined in accordance with Directives 2000/14/EC (Annex V) and standards
EN/ISO3744:1995 and ISO 11094:1991
Series TA-17DE TA-25DE
Guaranteed Sound Power Level 103 dBA 107 dBA
Sound Pressure 91 dBA 89dBA
Vibration 7.3 m/s² 8.6 m/s²
Vibration:
Hand/arm vibration was measured at the right and left operator handles per ISO 5349-1-2001 and ISO 5349-2-2001.
Levels were calculated using ISO/DIS 5395-1, in accordance with 2002/44/EC. Only the highest of the left and right
readings is given.
Intended Use and Limits:
This machine is for cutting sod in grass areas grown for the purpose of harvesting sod, and general sod removal. It
is intended for use on at areas and small slopes. Loss of control may result on steeper slopes. It is not intended
for use in rocky areas.
EC Declaration of Conformity
Chuck Clark
Director of Operations
Date: March 8, 2011
Jim White
Managing Director
Date: March 8, 2011
6
P/N 800032

7

©2014 Schiller Grounds Care, Inc. All Rights Reserved.
2 YEAR LIMITED SERVICE AND
WARRANTY POLICY
CLASSEN®
SCHILLER GROUNDS CARE, INC.
1028 STREET ROAD, P.O. BOX 38
SOUTHAMPTON, PA 18966
PHONE 877-596-6337 • FAX 215-357-8045
Schiller Grounds Care, Inc.
1028 Street Road • Southampton, PA 18966
Telephone: 1-800-366-6268
TWO YEAR LIMITED WARRANTY
EffectiveApril 1, 2007
For the period of two years from the date of purchase, CLASSEN will repair or replace for the original purchaser
free of charge, any part or parts found upon the examination of our factory authorized service station, or by
the factory in Southampton, PA to be defective in material or workmanship. All transportation charges on parts
submitted for repair or replacement under this warranty shall be borne by the purchaser.
This warranty does not include engines or engine parts, tires, batteries, or gearboxes that are covered under
separate warranties furnished by their manufacturer or supplier, nor does it include normal maintenance parts,
including but not limited to, spark plugs, points, lters, blades, and lubricants.
All service under this warranty will be furnished or performed by our factory authorized service stations.
There is no other expressed warranty. Implied warranties, including those of merchantability and tness for a
particular purpose, are limited to two years from the date of purchase and to the extent permitted by law, any
and all implied warranties are excluded. The above remedy of repair and replacement of defective parts is
the purchaser’s exclusive remedy for any defect, malfunction or breach of warranty. Liability for incidental or
consequential damages under any and all warranties is excluded to the extent permitted by law.
NORMAL RESPONSIBILITIES OF THE SELLER AND THE USER
1. The Distributor or Dealer is responsible for the proper assembly and preparation of the product for
delivery to the end user.
2. The User is responsible for reading the Manual and Instructions.
3. The User is responsible for proper operation and maintenance as described in the manual.
4. The User is responsible for the replacement of wear items such as blades, belts, tires, batteries, etc.
5. The User is responsible for damage due to improper operation and maintenance, as well as abuse.
All claims must be received by the factory 30 days after the end of the warranty period to receive warranty consideration.
Table of contents
Other Classen Tiller manuals