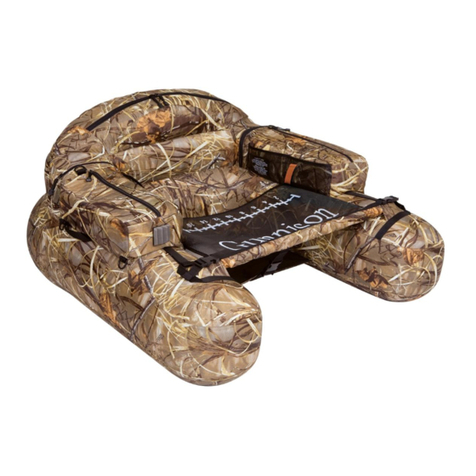
The Teton Materials list:
• 1floattubecoverwithmainflotationbladderand1rearbladder
• 1meshstrippingapronwithspreaderbarsleeve
• 3-pieceapronspreaderbar
• 1bladderrepairkit(contains:repairinstructions,twoPVCpatchesanda
deflationtube)
How to inflate your float tube bladders
Floattubebladdersaredesignedtobeinflatedbyfootorhandpump.
To inflate Main Bladders:
Turnthevalvecaponthevalvestem
counter-clockwisetoopentheairway.After
inflationclosethevalvebyturningthecap
clockwise(Fig.1).
To Deflate:
DONOTREMOVECAP–Turnthevalvecaponthe
valvestemcounter-clockwisetoopentheairway
fromthebladder.
To inflate Rear Bladder:
Openthecaponthevalvestem.Pinchthevalvestem
toopenairway.Afterinflationclosethevalvecapby
insertingthecapintothetopofthevalvestem(Fig.2).
To Deflate:
Openthecaponthevalvestem.Inserttheprovided
deflationtubeintothetopofthevalvestemuntiltheairwayisopen.DO
NOTINSERTTHEDEFLATIONTUBEALLTHEWAYINTOYOURBLADDER.
Inflating and assembling your float tube
1. Placeyourfloattubeflatonthefloorwiththepocketsfacingup.
2. Locateandaccessyourrearbladderbyunzippingtherearpocket
behindtheseat(Fig.3).
3. Inflatetherearbladderabout30%—just
enoughtoholdtheshape.
4. Checkthebladderbyunzippingthefloat
tubeshellinsidetherearpocket(Fig.3).
Thebladdershouldlieflat,untwistedand
centered.Makesurethevalvestemthat
attachestothebladderfitsintotheaccess
pocketofthefloattubecover.Zipclosedthe
floattubeshell.
5. Inflatetherearbladderuntilmost
ofthewrinklesareoutofthecover.
Ifanytwistsdevelopstop,deflate
thebladder,straightenitwithin
itspocketandre-inflate.Closethe
valvecap.
6. Accessyourmainbladdervalve
stemthroughtheinsidezipper
pocket(Fig.5).Ifvalvestemsare
notaccessibleinsidethepocket
seestep8.
7. Inflatethemainbladderabout
30%—justenoughtoholdtheir
shape.
8. Checkthemainbladderbyunzippingthe
pontoons.Thebladdershouldlieflat,
untwistedandcenteredunderneaththefloat
tubepockets.Makesurethevalvestemthat
attachestothebladderfitsintotheaccess
pocketofthefloattubecover(Fig.5).Zip
closedthefloattubecover.(Atwistedbladder
willdistortthecoverwhenyoublowitup.)
9. Inflatethemainflotationbladderuntilmostofthewrinklesareoutof
thecover.Ifanytwistsdevelopstop,deflatethebladder,straightenit
withinitspocketandre-inflate.Closethevalvecapstightly.
10. Connectthethreespreaderbarpiecesbyinsertingthetwolongtubes
intotheshortercouplingtubewiththeangledendsonbothlongtube
endsfacingout.Nowplacethemeshstrippingaprononthefloorwith
thegraphicsfacingup.Slipthespreaderbarwiththeangledends
facingdownintothefabricsleeveatoneendoftheapron.Slipthe
endsoftheapronsleeveintothefabricreceptaclesonthetopandfront
oftheleftandrightfloattubedarms.
Lifting the tube in and out of the water
Therearetwowebhandlesnexttothefloattubearmpocketsthatcanlift
thetubeinandoutofthewatereasily.
Launching and using your float tube
1. Startwithagentleslope(likeaboatramp).
2. Attachfinstoyourfeet,thenplaceyourfloattubeinknee-highwater.
Stepintoyourtubefromtheopensideandturnsothatyourbackis
facingthebackrest.
3. Nowjustsitdowninyourfloattube,fastenthestrippingapronandbegin
tofloat.Practicekickingwithyourfinstogobackwardortoturn.
Care and storage of your float tube
Alwayspartiallydeflatethebladdersbeforestoringyourassembled
floattubeinavehicleorhotarea.Theairinthebladderscanexpand
significantly.
Ifyouarenotgoingtouseyourfloattubeforanextendedperioddeflateit
andstoreit.Toavoidmildew,besurethatyourfloattubeisdrybeforeyou
packitandthatyoustoreitinadryplace.
Fig. 1
Fig. 2
Classic Accessories, Inc.
Fig. 5
Inside Pocket
Fig. 3
Rear Pocket
TOP
VIEW
right
left
rear
Float Tube Shell
Fig. 4
