Clesana C1 Series User manual

Operating instructions
Clesana C1 Version 2
07.09.22


5/324/32
Contents
1. Introducon ....................................................................................................................................................................................6
1.1. About this manual.....................................................................................................................................................6
1.2. Warning signs and symbols..............................................................................................................................6
2. Safety.......................................................................................................................................................................................................7
2.1. Proper use ........................................................................................................................................................................7
2.2. Userqualicaon .......................................................................................................................................................7
2.3. Operaon ...........................................................................................................................................................................7
2.4. Cleaning and maintenance...............................................................................................................................8
2.5. Modicaonsandrepairs..................................................................................................................................8
2.6. Residual risks ..................................................................................................................................................................8
2.6.1 Live parts................................................................................................................................................................8
2.6.2 Burning or pointed objects..................................................................................................................8
2.6.3 Water ingress.....................................................................................................................................................8
2.6.4 Moving parts......................................................................................................................................................9
2.6.5 Harmful substances.....................................................................................................................................9
3. Designandfuncon.............................................................................................................................................................. 10
3.1. Overview......................................................................................................................................................................... 10
3.2. Control panel.............................................................................................................................................................. 12
3.3. Display............................................................................................................................................................................... 13
4. Preparaon.................................................................................................................................................................................... 14
4.1. Check the status of the toilet..................................................................................................................... 14
4.2. Insert or change the foil liner..................................................................................................................... 14
5. Operangstepsaerthetoilettrip...................................................................................................................... 16
5.1. Usetheabsorberforuidbinding ........................................................................................................ 16
5.2. Notethellinglevel............................................................................................................................................. 16
5.3. Startushingprocess......................................................................................................................................... 17
6. Oponaloperangsteps ................................................................................................................................................. 19
6.1. Performmanualbagseparaon.............................................................................................................. 19
6.2. Interrupttheushingprocess................................................................................................................... 20
6.3. Restart the toilet..................................................................................................................................................... 21
7. Cleaning and maintenance............................................................................................................................................ 22
7.1. Cleaning ........................................................................................................................................................................... 22
7.2. ChangetheTeontapes.................................................................................................................................. 22
8. Maintenance................................................................................................................................................................................ 23
9. Troubleshoong........................................................................................................................................................................ 24
10. Error codes ................................................................................................................................................................................... 26
11. FAQ ........................................................................................................................................................................................................ 28
12. Disposal and the environment ................................................................................................................................. 29
13.Technicalspecicaons ................................................................................................................................................... 29
7/326/32
1. Introducon
1.1. About this manual
Theseoperanginstruconsfamiliariseyouwiththecharacteriscsandfunconsofthe
waterlesstoiletClesanaC1.Themanualcontainsimportantinformaonforthecorrect
and safe handling of the toilet.
X Readtheseoperanginstruconscarefullybeforetheinialstart-up.
X Keepthismanualsafesothattheinformaonisavailableatallmes.
Thismanualisconnuouslyimproved,butitmayhappenthatdocumentenclosedwith
Clesana C1 does not correspond to the current version. We recommend that you check
on our website hps://clesana.com/info-area whether there a newer version of this
manual is available.
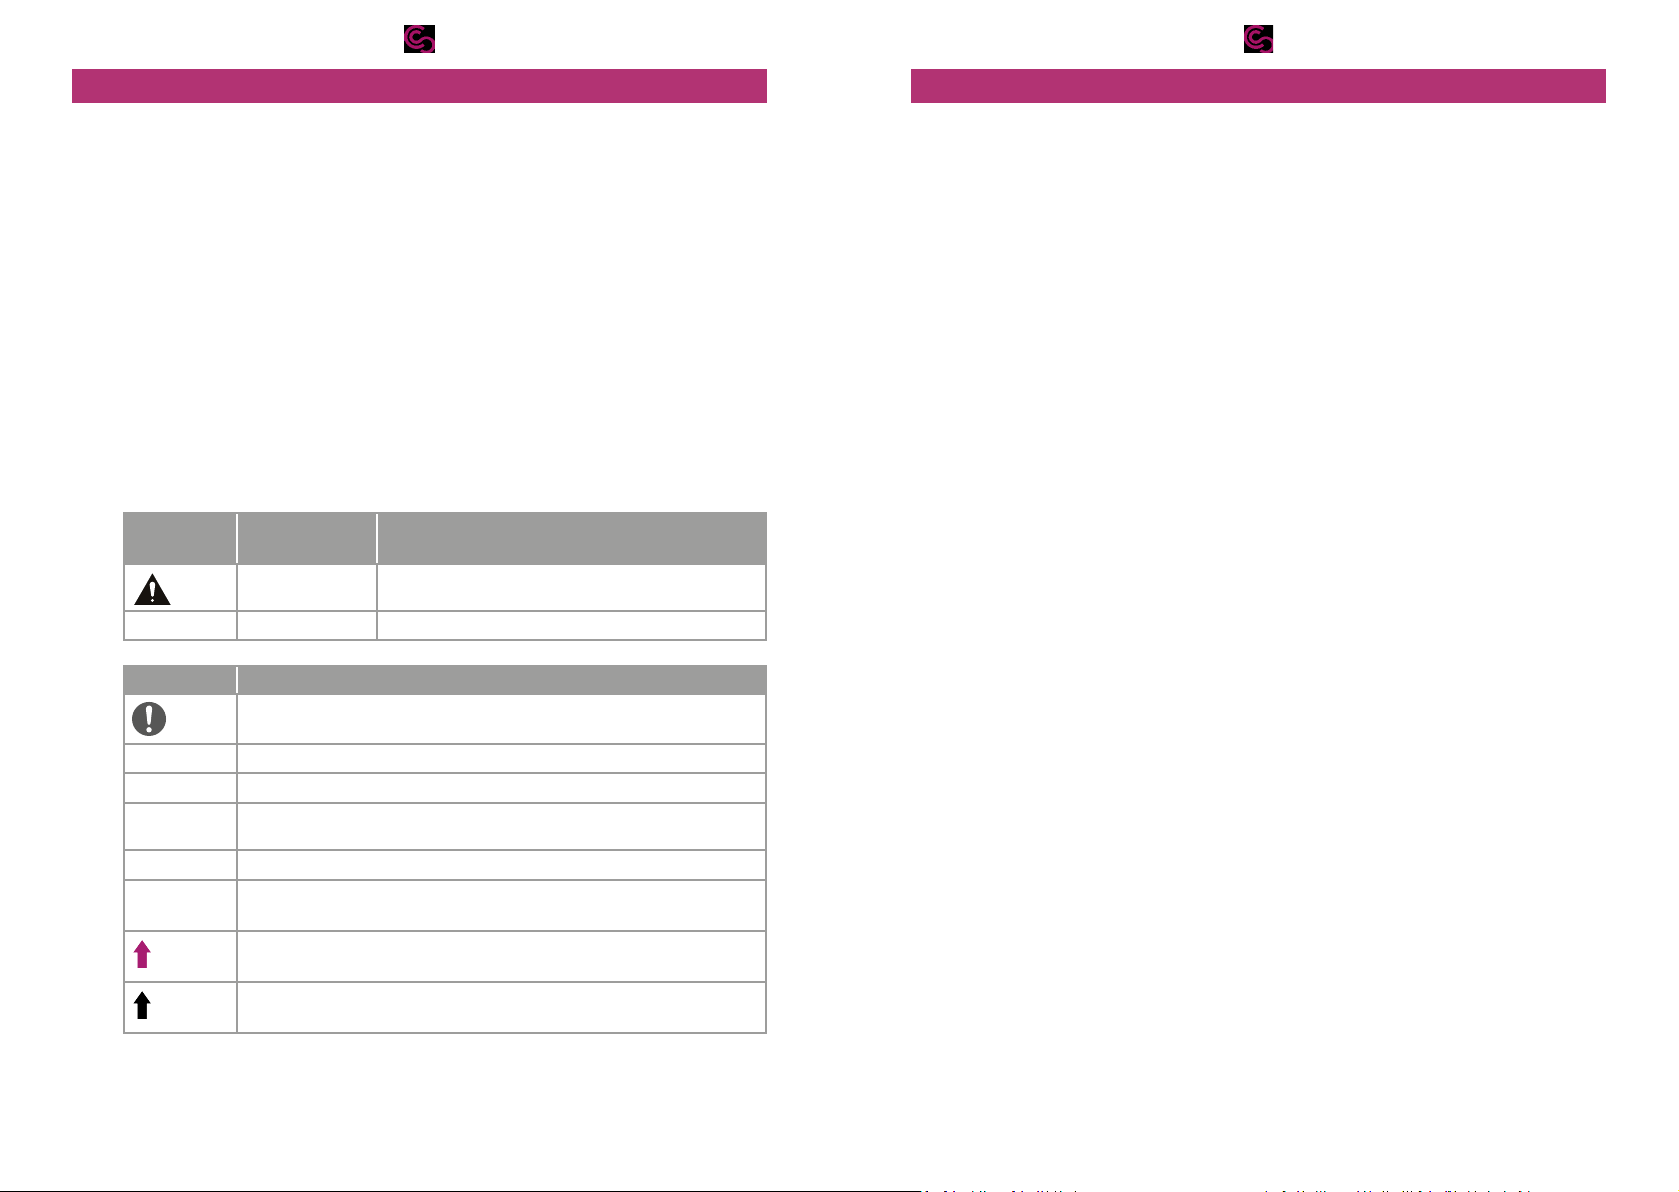
1.2. Warning signs and symbols
Warning signs are used in this manual in order to alert you against property damage and
personal injuries.
Warning
symbol
Warning word Meaning
CAUTION Hazards for persons.
Non-compliance can result in minor injuries.
– NOTE Informaonforavoidingpropertydamage.
Symbol Meaning
Importantinformaon,e.g.forbeercomprehensionorforfacilitangwork
processes
X Aconstepsthatyoumustperform
Z Measures for avoiding hazard in a warning sign
1.,2. Severalaconstepsthatyoumustperformintheorderspecied
ªResultindicaonofanaconsteporseveralaconsteps
(apage,
“Chapter”)
Reference to a chapter of the manual
Important details in graphics
Moonsequencesingraphics
2. Safety
Thischaptercontainsimportantinformaononsafetyofthedevice.Readthesafety
instruconsthoroughlybeforestart-upandoperaon.
2.1. Proper use
The waterless toilet Clesana C1 is intended to be used for sanitary bagging of excre-
mentsandpersonalhygienearcles.Baggingofnappiesorbiowasteisalsopossible.
Dierentusesarenotallowed.Thedeviceisintendedexclusivelyfornon-publicareas.
Possible misuse
Not intended use of the device can result in property damage and personal injuries. For
example,thedeviceisnotsuitableforthefollowinguses:
• Baggingofpointedorsharp-edgedobjects(e.g.brokenglass,needles,razorblades
• Baggingofburningorredhotobjects(e.g.Ashes,cigarees,matches)
• Bagging of liquids and chemicals that could react with the bag
• Baggingoffoodstusororganisms
• Use as climbing aid
2.2. User qualicaon
Persons,childrenandpeoplewithphysical,sensoryormentaldisabiliesnotfamiliar
with the device should use the Clesana C1 only under the supervision or according to
theinstruconsofaresponsibleperson.
Maintenanceworksmustbecarriedoutbyauthorisedqualiedpersons.Contactyour
dealer if needed.
2.3. Operaon
X Regularlycheckthatallfunconsarecarriedoutcorrectly.
X AereachuseandbeforeleavingtheClesanaC1unaended,makesurethatthe
ushingprocessiscompletedandthatthetoiletisreadyforuse.
X Never operate the Clesana C1 without correctly mounted lid and fully inserted tray.
TheSo-Closemechanismclosesthetoiletlidautomacally.Thismechanismwillbe
damaged if the lid is manually pressed downwards.
X Never press the toilet lid downwards.
X Never use the toilet without inserted foil liner.

9/328/32
2.4. Cleaning and maintenance
X Performonlythecleaningworksdescribedintheseoperanginstruconsandnote
theassociatedsafetyinstrucons.
X Do not clean the toilet with running water.
ClesanafoillinersensureareliablefunconingofyourClesanaC1.Theuseofotherfoil
linerscanresultinmalfuncons.
X Use only Clesana foil liner.
2.5. Modicaons and repairs
Repairs not properly carried out can result in accidents and property damage.
X Do not open the base body.
X Donotinstallanyaddionalcomponentsanddonotmakeanymodicaonstothe
device.
X Contact your dealer if a defect is suspected.
2.6. Residual risks
2.6.1 Live parts
Opening the base body can expose the live parts. There is a risk of life threatening
electrocuon.
X Do not open the base body.
2.6.2 Burning or pointed objects
Burningobjectsignitethefoilbagandcauseres.Pointedobjectsdamagethefoilbag,
soiling the tray.
X Donotdisposeofanyburningmaterialssuchascigarees,matchesorhotashesin
the toilet.
X Do not dispose of pointed or shape-edged objects in the toilet.
2.6.3 Water ingress
Water can penetrate in the inside of the toilet through a not closed lid or a not correctly
insertedtray,causeashort-circuitanddamagetheelectroniccontrolorthewelding
mechanism.Thismayresultinmalfunconsanddamagetothecomponents.
X Do not expose the Clesana C1 to jet water (e.g. when taking a shower).
X Use the toilet only when seated.
X Never operate the Clesana C1 in a wet room without the lid properly placed and
fully inserted tray.
X If the welding unit comes into contact with water: Let the toilet to dry for 24 hours
without inserted foil liner.
2.6.4 Moving parts
TheClesanaC1hasarotangmechanismforopmalposioning.Iftheareaaroundthe
toiletisobstructedbyobjects,therotangofthetoiletmayresultincrushingofngers.
X Keep the surroundings of the toilet free of objects.
2.6.5 Harmful substances
Swallowing the absorber can lead to nausea and stomach discomfort. Eye contact can
posetheriskofsevereyeirritaon.
X Keep the absorber away from the reach of children.
X Notethesafetydatasheetoftheabsorber,availableonthewebsite:hps://clesa-
na.com/info-area.
X Intheeventofeyecontact,rinsetheeyeswithrunningwaterforseveralminutes.
X Ifyouhaveswallowedtheabsorber,rinseyourmouthwithwateranddrinkup
plenty of water.
X See a physician in case of persistent discomfort.

11/3210/32
3. Designandfuncon
3.1. Overview
5
1
2
3
4
6
7
9
8
No. Descripon Funcon
1 Lid/Seat • Covering of the foil compartment
• Proteconagainstentryofjetwater
2Foilcassee Mounngofthefoilliner
3 Foil compartment • Replica of a toilet bowl
• Guiding the foil to the welding mechanism
4 Control Panel/Display • Toilet control
• Display of the remaining toilet uses with the
inserted foil liner
• Displayofoperangstatusanderrorcodes
5 Housing/Base body Mounngoflid/seat,foilcassee,Teontape
and tray
6 L-Adapter • Placing the toilet on the wall
• Mounngthetoiletontheoor
• Coveringtheexisngopeningsinthewall,e.g.
due to a previously installed toilet
7 Round base Placingandfreemounngofthetoiletinthe
room
8Tray Collects up to 6 bags. This corresponds to 2 bag
chains with 3 bags each.
9Teontape((PTFETapes) Prevenngthesckingandtearingofwelding
seam in the welding process
TheClesanaC1istherstmobilewaterlesstoiletwhichoperatesbasedonthe
bag-weldingprinciple.Aereachtoilettripthetoiletweldsthetoiletcontentina
separate foil bag.
Thefoilbagismadeofamulple-foldedconnuousfoil,thefoilliner,previously
mountedonthefoilcassee(2)andisinsertedinthefoilcompartment(3).Thefoilbag
replicates a toilet bowel.
Oncetheushingprocessistriggeredviathecontrolpanel(4)thetoiletpullsthefoil
fromthefoilcassee(2)automacally,weldsitandpreparesforthenextuseofthe
toilet.
The odour-proof closed foil bags are collected in the tray (8).

13/3212/32
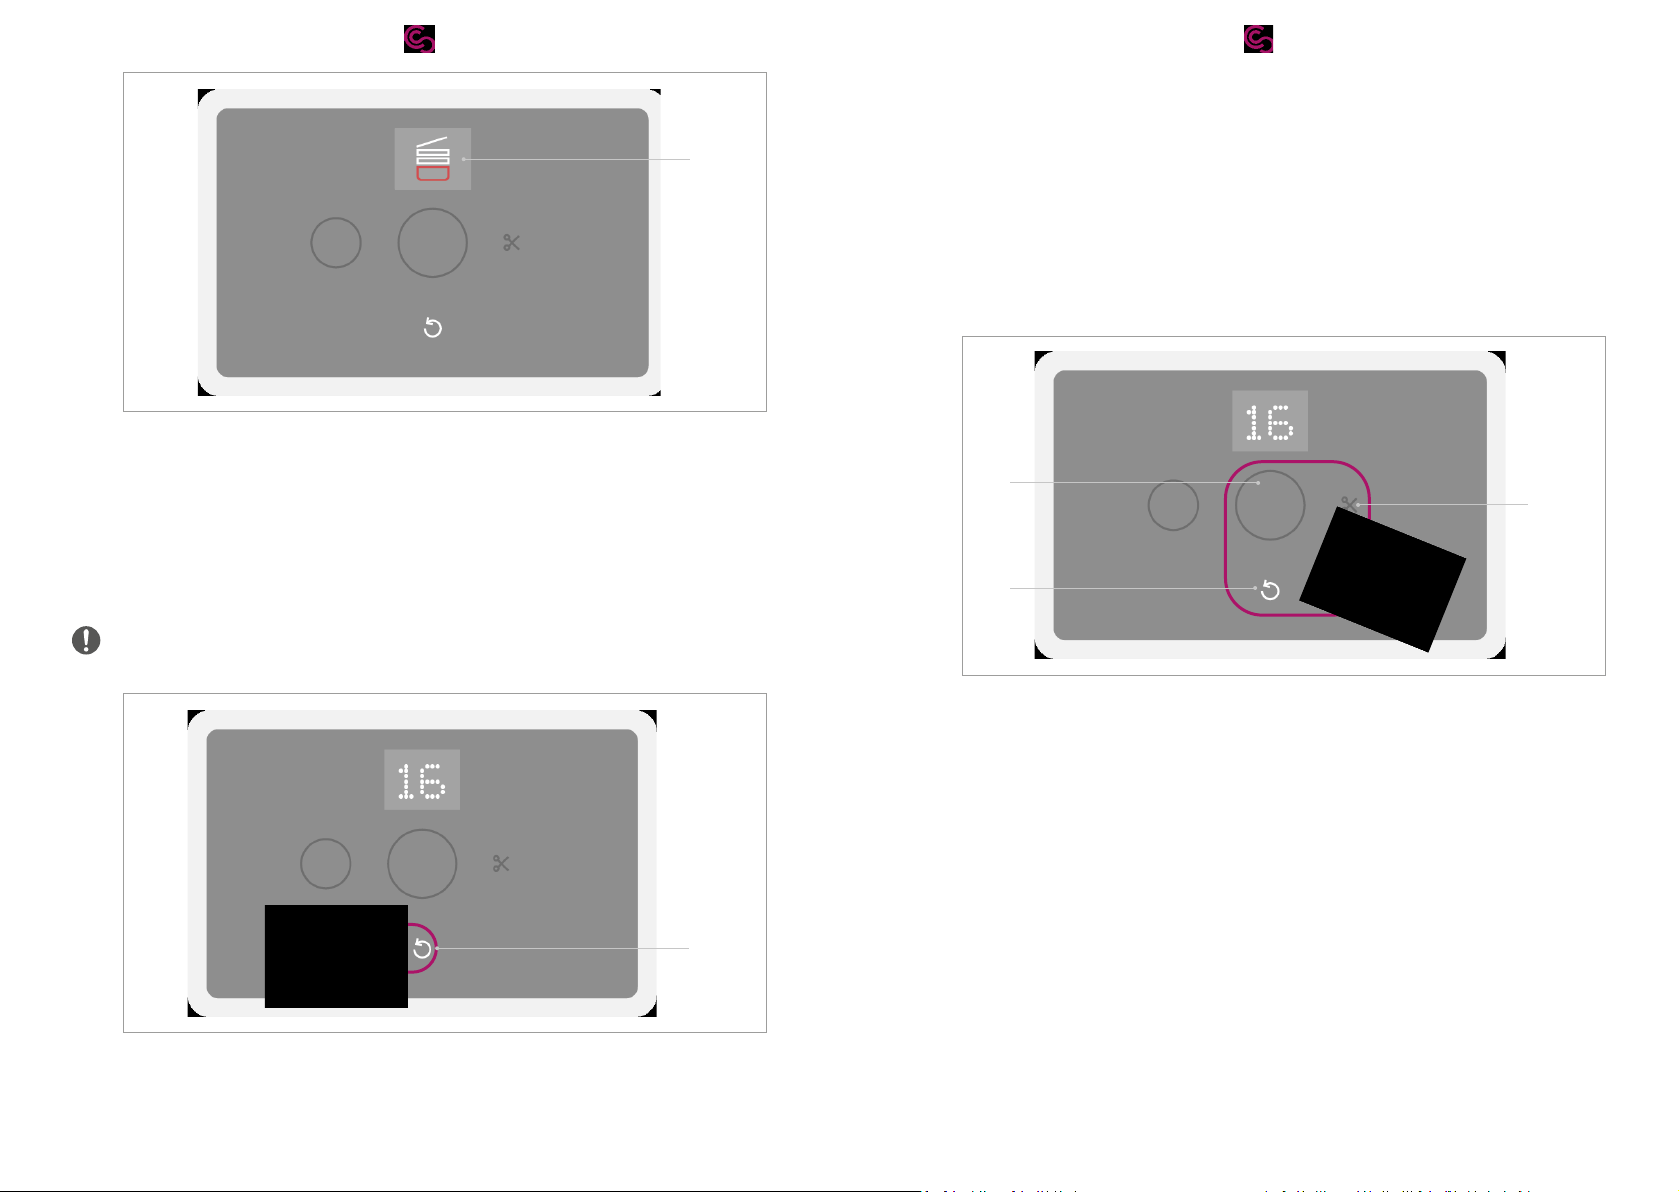
3.2. Control panel
1
2
3
4
5
No. Descripon Funcon
1 Display Displayoftheremaininglargeushingprocesses
2“Smallushingprocess”
buon
• Pressonce:Triggeringofasmallushingprocess
• Presstwice:Triggeringofanextrasmallushing
process
3“Largeushingprocess”
buon
• Pressonce:Triggeringalargeushingprocess
• Presstwice:Triggeringofanextralargeushing
process
4“Separate”buon Creangasinglebagwithsubsequentpressingof
buons(2)or(3)
5Arrowbuon • Resengthecounter/displayaerreplacingthe
foil liner
• Interruponoftheushingprocess
3.3. Display
The toilet is ready for operaon.
• Displayednumbersstandforthesllavailable
“Largeushingprocesses”.
• Fromanumberof“3”,thedisplaylightsupinredtoindicatetheimmi-
nent ending of the foil liner.
The toilet is not ready for operaon.
The toilet lid is not properly closed.
X Close the toilet lid.
X Ifthedisplaypersists,performatroubleshoong(aPage24,“9.
Troubleshoong”).
The toilet is not ready for operaon.
There is not enough foil available.
X Insert a new foil liner (aPage14,“Insertorchangethefoilliner”).
X Ifthedisplaysllpersistspreformatroubleshoong(aPage24,“9.
Troubleshoong”).
The toilet is not ready for operaon.
There is a fault in the welding unit.
X PerformaTroubleshoong(aPage24,“9. Troubleshoong”).
The toilet is not ready for operaon.
Thetraymustbeemped.
X Empty the tray.
X Ifthedisplaypersists,performatroubleshoong(aPage24,“9.
Troubleshoong”).
The toilet is not ready for operaon.
Thebaeryvoltageistoolow.
X PerformaTroubleshoong(aPage24,“9. Troubleshoong”).
The toilet is not ready for operaon.
X Performatroubleshoongusingtheerrorcodes
(aPage26,“10. Error codes”).
Status display of the process ow
The process is stopped if the lid or the tray is opened during the running
process.
X Waitunltheprocessiscompleted.

15/3214/32
4. Preparaon
4.1. Check the status of the toilet
Thedisplayshowsthetheorecallyavailablenumberoflargebags.Ifthecontentin
thefoilcompartmentisheavierthan500g,theweightcanpulldownthefoillinerand
falsify the number on the display.
Fortechnicalreasons,alowresidualfoilalwaysremainsonthefoilliner.
X Check that there is enough foil for a complete bag before each use of the toilet and
inparcularwhenthedisplayshowslessthan5availablebags.
X MakesurethatthereisalwaysenoughrellfoillinerneartheClesanaC1.
4.2. Insert or change the foil liner
1. Press the rear tab of the lid unit for-
ward(2)andliitupwardswithboth
hands (2).
2. Takethefoilcasseeoutofthetoilet
and lay it upside down on an even
surface.
3. Placethefoillineroverthefoilcassee.
The protruding part of the foil liner
points downwards.
4. Rotatethefoilcasseeandpullthe
protruding foil approx. 10 cm upwards.
5. Reinsertthefoilcasseewiththe
protrudingfoilpoinngupwardsinthe
foil compartment. Make sure no foil is
jammed between the foil compartment
andthefoilcassee.
6. Pullthefoilupwardsunlyouseeat
least 4 visible folds.
7. Fold the foil inwards and distribute it
evenly in the foil compartment.
8. Place the lid unitbyxingitinthefront
area (1) and then snapping it in the
groove in the rear area of the Clesana
C1 (2).
9. Pressandholdthearrowbuononthe
control panel for 3 seconds.
ªThe foil tube is welded.
ªThe counter is reset.
ªThetoiletsisreadyforoperaon.

17/3216/32
5. Operangstepsaerusingthetoilet
5.1. Use the absorber for uid binding
CAUTION! Health impairment through improper use.
Z Do not swallow the absorber.
Z Do not allow the absorber to come into contact with the eyes.
Forbindingtheuids(e.g.urine)werecommendtheuseofClesanaSuperAbsorber.
Thepowdershelldissolvesuponcomingintocontactwiththeuids.Thepowderbinds
theuidsinthefoilbag.
Aerapprox.1-2minutes Aerapprox.2-4minutes
X Insertabaginthefoilcompartmentbeforeoraertoilettrip.
5.2. Note the lling level
Toiletpapershouldnotbeovertheprescribedmaximumllinglevel,otherwisethe
welding can be interrupted.
A Maximumllinglevelofalargebag
B Maximumllinglevelofasmallbag
C Maximumllinglevelofanextrasmallbag
D Exceedingthemaximumllinglevel
X Notethecorrectposionofthetoiletpaper:
– A:Withlargebagsbelowthewhiteplascringshiningthrough
the foil
– B: With small bags bellow the upper transport rollers
– C: With extra small bags bellow the welding jaws
5.3. Start ushing process
Duringtheushingprocesstheindividualbagsareseparatedfromeachotherbyweld-
ing.Aerthreebagsthebagchainisautomacallyseparatedfromthefoillinerandfalls
into the tray.
12
3
Fig. 1: Selectsmallorlargeushingprocessonthecontrolpanel
1 “Smallushingprocess”buon
2 “Largeushingprocess”buon
3 “Separate”buon
1. Checkthellinglevelofthetoilet(aPage16,“5.2. Notethellinglevel”).
2. Close the toilet lid.
3. Selectthebagsizeonthecontrolpanelwithbuon(1)or(2):
Bag size Buon Bag
length
Max. bag
per liner
Recommended
“Small” 1 x Flushing
process small
approx.
20cm
38 “Small business” and “large
business” with less paper
“Large” 1 x Flushing
process large
approx.
30cm
26 “Large business” with normal
paperquanty
“Extra
small”
2xsmallush-
ingprocess,
within 2 s
approx.
15cm
50 “Small business” without paper
“Extra
large”
2xlargeush-
ingprocess,
within 2 s
approx.
40cm
19 “Large business” with lots of
paper.Isseparatedautoma-
cally.
ªTheushingprocessisstarted.
ªSelectedbuon(1)or(2)ashes.
ªTheaddionalbuon(3)isashingwhilethebagchainisseparated
automacally.

19/3218/32
4. Waitunlallbuonsofthecontrolpanellightup.
ªTheushingprocessiscompleted.
4
Fig. 2: Emptythetrayaertheseparaonofthesecondbagchain
5. Ifthesecondbagchainisseparatedautomacally,followthepromptonthedisplay
(4) and empty the tray.
6. Oponaloperangsteps
6.1. Perform manual bag separaon
Withthisfunconyoucanseparatethebagfromthefoillineraerushingprocessand
can remove it directly out of the tray.
2211
12
3
Fig. 3: Performmanualbagseparaon
1. Checkthellinglevelofthetoilet(aPage16,“5.2. Notethellinglevel”).
2. Close the toilet lid.
3. Pressandholdfor3secondsoneaertheotherthebuon(3),followedbybuon
(1)or(2),dependingonthebagsizeyouwishtouse.
ªTheushingprocessisstarted.
ªBuon(3)andselectedbuon(1)or(2)ashes.
4. Waitunlallbuonsofthecontrolpanellightup.
ªTheushingprocessiscompleted.
ªThelledandweldedbagisseparatedandisinthetray.
21/3220/32
4
Fig. 4: Emptythetrayaermanualseparaonofthebagchain
5. Follow the prompt on the Display (4) and empty the tray.
6.2. Interrupt the ushing process
Withthisfunconyoucaninterrupttheweldingorseparaonprocessanyme,e.g.if
you have selected the incorrect bag size on the control panel. The welding jaws return
tothestartposionaertheinterrupon.
Ifthefoilhasbeentransportedbeforetheprograminterrupon,thecounteronthe
Display is adjusted accordingly.
5 s
1
Fig. 5: Interrupttheushingprocess
1. Pressandholdthearrowbuon(1)for5seconds,whileaprocessisinprogress.
ªMessage “E6” appears on the Display.
2. Conrmthemessagebypressingthearrowbuon(1).
3. Waitunlallbuonsofthecontrolpanellightup.
ªTheprograminterruponiscompleted.
6.3. Restart the toilet
You can restart the toilet if the control panel does not respond or if there is an error. The
number of remaining toilet trips is stored.
5s
1
2
3
Fig. 6: Restart the toilet
1. Pressandholdfor5secondssimultaneouslythearrowbuon(3),the“Flushing
process”buon(1)andthe“Separate”buon(2).
ªThe toilet restarts.
2. Waitunlallbuonsofthecontrolpanellightup.
3. Iftheerrorpersists,preformatroubleshoong(aPage24,“9. Troubleshoot-
ing”).

23/3222/32
7. Cleaning and maintenance
7.1. Cleaning
NOTE! Damage to the toilet through improper cleaning.
Z Do not clean the toilet with running water (e.g. With a hose).
Z If the welding unit comes into contact with water: Let the toilet to dry for 24
hours without inserted foil liner.
Z Do not use bleach.
SincetheClesanaC1operateswithoutwater,andthe“Foilbowl”isrenewedwitheach
use,itisverylowmaintenance.Werecommendhowevertocleanthefollowingcompo-
nents regularly with a moist cloth and commercially available cleaning materials:
• Toilet seat
• Toilet lid
• Foil compartment
• Base body
7.2. Change the Teon tapes
BothTeontapesmustalwaysbechangedatthesameme.
Aerapprox.1500weldingsresp.separaonsthenon-sckcoangoftheTeontapes
overtheweldingwiresloosesitseecveness.Thelossofthenon-sckingeectleads
toproblemsinthetransportandtheweldingoftheplascfoil.
Remove the Teon tapes
1. Takethefoilcasseeoutofthetoilet.
2. Close the toilet lid.
3. Pressthe“Flushingprocess”buonon
the control panel and open the toilet lid
aerapprox.2seconds.
ªTheushingprocessisinterrupted.
ªThe distance between the welding
jaws is 6 to 10 cm.
4. Insertthepofasloedscrewdriver
intherecessandlevertherstTeon
tape out of the guide.
5. Repeat the process for the second
Teontape.
6. DisposeoftheremovedTeontapin
the household waste.
Insert the Teon tapes
NOTE! Damage to the welding mechanism due to falling o of the Teon tape
IfpreviouslyremovedTeontapesareusedagaintheycanfalloduetotheworn
retaining lug. The welding mechanism might be damaged if the welding process is
performedwithoutTeontapes.
Z DonotuseanypreviouslyremovedTeontapes.
1. MakesurethatwhenmounngtheTef-
lon tapes all retaining lugs are snapped
into place and are not damaged.
2. ClicktherstTeontapeintheguide
rail.
3. Repeat the process for the second
Teontape.
4. Close the toilet lid.
ªThe welding jaws return to their
originalposion.
ªThe toilets is ready for use.
8. Maintenance
X Maintenanceshouldbecarriedoutonlybyauthorisedqualiedpersonnel,ideally
bythedealer / manufacturerfromwhomyouhavepurchasedtheClesanaC1.

25/3224/32
9. Troubleshoong
Fault
Display
Possible Cause
Remedy
The toilet
cannot be
used
Baeryvoltage<11.8V X Chargethevehiclebaery.
The lid is open or is not
mounted.
X Close or mount the lid or the
lid unit.
The magnets of the lower rub-
ber pads of the lid are missing.
X Reinsert the magnets.
The tray is not inserted or is
full.
X Close or empty the tray (the
tray must be open more than 2
seconds).
The magnets behind the tray
have fallen out of their seat.
X Reinsert the magnets.
No more foil in the foil com-
partment.
X Replace the foil liner
((aPage14,“Insertor
change the foil liner”)).
The control
panel does
not light up
— The toilet is in standby. X Open/close the lid or press any
buon.
There is no voltage. X Check the circuit breaker
ortherelayandthebaery
voltage.
The control panel or the toilet
isdefecve.
X Contact your dealer.
The bag is
leaking
— There is foreign object in the
welding seam e.g. Toilet paper.
X Use less paper or press
it further downwards
((aPage16,“5.2.
Note
thellinglevel”)).
TheTeontapeisdefecve,
worn or loose.
X PressontheTeontape.
X ReplacetheTeontapeif
needed (aPage22,“7.2.
ChangetheTeontapes”).
Defecveweldingrod X Contact your dealer.
Separaon
not success-
ful
— There is foreign object in the
welding seam e.g. Toilet paper.
X Remove object or use less
paper or press it further down-
wards.
Theweldingrodisdefecve. X Contact your dealer.
The bag
sckstothe
Teontape
—TheTeontapeiswornout. X ReplacebothTeontapes
(aPage22,“7.2.
ChangetheTeontapes”).
The length
of the bag is
irregular
— The foil is jammed between
the foil compartment and the
cassee.
1. Removethefoilcassee.
2. Checkthefoilcasseeand
reinstall properly.
The bag length varies with
contentandlingprocess.
X Nocorreconneeded.
The bag
wraps itself
around the
transport
rollers
— The bags accumulate in the
tray and are pulled upwards
and in the transport rollers.
1. Remove the foil from the
transport rollers.
2. Empty the tray and pull new
foil downwards.
3. Pressthe“Smallushingpro-
cess”buon.
—ThefoilsckstotheTeon
tape.
1. LoosethefoilfromtheTeon
tape.
2. ReplacetheTeontapeif
needed (aPage22,“7.2.
ChangetheTeontapes”).

27/3226/32
10. Error codes
Error Cause Troubleshoong
E1 Thetoiletdoesnotinialize. X Switchthepoweroandonagain.
E2 The toilet lid has been opened
during the process.
X Close the lid.
ªTheprocessconnues.
E3 The tray has been opened
during the process.
X Close the tray.
ªTheprocessisconnued.
E4 Voltage drop bellow 8.4V on
the printed circuit board
1. Pressthearrowbuontoconrm.
2. Have the C1 power supply checked by your
dealer.
E5 Thebaeryvoltageislessthan
11.8V
1. Pressthearrowbuontoconrm.
2. Chargethebaery.
E6 Conrmprogramabort X Pressthearrowbuontoconrm.
E8
E9
Light barrier error X Restart the toilet (aPage21,“6.3.
Restart the toilet”).
E10
E11
Motor error X Restart the toilet (aPage21,“6.3.
Restart the toilet”).
E12 Overcurrentonthelewelding
jawmotor,possibleobject
between the welding jaws
1. Pressthearrowbuontoconrm.
2. Open the lid and check for jammed objects.
E13
E14
Errorontheleweldingjaw
motor
X Pressthearrowbuontoconrm.
E15 Overcurrent on the right weld-
ingjawmotor,possibleobject
between the welding jaws
1. Pressthearrowbuontoconrm.
2. Open the lid and check for jammed objects.
E16
E17
Error on the right welding jaw
motor
X Pressthearrowbuontoconrm.
E18 Overcurrent on upper roller
motor,possiblefoilwrapping
1. Open the lid and check the upper rollers.
2. Ifneeded,removethewrappedfoilfromthe
roller.
3. Close the lid.
E19
E20
Error on the upper roller motor X Pressthearrowbuontoconrm.
Error Cause Troubleshoong
E21 Overcurrent on lower roller mo-
tor,possiblefoilwrapping
1. Open the lid and check the lower rollers.
2. Ifneeded,removethewrappedfoilfromthe
roller.
3. Close the lid.
E22 Error on the lower roller motor X Pressthearrowbuontoconrm.
E23 Error on the lower roller motor X Pressthearrowbuontoconrm.
E24
E25
Safety Timer On Theerrorisautomacallycorrectedbythe
system.
E26 Welding overcurrent X Contact your dealer.
E27 Interruponofthewelding
current
X Contact your dealer.
E28 Overtemperature when welding X Contact your dealer.
E29 Printed circuit board error X Contact your dealer.
E30 Fan overcurrent 1. Pressthearrowbuontoconrm.
2. Contact your dealer.
E31 Fan error X Pressthearrowbuontoconrm.
E32 No foil 1. Open the lid
2. Pull the foil 15 cm downwards.
3. Close the lid.

28/32
11. FAQ
AllFAQ&Informaonareavailableatclesana.com.
Can the bags be put in the compost (biowaste)?
No,thebagsmustbedisposedofwiththehouseholdwaste.Abiologicallydegradable
variant is currently being evaluated.
Can the bags be disposed of in commercially available waste containers
(residual waste)?
Yes,unlessthereareseparateregulaonsinthisrespect.
Are the bags odour-proof?
In room temperature the bags are odour-proof for at least 2 weeks. With higher temper-
atures it is recommended to dispose of the bags within 2 days.
Can I use the toilet again immediately aer the triggering of the ushing process?
No,theprevious“Flushingprocess”mustbecompletedrst.Openingthelidearliercan
causeamalfuncon.
Can I weld other things in the bag?
Yes,basicallybiowaste,nappiesorfemininehygieneproductscanbewelded.However,
nosharp-edgedobjectsorhotashesshouldbeputinthebag.Notethemaximumlling
level!
Does the toilet funcon only with a 12V voltage?
Yes,onlythispowersupplyiscurrentlypossible.Operaonovermainsvoltageof230
volts is not possible.
How stable is the toilet?
Theload-bearingcapacityofthetoiletwithclosedlidis150kg(singperson).
12. Disposal and the environment
TheClesanaC1meetstherequirementsofEUDirecve“RestriconofHazardousSub-
stances” (2002/95/EC). It is largely free of environmentally hazardous substances such
aslead,cadmium,mercuryorchromiumVI.
InaccordancewithEUDirecves,thedeviceisconsideredelectrical
and electronic equipment waste for disposal purpose and must not be
disposed of as household waste.
• Disposeofthedeviceinaccordancewithlocalregulaons.
• Disposeoftheusedbaeriesatthecolleconpointsprovidedforthis
purposes.
13. Technicalspecicaons
Characterisc Value Unit
Height
Width
L-Adapter/round base length
515
363
516/461
mm
mm
mm
Seat height 478 mm
Weight of C1 with L-Adapter/with round
base
13.8/13.1 kg
Supply voltage 11.8–15 V
Rated voltage 12 V
Currentconsumpon(max.) 22 A
Powerconsumponinstandby 0.28 W
Powerconsumpon(max.) 265 W
Energyconsumponinseparaonprocess 1.7 ±0.17 Wh
Energyconsumponinweldingprocess 0.55 ±0.06 Wh
Usage temperature 5–40 °C
IPproteconclass X4(splashwaterprotecon) —

Declaraon of conformity
Manufacturer: Clesana AG
Werdenstrasse 72
9472 Grabs
Switzerland
hereby declares that the following product
Waterless toilet
Clesana C1 Series
based on the following applied standard:
• EN50498-2010EMCAermarketElectronicEquipmentsinVehicles
meetsthebasicrequirementsofthefollowingdirecves:
• 2011/65/EU RoHS 2
• MotorVehicleEMCDirecve2004/104/EC
Theproductinquesondoesnothaveanydisrupvefunconsinaccordancewith
VehicleEMCDirecve2004/104/EG.
Grabs,20December2021
Signature
Markus Erb
ExecuveDirector
Placer, date

clesana.com
Other manuals for C1 Series
1
Table of contents
Other Clesana Toilet manuals

Popular Toilet manuals by other brands

Catalano
Catalano Zero Monobloc installation instructions

Kohler
Kohler K-12687 Series Installation and care guide

Sanela
Sanela SLP 36RB Instructions for use

Woodbridge
Woodbridge B0930S installation manual

Cinderella
Cinderella FREEDOM GAS NA product manual

DURAVIT
DURAVIT Rimless ME by Starck Dry 2814300000 Mounting instructions


