Clever Life CL-S-GS322 Assembly instructions
Operating and Installation Instruction
1 Product Overview
The CL-S-GS322 Door & Window Detector adopts the design of split magnetic sensor
technology used to detect the status of doors and windows in real time. According to the
changes in status of doors and windows, you can achieve intelligent lighting or security
alarm systems. It can bring convenience to your home while protecting the security of
your family and your assets.
Built-in Wi-Fi wireless transmission module, high sensitivity compatible, fast response
time and no wiring making it the perfect solution for any home or installation. Through
the Smart Life App, alarm notifications and other automation functions can be realised.
2 Product Features
⚫Wi-Fi protocol can be added to Smart Life App intelligent security system.
⚫Standby power consumption is less than 10μA making for long battery life.
⚫Real time display of battery level
⚫High sensitivity and quick response time.
⚫Simple installation without wiring.
Clever Sense Product
www.cleverlife.com.au
CL-S-GS322 Door & Window
Sensor (Wi-Fi)

CLEVER SENSE –Door & Window Sensor Rev A.1
www.cleverlife.com.au 2 / 5
3 Product Parts
Number
Name
1
Magnet
2
Mainframe
3
LED
4 Installation Instruction
4.1 Battery Installation
Battery Installation
4.2 Product Installation
⚫If installed on a door, the mainframe is mounted on the door frame.
⚫If installed on a window, the mainframe is mounted on the windows frame.
⚫The distance between the mainframe and the magnet should be < 8mm after the
installation.
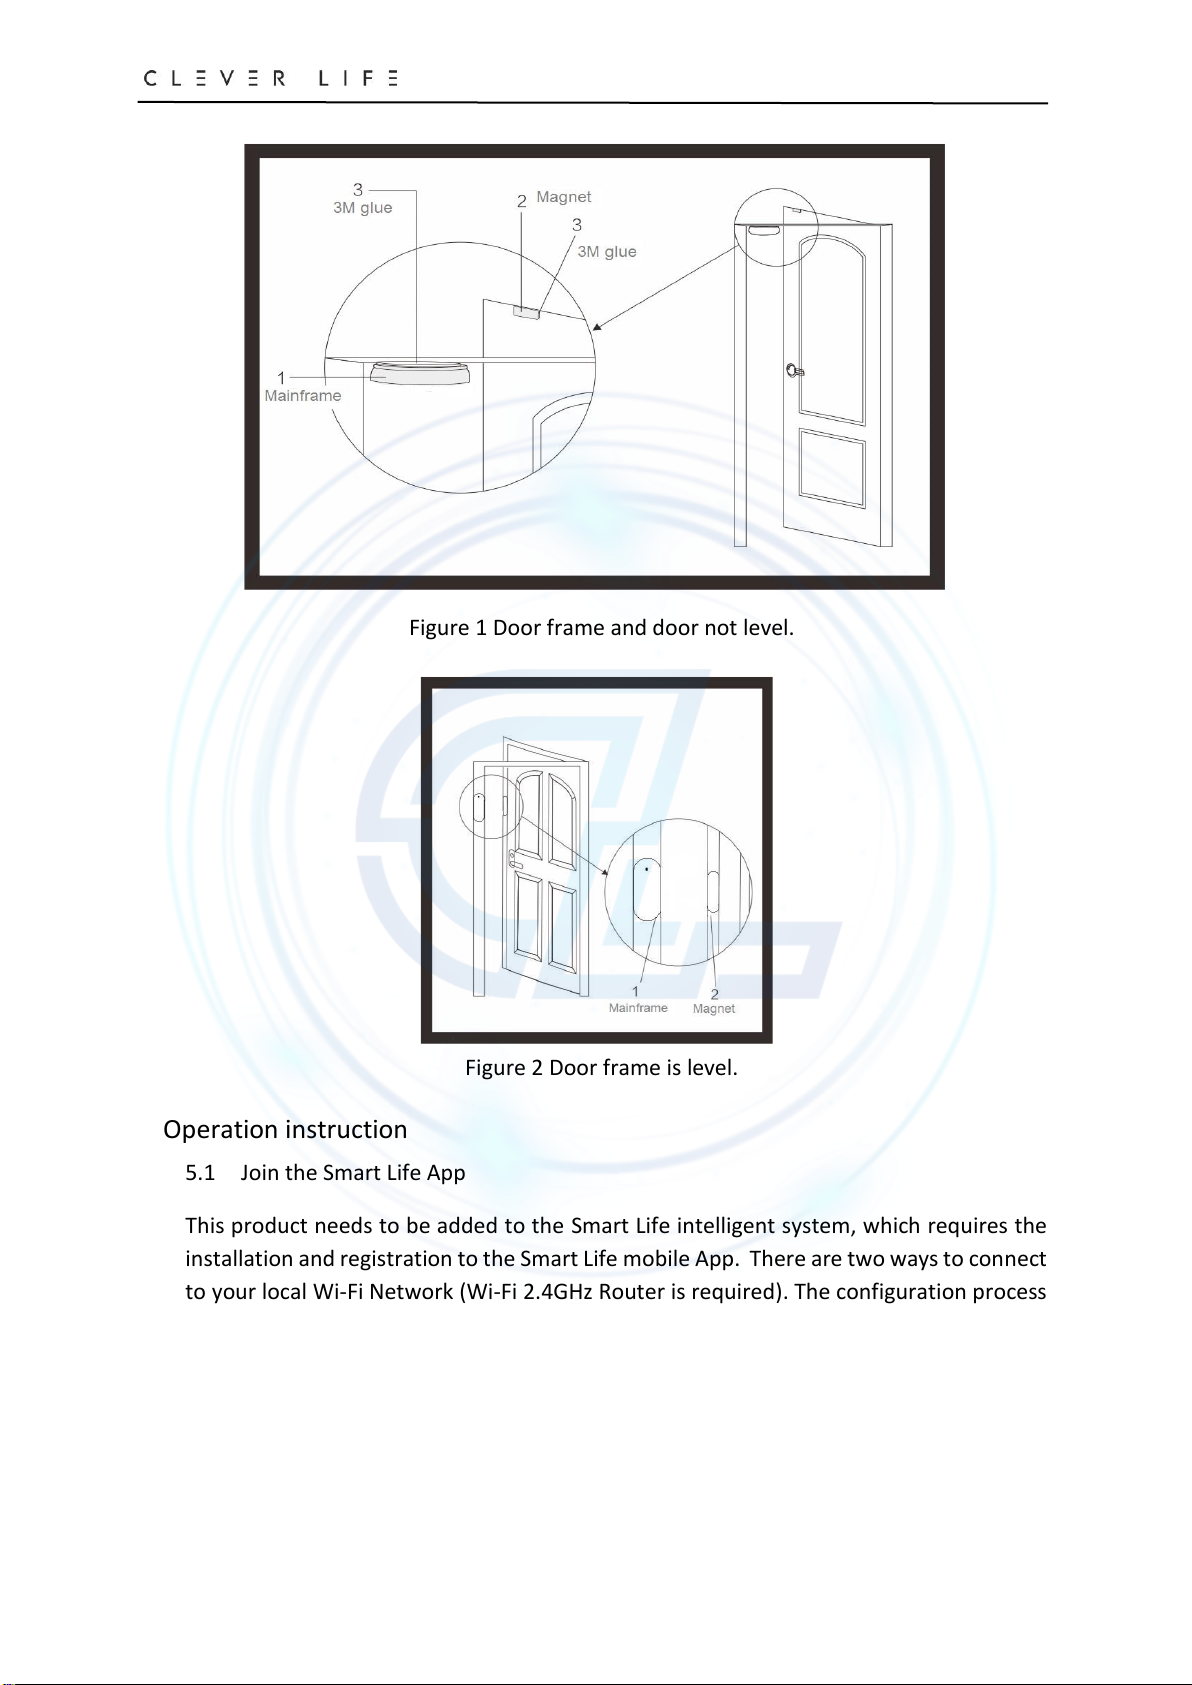
⚫The detector is best installed in a position where there is no height difference
between the door (window) and the door frame (window frame).
CLEVER SENSE –Door & Window Sensor Rev A.1
www.cleverlife.com.au 3 / 5
Figure 1 Door frame and door not level.
Figure 2 Door frame is level.
5 Operation instruction
5.1 Join the Smart Life App
This product needs to be added to the Smart Life intelligent system, which requires the
installation and registration to the Smart Life mobile App. There are two ways to connect
to your local Wi-Fi Network (Wi-Fi 2.4GHz Router is required). The configuration process
is as follows:
Smart Configuration mode:
1 - After the device is powered on, the LED flashes for 3 times (initialisation) and then
automatically requests to enter the network. If the network access fails, the LED will
flash rapidly, which indicates that the device has entered the smart configuration
mode.
CLEVER SENSE –Door & Window Sensor Rev A.1
www.cleverlife.com.au 4 / 5
2 - After step 1, open the Smart Life App, successively click button in the upper
right corner of the home page →Security & Sensors →Contact Sensor (Wi-Fi) →
Confirm indicator rapidly blinking. Enter Wi-Fi password, click Confirm, wait for the
networking to succeed. If successful, the door-window detector LED will flash 10
times.
AP Configuration mode:
1 - If the Smart configuration mode fails to access the network, remove the battery and
power on again. After the product completes initialization, the LED will flash slowly,
indicates that the device has entered the AP configuration mode.
2 - After step 1, open the Smart Life App, successively click button in the upper
right corner of the home page →Security & Sensors →Contact Sensor (Wi-Fi) →
Other Mode (in the upper right corner) →AP Mode →Confirm indicator slowly
blinks →and then enter Wi-Fi password, click Confirm →Connect your mobile phone
to the device's hotspot →select SmartLife-xxx, then wait for the networking. When
successful, the door-window detector LED will flash 10 times.
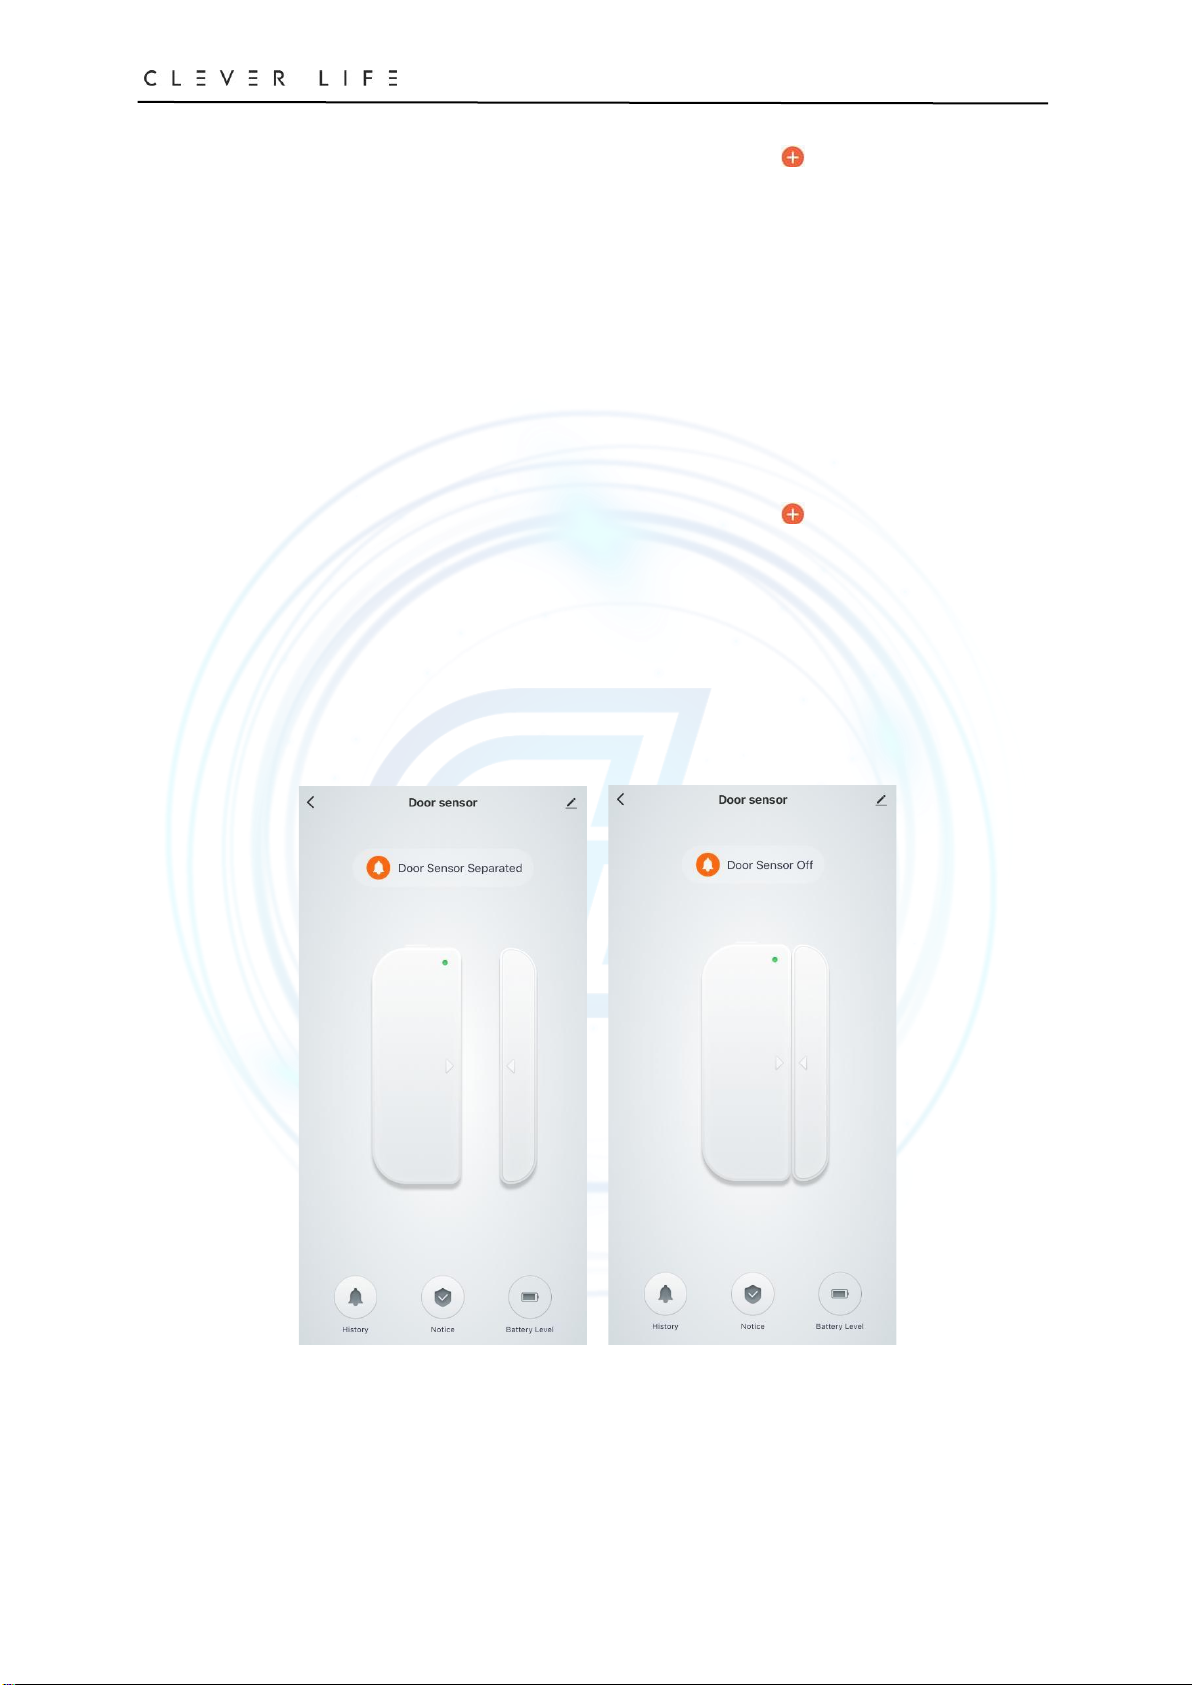
5.2 After adding successfully, the open/close status of the door-window detector can
be displayed in the app in real time.
1) Door open 2) Door Close

CLEVER SENSE –Door & Window Sensor Rev A.1
www.cleverlife.com.au 5 / 5
5.3 Sensor detection mode description
When the sensor is powered on, the red indicator light starts to flash for 3 times, and the
sensor enters the preheating mode. After 16 seconds, the preheating is completed and
enters the distribution network mode. After the router is connected successfully, the
device enters the test mode. In the test mode, each time the sensor detects that the door
is open or closed, it will immediately enter the next detection state. The test mode will
last for 5 minutes. After 5 minutes, the sensor automatically enters the power-saving
mode. In the power-saving mode, each time the sensor detects the door is open, it will
wait 10 minutes to enter next detection state for detecting door open/closed again. If the
sensor is repeatedly triggered within 10 minutes, the sensor will not enter the next
detection state until 10 minutes later. If there is no trigger during 10 minutes, the sensor
will re-enter the detection state.
Note: If you need to enter the test mode again, remove the sensor battery, wait for one
minute, install it again to enter the test mode again.
5.4 Status Description
Indicator Function
•Slowly blink 3 times Initialization after power on.
•Flashes rapidly twice per second Smart Configuration mode
•Flashes slowly once per 3 seconds AP Configuration mode
•Flash 10 times rapidly Connect the router successfully
•Flash once Door open/close
6 Technical Specifications
Power input
DC3V (CR17450×1)
Standby current
≤10μA
Battery life
1 year (based on 1 operation p/day)
Trigger current
≤600mA
Installation distance
Less than 10mm between mainframe and magnet
Installation mode
3M glue
Frequency
Wi-Fi 2.4GHz
environment
-10℃- 60℃, ≤95%RH Non-condensate
Compliance Standards
RoHS, CE, RCM
Size
〈Mainframe〉90×34×24mm
〈Magnet〉58.5×12×15mm
Table of contents
Popular Accessories manuals by other brands


ASM
ASM posiwire Installation and operation manual

LEGRAND
LEGRAND Wattstopper UT-355 installation instructions

Rohde & Schwarz
Rohde & Schwarz NRQ6 user manual

Celestron
Celestron 94155 instruction manual

Tendercare
Tendercare Snappi Sun Hood and Transparent Rain Shield instructions

Profroid
Profroid SOPRANO CO2 operating instructions
 owner's manual")


