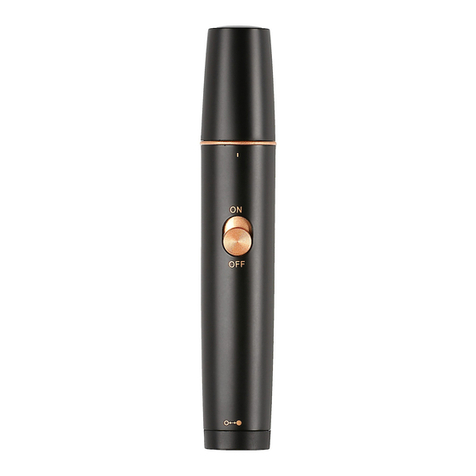
CLIO beautytrim 3900 User manual

beautytrim®
personal hair trimmer
model 3900/3901
Thank you for purchasing the beautytrim®from Clio Designs.
Please read the enclosed instructions and warnings carefully
before using this product.
Installing the Battery
To install the battery simply pull the outer sleeve from the trimmer in a downward direction (away
from the blades) until the sleeve slides off [Fig. 1]. Once the sleeve has been removed one (1)
’AAA’ 1.5 volt alkaline battery may be installed or removed according to the markings inside the
battery compartment [Fig. 2]. Please dispose of used batteries following the battery manufacturer’s
instructions or your local guidelines or regulations on battery disposal.
Fig. 2
Push
Down
Fig. 1
ON
Outer Sleeve
Cap
Blades
ON/OFF
beautytrim®
personal hair trimmer
model 3900/3901
Thank you for purchasing the beautytrim®from Clio Designs.
Please read the enclosed instructions and warnings carefully
before using this product.
Fig. 2
Push
Down
Fig. 1
ON
Outer Sleeve
Cap
Blades
ON/OFF
Installing the Battery
To install the battery simply pull the outer sleeve from the trimmer in a downward direction (away
from the blades) until the sleeve slides off [Fig. 1]. Once the sleeve has been removed one (1)
’AAA’ 1.5 volt alkaline battery may be installed or removed according to the markings inside the
battery compartment [Fig. 2]. Please dispose of used batteries following the battery manufacturer’s
instructions or your local guidelines or regulations on battery disposal.

Removing / Replacing the Trimmer Blades
The blades of the enclosed trimmer may be removed
for cleaning or replacing. To remove the blades unlock
the snap lock illustrated in Fig. 5 and lift off the blade assembly
by gently pulling the blade away from the trimmer base. The blade
assembly can be put back on by securing the top portion first and
then pushing down and locking the bottom snap lock illustrated in Fig. 5.
Snap Lock
Fig. 5
Attaching an Eyebrow Comb
Your trimmer includes a special comb attachment for trimming
eyebrows at a guided level. The two sides of the comb
enable different length eyebrow trimming based on
the length of the comb teeth on the attachment.
It can be applied by slipping it over the top of
the trimmer blades as pictured in Fig. 3.
WARNING: In order to prevent injury, handle the
guide by gripping the flat sides between thumb
and index finger as pictured. Do not attempt to
remove while gripping the bottom of the guide.
[see Fig. 4]
Maintenance / Cleaning
A little brush can be used to clean the trimmer region [Fig. 6] or a soft cloth can
be used to gently wipe it clean. It is not suggested that you use water to clean the
trimmer.
Fig. 6
Removing / Replacing the Trimmer Blades
The blades of the enclosed trimmer may be removed
for cleaning or replacing. To remove the blades unlock
the snap lock illustrated in Fig. 5 and lift off the blade assembly
by gently pulling the blade away from the trimmer base. The blade
assembly can be put back on by securing the top portion first and
then pushing down and locking the bottom snap lock illustrated in Fig.5.
Snap Lock
Fig. 5
Fig. 3Comb Attachment
Attaching an Eyebrow Comb
Your trimmer includes a special comb attachment for trimming
eyebrows at a guided level. The two sides of the comb
enable different length eyebrow trimming based on
the length of the comb teeth on the attachment.
It can be applied by slipping it over the top of
the trimmer blades as pictured in Fig. 3.
WARNING: In order to prevent injury, handle the
guide by gripping the flat sides between thumb
and index finger as pictured. Do not attempt to
remove while gripping the bottom of the guide.
[see FIG. 4]
CAUTION/WARNING
•This is NOT A TOY and should not be used by children .
•Do NOT use if the trimmer has a damaged blade.
•Do NOT immerse in water or allow water to enter the battery compartment.
•Make certain that the blade assembly is properly installed before use.
•When changing the blades make certain that the device is turned to OFF.
•Do not use cleaners such as alcohol, corrosive detergents or scouring pads.
Contact / For More Information
If you have questions or concerns about your beautytrim®please feel free to contact us at:
Clio Designs Incorporated or Email us at:
1000 Highland Ave. info@cliodesigns.com
Needham, MA 02494
To order replacement blades or for customer service, please contact us toll free at (800) 514-CLIO
(except in MA) or in MA at (781) 449-9500. Press zero for an operator and request assistance Monday
to Friday 8:30AM to 5:30PM EST.
Thank you for your support of Clio Designs.
Visit us online at www.cliostyle.com
© 2014 Clio Designs Incorporated
Maintenance / Cleaning
A little brush can be used to clean the trimmer region [Fig. 6] or a soft cloth can
be used to gently wipe it clean. It is not suggested that you use water to clean the
trimmer.
Fig. 6CAUTION/WARNING
•This is NOT A TOY and should not be used by children .
•Do NOT use if the trimmer has a damaged blade.
•Do NOT immerse in water or allow water to enter the battery compartment.
•Make certain that the blade assembly is properly installed before use.
•When changing the blades make certain that the device is turned to OFF.
•Do not use cleaners such as alcohol, corrosive detergents or scouring pads.
Contact / For More Information
If you have questions or concerns about your beautytrim®please feel free to contact us at:
Clio Designs Incorporated or Email us at:
1000 Highland Ave. info@cliodesigns.com
Needham, MA 02494
To order replacement blades or for customer service, please contact us toll free at (800) 514-CLIO
(except in MA) or in MA at (781) 449-9500. Press zero for an operator and request assistance Monday
to Friday 8:30AM to 5:30PM EST.
Thank you for your support of Clio Designs.
Visit us online at www.cliostyle.com
© 2014 Clio Designs Incorporated
Fig. 3Comb Attachment
Fig. 4Fig. 4
This manual suits for next models
1
Table of contents
Other CLIO Electric Shaver manuals
