Clipcomm CP-100 User manual

1
1. CP-100/100D FEATURES.............................................................................................................................. 2
2. PARTS CHECKLIST....................................................................................................................................... 3
3. INSTALLATION ............................................................................................................................................... 4
4. CONTROLS AND FUNCTIONALITIES....................................................................................................... 6
5. PHONE CONFIGURATION............................................................................................................................ 8
6. MAKING / RECEIVING PHONE CALLS ................................................................................................... 22
7. ADDITIONAL FUNCTIONS ......................................................................................................................... 23
8. WIRELESS-LAN EXTENSION.................................................................................................................... 29
9. FIRMWARE UPGRADE ............................................................................................................................... 30
10. CHARACTER INPUT USING KEYPAD................................................................................................... 32
Contents

2
1. CP-100/100D Features
zStand-alone H.323/SIP-based VoIP phone.
zEasy menu system with 16*2 character LCD and keypad.
zApplicable for private Internet line, ADSL (by PPPoE) and Cable Modem (by DHCP).
zOperable as a switching hub in a 2 IP environment.(CP-100D only)
zAutomatic Answering Machine function.
zTwo-way speakerphone function.
zUser configurable ringer melodies.
zPhonebook editing and speed dialing.
zWorks as a wireless LAN access point or station when a wireless LAN PCMCIA card is
inserted.
1. CP-100/100D Features

3
2. Parts Checklist
Please check to ensure that you have all the following components in the package:
Item Quantity Usage
CP-100/100D 1 CP-100/100D Main Body
User Manual 1 This user manual
Handset 1 CP-100/100D Handset
Power Adaptor 1 DC 12V power supply
LAN Cable 1 RJ45 LAN cable for network access
2. Parts Checklist

4
3. Installation
Check the location of each port and follow the below instruction to install your CP-100/100D correctly.
3.1. CP-100
① Connect handset to your CP-100 body.
② Connect UTP cable linked with ADSL/cable modem/hub to the ‘LAN’ port at the rear panel of your
CP-100/100D. (Figure’s “B”)
③ Connect the supplied power adapter (12V DC) to the power input jack. (Figure’s “A”)
④ Connect the wired headset. (Figure’s “C”)
3.2. CP-100D
① Connect handset to your CP-100D body.
② Connect UTP cable linked with ADSL/cable modem/hub to the ‘LAN’ port at the rear panel of your
3. Installation

5
CP-100/100D. (Figure’s “C”)
③ Connect the supplied power adapter (12V DC) to the power input jack. (Figure’s “A”)
④ Connect the LAN cable from PC’s LAN port to the ‘PC’ port to use NAT. (Figure’s “B”)
⑤ Connect the wired headset. (Figure’s “D”)
³Caution: Please be sure to use only the supplied AC power adapter. Otherwise, proper
function of your CP-100/100D is not guaranteed.

6
4. Controls and Functionalities

7
Controls Functionality
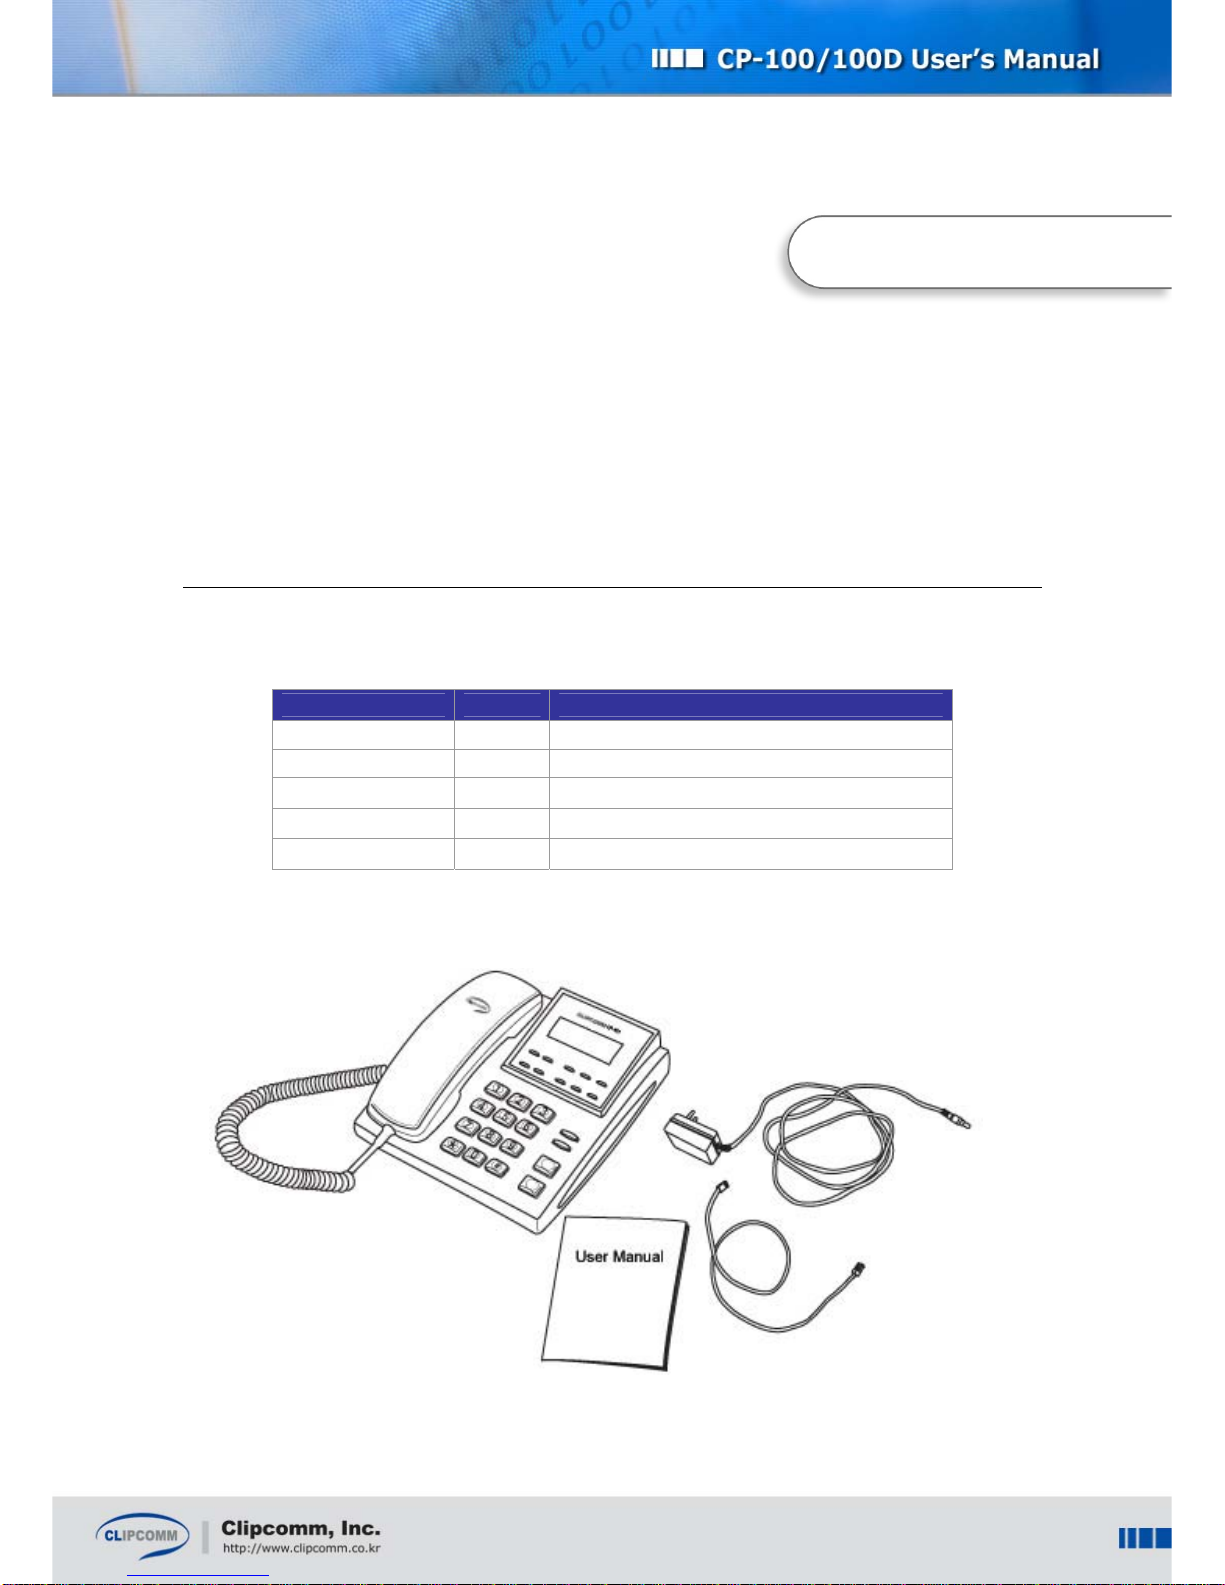
Handset ♦Used for normal telephone functionality.
LCD display ♦Displays system status and user information.
START ♦Restarts network access viaADSL, DHCP, Static IP mode.
MUTE ♦Deactivates your handset microphone.
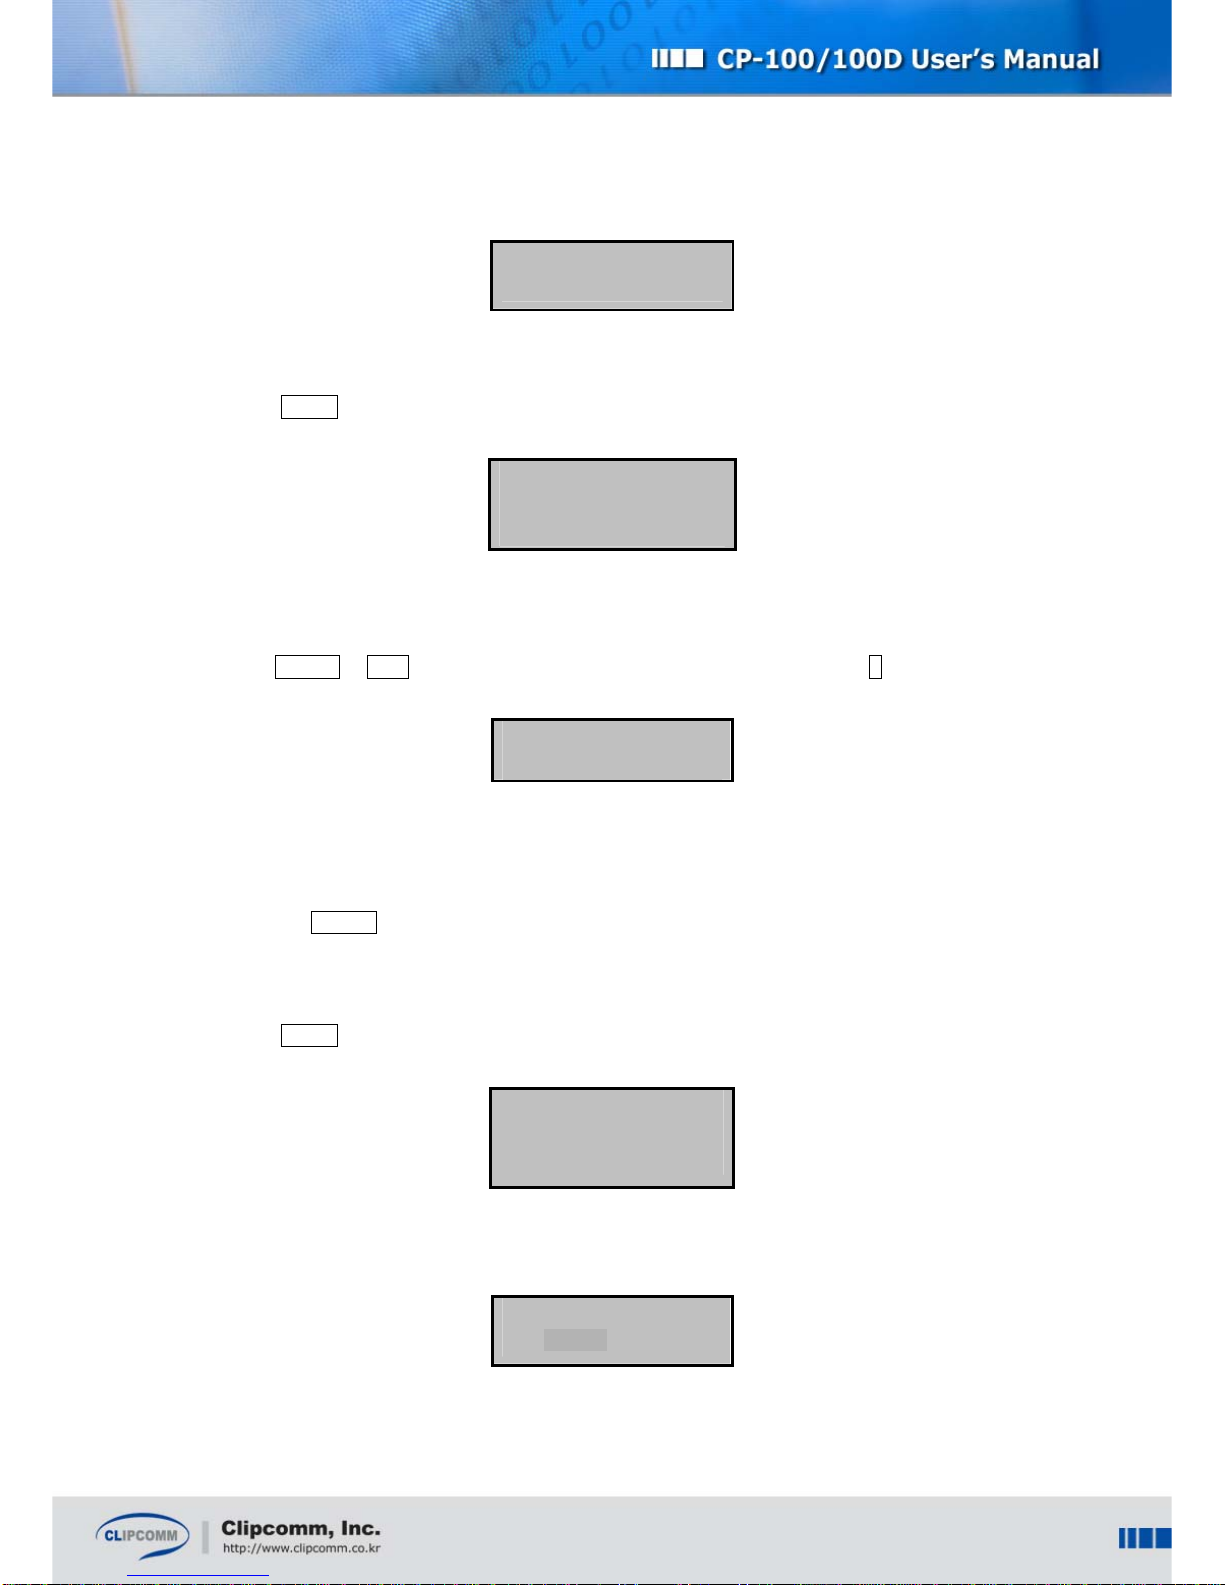
MENU
♦Initial state: activates main menu.
♦Character input state: changes input mode
(upper case/ lower case/ numeric/ symbolic).
♦Phonebook lookup state: displays edit menu.
♦Message check state: plays previous message.
CLEAR
♦Character input state : same as backspace
♦Phonebook delete menu : deletes phonebook.
♦Message check state : deletes current message and plays the
next message.
♦All the other states : activates previous level menu.
ENTER ♦Activates inverted menu item.
♦Confirms input of character string or numeric constants.
♦Message check state: plays next message
TRF/FLASH ♦Initiates call transfer.
♦While you are dialing, you can re-dial using this button.
HOLD ♦Holds current call and transmits hold signal to the held peer.
VOL(▲▼)
♦During conversation: adjusts receiver volume.
♦In ringer setting menu: adjusts ringer volume.
♦During other menu manipulation: navigates among menu
items.
Button
Part A
END ♦Returns to main menu.
♦During conversation: finishes call session.
AutoAnswer ♦Toggles auto answer mode. If auto answer mode is enabled,
its LED is ON.
Message ♦Plays received voice messages. If new message(s) arrived, its
LED flashes.
VoIP ♦If VoIP call is valid, its LED is ON. If registration is failed or
VoIP call is invalid, its LED flashes.
SPEAKER ♦Activates speaker phone mode.
Button
Part B
SEND ♦Makes an outgoing call after phone number input.
Dial buttons ♦Used for phone number or character input.
♦Also used for direct selection of menu item.

8
5. Phone Configuration
After installation, you need to configure your CP-100/100D according to your environment. You can
configure your CP-100/100D by either the LCD menu or internal Web interface. From now on, LCD
and keypad based configuration method is going to be explained. For Web based configuration,
please refer to section 5.6 “Internal Web Interface.”
To begin phone configuration using LCD and keypad, select MENU button Æ“3:Phone Mgmnt” then,
phone configuration sub-menu appears as follows:
1: Set Network
2: Set VoIP
3: Call Forward
4: Wireless LAN
5: Change Pwd
5.1. Network Configuration
To use your CP-100/100D IP Phone functionality, you need to subscribe for an Internet access line
from your local ISP (Internet Service Provider). It could be leased line, ADSL or Cable modem. If your
CP-100/100D is directly connected to an external ADSL modem, you need to configure your system to
use ADSL. If your CP-100/100D is directly connected to a Cable modem or receives IP address
configuration from a DHCP server in your local network, you need to configure your system to use
DHCP. Otherwise, you need to configure your CP-100/100D with static IP address information.
To begin network configuration using LCD and keypad, select MENU button Æ“3:Phone Mgmnt” Æ
“1:Set Network” then, network configuration sub-menu appears as follows:
5. Phone Confi
g
uration

9
1: Current Info
2: Change Config
5.1.1. Static IP Setting
① Select MENU Æ“3: Phone Mgmnt”Æ“1: Set Network” Æ“2:Change Config”.
1: Static IP
2: DHCP
3: ADSL
② Select “1:Static IP”, if you want to configure your CP-100/100D in static IP environment.
③ Select “1:IP Address” and enter required IP address using keypad. To confirm or cancel your input,
press ENTER or END button. You can enter dots (“.”) in the IP address using # button.
IP address
211.12.23.34_
④ Gateway, DNS, and Netmask addresses can be set by the same procedure.
⑤ Updated static IP configuration will take effect only after restarting the system. You can restart
your system with the new configuration simply by power cycling or selecting “5:Restart Network”
and press ENTER at static IP sub menu.
5.1.2. Dynamic IP (DHCP) Setting
① Select MENU Æ“3: Phone Mgmnt”Æ“1: Set Network” Æ“2:Change Config”.
1: Static IP
2: DHCP
3: ADSL
② Select “2: DHCP ” if you want to configure your CP-100/100D in DHCP environment.
Use DHCP mode?
Yes[ * ] No[ ]

10
③ Select “Yes” and press ENTER. Your CP-100/100D will automatically restart in DHCP client mode
after a few seconds.
5.1.3. ADSL Setting
① Select MENU Æ“3: Phone Mgmnt”Æ“1: Set Network” Æ“2:Change Config”.
1: Static IP
2: DHCP
3: ADSL
② Select “3: ADSL” if you want to configure your CP-100/100D inADSL environment.
1: ADSL ID
2: ADSL Password
3: Service Provider
4: Connect ADSL
③ Enter yourADSL ID and password respectively using sub menu 1 and 2.
Enter ADSL ID [ a ]
myid_
④ Select a specific ADSL service provider using sub menu 3.
⑤ Select “4:Connect ADSL” and press ENTER. Your CP-100/100D will automatically restart in
ADSL mode. In SIP version, you should restart system manually.
⑥ When ADSL connection fails, press START button to try again.
5.1.4. Viewing Current IP Setting
① Select MENU Æ“3: Phone Mgmnt”Æ“1: Set Network”.
1: Current Info
2: Change Config
② ②Select “1:Current Info”. Then current network configuration status will be displayed.

11
1: Current Mode
DHCP
2: IP address
192.168.0.223
3: G/W Address
192.168.0.1
4: DNS Address
168.126.63.1
5: Netmask
255.255.255.0
6: Enet Address
000788100AE1
5.2. VoIP Configuration - H.323 version
You need to subscribe for an ITSP (Internet Telephony Service Provider) to use versatile VoIP services.
You can use this VoIP configuration menu to configure your CP-100/100D according to your local
ITSP’s requirements.
To begin VoIP configuration using LCD and keypad, select MENU button Æ“3:Phone Mgmnt” Æ
“2:Set VoIP,” then, VoIP configuration sub-menu appears as follows:
1: Use GK
2: GK Address
3: GK Password
4: H.323 ID
5: E.164 ID
6: Voice Codec
7: NAT Traversal
8: RRQ Time
5.2.1. Gatekeeper Configuration
① Select “1:Use GK” and select “Yes” if you want to use a gatekeeper.
Use Gatekeeper?
Yes [ * ] No [ ]

12
② Select “2:Gatekeeper Address” and enter proper IP address of a gatekeeper. To confirm or cancel
your input, press ENTER or END button.
GK Address
211.28.99.97_
③ GK Password, H.323 ID, E.164 ID, Voice Codec, and RRQ Time (Registration Request Time
Interval) can be set by the similar procedure. You can select voice codec among G.723.1A,
G.711
µ
-law, G.711 A-law, and G.729AB codec.
5.2.2. NAT traversal (External IP)
① If you are using private IP(under NAT) and want to use NAT traversal to make a call to outside of
NAT, set "Use NAT Traversal" enable. Otherwise, make it disable.
② When you use NAT traversal, you need to enter the external or Internet IP address of the NAT
Router in “NAT Router IP”. The phone includes this IP address in the H323 messages it sends to
other H323 user agents to indicate that this is the address to which H323 and RTP packets are
sent.
5.2.3. Restart System after VoIP Configuration
① When you press CLEAR button to exit VoIP configuration sub menu, your CP-100/100D asks you
whether to restart. By selecting “Yes,” your CP-100/100D will restart with the new VoIP
configuration. If you select “No,” the modified configuration is stored and takes effect only after
restarting.
Restart System?
Yes [ * ] No [ ]
³Note: For more detailed VoIP configuration, you can use the internal Web interface of CP-
100/100D.

13
5.3. VoIP Configuration - SIP version
You need to subscribe for an ITSP (Internet Telephony Service Provider) to use versatile VoIP services.
You can use this VoIP configuration menu to configure your CP-100/100D according to your local
ITSP’s requirements.
To begin VoIP configuration using LCD and keypad, select MENU button Æ“3:Phone Mgmnt” Æ
“2:Set VoIP”, then, VoIP configuration sub-menu appears as follows:

14
1: Proxy Config
2: Name Config
3: Voice Codec
4: NAT Traversal
5.3.1. Proxy Configuration
① Select “1:Proxy Config”.
1: Registration
Success
2: Outbound Proxy
192.168.0.1
3: Registrar Server
192.168.0.1
4: SIP Server
www.clipcomm.co.kr
5: Expiry[sec]
3600
② “1:Registration” shows the state of the registration.
③ Select “2:Outbound Proxy” and enter the address of outbound proxy.
Outbound Proxy [1]
__
④ Registrar Server, SIP Server, and Expiry can be set by the similar procedure. Usually, registrar
server is same as outbound proxy. SIP server is likely as domain name. Expiry is registration
interval to keep connecting to server.
5.3.2. Name Configuration
① Select “2:Name Config”.
1: User ID
20002
2: Display Name
clip
3: Password
0000

15
② Select “1:User ID” and enter proper number for SIP. To confirm or cancel your input, press
ENTER or END button. User ID is used for phone number after registration.
[1]UserID
20002
③ Display name and password can be set by similar procedure. Display name is user name, and
password is PIN code for registration to registrar.
5.3.3. Codec Selection
Select “3:Voice Codec”, then current codec is shown for a sec, and the menu is displayed.
1:G.723.1
2:G.711 Mu Law
3:G.711 A Law
4:G.729 Annex A
Select the codec you want to use.
5.3.4. NAT Traversal
① Select “4:NAT Traversal”.
1:NAT Function
No Use
2: STUN Server
3: NAT Router IP
4: NAT Timer
5.3.4.1. NAT Traversal using STUN server
① If you use NAT traversal using STUN server, select “1:NAT Function” and select “2:STUN”.

16
1. No Use
2. STUN
3. Manual
② After selecting “1:NAT Function”, select “2:STUN Address”. Enter the address of STUN server.
This address can be FQDN.
[a] STUN Address
clipcomm.co.kr:5088
5.3.4.2. NAT Traversal without STUN server
① If you use NAT traversal without STUN server, you should know the external IP address of NAT
router. Select, “1:NAT Function” and then select “3:Manual”.
② After selecting “1:NAT Function”, select “3:NAT Router IP”. Enter the external address of NAT
router.
[a] NAT Router IP
5.3.4.3. NAT session keep time
Select “4:NAT Timer”. Enter the time to send packet for keeping NAT session.
NATTimer
30
³Note: For more detailed VoIP configuration, you can use the internal Web interface of CP-
100/100D.

17
5.4. Call Forwarding
You can configure that CP-100/100D can forward incoming call to selected number.
① Select MenuÆ”3:Phone Mgmnt”Æ”3:Call Forward”
1: Setting
Disable
2: Forwarding No.
② Select “1:Setting”, and choose condition when you want to enable call forwarding function.

18
1: Disable
2: Unconditional
3: on Busy
4: on No Answer
In H.323 version, “3:on Busy” and “4:on NoAnswer” is not available.
③ Select “2:Forwarding No”. Enter the number where you want to forward incoming call.
³Note: The settings are prioritized; 1) auto answering 2) call forwarding. That is, if you set on
auto answering, then you can’t use call forwarding.
5.5. Changing Password
① A default password of CP-100/100D is set as “0000.” We recommend that you change this
default password to prevent any unwanted access to your phone. To change the 4-digit password,
select MENUÆ”3:Phone Mgmnt”Æ“5:Change pwd.”
② Enter a new 4-digit password (numerical only).
③ Enter the new password again to confirm.
5.6. Internal Web Interface
You can configure and monitor your CP-100/100D using the internal Web interface. When the network
configuration of your CP-100/100D is completed and the CP-100/100D properly connects to your
network, you can access the internal Web interface of your CP-100/100D via following HTTP address
and port number:
http:// IP address of your CP-100/100D:1001
Enter “admin” as the User ID and “0000” as the password once the pop-up window appears.
5.6.1. System Information
zSystem Status: Displays current system status information regarding network and H.323/SIP.
zTechnical Specification: Lists software version, serial number, MAC address, and other
detailedspecifications.of CP-100/100D.

19
5.6.2. System Configuration
zNetwork Setting: You can configure IP address and time server.
zH.323(or SIP) Setting: You can configure various H.323(or SIP) related parameters such as IP
address of H.323 gatekeeper, H.323 ID, E.164 ID, etc.
zCurrent Setting: Shows all the current system settings of your CP-100/100D.
5.6.2.1. Network Setting
① lick “Network Setting” and fill in each of items.
② After completing filling up values, click “Save and Restart” button and CP-100/100D will restart
automatically with the updated setting. If you click “Save” button, the updated network setting is
stored in your CP-100/100D but will not take effect until restarts.
³Note: Please refer to the following terminology for your network setting.
zStatic IP: If you want to assign static IP address to your CP-100/100D, choose “Static IP”
radio button and fill the following items.
IP : IP address of your CP-100/100D.
Gateway : : IP address of the gateway in your local network.
Subnet Mask : Network mask of your local network.
zDHCP: Choose “DHCP” radio button if your CP-100/100D directly connects to a Cable modem
or receives IP address configuration from a DHCP server in your local network.
zADSL (PPPoE): If you want to directly connect your CP-100/100D to the external ADSL
modem supporting PPPoE interface, choose “ADSL (PPPoE)” radio button and fill the following
items :
ID : User ID for the ADSL network.
Password : Password for the ADSL network.
zDNS Server: IP address of a domain name server in your network.
5.6.2.2. H.323 Setting
① Click “H.323” and fill in each of items.
② After completing filling up values, click “Save and Restart” button and CP-100/100D will restart
automatically with the updated setting. If you click “Save” button, the updated setting is stored in
your CP-100/100D but will not take effect until restart.
³Note: Please refer to the following terminology for your H.323 setting.
zUse gatekeeper: If enabled, CP-100/100D tries to communicate with the gatekeeper whose
address is specified in “Gatekeeper address” tab.
zFast start: If enabled, CP-100/100D tries to make outgoing call by fast start procedure.
This manual suits for next models
1
Table of contents
Other Clipcomm IP Phone manuals