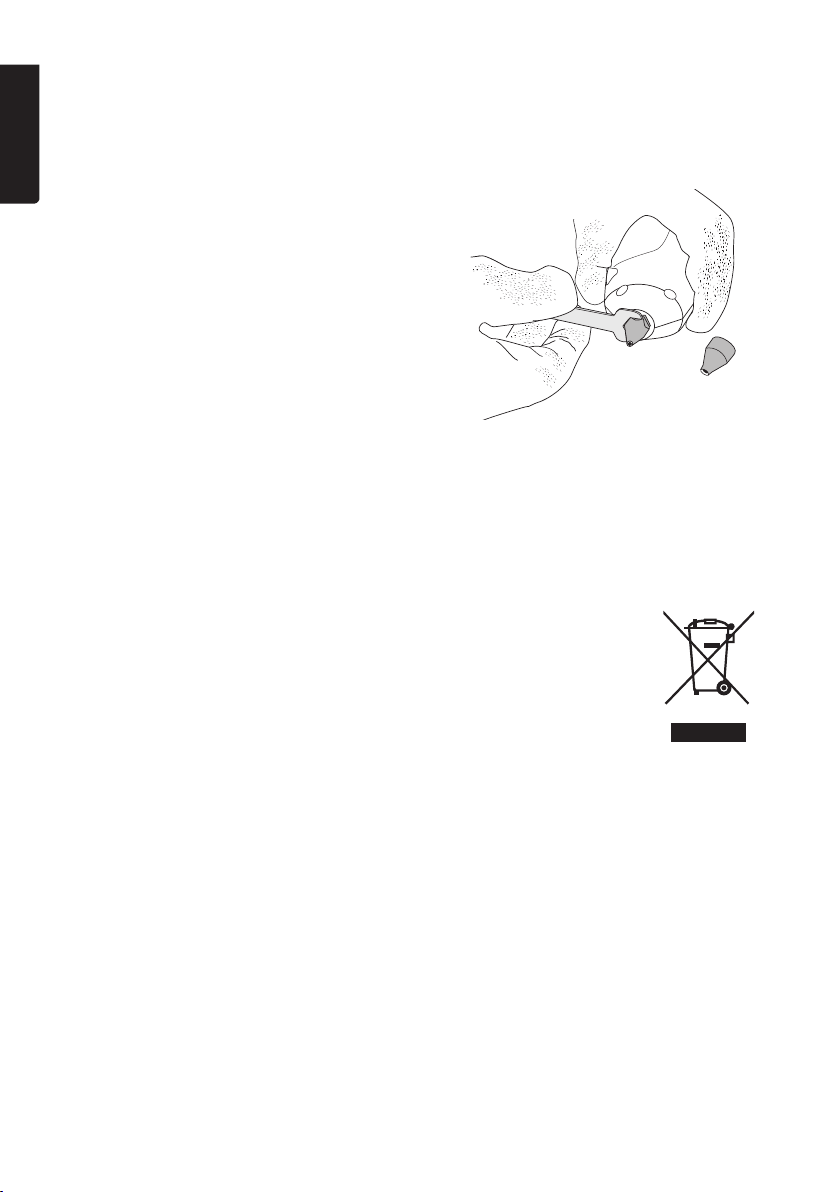
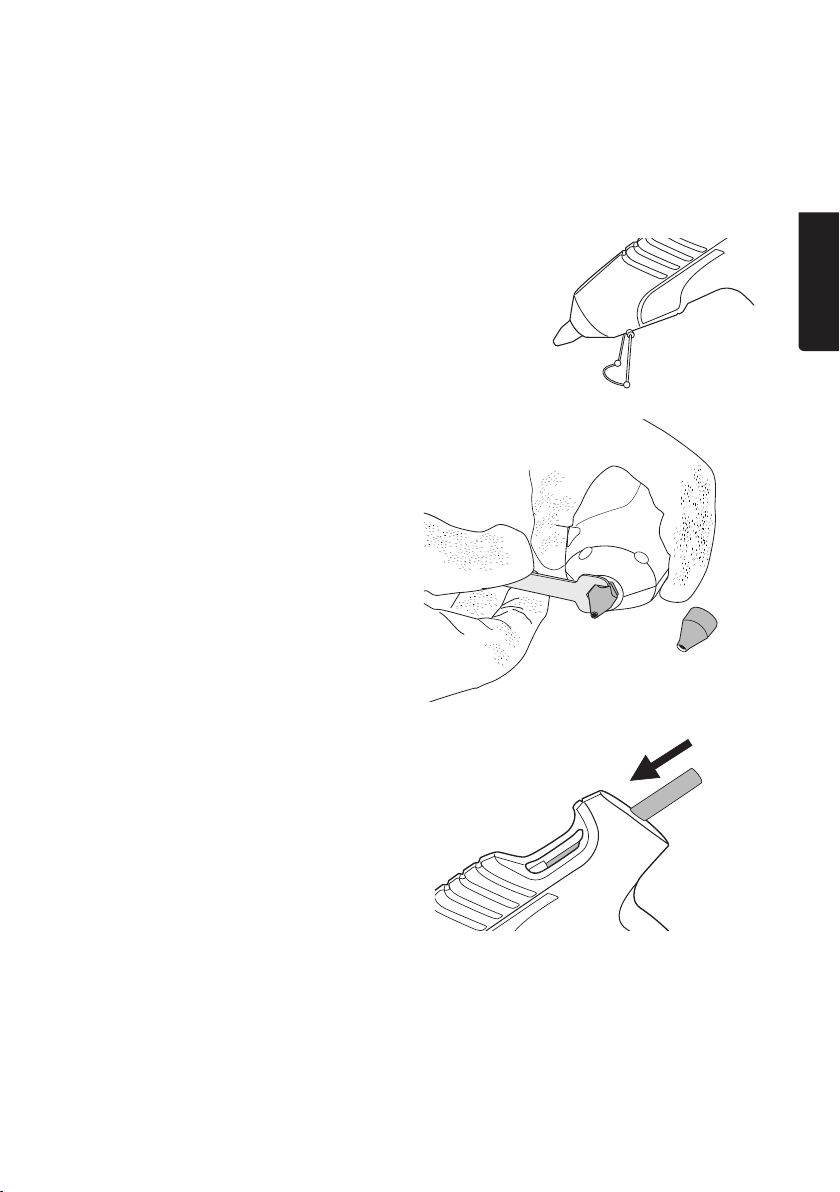
Cocraft HG 500-D User manual

ENGLISHSVENSKANORSKSUOMIDEUTSCH
Important!
Read the entire instruction manual 
carefully and make sure that you fully 
understand it before you use the 
equipment. Keep the manual for future 
reference.
Viktig information:
Läs hela bruksanvisningen noggrant och 
försäkra dig om att du har förstått den 
innan du använder utrustningen. Spara 
bruksanvisningen för framtida bruk.
Viktig informasjon:
Les disse anvisningene nøye og forsikre 
deg om at du forstår dem, før du tar 
produktet i bruk. Ta vare på anvisningene 
for seinere bruk.
Tärkeää tietoa:
Lue nämä ohjeet huolellisesti ja varmista 
että olet ymmärtänyt ne, ennen kuin 
alat käyttää laitetta. Säilytä ohjeet 
myöhempää tarvetta varten.
Wichtiger Hinweis:
Vor Inbetriebnahme die komplette 
Bedienungsanleitung sorgfältig 
durchlesen und aufbewahren.
HG 500-D
CORDLESS OR MAINS OPERATED
35 W
18-3121 ∙40-6975
GLUE GUN
LIMPISTOL LIMPISTOL
LIIMAPISTOOLI KLEBEPISTOLE
Ver. 20160630
Original instructions
Bruksanvisning i original
Originalbruksanvisning
Alkuperäinen käyttöohje
Original Bedienungsanleitung
Art.no Model
18-3121 JS500JQ
40-6975 JS500JQ

ENGLISH
2
Glue Gun
Art.no 18-3121 Model JS500JQ
 40-6975 JS500JQ
Please read theentire instruction manual before using theproduct and save it for 
future reference. We reserve theright for any errors in text or images and any necessary 
changes made to technical data. If you have any questions regarding technical 
problems please contact Customer Services.
Safety
Thetool can become afire risk if used improperly. Please take thefollowing into 
consideration:
• Return thetool to its stand after use and let it cool sufficiently before putting it 
away for storage.
• Never leave thetool unattended.
• Never expose thetool to rain or moisture.
• Thepower lead should be checked regularly. Never use thedevice if thepower 
lead or plug is damaged.
• If thepower lead is damaged it must only be replaced with apower lead 
recommended by themanufacturer or its service centre.
• This product must not be used by anyone (including children) suffering from 
physical or mental impairment. This product should not be used by anyone that 
has not read theinstruction manual unless they have been instructed in its use by 
someone who will take responsibility for their safety.
• Never let children play with theproduct.
• Theglue will become very hot during use. This can cause burn injuries. 
If this happens, rinse theburn with cold water and let it run over theburn 
for some time.
• Make sure that power from thewall socket corresponds to therated voltage of 
theglue gun.
Product description
Contents
• Glue Gun
• Charging station
• 3 nozzles
• Nozzle spanner for nozzle changes
• Support stand
• 6 glue sticks (Ø 11 mm, length: 15 cm)

ENGLISH
3
11
2
75 6
3
1
4
10
8
9
1. Glue stick insert hole
2. Nozzle
3. Eject button
4. Charging station
5. Drip tray
6. Support stand
7. Trigger
8. Indicator lamp
9. Gun mains connection
10. Support plate
11. Charging station mains connection
Areas of use
This glue gun can be used for gluing wood, paper, cardboard and certain 
plastic materials.
Parts

ENGLISH
4
Before initial use
Unpack theglue gun and accessories. Check that no parts are missing.
Preparations
Glue gun
1. Assemble thesupport stand 
according to thefigure.
3. Insert theglue stick into thefeed 
opening on theback of theglue 
gun according to thefigure. Insert 
theglue stick as far in as possible.
2. Attach thedesired nozzle with 
thehelp of theincluded nozzle 
spanner. Make sure thenozzle 
is screwed on correctly and not 
cross-threaded.
Cleaning
Clean thesurfaces of all glue residues. Theexterior should be dry and clear of dust or 
grease. Smooth surfaces should be roughed before gluing.

ENGLISH
5
ba
Gluing
Theglue gun can be mains operated with themains lead plugged into thesocket at 
thebase of thehandle or used cordlessly with thecable connected to thecharging 
station. Place theglue gun in thecharging station at regular intervals to keep theglue 
stick at aworking temperature.
1. Let theglue gun heat up for about 4 minutes in one of thefollowing ways:
 a) Mains lead connected directly to theglue gun.
 b) Mains lead connected to thecharging station and glue gun placed 
 in thecharging station. Theglue gun is correctly connected when 
 theindicator light is on.
2. Press thetrigger to feed theglue as theglue stick begins to melt.
3. Apply theglue to those surfaces you wish to adhere.
4. Immediately press thesurfaces together and hold them in position for 15 seconds.
5. Let any excess glue cool and remove it with asharp knife.
6. Unplug theglue gun from thewall socket.
Non-drip protection
Thenon-drip protection is activated once thefeed trigger is released. This will shut 
off theflow of glue to thenozzle. Asmall amount of glue will remain in thenozzle and 
must be allowed to flow out completely.

ENGLISH
6
Changing nozzles
Note: Change nozzles while theglue is still warm since theglue gun can be damaged 
by trying to change thenozzle once theglue has hardened. Use protective gloves 
when changing nozzles.
Care and maintenance
Always unplug thedevice from thewall socket before cleaning. Wipe theglue gun clean 
with adamp cloth when needed. Never use abrasive cleaning agents or solvents.
Responsible disposal
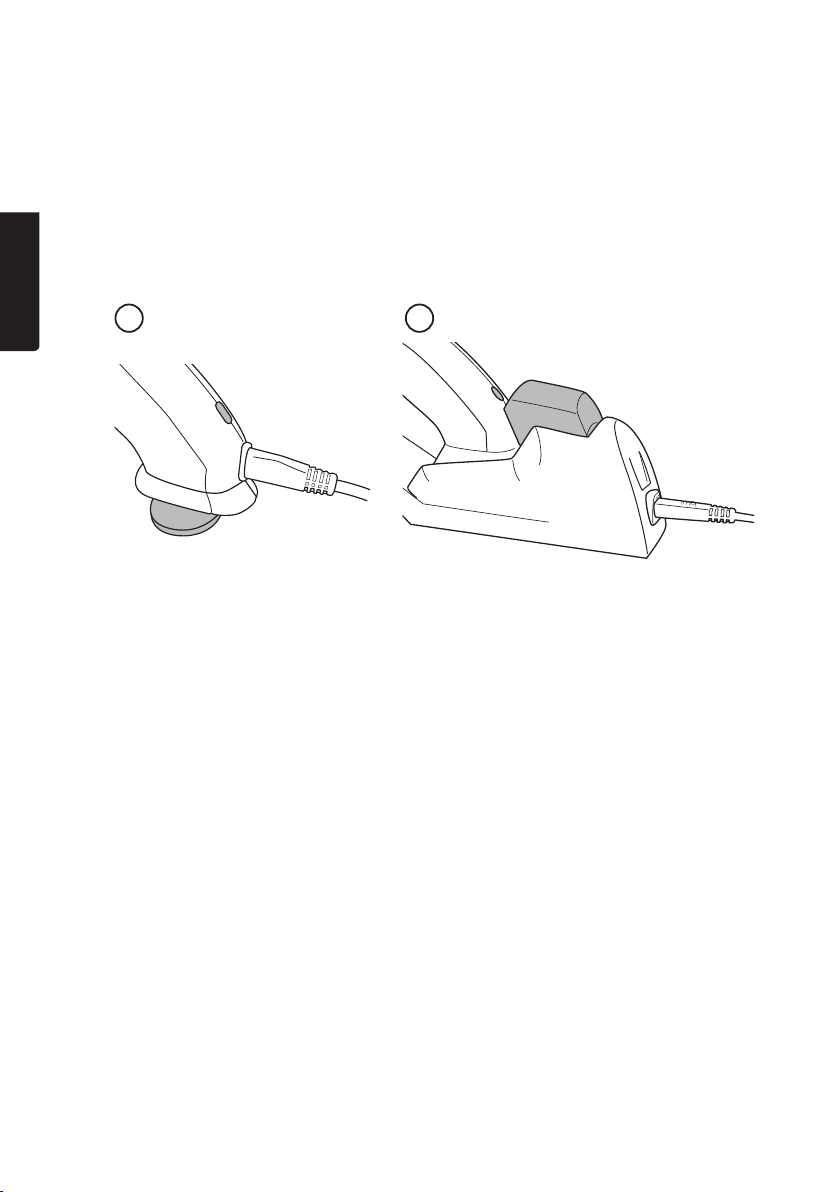
1. Unplug theglue gun from thewall socket.
2. Remove theprotective rubber cap from 
thenozzle.
3. Use theincluded spanner to remove 
theexisting nozzle.
4. Attach thedesired nozzle with thehelp of 
theincluded nozzle spanner. 
Make sure thenozzle is screwed on 
correctly and not cross-threaded. 
Place theprotective rubber cap over 
thenozzle.
This symbol indicates that this product should not be disposed of with 
general household waste. This applies throughout theentire EU. In order 
to prevent any harm to theenvironment or health hazards caused by 
incorrect waste disposal, theproduct must be handed in for recycling 
so that thematerial can be disposed of in aresponsible manner. When 
recycling your product, take it to your local collection facility or contact 
theplace of purchase. They will ensure that theproduct is disposed of in 
anenvironmentally sound manner.
Specications
Power supply 230 V AC, 50 Hz
Power 35 W 
Protection class II
Glue sticks Ø 11 mm, length: 15 cm
Warm-up time Approx. 4 min
Weight 0.3 kg

SVENSKA
7
Limpistol
Art.nr 18-3121 Modell JS500JQ
 40-6975 JS500JQ
Läs igenom hela bruksanvisningen före användning och spara den sedan för framtida bruk. 
Vi reserverar oss för ev. text- och bildfel samt ändringar av tekniska data. Vid tekniska 
problem eller andra frågor, kontakta vår kundtjänst (se adressuppgifter på baksidan).
Säkerhet
Om verktyget används på ettfelaktigt sätt uppstår brandfara. Tänk därför på följande:
• Placera apparaten stående efter användning och låt det svalna ordentligt innan du 
stoppar undan det för förvaring.
• Lämna inte apparaten utan uppsikt när den är idrift.
• Utsätt aldrig apparaten för regn eller fukt.
• Nätsladden bör regelbundet kontrolleras. Använd aldrig apparaten om nätsladden 
eller stickproppen är skadade.
• Om nätsladden skadats får den endast bytas av tillverkaren eller dess serviceställe.
• Apparaten får inte användas av personer (inklusive barn) med nedsatt fysisk eller 
mental förmåga. Den får inte heller användas av personer utan tillräcklig erfarenhet 
och kunskap ifall de inte har fått instruktioner om användningen av någon som 
ansvarar för deras säkerhet.
• Låt aldrig barn leka med apparaten.
• Limmet och apparatens munstycke blir mycket varmt vid användning. Det kan 
orsaka brännskador på huden. Skölj genast med kallt vatten och låt det spola länge.
• Kontrollera att strömmen ivägguttaget stämmer överens med spänningen 
som anges på apparaten.
Produktbeskrivning
Förpackningen innehåller
• Limpistol
• Laddningsstation
• 3 st. munstycken
• Nyckel för byte av munstycke
• Stöd
• 6 st. limstavar (Ø 11 mm, längd 15 cm)

SVENSKA
8
11
2
75 6
3
1
4
10
8
9
Delar
1. Öppning för limpatroner
2. Munstycke
3. Lösgöringsknapp
4. Laddningsstation
5. Droppbricka
6. Stöd
7. Avtryckare
8. Indikatorlampa
9. Anslutning för limpistolens nätkabel
10. Stödplatta
11. Anslutning för laddningsstationens nätkabel
Användningsområde
Limpistolen är avsedd för limning av trä, papper och papp samt vissa plaster.

SVENSKA
9
Före första användning
Packa upp apparaten och tillbehören. Kontrollera att alla delar finns med iförpackningen.
Förberedelser
Limpistolen
1. Montera stödet enligt bilden.
Rengöring av ytor
Rengör ytorna du ska limma. Ytorna ska vara torra samt fria från damm och fett. 
Släta ytor bör ruggas upp före limning.
2. Montera önskat munstycke med 
hjälp av den medföljande nyckeln. 
Se till att munstycket gängar 
iordentligt och inte lutar.
3. Sätt ienlimstav iöppningen baktill 
på pistolen som bilden visar. 
Tryck in den så långt som möjligt.

SVENSKA
10
ba
Limning
Du kan använda limpistolen antingen med nätsladden direkt ansluten till elnätet eller 
med nätsladden ansluten till laddstationen, vilket då gör limpistolen sladdlös. Placera 
iså fall limpistolen iladdningsstationen med jämna mellanrum för att värma limmet.
1. Värm limpistolen under ca 4 minuter.
 a) Med nätsladden direkt ansluten till limpistolen.
 b) Med nätsladden ansluten till laddningsstationen och med limpistolen placerad 
 till laddningsstationen. Limpistolen är korrekt ansluten när indikatorlampan lyser.
2. Tryck på avtryckaren för att mata fram lim när det har börjat smälta.
3. Lägg på smältlim på de ytor som ska sammanfogas.
4. Tryck genast ihop ytorna och håll samman i15 sekunder.
5. Låt överflödigt lim svalna och ta sedan bort det med envass kniv.
6. Dra stickkontakten ur vägguttaget för att stänga av limpistolen.
Droppskydd
Droppskyddet aktiveras när avtryckaren släpps upp. Det stänger av limflödet ikanalen 
till munstycket. Enliten mängd lim blir då kvar imunstycket och måste få rinna ut.
This manual suits for next models
3
Table of contents
Languages:
Other Cocraft Glue Gun manuals
Popular Glue Gun manuals by other brands

Grizzly
Grizzly T1236 instructions

EINHELL
EINHELL TE-CG 18 Li Original operating instructions

SURTECO
SURTECO Dollken Profiles HKP 220 Instruction handbook

Dollken
Dollken Profiles HKP 2.0 E Instruction handbook

SURTECO
SURTECO Dollken Profiles HKP 220 Instruction handbook

Parkside
Parkside PHPA 20-Li A1 Translation of the original instructions


