InstallationInstallation
DW 80 - Installation
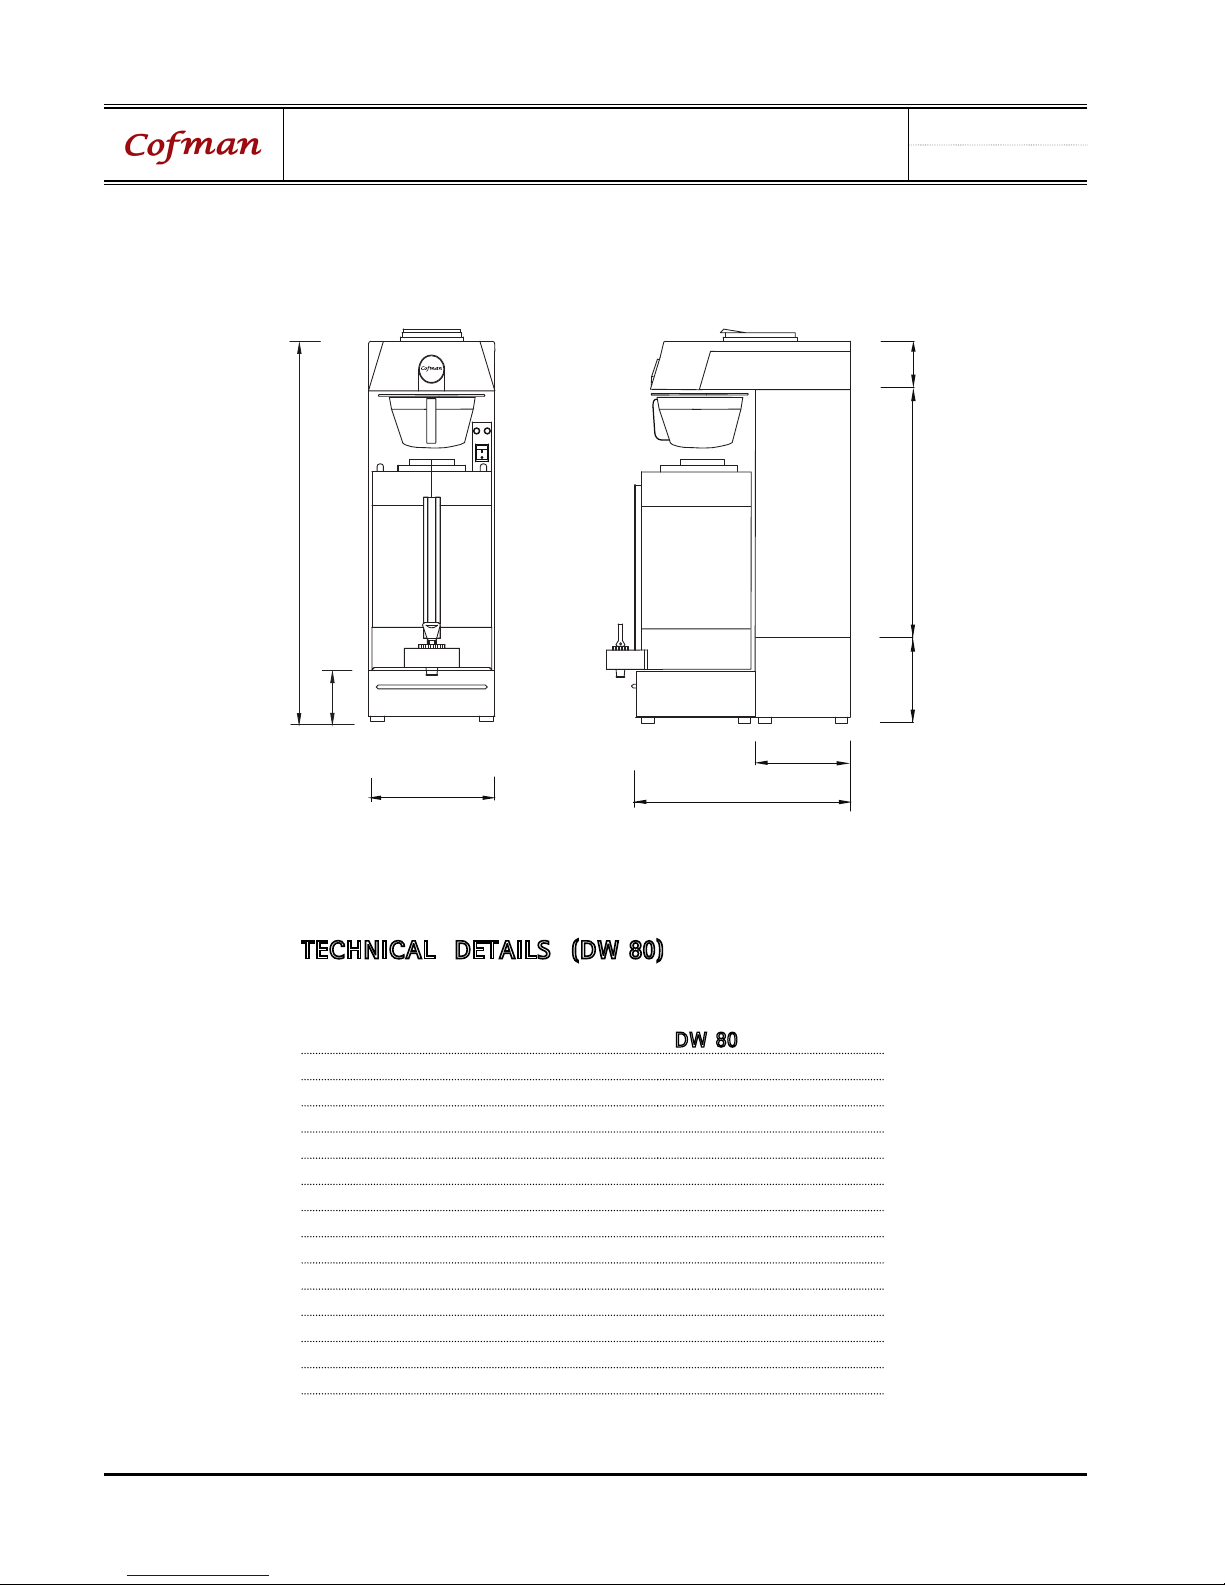
DW 80
01 . 60
6. The coffee maker will be stand-by for operation as soon as the stand-
by light comes on to signify that the water tank is up to temperature.
7. The coffee maker will be stand-by for operation as soon as the stand-
by light comes on to signify that the water tank is up to temperature.
8. Brew one batch (water only) to confirm proper fill levels.
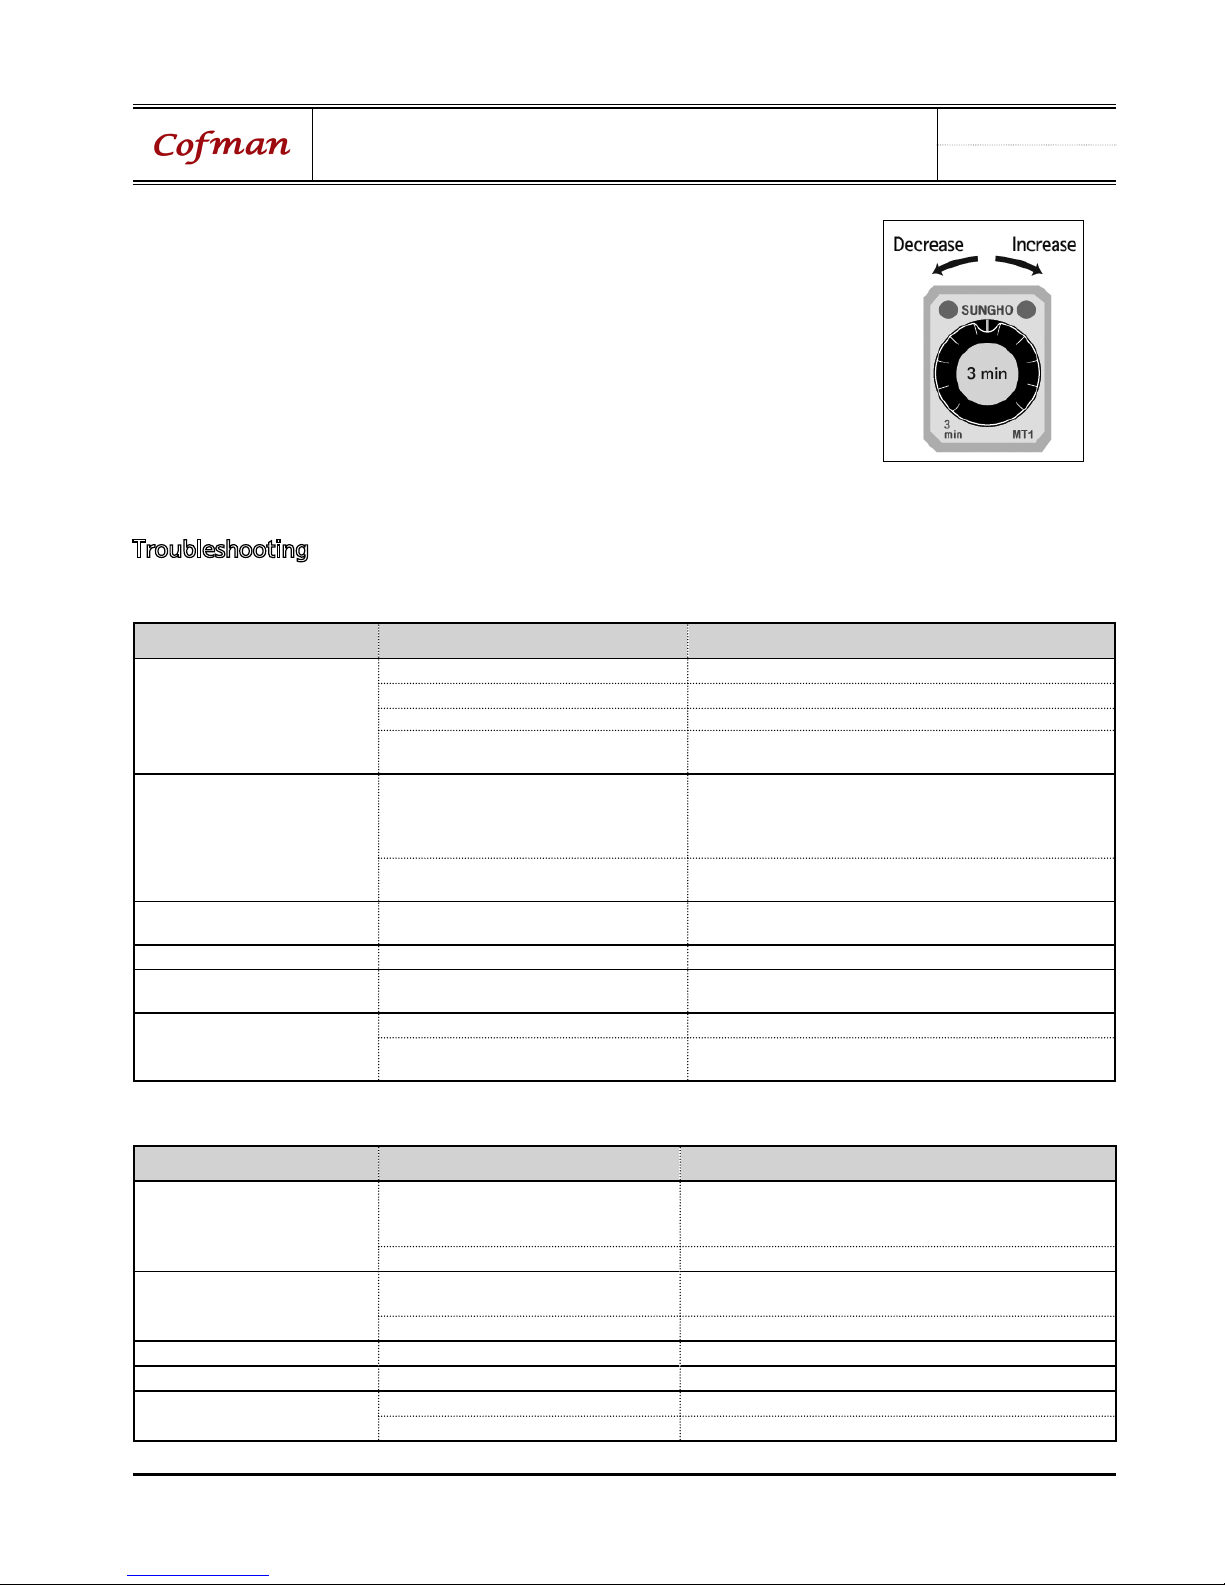
Quantity of brewing can control increase-decrease by Timer.
9. Re-attach the covers after one final inspection for leaks.
Look closely in the top of the brewer at the dispense fitting during
this inspection.
Troubleshooting
< BREWING PROBLEM >
DIVISION POSSIBLE CAUSE SOLUTION
Shot brew levels (Every Brew)
One or half batch are affected
and levels are consistent.
Spray-cap clogged. - Clean and replace the spray-cap.
Timers are set too low. - Advance timers to proper level.
Water filter clogged. - Change water filter.
Incoming Voltage is too low for timers
to function at proper time sequences. - Call an electrician in the building.
Shot brew levels (Some Brews)
One or half batch are affected
and levels are erratic.
Water pressure or flow rate is too low
or fluctuates too much to support a full
brew. (Problem is worse in simultaneous
brews.)
- Make sure Maker has a dedicated water line.
- Increase the diameter of the water line to the Maker
or stable source.
Water filter clogged. (Problem is worse
during simultaneous brews.) - Change water filter.
High brew levels (Every Brew)
Overfills but does stop Timer(s) are set too high. - Adjust timers down to appropriate level.
High brew levels (Some Brews) Glass Decanter not empty. - Empty the Glass Decanter and try again.
Maker basket or filter overflows Water pressure increase. - Adjust – Timer.
- Pressure more than 5 Bar: Install Regulator.
Maker won't stop brewing Bad or stuck fill Solenoid Valve. - Replace or rebuild the fill Solenoid valve.
Do not install Water-filter. - Install the water-filter system and replace or rebuild the
fill solenoid valve.
< TEMPERATURE PROBLEM >
DIVISION POSSIBLE CAUSE SOLUTION
Brew water is cold /
not hot enough,
Stand-by light is OFF.
No power to brewer - Make sure power switch is on.
- Check power connection. (plug or wire)
- Check building circuit breaker
Bad heater element - Check amperage draw on heater wires.
Brew water is cold /
not hot enough,
Stand-by light is ON.
Bad Thermostat (the thermostat
Belive that it is at set temperature) - Change the new Thermostat
Low brew temperature setting on EGO. - Adjust thermost (Set it to 'BEST' sign)
Slower to recover temperature. One heater fail or water tank limed up - Check amperage and inspect for lime.
Glass Decanter (Not hot ) Bad heater element - Change the new warmer heater
Boiling Thermostat set too high for altitude - Reduce temperature setting to 5℃ below
Defective thermostat (EGO) - Replace the thermostat