CWW 6084 V1
EN t+44 (0) 1604 495 151 f+44 (0) 1604 495 095
esales@collingwoodgroup.com wcollingwoodlighting.com FR t+33 (0) 4 816 816 10 f+33 (0) 4 816 816 11
eventes@collingwoodgroup.com wcollingwoodlighting.com DE t+49 (0)89 411123 777 f+49 (0)89 411123 778
everkauf@collingwoodgroup.com wcollingwoodlighting.com
EN DEFR
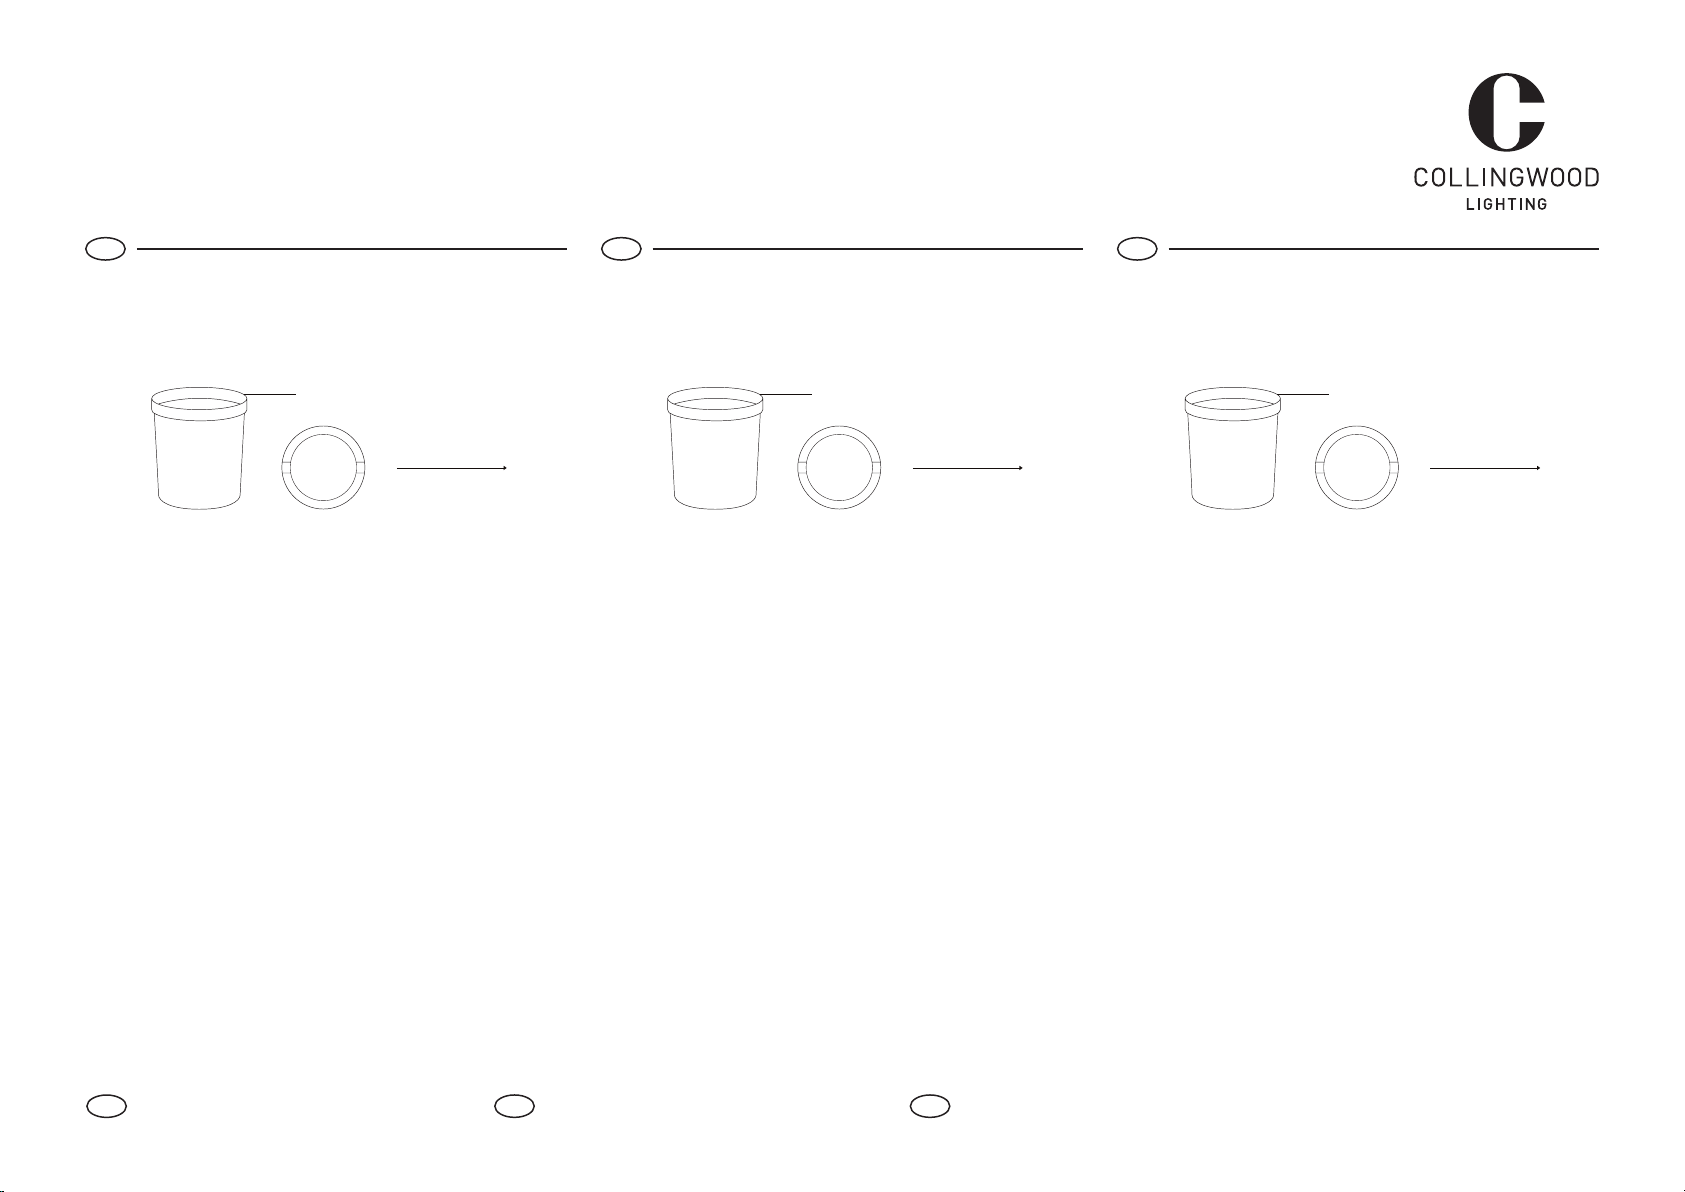
INSTALLATION
1. Install the installation tube in the ground.
NOTE: Ensure that the square recesses in the tube point in the direction of the light
beams.
2. Install suitable cable
e.g: Collingwood CR575RGBW.
3. Wire as shown overleaf.
4. Fit the unit into the installation tube. Ensure it located in the square recesses.
BEAM ADJUSTMENT
1. Remove the top plate and glass.
IMPORTANT: note which way up the seal is fitted.
2. a. Push on the lampholder to tilt to the required angle.
Do NOT push on the LED fitting.
b. Rotate the lampholder to adjust the beam direction.
I. Tilt the lampholder to maximum.
II. Place index fingers under the lampholder rim, and pull up to remove.
III. Refit the lampholder in the required position.
If the lamp holder cannot be removed this way, unscrew
the two screws securing the lampholder plate and remove
the plate. Push the lampholder out from underneath.
3. Replace the glass ensuring the seal is fitted the correct way up.
4. Refit the steel top and tighten the screws firmly and evenly.
INSTALLATION
1. Installez le pot d’encastrem dans le sol.
NOTE: Assurez-vous que les carrés dans les tubes pointent dans la direction des flux
lumineux.
2. Installez le câble approprié
par ex: Collingwood CR575RGBW.
3. Câblez le produit comme illustré au verso.
4. Installez le produit dans le pot d’encastrement. Assurez-vous qu’il soit installé
dans les carrés.
AJUSTEMENT DU FLUX LUMINEUX
1. Retirez l’anneau de couverture ainsi que le verre.
IMPORTANT: Notez bien de quel côté le joint doit être mis.
2. a. Diriger le support de la source dans l’angle désiré.
N’appuyez pas sur la source LED.
b. Ajustez le support de la source pour orienter le flux lumineux:
I. Ajustez la source au maximum.
II. Placez vos index sous le support de la source et tirez pour l’enlever.
III. Replacez le support dans la position désirée.
Si vous n’arrivez pas à retirer les supports de cette manière, dévissez les 2 vis qui
retiennent l’anneau du support et retirez-le. Enlevez le support de la source en
poussant par le dessous.
3. Remettez le verre en place en vous assurant que le joint soit placé dans le
bon sens.
4. Remettez en place l’anneau de couverture et serrez les vis correctement.
INSTALLATION
1. Setzen Sie die Installationshülse in den Boden.
HINWEIS: Stellen Sie sicher, dass die rechteckigen Aussparungen im Rohr in die
Richtung der Lichtstrahlen zeigen.
2. Verlegen Sie ein geeignetes Kabel,
z.B. Collingwood CR575RGBW.
3. Nehmen Sie die Verdrahtung vor wie umseitig gezeigt.
4. Setzen Sie die Einheit in die Installationshülse ein. Achten Sie auf korrekte
Positionierung in den rechteckigen Aussparungen.
EINSTELLUNG NEIGUNGSWINKEL
1. Entfernen Sie Deckplatte und Glas.
WICHTIG: Achten Sie darauf, in welcher Richtung die Dichtung angebracht ist.
2. a. Drücken Sie die Lampenfassung, bis der gewünschte Neigungswinkel
erreicht ist.
Drücken Sie NICHT auf die LED-Leuchte.
b. Drehen Sie die Lampenfassung zur Einstellung der Strahlrichtung.
I. Kippen Sie die Lampenfassung so weit wie möglich.
II. Halten Sie die Zeigefinger unter den Lampenfassungsring, und ziehen Sie
die Fassung heraus.
III. Montieren Sie die Lampenfassung wieder in der gewünschten Position.
Lässt sich die Lampenfassung auf diese Weise nicht herausnehmen, lösen
Sie die beiden Sicherungsschrauben der Fassungsplatte und entfernen
Sie die Platte. Drücken Sie die Lampenfassung dann von unten heraus.
3. Ersetzen Sie das Glas, und achten Sie dabei darauf, dass die Dichtung richtig
herum montiert ist.
4. Bringen Sie das Stahloberteil wieder an, und ziehen Sie die Schrauben fest und
gleichmäßig an.
STRAHLRICHTUNG
INSTALLATIONSHÜLSE
BEAM DIRECTION
INSTALLATION TUBE
DIRECTION DU
FLUX LUMINEUX
POT D’ENCASTREMENT
GL008RGBW
Installation Instructions / Consignes d’installation / Montageanleitung


