Follow these easy step-by-step instructions to get you
started. Take a look at the picture on the package for
inspiration!
Stepping Stone
Step 2
S
h
a
r
e
y
o
u
r
m
a
s
t
e
r
p
i
e
c
e
w
i
t
h
t
h
e
w
o
r
l
d
!
Visit www.youdesignitkids.com
and follow the instructions to be included
in the online art gallery!
51051
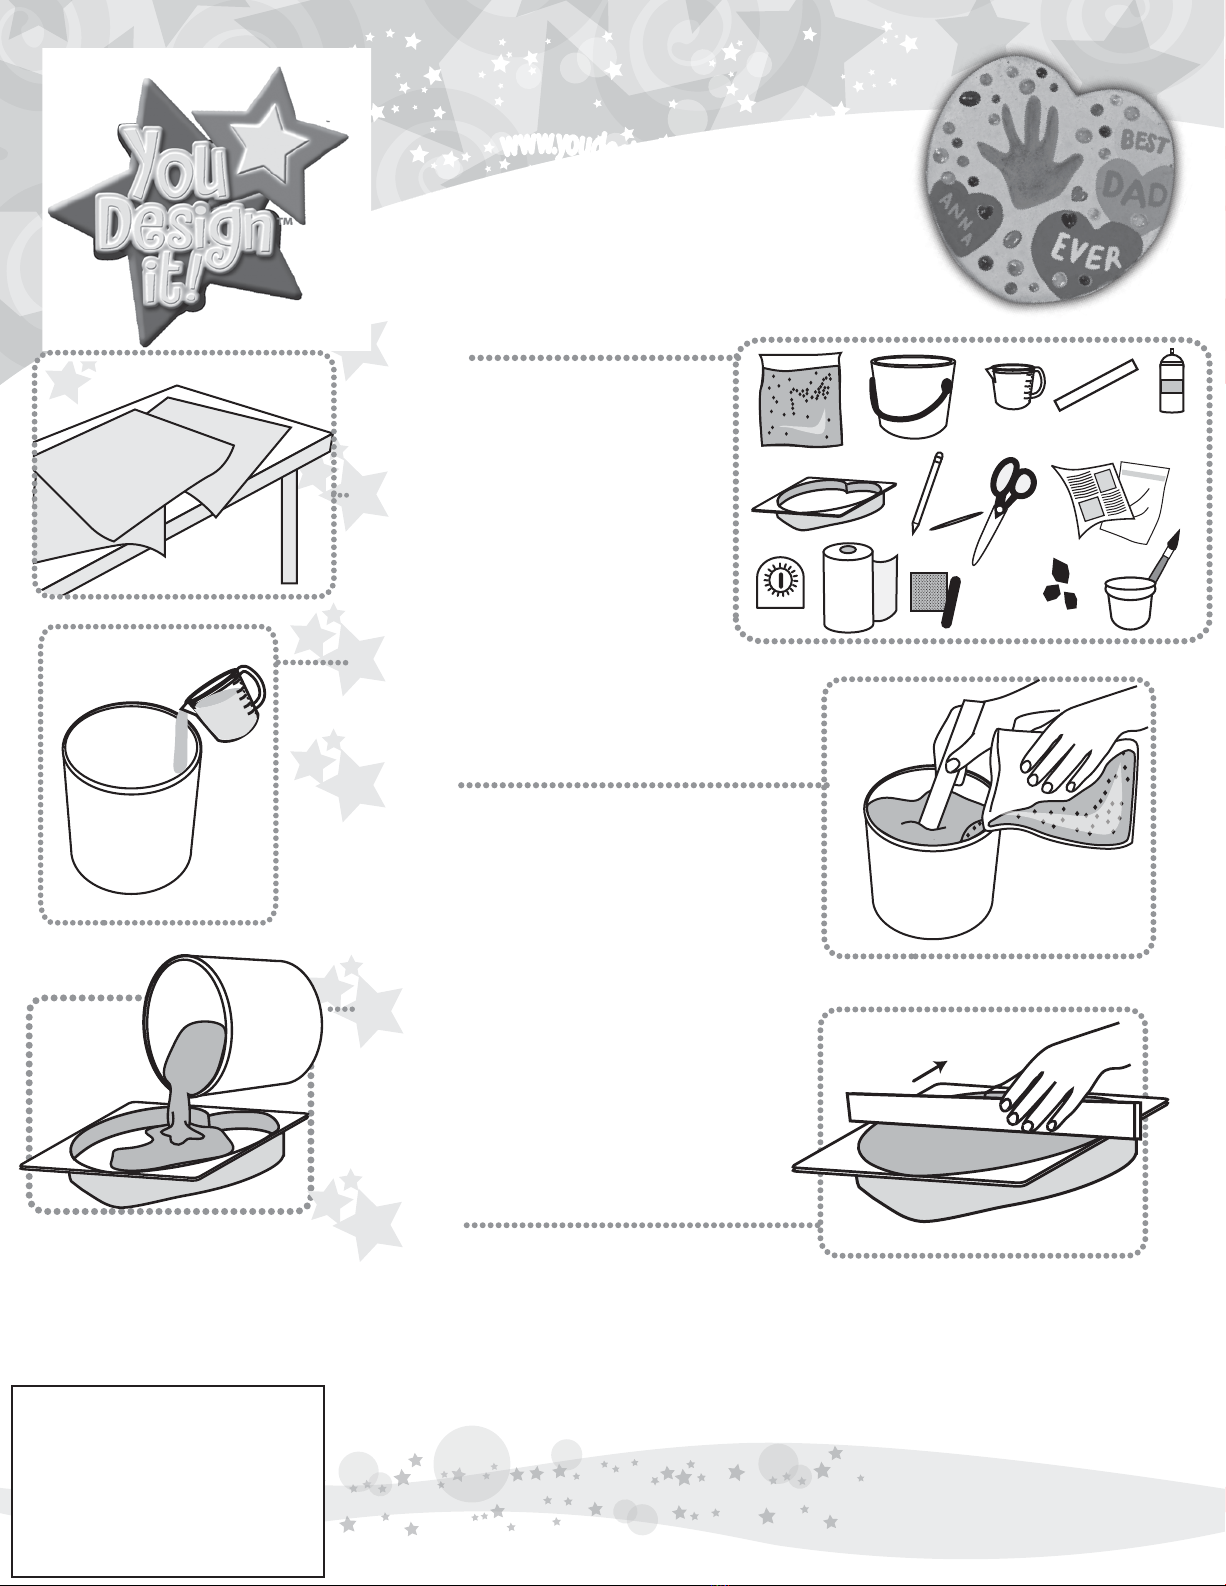
Get it together!
Collect all your supplies and keep them easily
accessible as you are working.
Prepare work area!
You will need to work on a large level surface.
Cover surface with newspaper or plastic
garbage bags. Make sure you have all of your
supplies gathered.
Pour water in bucket
Pour 2 1/4 cups of water into a 5 quart bucket.
Take out the guess work! Visit the You Design It™ website
and pre-design your layout or follow these
instructions to make your design shine!
Take out the guess work! Visit the You Design It™ website
and pre-design your layout or follow these
instructions to make your design shine!
w
w
w
.
y
o
u
d
e
s
i
g
n
i
t
k
i
d
s
.
c
o
m
w
w
w
.
y
o
u
d
e
s
i
g
n
i
t
k
i
d
s
.
c
o
m
Step 5
Step 6
Pour cement into mold.
Before you start apply non-stick spray to the interior of
the mold. Pour about 1 inch of cement at a time, then
shake the mold and tap it on the table to release air
bubbles.
Prepare surface for decorating
Drag the side of the stirring stick over the surface to
smooth wet cement. Let cement set up for 15-30
minutes before setting stones, making hand prints,
writing or drawing in the cement. Climate and
temperature may have an eect on setting time.
9” X 9”
9” X 9”
2 ¼
Cups of Water
9” X 9”
5 qt.
Bucket
Paint
Paint
brush
Sand Paper
Emery Board
or Files
Paper
Towel
Stir stick
Pencil
Toothpick
Scissors
Plastic Shapes
Cement
Timer
Mold
Add 1/3 of the
cement to water
at a time. Stir
thoroughly!
Newspaper or
plastic garbage bags
2 ¼
Cups
Water
Mix cement
Add 1/3 of the cement mix into the water at a time. Use
wooden mixing stick to stir thoroughly, (at least 1
minute), scrapping the sides and bottom of the bucket
to get all of the dry cement. Mix until all the cement is
wet and has the consistency of a milk shake.
NOTE: If the mixture is too thick, add
two tablespoons of water at a time
until it is the correct consistency. Add
water sparingly! Too much water will
not allow the cement to cure correctly
so you can decorate your stone!
Newspaper
or Plastic
Garbage Bags
Step 1
Step 3
Step 4
CAUTION: Contains portland cement and silica sand.Contact may
cause eye damage.Avoid breathing dust. Harmful if inhaled or
swallowed.Prolonged skin contact may cause irritation. Wash hands
immediately after use. If cement particles get into eyes, rinse
immediately with clear water and seek prompt medical attention.
Children should not use this product except under adult
supervision. It is recommended that people who are sensitive to
dust, wear a mask when mixing the cement.
“WARNING:THIS PRODUCT CONTAINS CRYSTALLINE SILICA KNOWN
TO THE STATE OF CALIFORNIA TO CAUSE CANCER.”
Conforms to ASTM D-4236
Non-stick
spray


