manuals.online logo
Brands
  1. Home
  2. •
  3. Brands
  4. •
  5. Timberkits
  6. •
  7. Toy
  8. •
  9. Timberkits Skateboarder User manual

Timberkits Skateboarder User manual

Skateboarder
1
(UK) Symbols in these instructions. (FR) Symboles des instructions. (ESP) Simbolos en estas instrucciones. (IT) Simboli
in queste istruzioni. (Ger) Symbole in dieser anleitung
(UK) Waiting time.
(FR) Temps d’attente.
(ESP) Tiempo de espera.
(IT) Tempo d’attesa.
(DE) Wartezeit.
(UK) Glue.
(FR) Coller.
(ESP) Pegar.
(IT) Incollare.
(DE) Leimen
(UK) Don’t glue.
(FR) Ne pas coller.
(ESP) No pegar.
(IT) Non incollare.
(DE) Nicht leimen.
(UK) Glue guard. Prevents glue getting between moving parts during build. Remove after 2
minutes.
(FR) Piece de protection contre la colle. pendant l’assemblage, eviter tout depôt de colle sur les
pieces en mouvement. Enlever apres 2 minutes.
(ESP) Parte de protection de el pegamento. durante la fase de esambalje, evitar que el pegamento
se ponga sobre partes que se mueven. Quitar despues de dos minutos .
(IT) Pezzo di protezione della colla. Durante l’assemblaggio evitare che la colla vada su parti non
statiche . Imuovere dopo due minuti.
(DE) Karton. Verhindert das eindringen von leim zwischen die bewegliche teile während der
montage. Zwischen die beweglichen Teile.
(UK) Wax surface to lubricate.
(FR) Appliquer la cire sur cette
surface.
(ESP) Aplica la cera sobre esta su-
percie.
(IT) Applicare la cera su questa
supercie
(DE) Wax Oberäche zu schmieren.
Helpful hints/conseils utiles/consejos utiles/suggerimentutili/nützliche tipps
(UK) Check all parts present in trays
(FR) Vérier que toutes les pièces soient présentes dans les bacs
(ESP) Controlar que hay todas la partes en la caja
(IT) Controllare tutte le parti presenti nel kit
(DE) Bitte prüfen sie, ob alle benötigten teile vorhanden sind
(UK) Read all instructions and look at all diagrams
(FR) Lire toutes les instructions et regarder toutes les gures
(ESP) Leer las intrucciones y guardar a los diagrames
(IT) Leggere tutte le istruzioni e guardare i diagrammi
(DE) Lesen sie alle anweisungen und betrachten sie die schaubilder
(UK) Check assembly before gluing
(FR) Vérier le montage avant collage
(ESP) Controlar el montaje antes de empezar a pegar
(IT) Controllare l’assemblaggio prima di incollare
(DE) Montage prüfen vor dem einklebern
(UK) Some parts may need sanding
(FR) Certaines pièces nécessiteront d’être poncées.
(ESP) Algunas parte necesitan de ser suavizadas
(IT) Alcune parti potrebbero aver bisogno di levigatura
(DE) Möglicherweise müssen manche teile geschlien werden
Colouring tips/conseils concernant l’application de peinture/ consejos para Pintar/ suggerimenti per colorare/
lackiertipps
(UK) Do not apply paint to parts which move against one another. It is easier to paint some parts before
assembling
(FR) Ne pas appliquer de peinture sur les parties qui se déplacent l’une contre l’autre. Il est conseillé de pein
dre avant assemblage
(ESP) No aplique la pintura sobre las partes que se tocaran. Resulta mas facil pintar las partes antes de montar.
(IT) Non applicare la pittura su quelle parti dove ce attrito con un’altra parte. è piu semplice pitturare alcune
parti prima della fase di assemblaggio.
(DE) Teile, die aneinander reiben, sollten nicht lackiert werden. Fertig lackierte teile sind o leichter zu
montieren
Visit our website to view
instructional videos where you
see this symbol.
www.timberkits.com
!
Pay special attention to this
section.
New Symbols in our
Instructions
2
Or visit our website for tips, advice and our
instructional videos.
2
47
47
11
8
43
44
44
7
41
9
4
38
28
10
3
3
17 x2
19 & 33
42
13
34
32
32
40 x2
4
4646303030
12 31
36
6537
21 22
29 29
29 29
26
25
6x95
20 20 20 20 45 14 45
6x25
5x9
35 39
1
15
16
27
18
23
2
24
24
5
1
1
1a
2x46mm
3
2
2x8mm
1b
1c
1d
1e
1f
3x66mm
2x8mm
5
6
4
2x20mm
2x20mm
6
2
2a
7
8
3x12mm
2b
3x22mm
2x18mm
2x18mm
2x18mm
3a
3
3b
3c
10mins
4
7
9
4a
10
11
2x20mm
2x18mm
5
4b
4c
5a 5b
12
10mins
8
6
6a
6b
6c
6d
13
14
15
16
12
12
12
12
10mins
9
77a
17
7b
7c
8a
8b
8c
17
18
19
3x12mm
3x12mm
3x12mm 3x12mm
3x12mm
8
3x12mm
20mins
10
9
21
22
3x10mm
9a 9b
9c
10
10a
10b 10c
3x10mm
3x10mm
23
20
24
24
11 11a 11b
10mins
20
20 20
3x20mm
3x14mm
25
26
27
11
12 12a
13
12b
3x12mm
28
3x14mm
13a
13b
29
Do not glue the Spacer (29) too close to the Sliding
Assembly. It must be held against the Side (17) but be
able to move freely back and forth.
12
13c
13d
29
14
15
30
6x95mm
31
6x25mm
32
30
32
15a
20mins
20mins
13
15b
15c 15d
15e
32
30
32
32
32
30
20mins
With the Handle Shaft pulled out by about 1cm push
the Cam (32) furthest away from the Handle against the
Side (17), put some glue on the shaft in front of the Cam
and then push the Handle Shaft back in place, turning it
as you do so. Then put more glue on the Handle Shaft,
in front of the glued Cam and push up the Spacer (30),
then put more glue on the Handle Shaft in front of the
Spacer and push up the second Cam. Oset the two
Cams as shown in the diagram. Try to make sure there
is a 1mm gap between the rst Cam and the Side so that
the Cam does not rub against the Side.
14
15g
30
33
16 16a
16b
Do not apply too much glue on the Side (17), next to the
Sliding Assembly as it might spill out and glue the
Sliding Assembly to the Side.
15
17
18
19
34
20mins
29 29
35
Put glue inside the 9mm hole in part 34, then push onto part
14 as shown. Part 34 must not be loose against the Platform
Top (33) but not be so tight that the part cannot swivel. When
the glue is nearly dry, turn the Handle and the Skateboard
should turn from left to right evenly. If it doesn’t, make a
slight adjustment to part 34 to one side or the other and this
should correct the problem.
16
10mins
20
With part 35 held between your nger and thumb, thread the 3mm x 66mm shaft
(underneath the Left Foot) down through the Platform Top (33) and through into the hole
in the top of part 35 (as shown). Turn the Handle so that the two Cams (32) are pointing
one up and one down, then carefully lift up part 25 and put a dab of glue underneath it.
Arrange part 25 so that it is parallel with the Sliding Assembly and it makes the back of
part 27 parallel with the Vertical Column (18) as shown. Allow 10mins to dry then lift the
Leg Assembly back out from the Platform Top.
Carefully use a cocktail stick to put glue into the top of part
35, then position it back inside part 27. Repeat threading
the 3mm x 66mm shaft down through the Platform Top and
through into the hole in the top of part 35. Then, whilst
the glue is still drying, turn the handle so that the Cam (32)
nearest the centre is pointing towards the Vertical Column
(18). Make sure the soles of the feet are rmly pressed
down against the Skateboard. Leave it in this position for
30mins until the glue is completely dry.
35
25
27
17
20mins
2x10mm
37
36
21a
21
21
Turn the handle so that the Cam (32) nearest the centre is pointing
away from the Vertical Column. Then carefully lift up the feet and put
glue on the sole of each one and glue to the surface of the Skateboard.
Whilst the glue is still wet turn the feet so that they are at an angle
of about 30 degrees to the Skateboard and leave about 1mm gap in
between each foot to allow the legs to move freely when the handle
is turned. Also position the feet so that parts 5 and 6 (in the ankle of
the left foot) are vertical and in line with each other and not bent at an
angle – this is important. You can do this by sliding the feet carefully
backwards until the two parts in the ankle are vertical. Allow to dry for
20mins before turning the handle. When you do the Skateboard should
swing from left to right and the legs should bend up and down at the
knees and ankles.
18
18
3x27mm
3x29mm
20mins
21b
21c
21d
21e
38
39
Turn the handle to check
the body tilts equally in
each direction. Adjust
the 2mm x 46mm peg
glued into part 37 to alter
the tilt whilst the glue is
still wet.

Other Timberkits Toy manuals

Timberkits Vintage Car User manual

Timberkits

Timberkits Vintage Car User manual

Timberkits Trombone Player User manual

Timberkits

Timberkits Trombone Player User manual

Timberkits Pianist User manual

Timberkits

Timberkits Pianist User manual

Timberkits Xylophone Player User manual

Timberkits

Timberkits Xylophone Player User manual

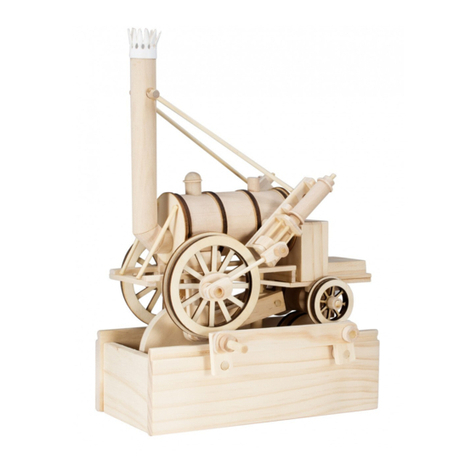
Timberkits Stephenson's Rocket User manual

Timberkits

Timberkits Stephenson's Rocket User manual

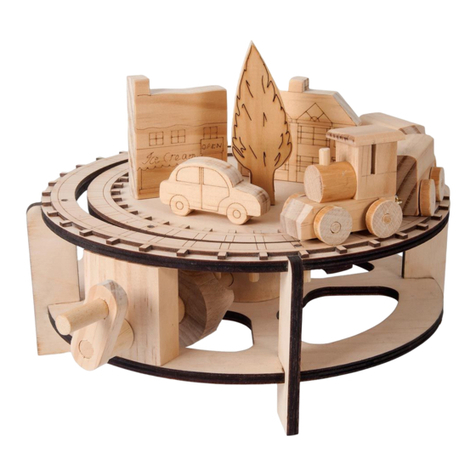
Timberkits Chuffy Train User manual

Timberkits

Timberkits Chuffy Train User manual

Timberkits BALLISTA User manual

Timberkits

Timberkits BALLISTA User manual

Timberkits Magician User manual

Timberkits

Timberkits Magician User manual

Popular Toy manuals by other brands

marklin 36605 user manual

marklin

marklin 36605 user manual

Costway TY578545 user manual

Costway

Costway TY578545 user manual

Eduard Sopwith F.1 Camel RFC Assembly guide

Eduard

Eduard Sopwith F.1 Camel RFC Assembly guide

Hudora 75 053 Instructions for use

Hudora

Hudora 75 053 Instructions for use

PLAYMOBIL 9372 manual

PLAYMOBIL

PLAYMOBIL 9372 manual

Eduard F-22A bomb bay Assembly instructions

Eduard

Eduard F-22A bomb bay Assembly instructions

Horizon Hobby Hangar 9 Solo Assembly manual

Horizon Hobby

Horizon Hobby Hangar 9 Solo Assembly manual

Thames & Kosmos 620380 Experiment manual

Thames & Kosmos

Thames & Kosmos 620380 Experiment manual

Rollplay W486TG Owner's manual and assembly instructions

Rollplay

Rollplay W486TG Owner's manual and assembly instructions

Faller 242301/3 manual

Faller

Faller 242301/3 manual

LEGO Statue of Liberty 3450 Assembly guide

LEGO

LEGO Statue of Liberty 3450 Assembly guide

LEGO 75049 Instructions for use

LEGO

LEGO 75049 Instructions for use

Meccano 15207 instructions

Meccano

Meccano 15207 instructions

Twisted Hobbys Crack Turbo Beaver manual

Twisted Hobbys

Twisted Hobbys Crack Turbo Beaver manual

IKEA DUKTIG manual

IKEA

IKEA DUKTIG manual

Fisher-Price imaginext ADVENTURES quick start guide

Fisher-Price

Fisher-Price imaginext ADVENTURES quick start guide

Eduard Zoom Mosquito FB Mk.VI/NF Mk.II quick start guide

Eduard

Eduard Zoom Mosquito FB Mk.VI/NF Mk.II quick start guide

Super-E Neptune 08200R instruction manual

Super-E

Super-E Neptune 08200R instruction manual

manuals.online logo
manuals.online logoBrands
  • About & Mission
  • Contact us
  • Privacy Policy
  • Terms and Conditions

Copyright 2025 Manuals.Online. All Rights Reserved.