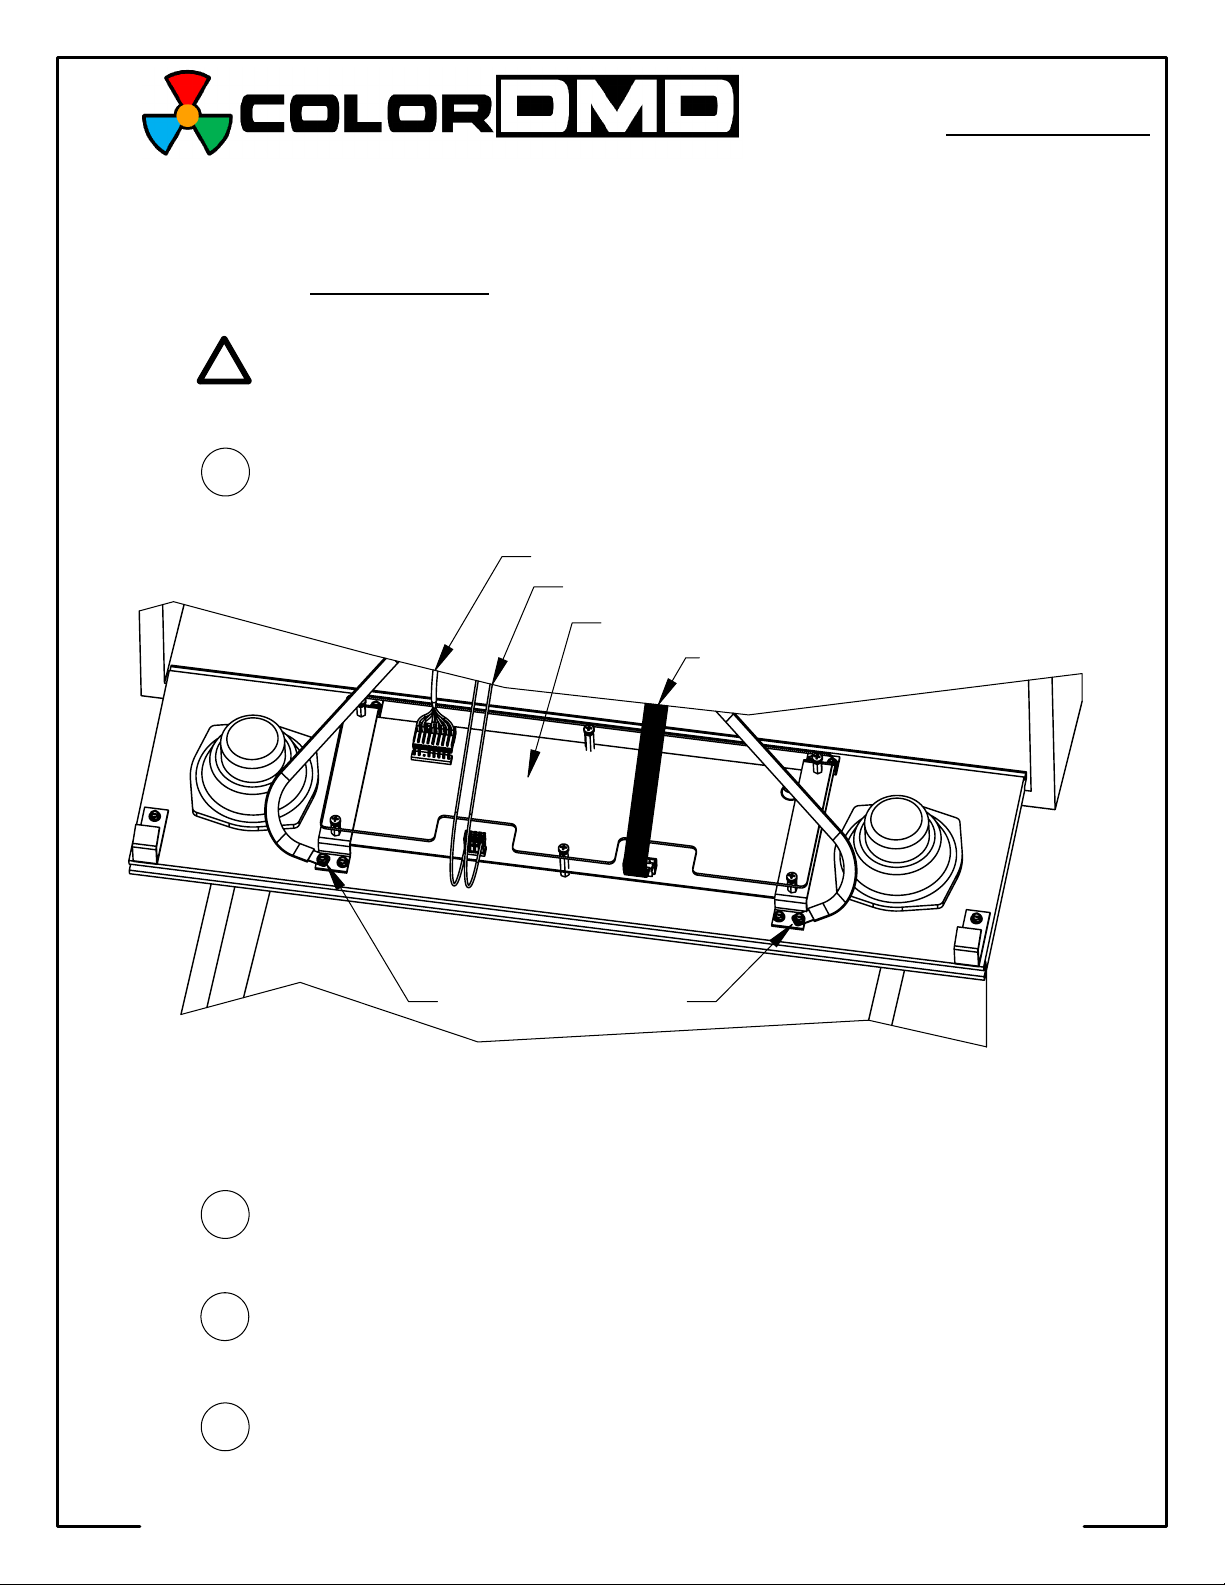
14-Pin DMD Ribbon Cable
Figure A
DMD Ground Cables
(Location may vary)
LED or Plasma DMD Assembly
LED Type DMD Power Cable
Plasma Type DMD Power Cable
}
Game will have only one
DMD power cable depending
upon type of DMD installed
(LED or Plasma).
Carefully remove the translite from the backbox and then lower
the speaker panel to the position shown in Fig. A to gain access
to the backbox.
ALL RIGHTS RESERVED - US PATENT 8,773,452 B2 - COPYRIGHT 2016 - COLORDMD DISPLAYS LLC
Installation Instructions
for
S.A.M.
-
CHROMA eDP
Be sure to turn
OFF the power to the pinball machine before
installing the ColorDMD display.
Tools Required
:
Remove the eight DMD assembly mounting screws.
Remove
the original DMD assembly from the game and store it
in a safe place
.
1
2
3
STEP
STEP
STEP
Disconnect the DMD power and ribbon cables from the DMD
(see Fig. A).
Completely remove the DMD Power Cable from
the game by unplugging the other end in the backbox
.
Congratulations on the purchase of a new ColorDMD display. The ColorDMD
will enhance your pinball machine by introducing
color
to the dot matrix
display graphics produced by the game.
If pinball machine has a transparent colored plastic film attached
to the wooden speaker panel, carefully remove and store it with
original DMD. If the DMD lens on the pinball machine is not clear,
a clear lens (sold separately) must be installed.
1/4" Nut Driver
Phillips Screwdriver
STEP
4
•
!
•


