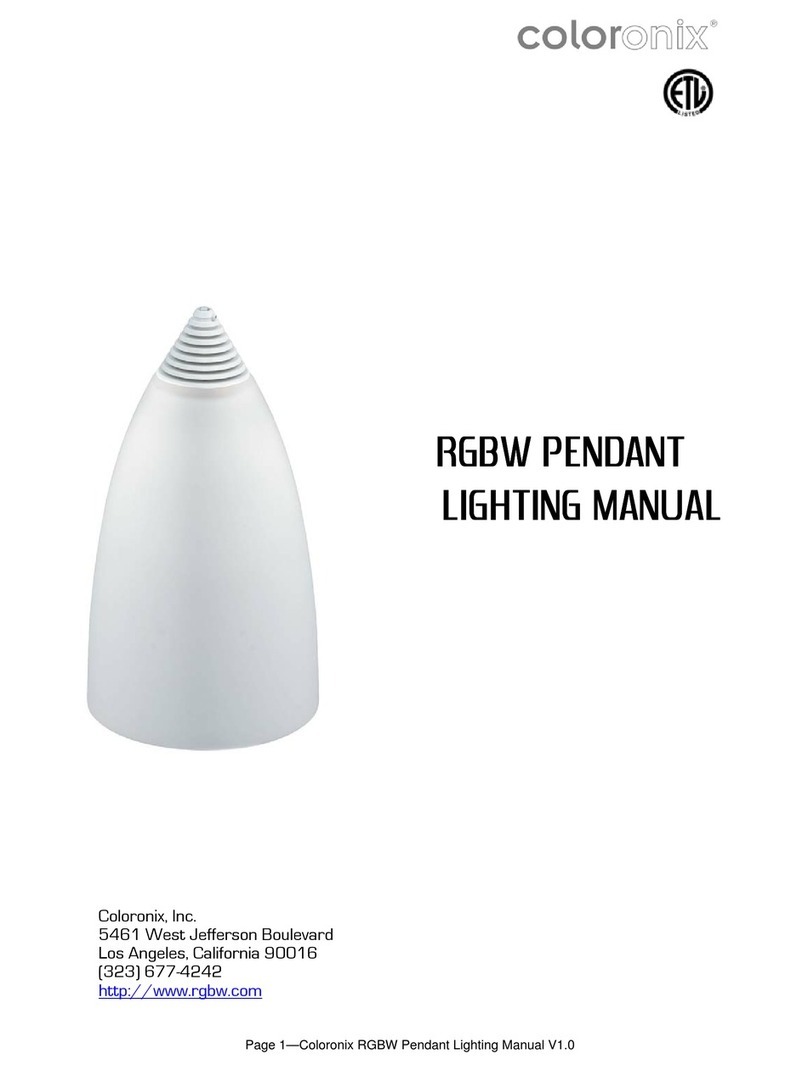
Coloronix SS2 User manual

SS2
SS2 SS2
SS2 -
--
-
DIRECT
DIRECT DIRECT
DIRECT
POWER
POWERPOWER
POWER
LIGHTING
LIGHTING LIGHTING
LIGHTING
MANUAL
MANUAL MANUAL
MANUAL
Coloronix, Inc.
5461 West Jefferson Boulevard
Los Angeles, California 9 16
(323) 677-4242
http://www.rgbw.com

Page 2 of 13 - Coloronix SS2 Direct Power Lighting Manual V.2. .1
Coloronix, Inc.
2 12 Coloronix, Inc. All rights reserved.
According to copyright laws, this manual may not be copied—partially, or wholly—
without the written consent of Coloronix, Inc.
Despite full effort to avoid any clerical or printing inaccuracies, Coloronix, inc. accepts
no responsibility for any such inaccuracies to be found in this manual.
Coloronix, Inc.
5461 West Jefferson Boulevard
Los Angeles, California 9 16
Tech Support: (9 9) RGBW-555
http://www.rgbw.com
Coloronix and the Coloronix logo are brands of Coloronix, Inc.
Any non-Coloronix brands or products found in this manual are not endorsed, branded,
or recommended for use by Coloronix, Inc.; rather, they are only references for
informational purposes. Coloronix has no responsibility for these products in regards
to either performance or use.

Page 3 of 13 - Coloronix SS2 Direct Power Lighting Manual V.2. .1
Contents
ContentsContents
Contents
Summary 4
Summary 4Summary 4
Summary 4
Introduction 4
Scope 4
Who is this manual intended for? 4
Additional Supplies 4
Sa ety 5
Sa ety 5Sa ety 5
Sa ety 5
Hazard Icon Key 5
Speci ications 5
Speci ications 5Speci ications 5
Speci ications 5
Planning or Installation 6
Planning or Installation 6 Planning or Installation 6
Planning or Installation 6
Unpacking 6
Preparation 6
Points to Consider About Data 6
Quick Step-by-Step Instructions 6
Setting Color Mode 7
Setting Color Mode 7Setting Color Mode 7
Setting Color Mode 7-
--
-8
88
8
DMX Mode 7
Pre-Programmed Mode 8
Mount
MountMount
Mounting and Alignment o Fixture 9
ing and Alignment o Fixture 9ing and Alignment o Fixture 9
ing and Alignment o Fixture 9-
--
-10
1010
10
Electrical Connection 9
Data Connection 1
Maintenance 1
Maintenance 1Maintenance 1
Maintenance 11
11
1
Replacing a Failed Fixture 11
Troubleshooting Guide 12
Troubleshooting Guide 12Troubleshooting Guide 12
Troubleshooting Guide 12
Warranty In ormation 13
Warranty In ormation 13Warranty In ormation 13
Warranty In ormation 13

Page 4 of 13 - Coloronix SS2 Direct Power Lighting Manual V.2. .1
Summary
SummarySummary
Summary
Introduction
RGBW Color Changing Adjustable Flood Lights are active, top-of-the-line color changing
fixtures. They draw on solid-state elements in order to produce highlights and washes
in architectural spaces.
More specifically, “RGBW” is an acronym for “Red, Green, Blue, and White”. RGBW
LED color mixing luminaires have the potential to produce 4.3 billion colors, and 16.7
million white light tones.
When installed and operated according to this manual, these downlights will operate
safely and dependably for their rated lifespan.
These luminaries require a USITT DMX 512 control signal on four consecutive
channels total. The unit includes a DATA OUT output for connection to additional units
or other DMX512 devices.
The flood lights are UL 1598 wet location rated for use in indoor or outdoor
environments.
Scope
The purpose of this manual is to properly install and use color-changing flood lights at
peak performance
.
This manual must be complimented by additional references, consultation from
qualified professional(s), and observance of state and local codes and regulations. This
rule applies to any interior structure, exterior structure, or environment.
Therefore, it is important to:
“please read and comply with all instructions and
warnings in this manual when installing or using this product.”
Who Is This Manual Intended for?
This manual is intended for electrical contractors, electrical engineers, and licensed
electricians.
Additional Supplies
DMX512 compatible controller (optional)
DMX extension (optional)
DMX feed connector
4x4 inch electrical junction box rated for the application (optional)
Controller (DMX512 compatible)
Proper mounting bolts, washers and lock washers to secure the fixture to the mounting
surface.

Page 5 of 13 - Coloronix SS2 Direct Power Lighting Manual V.2. .1
Sa ety
Sa etySa ety
Sa ety
Hazard Icon Key:
The “ DANGER” icon means avoiding
pending
danger will result in serious injury, or death.
The “ WARNING” icon means avoiding this warning may result may in serious injury, or death.
The “ CAUTION” icon means not exercising caution here may result in minor to moderate injury, or property damage.
The precautions are:
DANGER: Not turning off the main power before wiring, installing, connecting, or disconnecting this product may result in
serious injury, or death.
WARNING: Not following NEC codes, local codes, or consulting a certified professional may result in property damage,
serious injury, or death.
WARNING: Not following instructions, or safety labels may result in property damage, or serious injury.
WARNING: Modifying, servicing, or ignoring these safety indications may void the warranty.
WARNING: Inspect product before use. DO NOT use if damaged.
WARNING: Install safety cables per local and structural engineer’s code.
CAUTION: Hot swapping, not turning off fixtures before connection or disconnection, will void the warranty, and damage
property.
CAUTION: Do not go beyond the specified voltage, input current, maximum number of fixtures, or run length.
CAUTION: Do not use sharp tools near the reflector or lens.
CAUTION: Do not look directly into beam, with or without optical instruments.
Note: Instructions and warning referenced in this installation guide are not
necessarily all inclusive, all conceivable, or all relevant to all applications as
Coloronix cannot anticipate all conceivable or unique situations.
Speci ications
Speci icationsSpeci ications
Speci ications
Power Input: Direct 12 -24 VAC 5 Hz/6 Hz
Power Consumption: 52W for “-6” version, 79W for “-9” version
L70 Life: 35, Hours.
Temperature Rating: 14°F - 1 4°F Ambient.
LED Die Colors: Red (62 -635nm)
Green (52 -535nm)
Blue (45 -465nm)
Neutral White (5 k)
Safety: Complies to UL1598 and ANSI/UL 875 .

Page 6 of 13 - Coloronix SS2 Direct Power Lighting Manual V.2. .1
Planning or I
Planning or IPlanning or I
Planning or Installation
nstallation nstallation
nstallation
Unpacking
The data enabler and trim are shipped assembled with no additional assembly needed.
Housing and trim are shipped in two different boxes.
Any optional accessories are included in the package. Use the packing list located on the
outside of the box to ensure all accessories are included.
Survey the unit to make sure the data enabler/trim are all intact—not cracked or
damaged. Any damages to the package or its contents are of the buyer’s responsibility;
please follow protocol for filing damage claims. Please recycle or appropriately discard of
any packing materials.
Preparation
Before Installation, Coloronix suggests:
• Consulting the provided submittal drawings to recognize layouts of luminaries,
power supplies, and wiring layouts.
• Drawing out a layout plan consisting of locations of luminaries and wiring.
• Record DMX addresses on a mapping grid for easy reference and addressing
(where applicable).
• An electrical inspector reviews all wiring plans.
Points to Consider About Data
•
Max power links is 9 per power feed
• AC Power and DATA cables may NOT run in the same conduit or within one
foot due to possible induced errors.
• 32 DMX DATA links max per run
Quick Step-by-Step Instructions
To successfully install RGBW Recessed Lighting, the steps are:
1. Mounting and alignment of fixture
2.
AC power connections
3.
DMX connections
4.
Ready to go.

Page 7 of 13 - Coloronix SS2 Direct Power Lighting Manual V.2. .1
Setting Color Mode
Setting Color Mode Setting Color Mode
Setting Color Mode
DMX Mode
For installations requiring DMX control, set the
personalized DMX address using the address table (Below)
for LCD menu settings. See figure.
Note: Up to 128 unique 4-channel addresses can be set
per DMX universe.
1. Press the “MODE”
,
enter the DMX mode “d.×××”.
2. Press the “UP” or “DOWN”
,
set up the DMX address value d. 1-d.512
3. Press the “SETUP”, enter the DMX working mode: X-ch
4. Press the “UP” or “DOWN”
,
set up the DMX working mode (See below)
DMX Working Mode 1: 1 CHANNEL (For static color control, 1 channel per fixture)
CH1
No. DMX Value Function
1 No use
2 1-22 Red
3 23-45 Green
4 46-68 Blue
5 69-91 Cyan
6 92-114 Yellow
7 115-137 Orange
8 138-16 Pink
9 161-183 Purple
1 184-2 6 Dark Blue
11 2 7-229 Light Green
12 23 -252 White
13 253-255 Warm White
DMX Working Mode 2: 4 CHANNEL
(For individual color dimming control)
Channel Value Function
CH1 -255 Red
CH2 -255 Green
CH3 -255 Blue
CH4 -255 Cool White
DMX Working Mode 3: 5 CHANNEL
(For individual color control and master
dimmer function)
Channel Value Function
CH1 -255 Master dimmer
CH2 -255 Red
CH3 -255 Green
CH4 -255 Blue
CH5 -255 White
Lock Function:
If MENU is IDLE for 2 seconds, MENU will lock. Hold “MODE” and “DOWN” button to
release lock.

Page 8 of 13 - Coloronix SS2 Direct Power Lighting Manual V.2. .1
Pre-Programmed Mode (Static Color)
1. Press “MODE”
,
enter the mode “Prxx”
2. Enter Pr. 1
3. Press “SETUP” and toggle between static color to achieve desired show
No. Color
1 Red
2 Orange
3 Green
4 Green/Blue
5 Blue
6 Purple
7 RGB
8 White
9 Bright White
1 Pink
11 Light Green
12 Light Blue
*Consult factory for custom colors in the RGBW spectrum.
Pre-Programmed Mode (Show Mode)
1. Same as above
2. Toggle between Programs 2-11 to achieve desired show
No. Show
2 Different shades of:
Red, green, blue, gray, yellow, hot pink, light pink, turquoise, green-blue, light
blue, gray, gray, turquoise, pink (slow fade to and from black between
colors)
3 RGBW (fade to and from black between colors)
4 RGBW (quick jump between colors)
5 RGBW (strobe effect)
6 RGBW (blend between colors slow)
7 RGBW (blend between colors fast)
8 Red (long duration on, then quick jump off and on)
9 Green (long duration on, then quick jump off and on)
1 Blue (long duration on, then quick jump off and on)
11 White (long duration on, then quick jump off and on)

Page 9 of 13 - Coloronix SS2 Direct Power Lighting Manual V.2. .1
Mounting and Alignment o Fixture
Mounting and Alignment o FixtureMounting and Alignment o Fixture
Mounting and Alignment o Fixture
•
Mount and secure each fixture into the designated position in accordance to the
installation plan. Ensure there is sufficient cable length between the fixture and junction
box to allow for final alignment of the fixture.
•
Secure the fixtures to a solid mounting surface using three threaded fasteners
minimum of 3/8 inch (1 mm) stainless steel complete with flat and locking washer.
•
Rotate the fixtures using the pan and tilt method into the desired position.
Electrical Connection (Hardwire)
WARNING: Do not expose bare wires outside wire nut connectors.
1. Per local or “National Electric Code”, provide electrical service to junction box
located on the housing.
a. The insulation of supply wire must be rated for at least 9 °C.
b. Junction boxes should be rated for:
i. Max. 8 No. 12 AWG Circuit Conductors
ii. Also suitable for at least 9 °C
2. Remove cover of junction box.
3. Remove proper round pryout, and then connect junction box with (not included)
proper connector.
4. Using properly sized wire nuts, connect lead wires of junction box (line, neutral,
and ground) to supply lead wires in the fixture.
a. WARNING: Do not leave bare conductors outside wire nut connectors.
5. Connect green (from electrical service) to the supply side to the green wire in
the junction box. Connect black-to-brown, and white-to-blue.
a. Any excess wiring and connectors should be put in the junction box.
Then, replace the cover.
NOTE: Supply lead wires should not be connected to a dimmer of any sort.
Maximum power connection should not exceed 9 units at 12 V.

Page 1 of 13 - Coloronix SS2 Direct Power Lighting Manual V.2. .1
Data Connection
Note: Inline DMX amplifier required if run length exceeds: 125 feet between fixtures (others)
Note: Maximum run length from DMX controller to last fixture: 1 feet.
Note: DMX must be continuous from controller to last fixture in a run. A splitter is needed if
signal is split.
Please follow below if provided data cables will not be used
Note: Fixtures on a serial data link must be daisy chained in one single line. To comply with
the EIA 485 standard, no more than 32 fixtures should be connected on one data link.
Connecting more than 32 fixtures on one serial data link without the use of a DMX
optically isolated splitter may result in deterioration of the digital DMX signal.
Maximum recommended serial data link distance: 5 m (164 ft)
Maximum recommended number of fixtures on a serial data link: 32
DMX Data Cable
If installer prefers 3-wire data cables, we suggest a Belden© 9481 or equivalent cable which meets the
specifications for EIA RS-485 applications. Standard microphone cables cannot transmit DMX data
reliably over long distances. The cable must have the following characteristics:
Type: shielded, 2-conductor twisted pair
Maximum capacitance between conductors:
3 pF/ft
Maximum capacitance between conductor and shield:
55 pF/ft
Maximum resistance: 2 ohms/1 ft
Normal impendance: 1
~
14 ohms
Note: To comply with all local codes and jurisdiction, qualified communications technicians must do
communications wiring.
Note: Communication cables and AC power lines must not be run in the same conduit.
A. Route Data Cables in series between fixture and any communications accessories using DATA
IN and DATA OUT.
B. In order that they may be easily accessed once construction is complete, secure data cables in
the immediate proximity of the fixtures.
Note: To avoid signal transmission problems and interference, it is always advisable to connect to a
DMX signal terminator.

Page 11 of 13 - Coloronix SS2 Direct Power Lighting Manual V.2. .1
Maintenance
MaintenanceMaintenance
Maintenance
Coloronix recommends periodic cleaning of the heat sink and lens. Over time these
components can become dirty or full of debris. This can result in lack of cooling or can
limit the capabilities of the fixture.
Lens Maintenance
Clean the front Lexan® as required using any of the following cleaners:
• Window Cleaner
• Mild soap and water solution
In addition, dry the Lexan® with a quality paper towel to avoid scratches or streaks.
Mount/Fasteners Maintenance
Check all fasteners annually for tightness and security to avoid damage to the fixture
and possibly liability.
Troubleshooting
If problems occur during usage, unplug the product immediately and call or email:
Coloronix, Inc.
Tech Support: (9 9) RGBW-555
support@coloronix.com
Replacing a Failed Fixture
“Hot Swapping” a fixture is not allowed. If a fixture needs to be replaced, the steps are
to:
1. Disconnect the DMX input at the junction box of the fixture needing
replacement.
2. Disconnect DMX output.
3. Replace fixture.
4. Reconnect AC negative.
5. Reconnect AC positive.
6. Reconnect DATA output.
7. Reconnect DATA input.
8. Reconnect power.
Make sure the replaced fixture and the entire system is in working order.

Page 12 of 13 - Coloronix SS2 Direct Power Lighting Manual V.2. .1
Troubleshooting Guide
Troubleshooting GuideTroubleshooting Guide
Troubleshooting Guide
If does not light, check if:
Electrical power is not connected.
Electrical power is less than specific voltage.
Electrical power is greater than specified voltage.
If does not respond to DMX control signal, check if:
DMX control device and RGBW are addressed differently.
DMX cable is damaged.
DMX control device is disconnected or not operating.
DMX device needs to be restarted.
LED fixture was not restarted after address change.
Restart fixture.
If the fixture is not responding to DMX, check if:
DMX addressing is incorrect:
Check Control Panel and unit addressing.
The wrong polarity settings may be on the controller:
Check polarity switch settings on the controller.
DMX cables may be loose:
Check cable connectors.
If DMX control operation flickers or is intermittent, check if:
RGBW fixture or final DMX device in daisy chain is not terminated.
DMX cable is damaged.
DMX control device is operating at less than 25Hz.
If there is a loss of signal, check if:
Non-DMX cables are being used:
Use only DMX compatible cables (see page 1 ).
Signals are bouncing:
DMX terminator is not installed as suggested.
If output is less than normal, check if:
Environment temperature may be in excess of 4 °C/1 5°F.
Lens may be damaged or dirty.
DMX control or RGBW channels may be set at low level.

Page 13 of 13 - Coloronix SS2 Direct Power Lighting Manual V.2. .1
Warranty In ormation
Warranty In ormationWarranty In ormation
Warranty In ormation
3 YEAR PRODUCT LIMITED WARRANTY
Coloronix, Inc. provides a warranty to fixtures in case of physical or assembly-related
malfunctions. This warranty is valid up to three years from the product’s purchase
date. Furthermore, Coloronix, Inc. offers to repair products with no charge for labor,
or at its own discretion, may offer to replace parts at no charge. However, any labor to
remove or install fixtures is not covered. This warranty is only valid for the original
purchaser of the product. Proof of date of purchase by receipt or by other means
(deemed acceptable by Coloronix, Inc.) is necessary for any warranty service. The
warranty only covers product failures due to failure in parts or labor resulting from
normal use. The warranty does not cover product failure due to mistake, improper
use, mistreatment, neglect, modification, improper installation, inappropriate
application of product, or any other defect not resulting from the manufacturer’s
construction or labor. This warranty does not cover damages resulting from products
interacted with non-Coloronix, Inc. brand products. Corrosion or discoloration in
components or products are not covered. Except as written above, no other
warranties are applicable.
Coloronix, Inc. is not liable for any damages—accidental, unusual, or resulting—in
breach of this warranty. Any warranties, stated here or implied, are only valid for the
duration of this warranty.
The length, limitation, or cancellation of a warranty, whether incidental or resulting
from use, may not apply to individuals in certain states.
This warranty is the only warranty, written or verbal, accepted by Coloronix, Inc. The
rights of the consumer herein may be different from state to state.
For warranty service, please write to:
Coloronix, Inc.
5461 W. Jefferson Blvd.
Los Angeles, CA 9 16
Please include the product name, a description of the product, and address and
telephone contacts.
Coloronix, Inc. will offer a solution to the problem, or provide instructions for return.
Any returns must include the return material authorization code (provided by Coloronix,
Inc.), as well as return freight prepaid. Returns without a return authorization code will
not be accepted.
Coloronix, Inc. accepts no liability for any damages incurred in shipping. All products
are inspected as packed. Damages, apparent or not, must be claimed with the delivery
carrier.
Table of contents
Other Coloronix Light Fixture manuals
Popular Light Fixture manuals by other brands

CLF Lighting
CLF Lighting YARA manual

Cooper Lighting
Cooper Lighting Combo Trimless Series LV-116-TR installation instructions

UltraPro
UltraPro ESCAPE LED Rope Light user manual

Iluminarc
Iluminarc Ilumiline 36 IP Optic RGB user manual

Metalux
Metalux SSRK installation instructions

DOMUS LINE
DOMUS LINE APEX installation manual

Lightolier
Lightolier STA 1'x4' 1 LAMP specification

LIGHTS 4 Europe
LIGHTS 4 Europe Lucid nova eos Operation, installation and service instructions

Philips
Philips CDB2SPF228 specification

Invuity
Invuity LED TURBO Operator's manual

DS Produkte
DS Produkte Z 08550 instructions

Volt
Volt Low Voltage Landscape Lighting installation instructions