Comm-Tec ProTUNE HD / S User manual
1von59
ProTUNEHD / S
DigitalHD / SD
SatelliteTVTuner
UserManual
Version 1.2
2von59
Disposal
The packagingofyourdeviceiscomposed exclusivelyofrecyclablematerials.Pleaserunthisagainsorted accordingtothe"dual
system".Thisproductmaynotbedisposed withthenormalhouseholdwaste,butshould bebroughttoacollection pointfor
recyclingelectricaland electronicequipment.
The -Symbol ontheProduct,user’smanual orpacking referstodisposal.
The materialsareasmarked recyclable. Byrecycling,material recycling orotherformsofrecoveryfromolddevices, youmakean
important contributiontoprotectourenvironment. Askyourcityorlocalauthoritiesaboutwaystoproperlydisposee-wastein
keepingwithcurrent environmental
standardsand regulations.
Returnspentbatteriestoadesignated collectionpoint. Neverdisposeofbatteriesalongwithyournormal household waste.
Batteriesprobablycouldcontaintoxicsubstances.Therefore,alwaysdisposeofbatteriesinaccordancewithcurrentlaws
governingmandatoryreturnschemesfore-waste.
SafetyPrecaution
•The lightningflashwitharrowheadsymbol,withinan equilateral triangle,isintended toalerttheuserto"dangerousvoltage"
andtoprevent fromariskof electricshock.
•WARNING: Toreducetheriskof electricshock,don'topenthehousing.Referservicingtoqualified personnel only.
•The exclamationpointwithinan equilateral triangleisintended toalerttheusertoimportantoperating andmaintenance
(servicing).
•WARNING: DonotusetheProTUNEHDwherecontactwithorimmersioninwaterisapossibility.Donotusenearflower
vase,washbowls,kitchen sinks, laundrytubs, swimmingpools,etc.
•WARNING: Donotputthecandleorlampstandon thehousing
•WARNING: Theunitshould beconnectedtoapowersupplyonlyofthetypedescribed intheoperating instructionsoras
marked ontheunit.Ifyou arenotsureof thetypeofpowersupply(forexample,120or230 V) toyourhome,consultyour
local dealerorlocal powercompany.
•WARNING: Thisproductinstallsdiodes.Donotopenthehousingortouchanypartsin theinnermechanism.Consultyour
local dealerfortechnicalserviceiftheopeningisrequired.
•Note: Toensureproperuseof thisproduct, pleasereadthisUsermanual carefullyandretainforfurtherreference.
•UnitCleaning:Aftertheunitpoweristurnedoff,you can cleanthehousing,panel andremotecontrol withasoftclothlightly
moistened withamilddetergent solution.
•Accessories/Attachments: Neveraddanyattachmentsand/orequipmentwithoutthemanufacturerconsent;assuch
additionsmayresultintherisk offire,electricshock,orotherpersonalinjury.
•Locating: Slotsand openingsinthehousingareprovided forventilationtoprotectitfromoverheating.Donotblockthese
openingsorallowthemtobeblockedbyplacingtheProTUNEHDon abed,sofa,orothersimilarsurface,norshoulditbe
placed overaradiatororheatregister.
•PowerCordProtection: Placethepowercordoutoftheway,whereitwill notbewalked on.Pleasetakespecial attentions
tocordsat plugs, conveniencereceptacles,andthepointwheretheyexit fromtheunit.
•Objectand Liquid Entry: Neverputobjectsofanykind intoProTUNEHDthroughopenings,astheymaytouchdangerous
voltagepointsorshort-outpartsthat couldresultinafireorelectricshock. Neverspill anyliquidontheProTUNEHD.
•Note: Moisturemaybeformed insidetheunitwhen itissuddenlymovedfromacoldenvironmentoran air-condition roomto
awarmplace,immediatelyafteraheaterhasbeenturned on,andinasteamyorveryhumidroom.Ifthemoistureforms
insidetheunit, itmaynotoperateproperly.Tocorrectthisproblem,turnon thepowerandwaitabouttwohoursforthe
moisturetoevaporate.
•PartsReplacements: Whentheunitpartsneedtobereplaced,usershouldmakesuretheservicetechnician usethe
replacementpartsspecified bythemanufacturerorhavingthesamecharacteristics astheoriginal part. Unauthorized
replacementmayputtheunit Intheriskoffire, electricshockorotherhazards.
•SafetyCheck Afterallthemaintenancesand repairsaredone, userisrequiredtorequesttheservicetechniciantoconduct
theoverallsafetycheck toensurethemachineisinthepropercondition.

Content
1. SCOPEOF DELIVERY.................................................................................................................. 3
2. INSTRUCTION............................................................................................................................... 3
DESCRIPTION FRONT PANEL / REMOTE CONTROL......................................................................................3
2.1.1 FRONT PANEL.......................................................................................................................3
2.1.2 BACK PANEL.........................................................................................................................4
2.1.3 DESCRIPTIONOF REMOTE CONTROL.......................................................................................5
2.2 BASIC FUNCTIONS.......................................................................................................................6
3. MENU ...........................................................................................................................................13
3.1 INSTALLATION............................................................................................................................13
3.1.1 LNBSETTINGS....................................................................................................................13
3.1.2 SATELLITE LIST ....................................................................................................................14
3.1.3 TPLIST ..............................................................................................................................16
3.1.4 CHANNEL SEARCH................................................................................................................19
3.2 CHANNELS ................................................................................................................................20
3.2.1 TVCHANNEL LIST................................................................................................................20
3.2.2 RADIO CHANNEL LIST ...........................................................................................................24
3.2.3 RENAME FAVORITES.............................................................................................................25
3.2.4 DELETE ALL.........................................................................................................................26
3.3 SYSTEM SETUP..........................................................................................................................27
3.3.1 LANGUAGE ..........................................................................................................................27
3.3.2 LOCAL TIME SETTING............................................................................................................28
3.3.3 TVSYSTEM.........................................................................................................................29
3.3.4 OSDSETTINGS ...................................................................................................................30
3.3.5 TIMER .................................................................................................................................30
3.3.6 FIRMWARE INFORMATIONEN ..................................................................................................32
3.3.7 PARENTAL LOCK ..................................................................................................................32
3.3.8 FACTORY SETTING ...............................................................................................................34
3.3.9 COMMON INTERFACE............................................................................................................35
3.4 DVROPTION.............................................................................................................................37
3.4.1 DVRMANAGER ...................................................................................................................38
3.4.2 STORAGE FORMAT ...............................................................................................................39
3.4.3 DVRSETTINGS....................................................................................................................39
3.4.4 DIASHOW SETTINGS .............................................................................................................40
3.4.5 STORAGE............................................................................................................................41
3.4.6 REMOVE STORAGE SAFELY...................................................................................................45
4. ASCII REMOTEPROTOCOL........................................................................................................46
5. IRTABLE.....................................................................................................................................51
6. NETWORK SETTINGS.................................................................................................................53
6.1 SETTINGTHE IP-ADDRESS ..........................................................................................................53
7. FIRMWAREUPDATE...................................................................................................................54
7.1 FRONT PANEL............................................................................................................................54
7.2 MAINBOARD...............................................................................................................................55
8. TECHNICAL DATA.......................................................................................................................56

1. ScopeofDelivery
•IRRemoteControl
•PowerCord
•Product-/Software-CD
2. Instruction
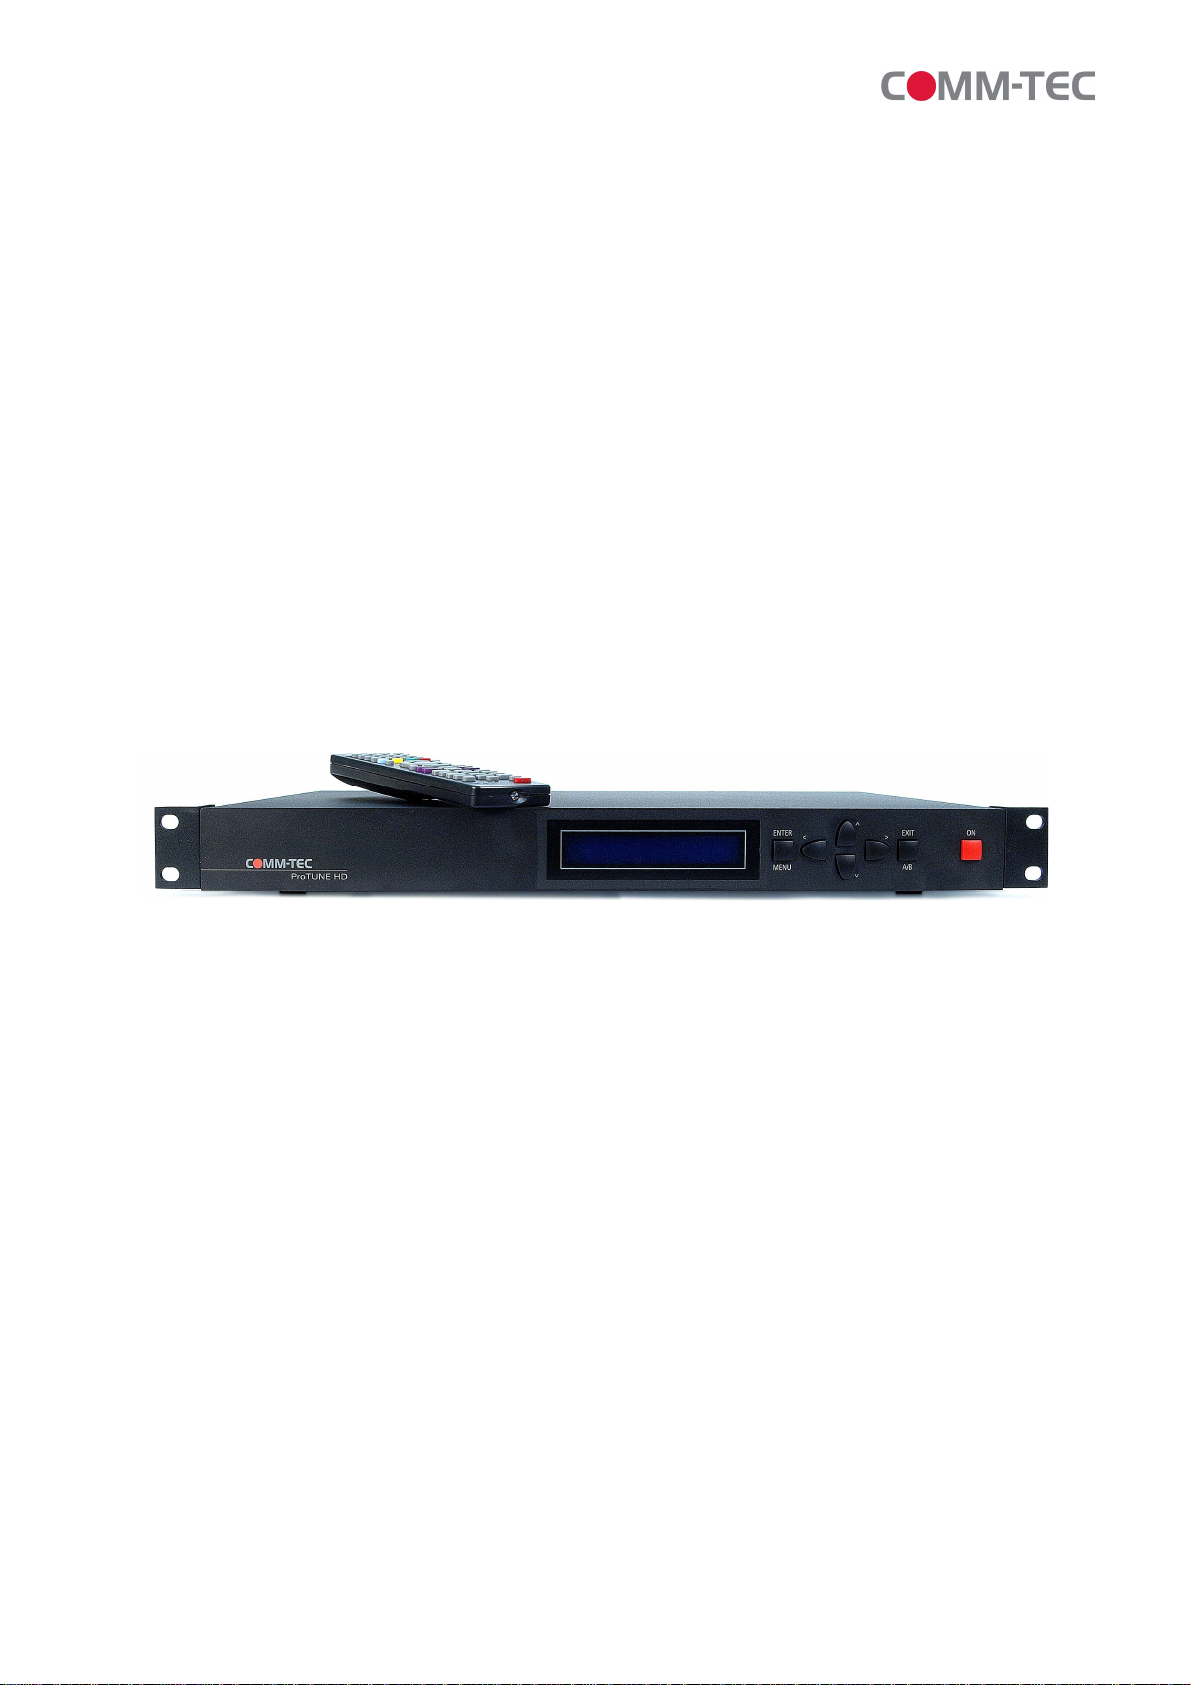
The ProTUNEHD /isaHDTV-Tuner,toreceivedigital TV(DVB-S2)and digital radiooversatellite.
The bi-directional RS-232 and Ethernet portallowsyou tocontrol the ProTUNEHD byexternalcontrol
systemssuchasAVIT®, RTI®, AMX®, Crestron®orothers.
Setup can be done bytheincluded IRRemoteControlorbythe easytousefront panel.
The Tunerisdesigned forthe useinpresentation rooms, trainingand seminarfacilities, schools,
universities, hotelsorinahomecinema.
2.1 Description Front Panel/ RemoteControl
2.1.1 FrontPanel
1. ON: SwitchtoPowerOnorstandbymode.
2.Display:Showscurrentchanneland programinformation when inoperation,and currenttime
instandbymode.
3.OK/SETUP:Toopen the mainmenu,ortoclosethe currentmenu level,and toconfirma
selection.
4. MENU /EXIT:ToExitthe mainmenu and current menu level
5.Up /Down:Toswitchbetween channelsornavigation and adjustmentof valuesinthe menu
(up ordown).
6. Left/ Right: Adjustment ofvolumeand changestovaluesinthe menu (left orright).

2.1.2 Back Panel
1. IF OUT:Satelliteoutput fordaisy-chaining withotherdevices.
2. IF IN:SatelliteInput
3. AUDIO SYM.: Balanced audiooutput
4. USB:Interfaceforfirmwareupdates, forthe connection toaexternaldatacarrier,tobe used
forrecordingortimeshift functions.
5. HDMI: Digitaloutput forthe transmision of audioand video data.
6. OPTICALS/PDIF:Optical,digital audiooutputforthe connection toan external AV-
Receiver.
7. S/PDIF:Electrical, digitalaudiooutputforthe connection toan externalAV-Receiver.
8. AUDIO R/AUDIOL:Analogaudiooutputforthe connection tostereo equipmentor
monitors.
9. Y/COut:Analog video output forthe connection toamonitor
10. YPbPr: Component outputs, thatcan alsobe used ascompositeoutputif desired.
11. LAN:Forthe connection toanetwork orcompatiblehardware,forexternalcontrol,and for
firmwareupdate.
12. RS232:Forthe connection tocompatiblehardware,forexternal control,and forfirmware
update.
13. PowerSwitch:PowerONorOFF.
14. PowerInput(100-240VAC):IEC-Socketforthe connectiontocurrentsupplybyapower
cord.

2.1.3 DescriptionofRemoteControl
TV/ Radio
Number 0-9/
Letter ButtonsA-Z
EnablingProgramInformation
Standby(ON/ OFF)
Page Up
Page Down
MainMenu/ go back one
step inthemenu
Curser button(up/down),
channelcontrol(+/-) in
normalmode andnavigation
Cursor button(left/right),
volumecontrolandnavigation
Confirmationofselections
Multifeed-Function
Red functionbutton
Enablethemediaplayer
Audio
Zoom
Bookmarkfunction
Pausefor stillimage function
ShowFavorites
Image previewinmedia
player
Mute
Goback tothelast channel
viewed
Electronic
programguide
Favorites+
Favorites-
EXIT: toexit themenu
or hide thedialog
Enabletherecord
manager
Selectionofvideo output
SelectionofTVformats
Subtitle
Teletext
Timeshift
Programfinder
PVR-Functions

2.2 BasicFunctions
•Turning on the ProTUNEHD
Turnon the [Devicemainstream] switch.Ifyou turnon the ProTUNEHD forthe first time,the first channel
fromthe default channellistisdisplayed.Withfurthercommissioning showsthe ProTUNEHD tothe
channelthat wasdisplayed beforethe last turn.
•Power
1.Press [Power] Keytoenterthe Standbystate.
2.InStandbystate,press [Power] Keyagaintocallbackthe unit and playthe previouschannel..
3.Usethe device’smainpowerswitchon the backtoturnoff the unitcompletely.
•CH 56
Press [CH56] toswitchchannelsinTVmode.
•VOL34
Press [VOL34]toincrease/decreasevolumeinTVmode.
•ChannelNumber
InTVmode,you can enterthe channelnumberdirectlywithyourremotecontroltoswitchtothedesired
channel.
•Mute X
1.InTVmode,press [Mute X]toturnoff sound. Activated Muteisindicated onthe displaybyan icon.
2.Press [Mute X]againtoturnonsound.
PAUSE
1.InTVmode,press [Pause] tostop the image.The sound of the channel continuestorun.
2.Press [Pause] againtocontinue the TVimage fromthe currenttime.
RECALL
Press [Recall]toswitchbetweenthecurrent andthelastchannelviewed.
FAV
1.InTVmode,press [FAV]todisplaythefavoritesliston themonitor.Eachfavoriteslistisbeingcreatedby
pressingtheEDITbutton,callingupthechannellist, andselecting thedesiredchannelsby[FAV].
2.IntheFavoritegroupwindowpleasenavigatewith[CH56]andpress[OK]toconfirmselection.Inlarger
favoritesgroups,[PGUP/PGDN] can beusedtonavigate.
3.Press [VOL34]toselectbetweenthedifferent favoritegroups.
FAV+/-
1.InTVmode,press [FAV+/-]toswitchbetweenFavoritesandactualFavoriteGroups.
2.TheorderingofthefavoritesisinaccordancetotherespectiveFavoriteGroup List.
3.Press [Exit], toleavethefavoriteswindow.
AUDIO
1. InTVmode, press [Audio]toopen the Audiooptions.
2. Select“AudioTrack”with[CH56],tochange the“AudioModes”press[VOL34]forStereo,Mono,
Right/Left.
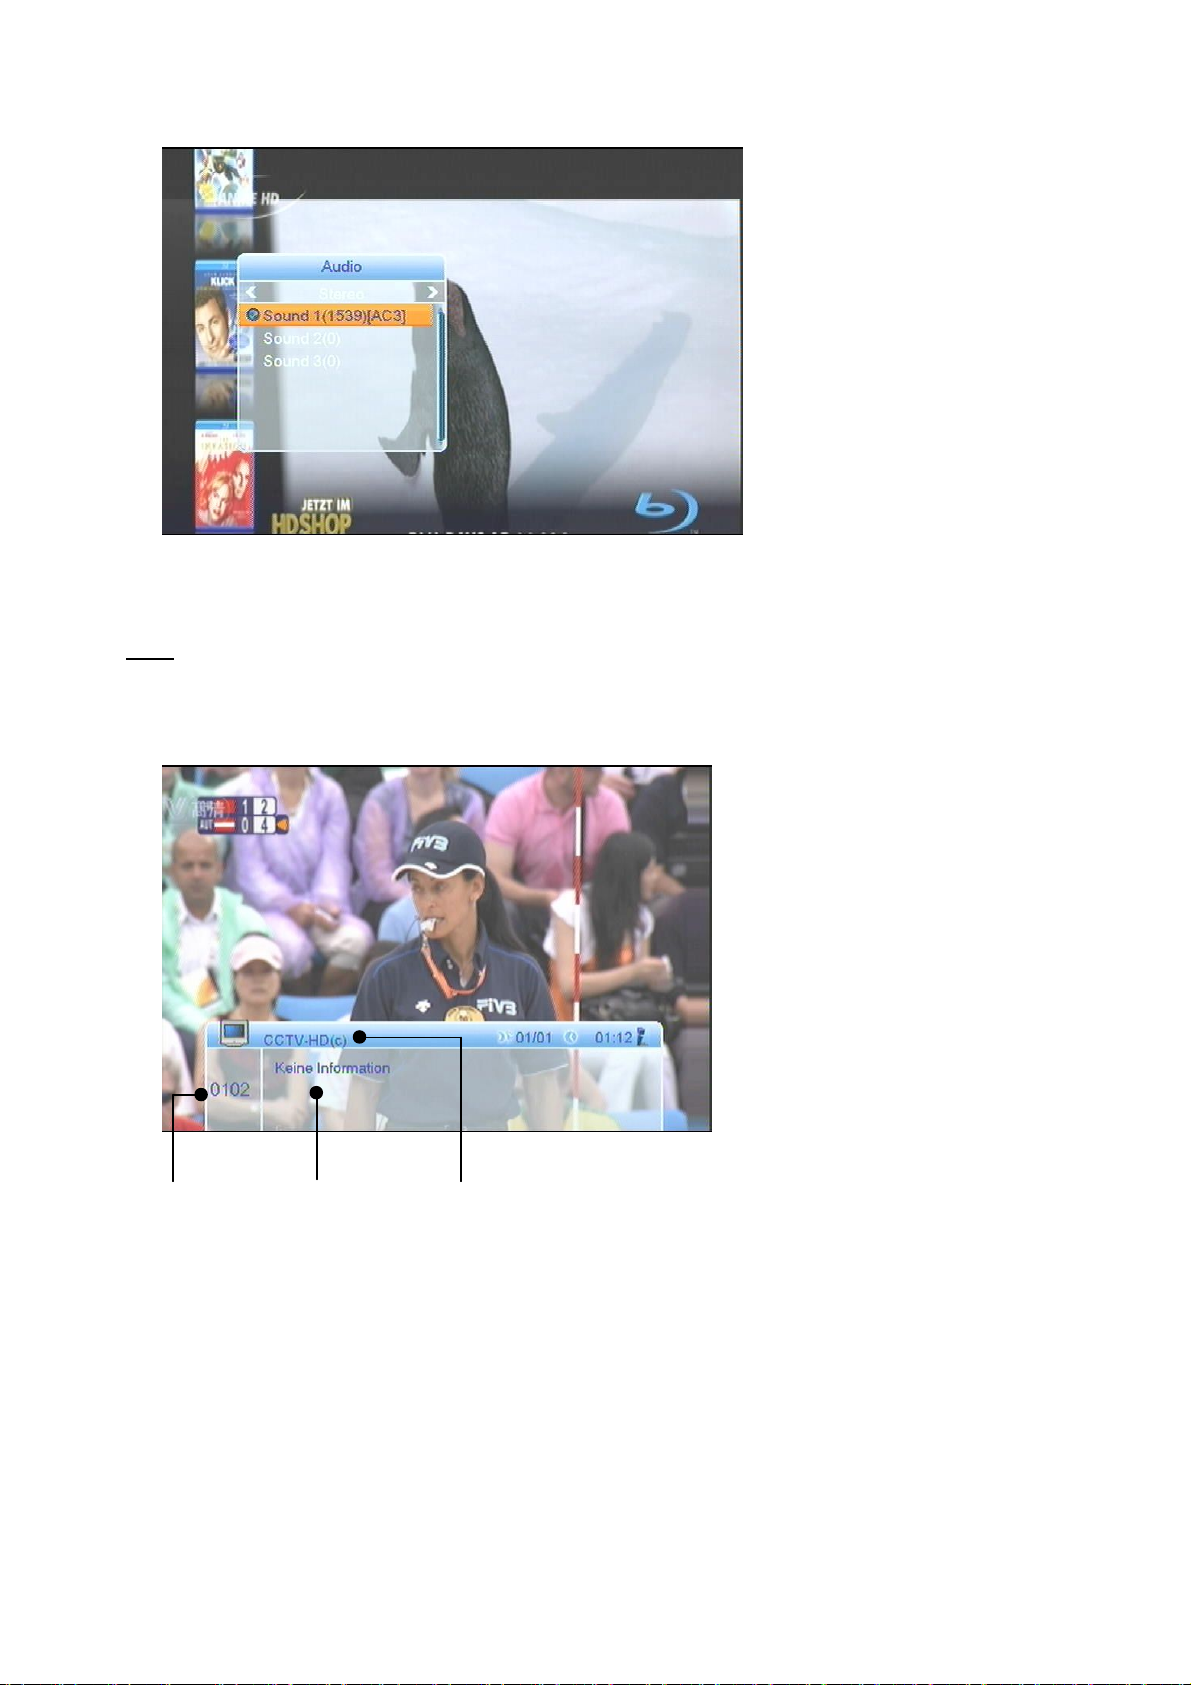
INFO
InTVmode,press [INFO]toopen the information screen, wherethe parametersof the currentchannel are
being displayed.The availabilityofso-calledServiceInformation (SI-Data)dependson the respective
program/serviceprovider.
Service
Information Channelname
Channel
number

EPG(ELECTRONICPROGRAMGUIDE)
The ProTUNEHD includesaelectronicprogramguide (EPG).TheEPGprovidesprograminformation in
tableformat(ifprovided bythe broadcaststation).The EPGincludesinformation aboutthe broadcast
timesand programcontents.Press [EPG]toopen the EPGwindow.
1. Press the “Time”function key[RED],toobtaininformation aboutthe programforthe upcoming days:
2.Use[VOL34]tonavigate,bypressing [OK]the desired timewillbe displayed.[EXIT]closesthis
dialogue.
Navigationiconsfor
EPG
Back topreviousmenu
Back tocurrenttime
Scrollina½hourintervall(back/forth)
Scrollina2hourintervall(back/forth)
Scrollina1dayintervall(back/forth)
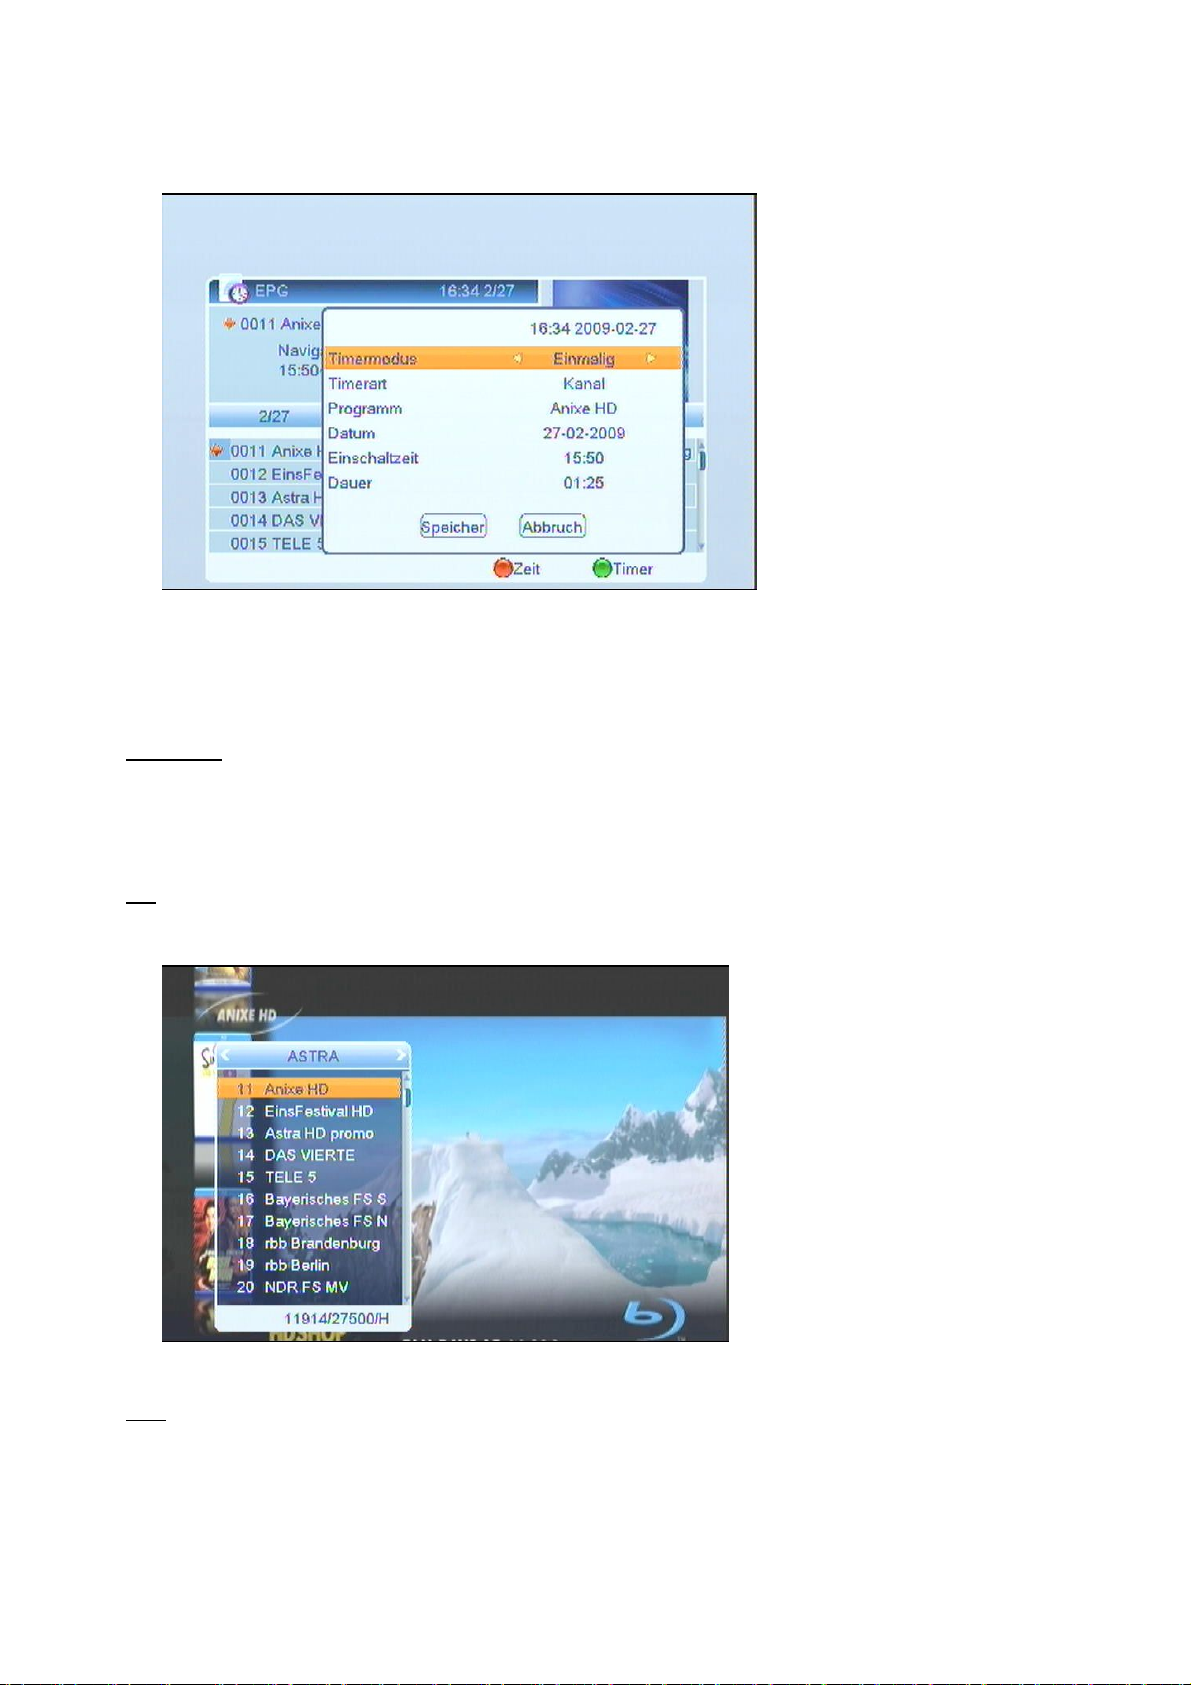
3. By pressing the“Timer”function key[GREEN], you can add the selected showdirectlytothe Timer.
Tonavigate,press [CH56VOL34]and setthe desired date,on and off timeusing the numberkeys.To
confirm, select“Save”.
TV/RADIO
The[TV/R] buttonallowsyoutotogglebetweentelevisionandradioservices.Whentransmitting aradiostation, the
receiverdisplays abackgroundpicture.
Toswitchfromradioback totelevision,press theTV/Radiobutton[TV/R]ontheremotecontrol..
OK
InTVmode,press [OK]toenablethechannellist.Inmenu/applications,press [OK]toconfirmyourselection.
SAT
1.InTVmode,press [SAT] toenablethe satellitelistand toselectaccordingly..
2.Press [VOL34], totogglebetween the differentsatellites.

MULTI
InTVmode,press the[MULTI]button toenterthemultipicturemode.
1.InMultiPictureMode,nine channel previewwindowsarebeing displayed (staticdisplay),starting withthe
current channel.Onlythe marked previewchannelisplayed continuously.
2.Press [CH56VOL34] tomovethe selected channel between the previewprograms.
3.Usethe numberbuttons[1]~[9]tomovethe markerdirectlyon the corresponding channel.
With[OK] you can getthe selected channelinfull screen mode.
LNB SHORTCIRCUIT
Ifthere’sashortcircuitinthe LNB,you will see "LNBshortcircuit!"onthe screen.Pleasecheck your
cablesand connectionsforshort circuits. Ifthe short circuitisremoved,the warning disappears.
SLEEP
1.Press [Sleep]inTVmode tosetthe Sleep Timer.You willsee:“Sleep TimerOFF/Sleep Timer10 /
Sleep Timer30 /Sleep Timer60 /Sleep Timer90/ Sleep Timer120”.2.
2.Ifyouset one offtime,the systemwillbe set tostandbyat the selected time.
TXT
1.Press [TXT] inTVmode toopen teletext. Thesupport of thisservicedependson the channelprovider.
2.Ifthereisno teletext provided, youwillsee “No teletext”on thescreen.
SUBTITLE
Press [SUB] inTVMode toenablesubtitles. The support of thisservicedependson the channelprovider.
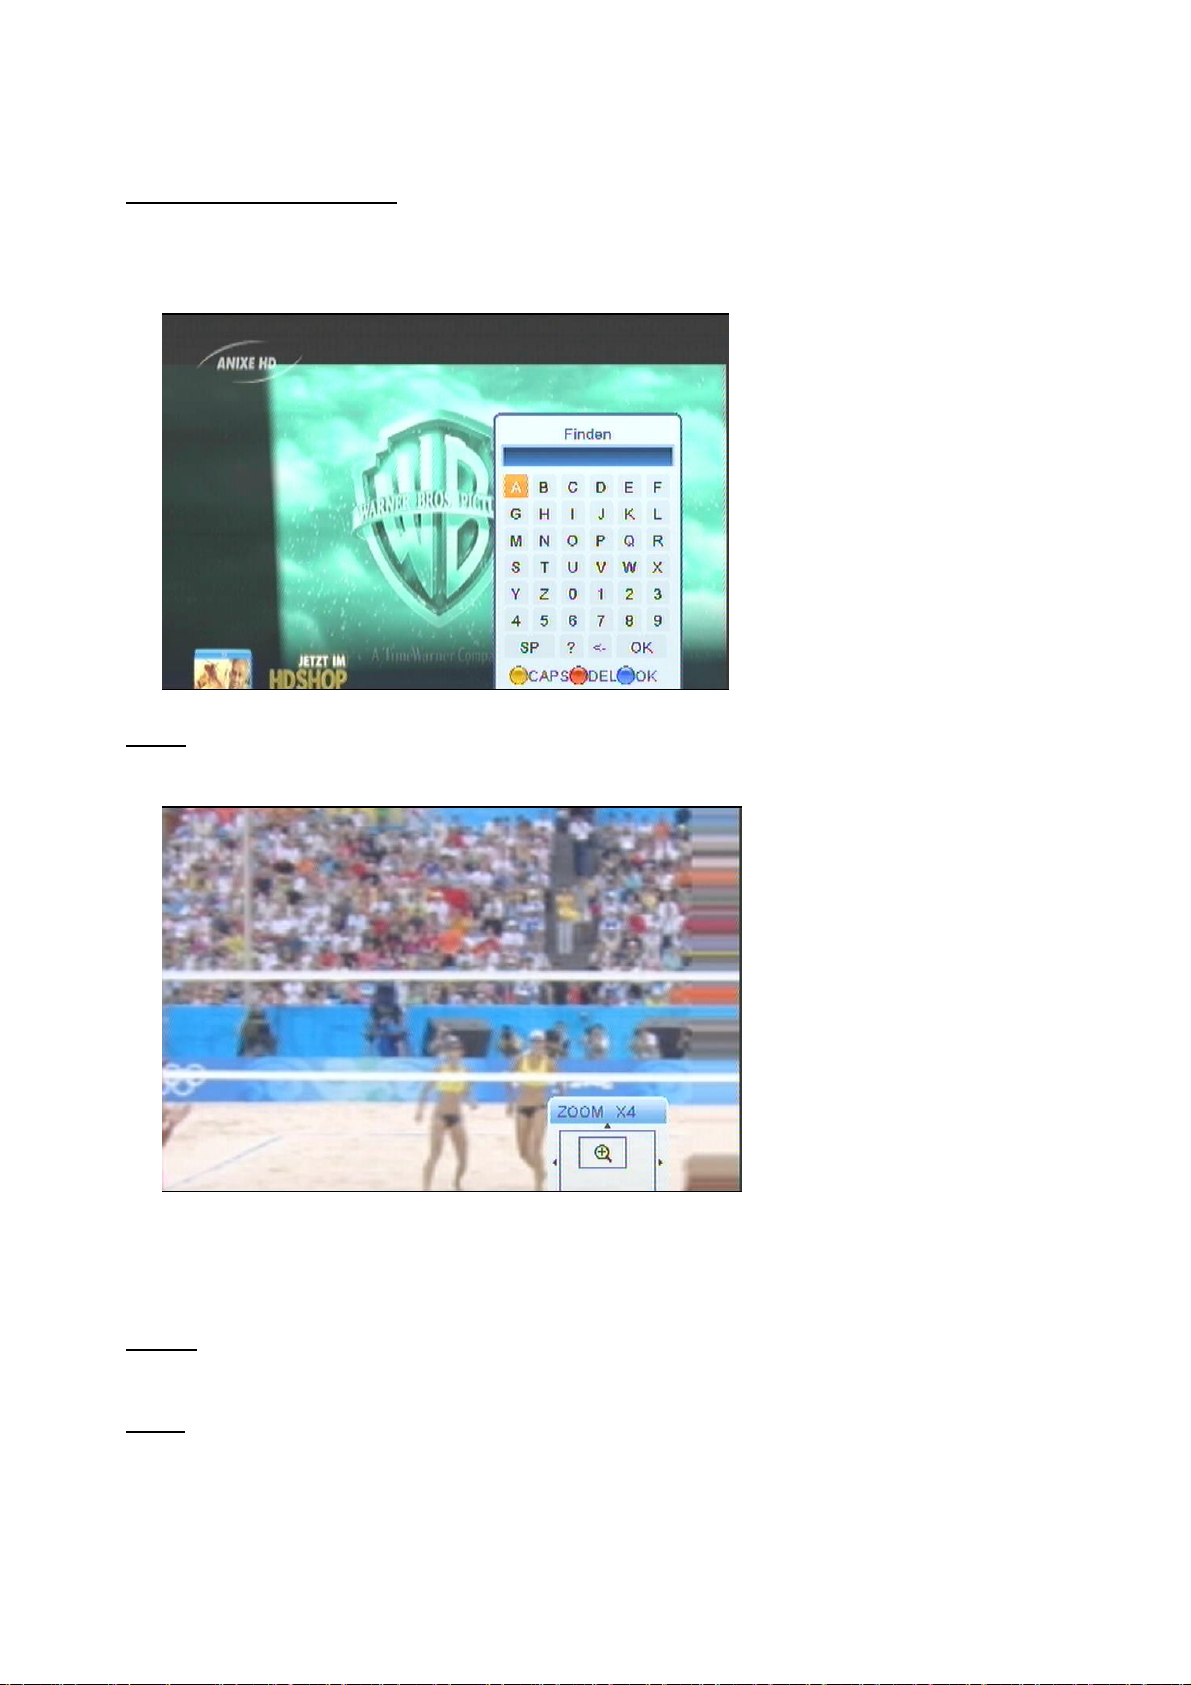
GOTO(SEARCH FUNCTION)
Press [Goto]orthe yellowbutten when inchannellist, toenablethe searchfunction.You can navigate
withthe
[CH56VOL34] buttons, confirmwiththe blue button,and deletewiththe red button.
ZOOM
1. Press [ZOOM] toactivatethe image enlargement function.
3.Press [ZOOM]again,and the video image willbe enlarged x1, x2, x4,x6,x8,x12,x16,depending on
numberof strokes.
4.Press [EXIT] toleavethe ZOOMfunction.
TV/STB
Press [TV/STB],totogglebetween TVand STBmode.
MENU
Press [MENU] toenterthe mainmenu. Anotherpress of [MENU] willexitthe mainmenu.

FORMAT
Press [Format] inthe full-screen mode,toselectbetween the differentresolutions:576i->480i->576P->
480P->720P_50 ->720P_60 ->1080i_25 ->1080i_30.
EXIT
Press [EXIT] toexit menusand applications..
3. Menu
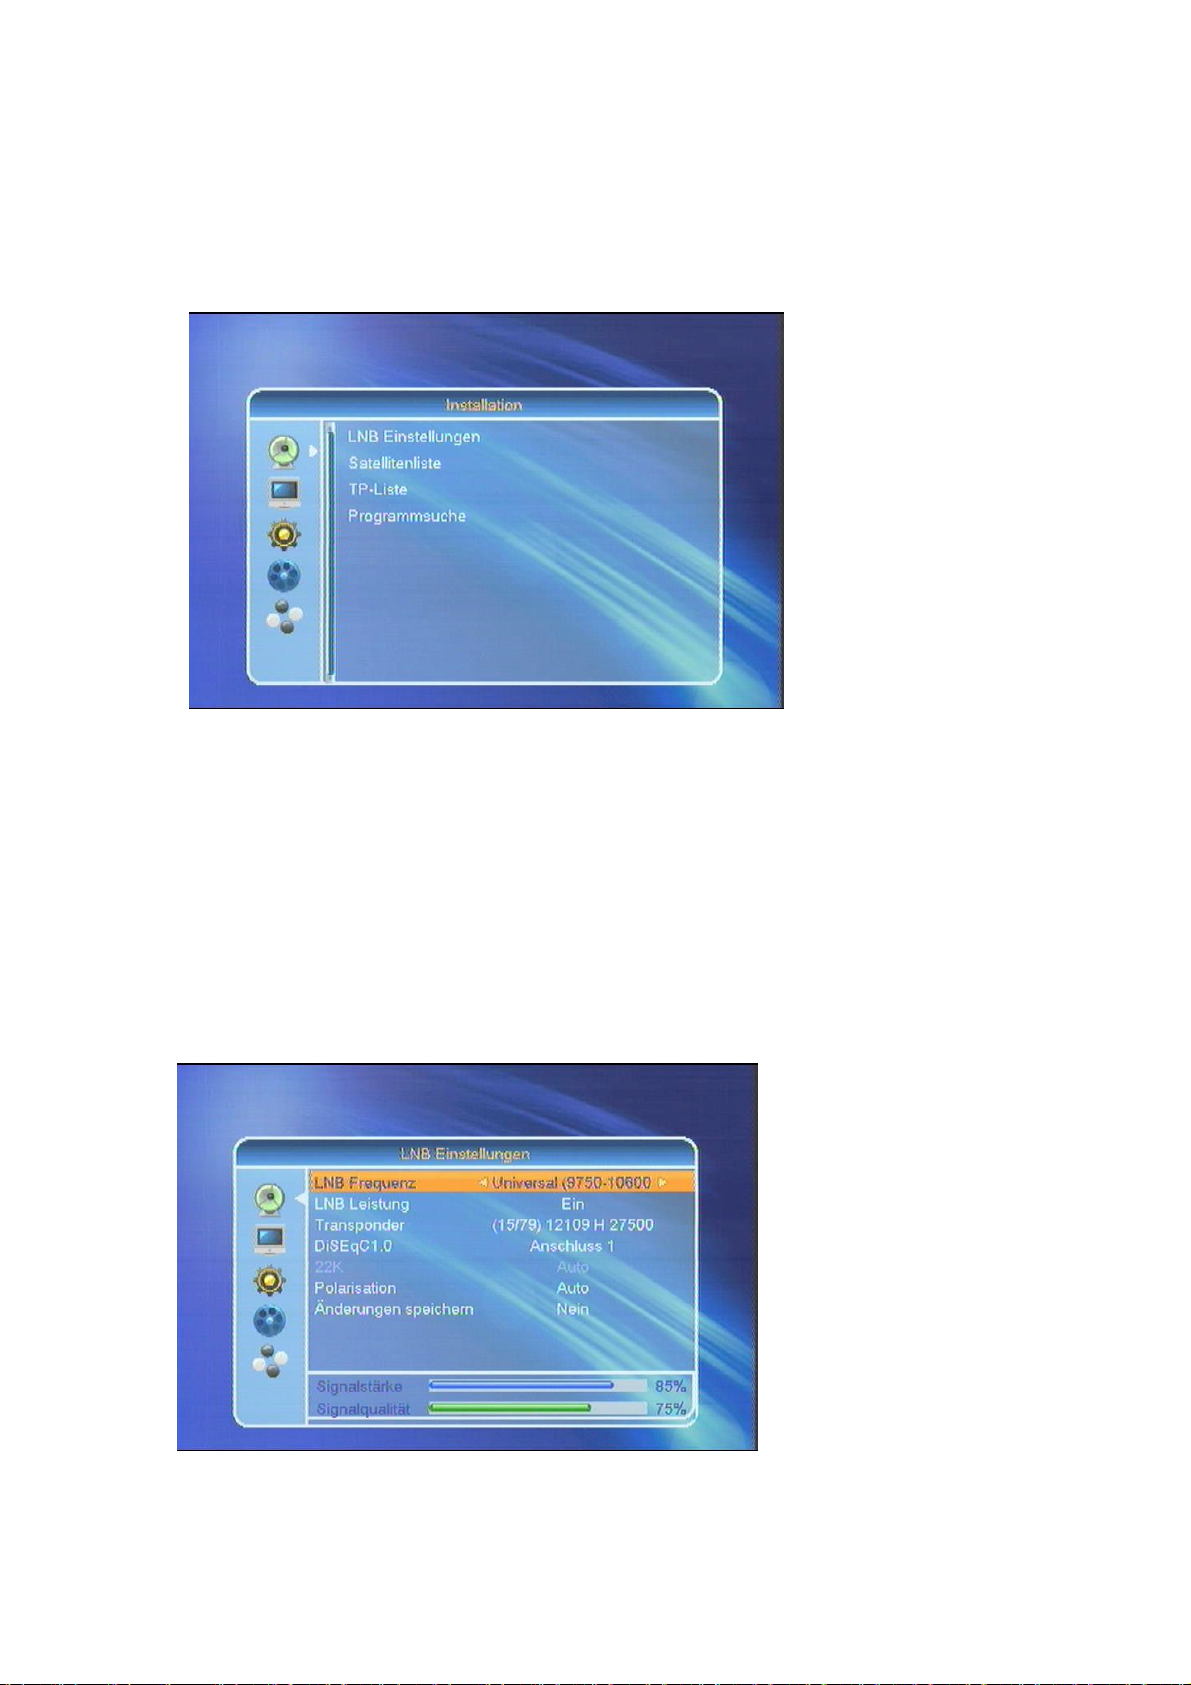
3.1 Installation
Whenentering the menu,the firstitemis"Installation".The windowisindicated asfollows:
1. Press [CH56VOL34]toselectbetween LNBSettings,SatelliteList, TPList, and Channel
Search.
2. Press [OK] togettothe respectivesetting/function.
3.1.1 LNBSettings
Press [VOL34]togetto“LNBSettings”. Awindowwillbe displayed asindicated below:
1. LNBFrequency:Press [VOL34] toselect between “Universal“,„Twin“,„User“ and C-Band.
ForExample:IfyouuseaSingleLNB,youshouldselect“Universal”.
22K: Use[VOL34]toselect “ON”or“OFF”. The 22kHzsignal isused atKUUniversalLNBtoswitch
betweenlowand high frequency band.
! NOTE:Ifyou set the LNBtype toUniversal, you cannotchange 22K.
DiSEqC1.0:Press [VOL34]toswitchDiSEqC switchoptions: disable/ LNB1/ LNB2/ LNB3/LNB4
2. Polarization:Press [VOL34]toselectbetween: Auto/H/V/OFF.
3. Transponder: Press [VOL34]toselectthe desired transponder.
Withthe helpofsignal strengthand qualitydisplay,you can checkifyoursettingsweresuccessful.
The respectivechangesarebeing saved by[YES]
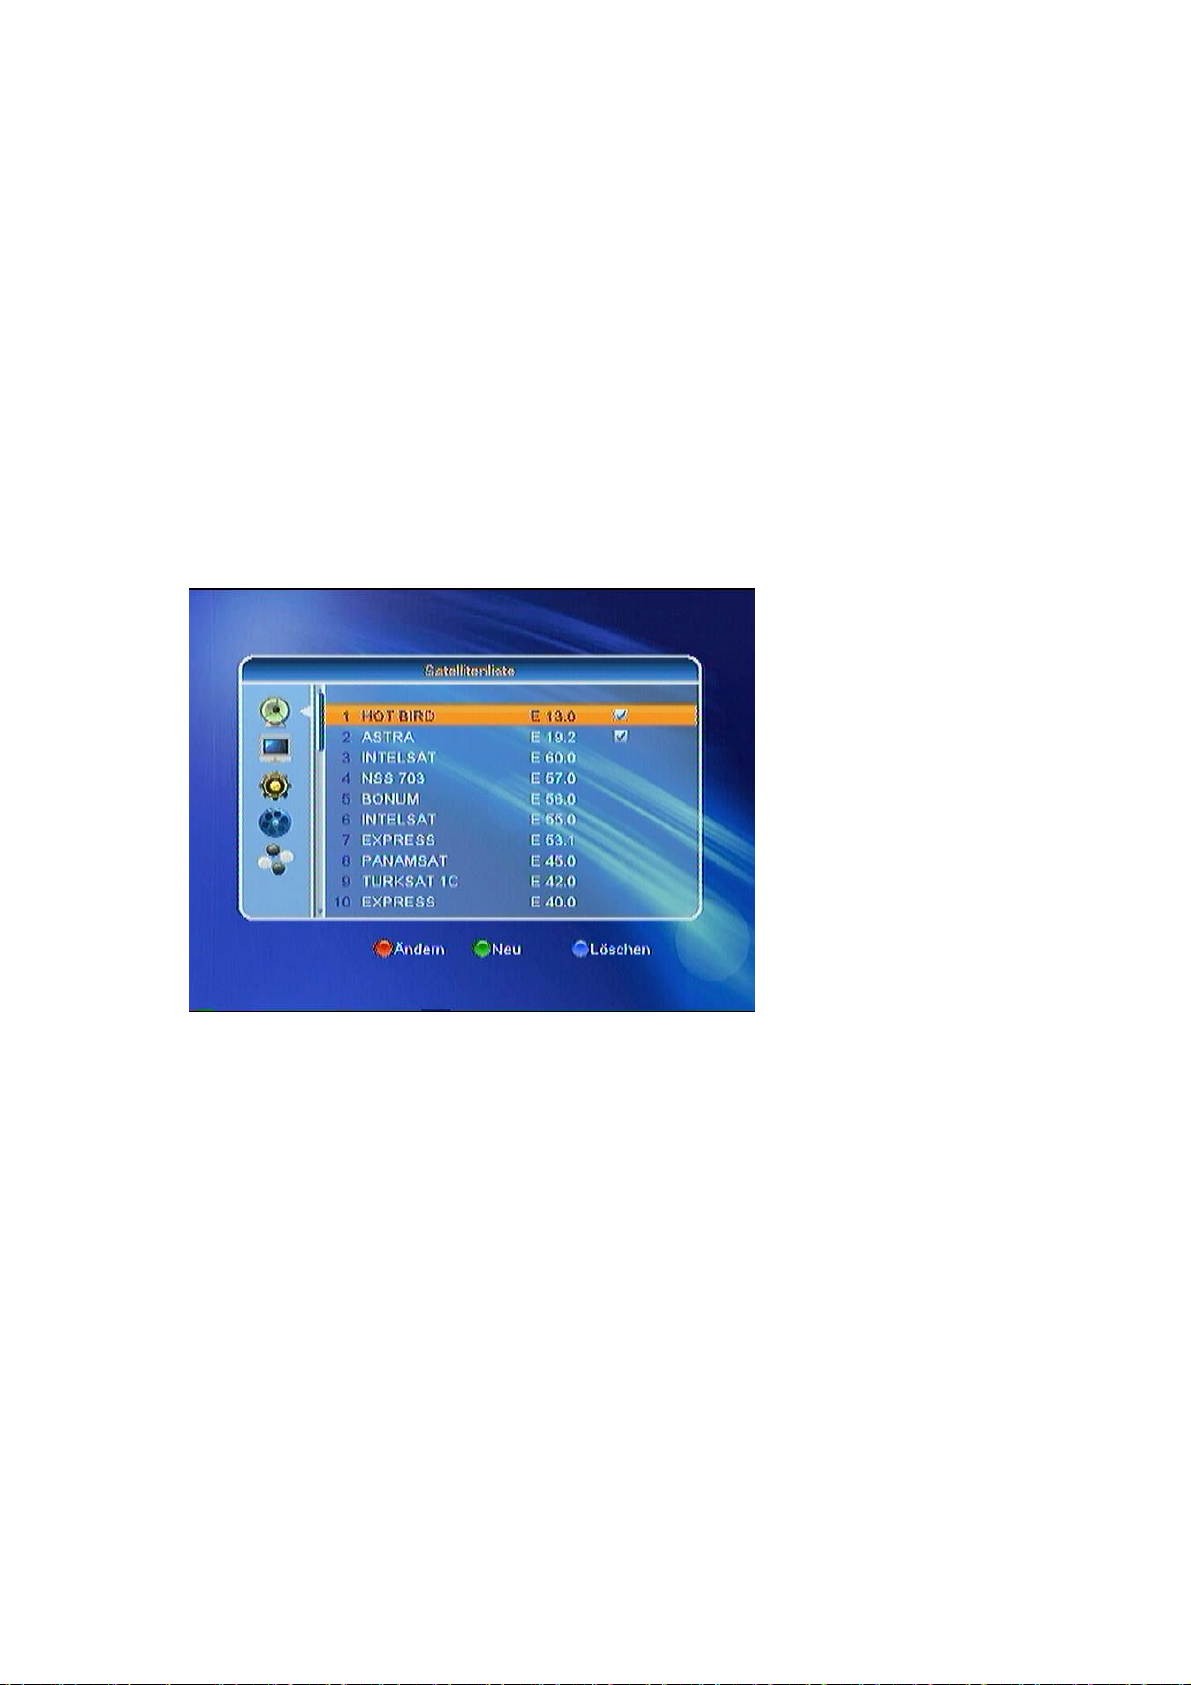
3.1.2 SatelliteList
Ifyouselect “SatelliteList”,you willsee the following window:
1. Press the red keytoeditthe satellite.You can editthe nameofthe satelliteand itslongitude
withthe respectivecolor, and [CH56 VOL34] buttons.
Inthisdialog,usethe [Red]keyforcase-sensitive,[Green]todelete,[Yellow]toconfirmand
[Blue]toexitthe menu.

2. Press the [GREEN] button toopen “Add Satellite”.

3.If youpress [Yellow], you willbe asked „Deleteit?“. Select„Yes“todeletethe markedsatellite,or
„No“tocancelthe process.
3.1.3 TPList
Ifyouselect “TPList”,the following dialog willbe indicated:
1.Press [VOL34]tochange the marked satellite.
2.Press the [Red] keytoopen “EditTP“,wherethe dataofthe transpondercan be edited.

3. Press [Green]toopen“Add TP”, whereyou can add anewTPand adjustitsparameters.
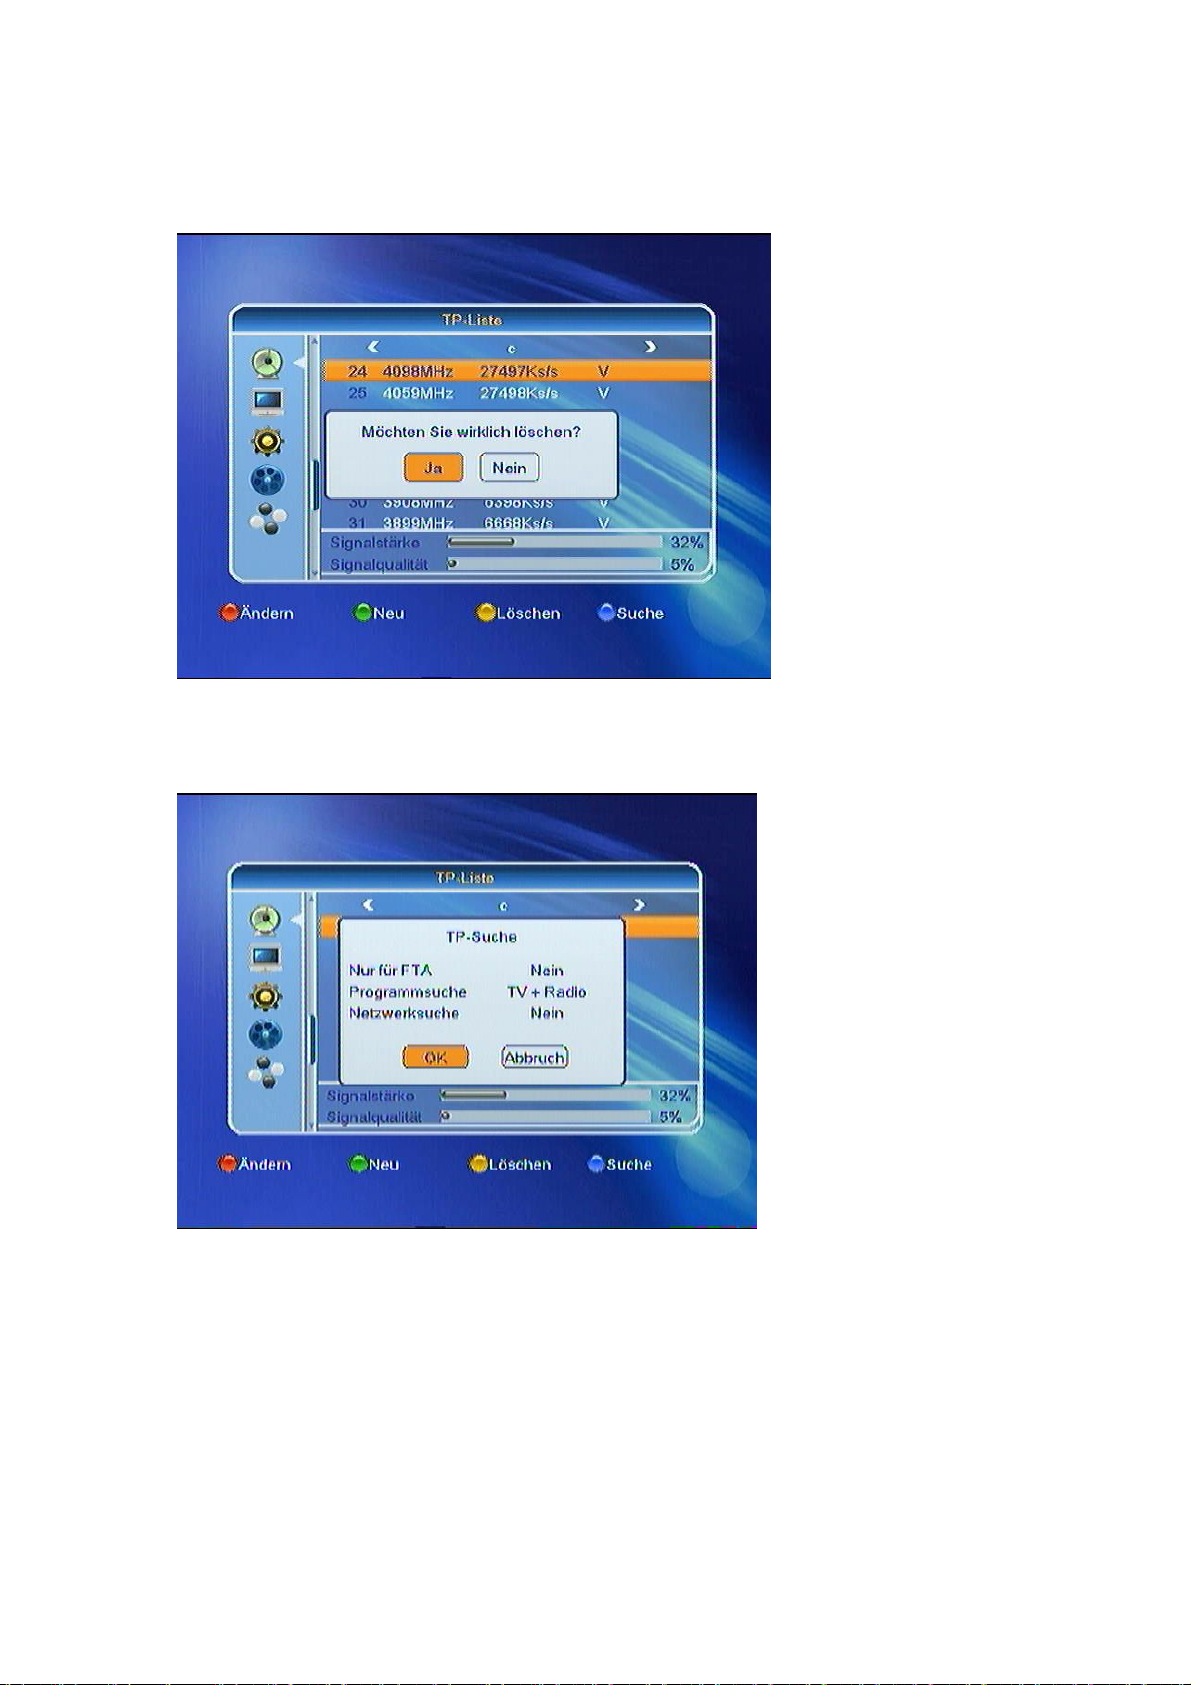
4. Press [Yellow] todeletethe transponder. Select“Yes”forconfirmation or“No”toexit..
5. Press [Blue]toopen adialog boxwiththeoption todo atransponderscan.Select"Yes"toconfirm,
"No"exitthe process.
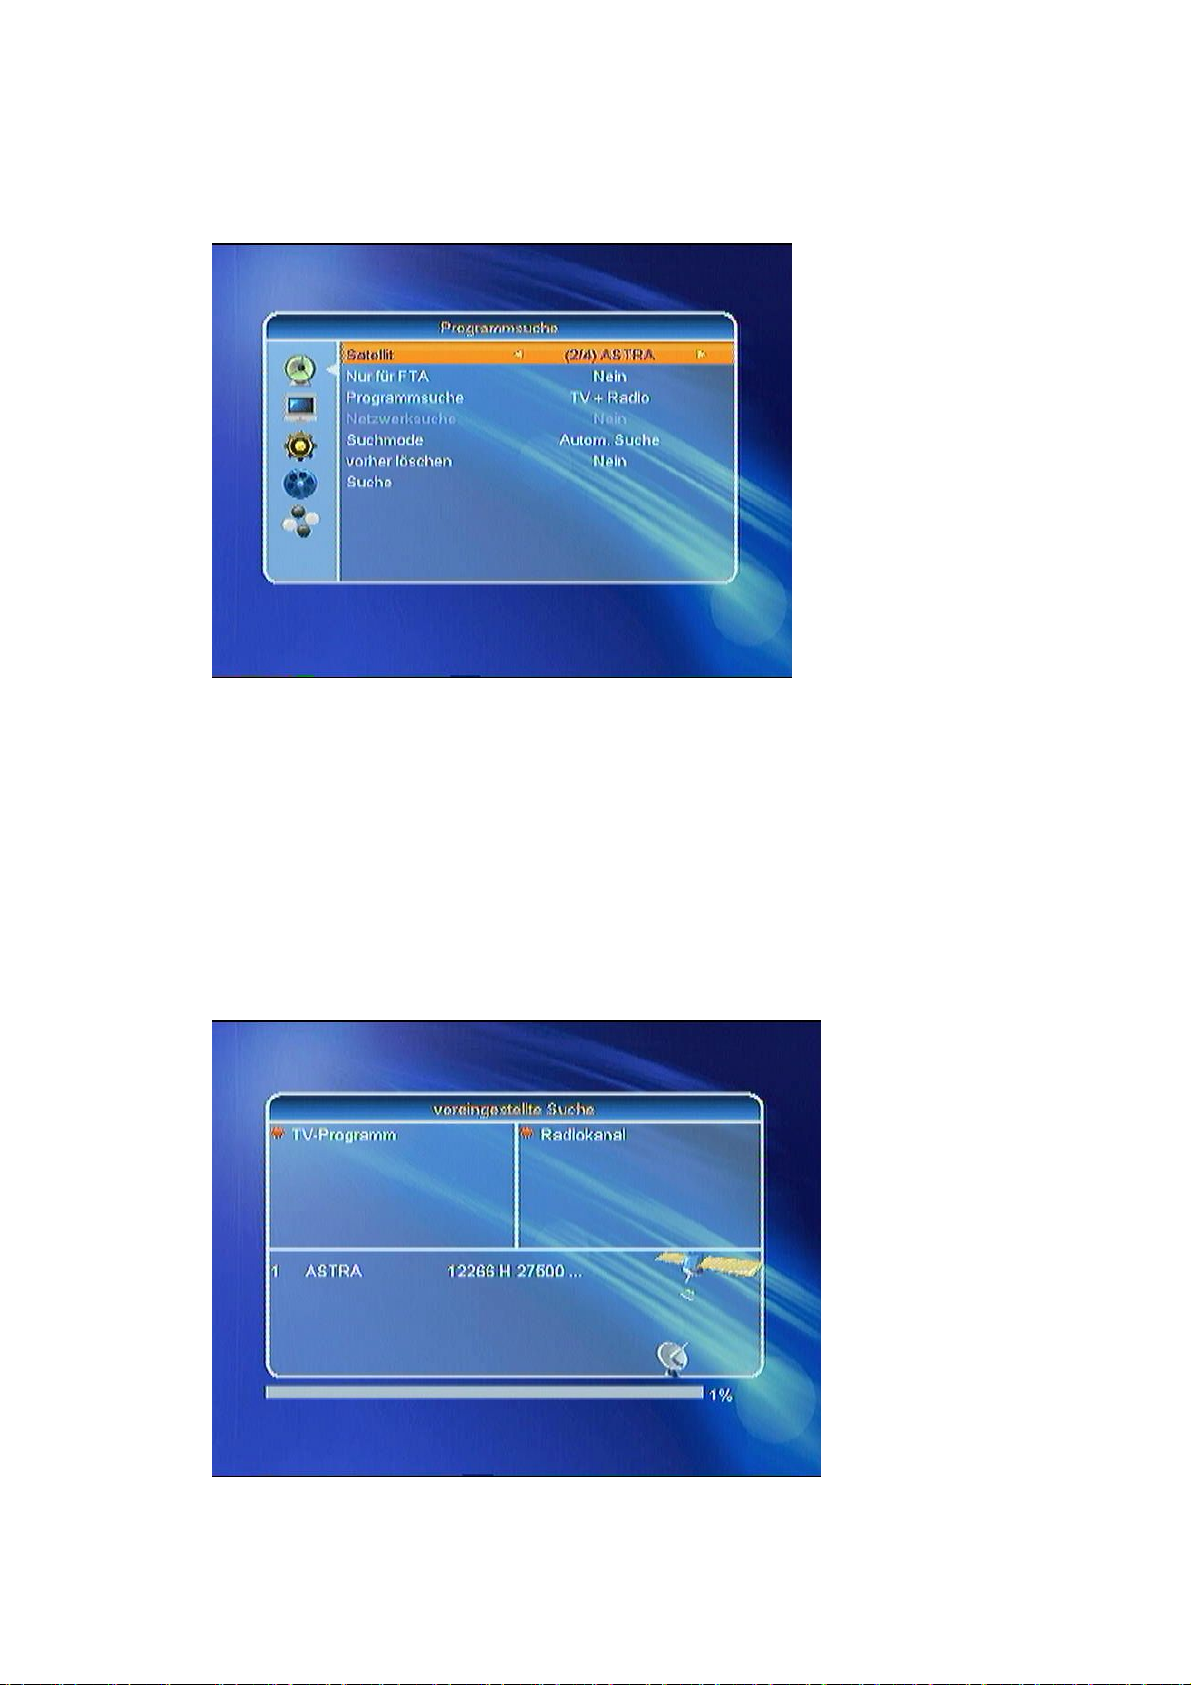
3.1.4 ChannelSearch
Ifyouselect „ChannelSearch“fromthe menu,the following dialog willbe indicated:
1.In„Satellite”selectwith[VOL34]the required satellite
2.In“OnlyFTA”,press [VOL34]toselectiftoscan onlyfreetoairor
encrypted channelsaswell.When you choose"Yes",onlyfree toairchannelswillbe
searched.
3.In“ChannelSearch”,press [VOL34]tosearch“TV+radiochannels","TVchannels"or
"radiochannels".
4.Inthe "SearchMode"youcan selectbetween "AutomaticSearch"forageneral searchor
"DefaultSearch"foralldefaulttransponders.
5.Select"Default Search"toenableanetwork scan.
6.Choosewhetheryou want todeletethe previoussearchornot.
7.Switchto“Search”by[VOL4]tostartthe scan.The progress baron the channelsearchis
displayed and liststhe channelsfound.
Table of contents


