2
Safety Information
For your safety, always remember to:
□
□
□
□
□
Turn off the power supply at the fuse or circuit breaker box
before you install the xture.
Ground the xture to avoid potential electric shocks and to
ensure reliable starting.
Double-check all connections to be sure they are
tight and correct.
Wear rubber soled shoes and work on a sturdy
wooden ladder.
Account for small parts and destroy packing material, as these
may be hazardous to children.
This xture is designed for use in a circuit protected by a fuse or
circuit breaker. It is also designed to be installed in accordance with
local electrical codes. If you are unsure about your wiring, consult a
qualied electrician or local electrical inspector, and check your local
electrical code.
CAUTION: Turn off themain power at the circuitbreaker
before installing the fixture, in order to prevent possible shock.
NOTICE: All electrical connections must be in accordance with local
and National Electrical Code (N.E.C.) standards. If you are unfamiliar
with proper electrical wiring connections obtain the services of a
qualified electrician.
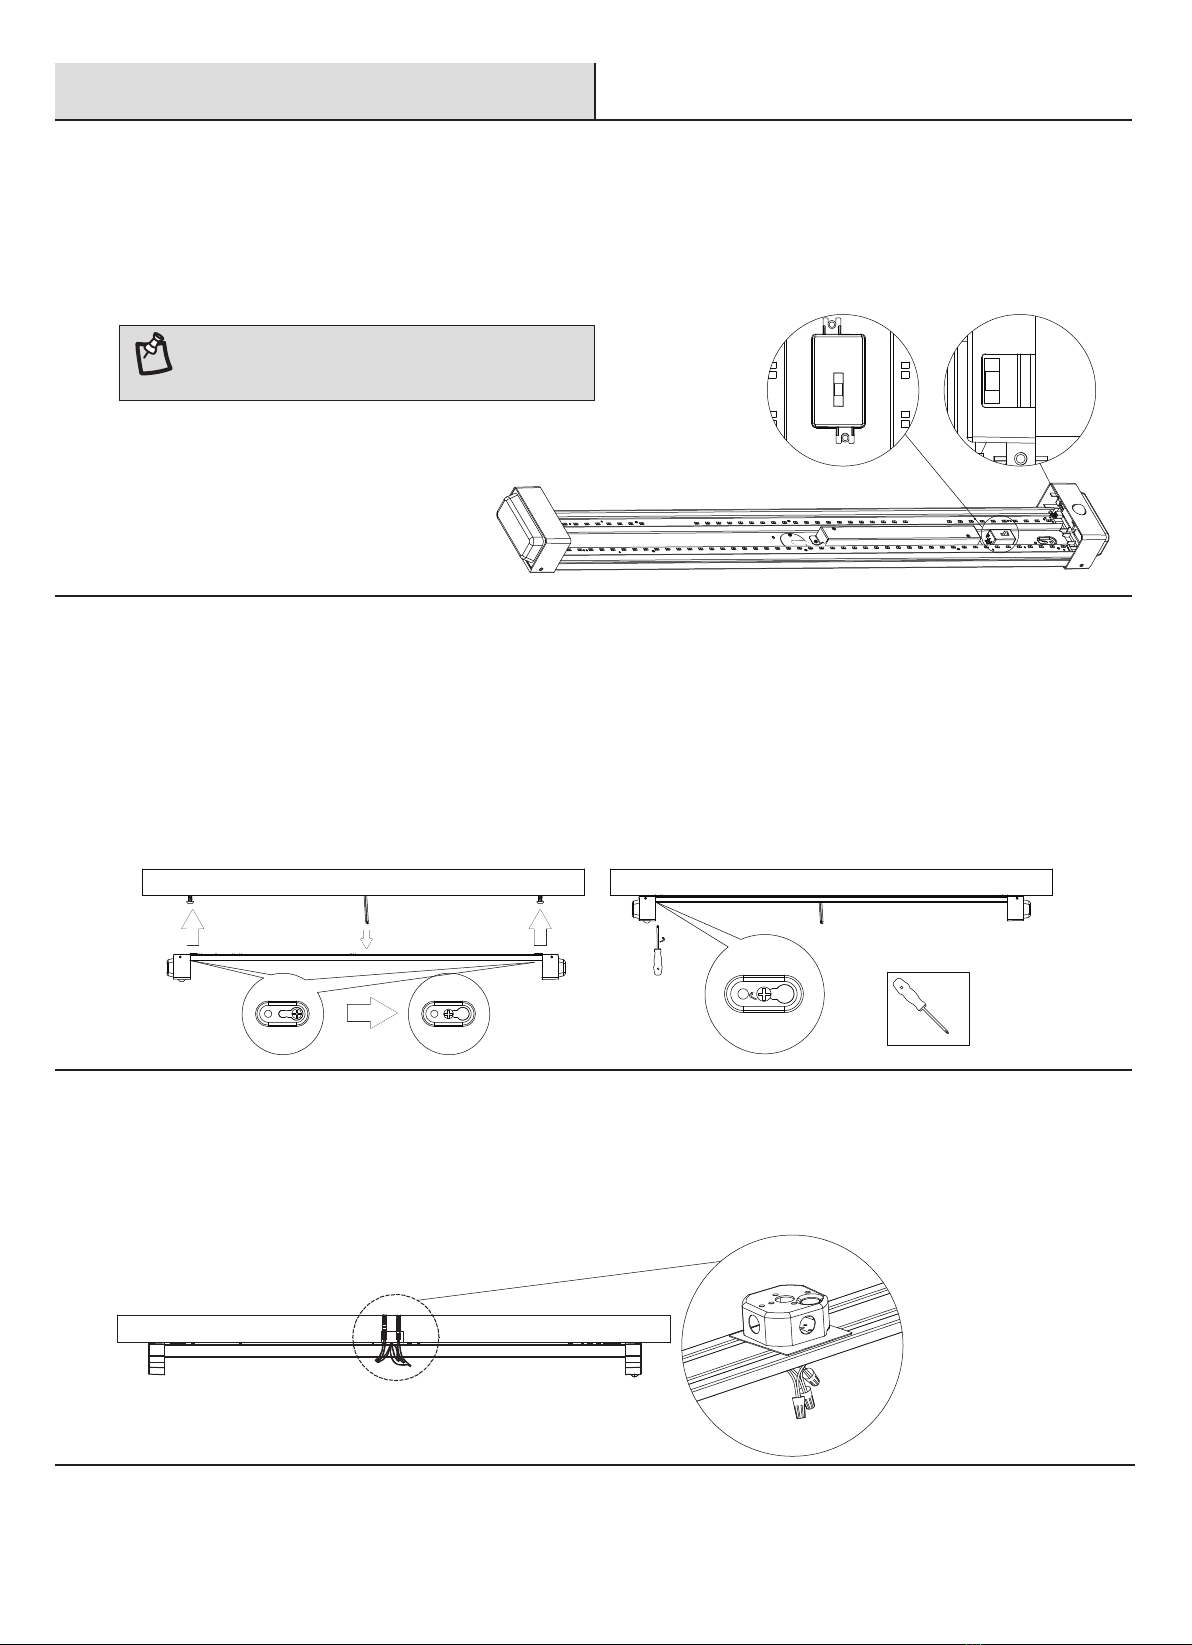
Remove the fixture and the mounting package from the box and make
sure that no parts are missing by referencing the illustrations on the
installation instructions.
Warranty
LIMITED WARRANTY
This product is warranted to be free from defects in workmanship and materials for up to 5 years from date of purchase. If it fails to do so,
please contact the Customer Service Team at 1-877-527-0313 or visit www.homedepot.com
Pre-Installation
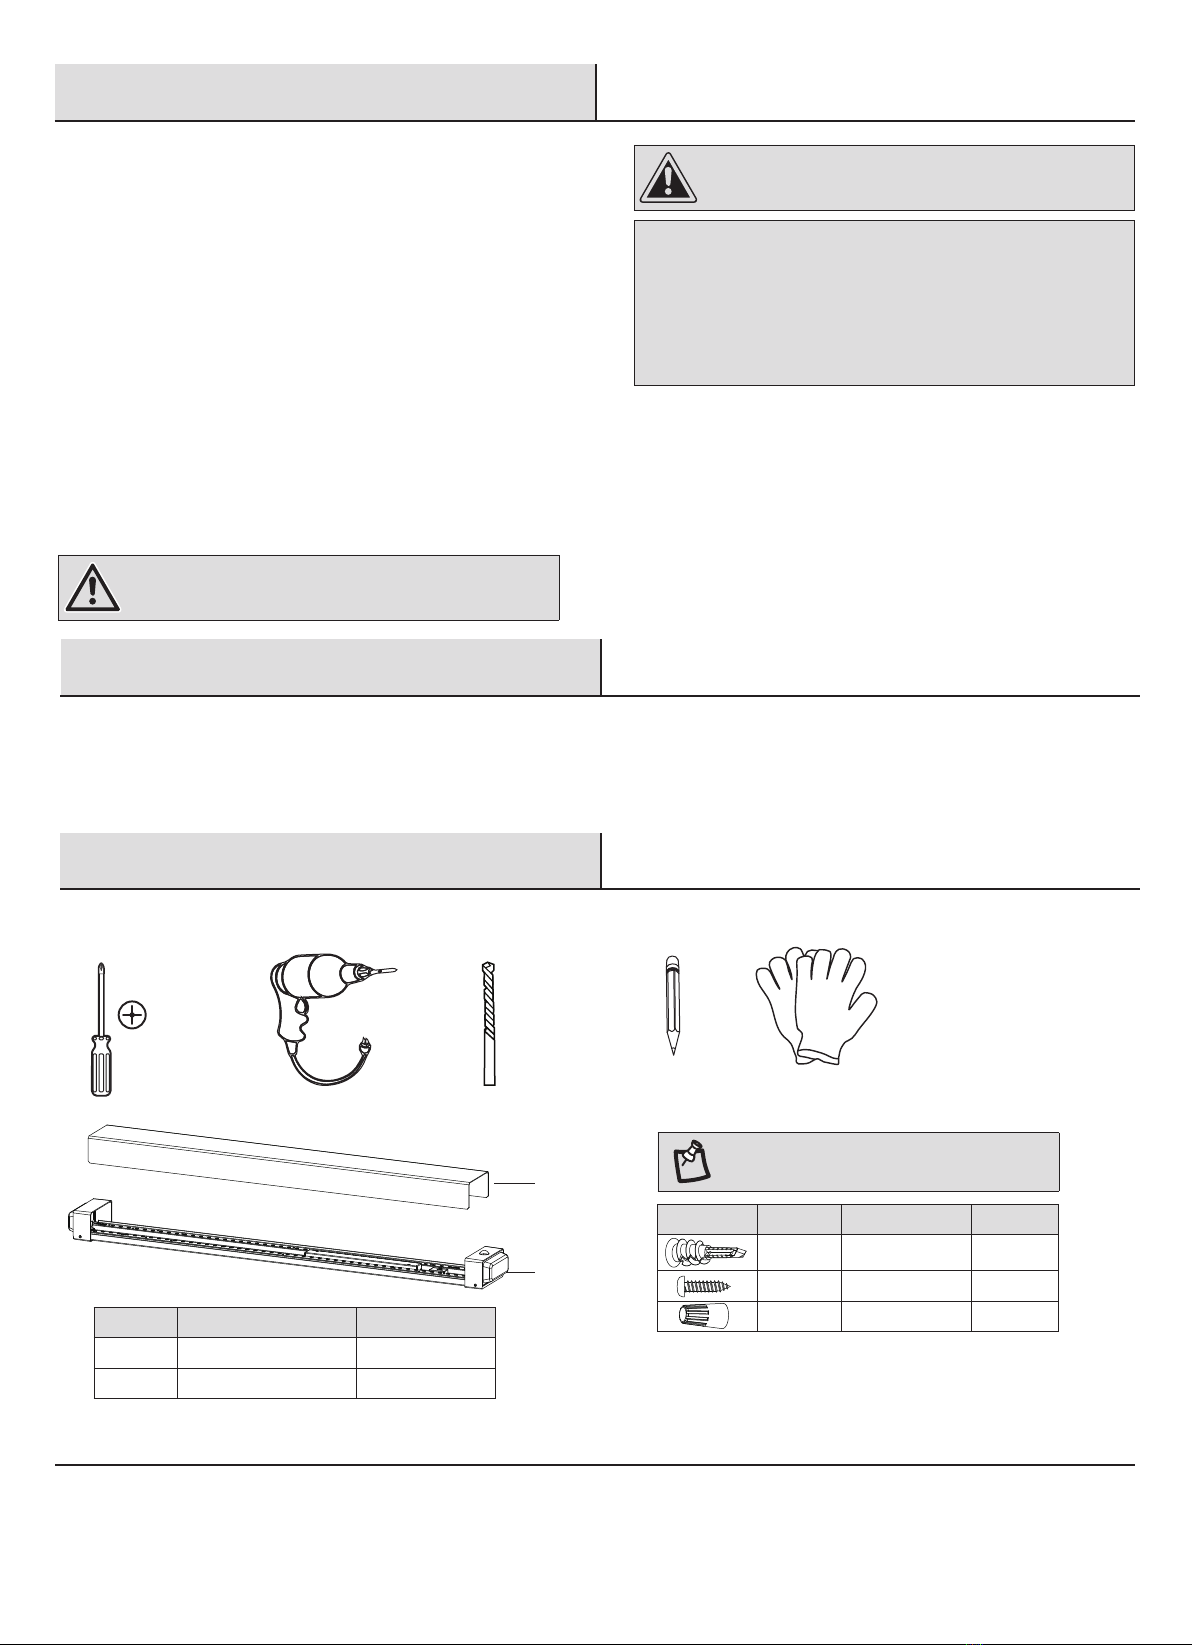
HARDWARE INCLUDED
NOTE: Hardware not shown to actual size.
Part Description Quantity
AA Drywall Anchors 2
BB Screws 2
CC Wire Nuts 3
Image
Part Description Quantity
ADiffuser 1
BHousing 1
B
WARNING: RISK OFSHOCK. House electric current can
causepainful shock or serious injury unless handled properly.
TOOLS REQUIRED
Phillips
screwdriver
Power Drill Drill Bit Pencil Gloves
A