manuals.online logo
Brands
  1. Home
  2. •
  3. Brands
  4. •
  5. Commodore
  6. •
  7. Desktop
  8. •
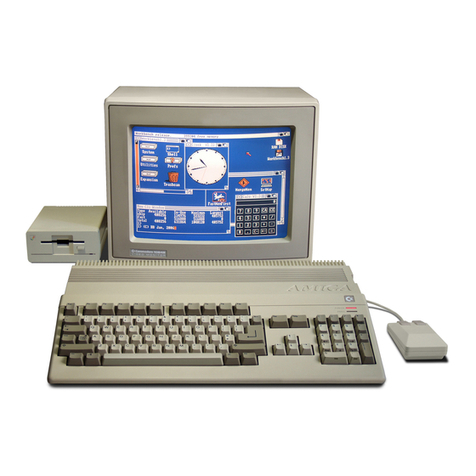
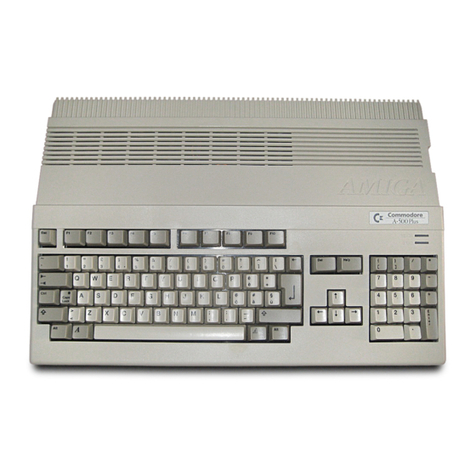
  9. Commodore AMIGA 2500 Reference manual

Commodore AMIGA 2500 Reference manual

Introduction to the
Introduction to the
2500
COPYRIGHT
©
1988,
Commodore-Amiga, Inc. All Rights Reserved. This document may not, in whole or in
part, be copied, photocopied, reproduced, translated, or reduced to any electronic medium or
machine readable form, without prior consent in writing from Commodore-Amiga, Inc.
Amiga
is
a registered trademark
of
Commodore-Amiga, Inc. Amiga 2000, AmigaDOS,
Amiga Workbench, and Bridgeboard are trademarks
of
Commodore-Amiga, Inc. Commo-
dore and the Commodore logo are registered trademarks of Commodore Electronics, Ltd.
Microsoft
is
a registered trademark of Microsoft Corp. UNIX
is
a registered trademark
of
AT&T.
DISCLAIMER
This information
is
provided
"as
is"
without representation or warranty
of
any kind, either
express or implied, including without limitation, any representations or endorsement regarding
the use of, the results of, or performance
of
the information, its appropriateness, accuracy,
reliability, or currentness, the entire risk as to the use of this information
is
assumed by the
user.
In no event will Commodore, its affiliated companies, nor its employees, be liable for any
damages, direct, indirect, incidental or consequential, resulting from any defect in the infor-
mation, even
if
Commodore has been advised ofthe possibility ofsuch damages.
This disclaimer shall supersede any verbal or written statement to the contrary.
User's
Manual
Statement
WARNING: This equipment has been certified to comply with the limits for a Class B comput-
ing device, pursuant to subpart J of
Part
15
of
the Federal Communications Commissions
rules, which are designed to provide reasonable protection against radio and television inter-
ference in a residential installation.
If
not installed properly, in strict accordance with the
manufacturer's instructions, it may cause interference.
If
you suspect interference, you can test
this equipment by turning it offand on.
If
this equipment does cause interference, correct it by
doing any
of
the following:
• Reorient the receiving antenna or
AC
plug.
• Change the relative positions
of
the computer and the receiver.
• Plug the computer into a different outlet so that the computer and receiver are on
different circuits.
CAUTION: Only peripherals with shield-grounded cables (computer input-output devices, ter-
minals, printers, etc.), certified to comply with Class B limits, can be attached to this device.
Operation with non-certified equipment may result in communications interference.
Your
house AC wall receptacle must be a three-pronged type (AC ground).
If
not, contact
an
electrician to install the proper receptacle.
If
a multi-connector box is used to connect the
computer and peripherals to AC, the ground must be common to all units.
If
necessary, contact your dealer or an experienced radio-television technician for additional
suggestions.
You
may find the following FCC booklet helpful:
"How
to Identify and Resolve
Radio-TV Interference Problems." The booklet
is
available from the U.S. Government Print-
ing Office, Washington, DC 20402, stock no. 004-000-00345-4.
Contents
1.
Introducing the A2500
1
2. Getting Started with the A2500 3
1\uningon
Your
Machine 3
Using the Accelerator Card 5
Using
Your
Hard
Disk 7
Copying Programs to
Your
Hard Disk 8
Saving/Retrieving Files
11
Backing Up
Your
Hard
Disk
11
3.
Running the Reinstall Software 13
Running
PrepHD
16
Running a Format Program 16
Running
an
Install Program 17
A. Subdividing the Work Partition 19
B.
Adding a Second
Hard
Disk to the A2500
23
Installing
an
Internal
Hard
Disk
23
Installing a 51
/4"
Hard
Disk
25
Connecting the
Hard
Disk to the A2090A
27
Connecting External SCSI Devices
29
Running Install Software on the New
Hard
Disk
29
1.
How Many Partitions? 29
2. The MountList Entries 30
3. Mounting the First 1\vo Cylinders 33
4. Prepping the Hard Disk 33
5.
Formatting the New Disk 34
Sample Session 35
C. Installing Expansion Cards in the A2500 37
D. Developing Software with the Accelerator
Card
39
E. Adjusting the Accelerator
Card
Hardware
41
Installing a Faster Math Chip
41
Installing
an
Additional 2MB
of
Memory
44
1.
Introducing
the
A2500
The Amiga 2500 computer combines the sophistication
of
the A2000 with the
speed
of
an
accelerator card and the increased storage capacity
of
a 40 mega-
byte hard disk drive. The accelerator card contains the circuitry for a 32-bit
68020 CPU, a
68881
Floating Point Unit and a
68551
Memory Management
Unit. The advantages
of
using the accelerator card are:
• faster system operation
• ability to read/write
data
in 32-bit chunks instead
of
16-bit
• on-chip cache memories for faster performance even with slower
memory systems
• direct use
of
the
68881
Floating Point Unit for fast math
calculations
• direct use
of
the
68851
Memory Management Unit for translated,
virtual, and protected memory
The hard disk works in conjunction with the A2090A
Hard
Disk/SCSI Con-
troller card allowing you to boot (start operations) directly from the hard
drive. What this means
is
that there
is
no need to insert a Workbench disk, or
other bootable application diskette, into the machine's floppy disk drive to
get the system up and running.
Before proceeding any further, you should familiarize yourself with the mate-
rial included in the A2500 package.
In
addition to the A2000, the keyboard,
and the mouse, you also have three manuals (aside from thisone):
• Introduction to the Commodore-Amigo2000
• Commodore-AmigoEnhancer Software
• AmigaBasic
The Introduction to the Commodore-Amigo 2000 covers setting up your
machine, mouse, and keyboard, and using the Workbench software.
The Commodore-Amigo Enhancer Software manual explains the improve-
ments that were made to Workbench with the release
of
Version 1.3.
It
also
documents the utilities on Extras and contains valuable information concern-
ing printers, the SHELL and CLI (tools that let you communicate with the
Amiga through typed AmigaDOS commands), and startup-sequences.
1
Amiga Basic teaches the Amiga Basic programming language,
an
adaption
of
Microsoft® BASIC that was developed especially for the Amiga.
Before reading any further, set up your machine! Follow the instructions in
Chapter 2
of
the Introduction to the Commodore-Amigo manual.
It
explains
the various ports
on
the back
of
the machine and how to attach the mouse,
keyboard, monitor, and power cord.
Because the information in Chapter 3
of
the A2000 manual
is
for a floppy
disk-based system and not
an
autobooting hard drive system, you should
return to this manual for instructions on how to proceed after plugging in the
machine.
2
2.
Getting
Started
with
the
A2500
Turning
on
Yqur
Machine
By
now your machine should be set up, as outlined in Chapter 2
of
the Intro-
duction to the Commodore-Amiga 2000, and you should be ready to get
started! Thrn on the power switch
on
the back
of
the A2500 and the power
switch on your monitor. Remember, since the A2500
is
an
autobooting
machine,
you
do
not
need
to
insert a
diskette
into
the
floppy
disk
drive.
After a
few
seconds, a screen will appear on your monitor. This screen, which
contains the copyrights and version information for Workbench, disappears
quickly. The next screen that appears
is
the Workbench screen.
Workbench
Screen
Note the four icons that appear along the right side
of
the screen. These icons
represent the
RAM
disk and the three partitions
of
the hard
drive-Boot,
Workbench and Work.
3
You
should refer to the Introduction manual for general instructions on using
icons, the mouse, menus, etc.
To
access the files on Workbench, double-click
on the Workbench icon that appears on your screen; you do not need to insert
the Workbench disk into the disk drive.
When the Workbench window opens, it will not look exactly the same as the
Workbench window pictured on page
3-11
of
the A2000 manual.
Don't
worry.
You
have everything you need; it's just arranged a little differently.
Also, since the Workbench partition
of
the A2500 contains the programs
of
both the Workbench and the Extras disks, the drawers for both disks appear
in your window.
Your
display will look like this:
I
,.
....
I
a
I
,.
(1•
JW.I
DISK
r '
~~~
iil
Aniga
Systetl
Pvefs
Anig.JliASIC
~ovkbench
f
I
I
Attiga
Uti
1
ities
ExPansion
FD1.3
Wovk
r
t
r
Tools
EMPtY
BasicDenos
Boot
'
=··i
t:_j
PCUtil
Shell
Tvasltcan
Workbench
Window
Take some time to get used to using the mouse and the Workbench menus.
Open the drawers, and try out some
of
the utilities documented in the Intro-
duction and Enhancer manuals.
4
Using
the
Accelerator
Card
When you power on or reset your machine, the accelerator card automatically
takes over control from the 68000
CPU.
You
do not need to
run
any special
software programs or use any special commands to take advantage
of
its
capabilities. As mentioned in the introduction, the accelerator card speeds up
system operations in many ways. The 68020
CPU
is
clocked
at
approximately
14.3
MHz, twice the speed
of
the Amiga's 68000
CPU.
First
of
all, it reads and writes
data
in 32-bit chunks.
In
addition, the acceler-
ator card also contains 2 megabytes
of
32-bit wide, fast memory. (This
is
expandable to four megabytes.) The accelerator card's fast memory
is
recog-
nized by the system as standard auto-configured expansion bus memory; it
is
the first type
of
memory to be configured by the system. With this fast mem-
ory installed, you should see a
250-4000Jo
speed increase in most integer
based operations.
The Arniga 2500 comes equipped with one megabyte
of
internal RAM, and
you can add up to eight megabytes
of
expansion RAM. This allows for a total
of
9 megabytes
of
RAM
that can be used by the system. The accelerator card
comes with 2 megabytes
of
additional RAM; therefore, you can add up to 6
more megabytes
of
expansion
RAM
to the A2500.
If
you upgrade the acceler-
ator card to its total
of
4 megabytes
of
RAM, you can only add another 4
megabytes
of
expansion
RAM
to the A2500.
Although the accelerator card operates in a 32-bit environment, it must also
access the 16-bit hardware bus system
of
the Amiga 2000.
To
do
this, the
68020
CPU
has a built-in dynamic bus sizing feature that adjusts memory
cycles to any system resource that it addresses.
On
the card, logic tells the
68020 chip
that
its on-board memory
is
32-bits wide, while any normal sys-
tem resource, like
CHIP
RAM,
CHIP
registers, or expansion device,
is
only
16-bits wide.
For instance, while the 68020
is
running at
14.3
MHz for internal and 32-bit
wide operations, the Arniga's resources can only be accessed at the normal
7.2
MHz
cycle. The card compensates for this by adding enough wait states
to a normal14.3
MHz
cycle to span a full 7.2 MHz 68000 style cycle.
5
Changing
the
Operating
Mode
NOTE:
Some Amiga software may not
run
properly with the accelerator
card.
It
is
possible to temporarily disable the accelerator card and
run
the
system offthe 68000
CPU.
This may be necessary
if
the system crashes while
using certain software applications.
To
change the operating mode, reset the
machine by simultaneously pressing the CTRL, left Amiga, and right Amiga
keys, then
hold down both mouse buttons.
Holding down the mouse buttons
after the reset brings up the following display:
AmigaDOS
on
68000
AmigaDOS
on
68020
Amigaux
This screen allows you to choose the Amiga's operating mode. To make a
selection, move the pointer to the box next to the operating mode
of
your
choice, then click either mouse button.
If
you
choose
AmigaDOS
on 68000, the accelerator card
is
disabled, and the
system runs as a standard A2000 with hard drive.
If
you
choose
AmigaDOS
on 68020, the system runs off the 68020
CPU
allowing you to take advantage
of
the accelerator card's advanced capabili-
ties. This
is
the default option when you power on or reset the Amiga2500.
If
you choose
Amiga
UX, a
UN
IX®
operating system
is
invoked (provided
you have the proper hardware/software installed).
If
you are having problems with a particular software program, contact the
software developer for information on upgrades that may be compatible with
the accelerator card.
NOTE:
If
you
develop software on the Amiga, please see
Appendix
D
for
information on writing code when the accelerator cardis in operation.
6
Using
Your
Hard
Disk
If
you were to buy a hard drive and install it in your machine yourself, you
would have to prepare the drive to receive
data
in a form compatible with the
Amiga's operating system. This
is
calledformatting the drive and
is
done via
a software program. With the A2500 there
is
no need to do this; your hard
drive has already been formatted at the factory.
The hard drive installed in your A2500 has a
40
megabyte capacity, roughly
equivalent to the storage capacity
of
50 floppy disks, and
is
divided into three
partitions. (A partition
is
a subdivision
of
the drive's storage area.) The first
partition
is
the Boot partition.
It
is
slightly less than one megabyte in size and
contains a copy
of
the Workbench and the startup sequence files for the hard
drive.
The second partition
is
about 21
/z
megabytes and
is
called
Workbench.
It
contains the directories and files that are on the Workbench and the Extras
diskettes. There
is
also some storage room in this partition.
The third partition,
Work,
constitutes the rest
of
the hard drive. The only
directories on this partition are the Empty drawer and the Trashcan.
You
should use this partition for storing software programs and data.
Both the Workbench and Work partitions are formatted using the FastFile-
System (FFS). The Fasti.•'ileSystem
is
solely for use with a hard drive system.
It
differs from the standard file system in that it increases data transfer speed
and allows slightly more
data
to be stored on the disk. For more details on
FFS, see Appendix A
of
the Enhancer manual.
7
Copying
Programs
to
Your
Hard
Disk
Aside from working with the utilities on Workbench and Extras, you will also
want to transfer other software programs to your hard disk. Most software
applications that you purchase will allow you to do this. Once you start run-
ning programs
off
your hard disk, you'll never want to return to a floppy
based system.
This section demonstrates how to copy a generic software program to the
Work partition
of
your hard drive. Since this procedure involves the
CLI/
SHELL and some basic AmigaDOS commands, you should refer to Chapter
7
of
the Introduction manual
if
you are not familiar with using the CLI.
1. The Work partition
is
large enough to store dozens
of
floppy disks worth
of
information.
To
do this efficiently you should organize the partition into
drawers. The easiest way to create a
new
drawer, and at the same time a
new
directory,
is
to make a copy
of
Work's Empty drawer by using the Workbench
menu's Duplicate item.
Open the Work window by double-clicking
on
its icon. Click once on the
Empty drawer, then select Duplicate from the Workbench menu. A
new
drawer called
"Copy
of
Empty"
will appear in the window.
2. Rename
"Copy
of
Empty"
using the Workbench menu's Rename item.
For this example,
we
are going to call the drawer
"Program."
Select the
drawer, choose Rename from the menu, and a string gadget appears. Delete
the text inthe gadget with the Delete
key,
and type in the
new
name.
You
can name it anything you'd like, but you should use a name that reminds
you
of
the contents. Also,
if
there are spaces in the name (i.e.,
if
it
is
more
than one word), you must put quotation marks around the entire name when
using it in CLI commands.
3. Now that you have a new directory, you can copy your software disks to
the hard drive.
To
do this you must use the CLI. Open the Workbench parti-
tion, then open the SHELL. We'll assume that the software
is
on
a disk
called DISKI and that you are inserting it into the Amiga's internal floppy
drive,
DFO:.
8
Here are some general guidelines you should follow when copying programs
to your hard disk partition:
1.
Copy any files and directories that are on DISKl
but
are
not
already
in
the
Workbench
partition
to your
new
directory. Usually
your software will contain many
of
the files that are already
on
Workbench, such as the Trashcan, the system directory, etc.
You
do notneed to copy these files into your
new
directory.
To
look at the files on DISKl and on the Workbench partition,
use the AmigaDOS DIR command. Simply type,
DIR
DISK!:
and DIR
Workbench:,
and compare the files and directories
that appear in the output window.
(You
can also refer to Appendi-
ces B and C
of
the Enhancer manual for a list
of
the files
on
Workbench and Extras.) Any files that are on DISKl but are not
inthe Workbench partition should be copied to the
new
directory.
2.
Examine the standard directories
of
DISKl to see
if
there are any
files or subdirectories included on the disk that do not appear in
the Workbench partition. (Again, use the DIR command to do
this.)
If
you find any, copy them into the corresponding directo-
ries
of
the Workbench partition. The directories to examine
include:
L
LIBS
s
DEVS
DEVS/KEYMAPS
DEVS/PRINTERS
c
FONTS
SYSTEM
UTILITIES
EXPANSION
To
copy a file or directory, you must use the AmigaDOS COPY command.
For instance, to copy a file from DISKl to the Program directory
of
Work:,
you'd type:
COPY
DISKl:filename
Work:Program
9
To
copy all the files from a directory on DISKI to
an
equivalent directory
within the Program directory, you'd type:
COPY
DISKl:directory
Work:Program/directory
ALL
The
ALL
keyword tells the system to copy all the files in the directory. Please
refer to the Enhancer manual for more information on using the COPY com-
mand. Before copying anysoftware to your hard drive, check the documenta-
tion packaged with the program.
It
may include instructions for installing
and using the software on a hard drive.
4.
You
may have to set up some special ASSIGN statements in order for your
software to work correctly from the hard drive. The ASSIGN command
allows you to assign a logical device name to a directory.
In
this case the
device
is
DISKl, and the directory
is
Work:Program. Be sure to remove
DISKJfrom the floppy drive before attempting to run the softwarefrom the
harddrive.
For example, suppose you copy a program into the directory Work:Program,
and when you attempt to
run
the software a requester appears saying:
Please
insert
Volume
DISK!
into
any
drive
This indicates that the software
is
looking for files on the original disk (vol-
ume) on which it was distributed. By assigning the volume name to your new
directory, the software will be routed to the correct location. To do this, open
a SHELLwindow, and type:
ASSIGN DISK!:
Work:Program
If
the requester
is
still on the screen, click
on
RETRY.
If
the requester does
not reappear, the ASSIGN worked.
You
may want to add this command to
the Workbench partition's
Startupll
file (Workbench:s/Startupll) so that the
assignment
is
made when you boot the Amiga.
5. Double-click on the Program drawer. All the icons that normally appear
on the software disk will now appear in the Program drawer. However,
if
you
copied more than one disk to the drawer, it may be quite cluttered. Icons may
be covering other icons, etc. To straighten up the display, select Clean Up
from the Workbench menu.
10
--------------------
6. After Clean Up organizes the drawers, save the display.
To
do this, use
multiple selection
to mark the position
of
each icon, then select Snapshot to
save
the positions. Using multiple selection
is
easy. After clicking once on the
first icon, hold down the Shift key while clicking once on each
of
the other
icons. Then release the Shift key and select Snapshot from the Workbench
menu.
Saving/Retrieving
Files
You
can
save
files to and retrieve files from the hard drh;e just as you would a
floppy disk. For instance,
if
you want to save a file created with the Notepad
to the Workbench's Utilities drawer, you would type:
Workbench:Utilities/newfile
in the Notepad's
Save
requester. The generic path for accessing files on the
hard disk is:
Partition:Dra
wer
/file
Partition
is
the name assigned to the particular area
of
the hard drive, for
instance Workbench or Work. Drawer represents a directory
on
the partition,
and file
is
the name
of
the file you are creating or retrieving.
Backing
Up
Your
Hard
Disk
IMPORTANT:
Before adding
new
data to your A2500, it
is
strongly sug-
gested that you purchase a hard disk backup program for copying the infor-
mation stored
on
the hard disk to floppy disks. (Please see your local soft-
ware dealer for information on the available programs.)
You
should backup
the hard drive frequently, daily
or
weekly depending on how often it
is
used.
Without a floppy disk backup, it will be impossible for you to replace any
files that may be lost due to user error
or
system failure.
11
3.
Running
the
Reinstall
Software
Included with your A2500
is
the Reinstall disk. This allows you to recon-
struct the original files included on your hard drive in case
of
a catastrophic
failure that prevents you from accessing your files. WARNING: This disk
can only replace the files that were stored on the hard drive at the time
of
purchase.
It
cannot recover programs and data that were stored throughout
the hard drive's use. For this reason it
is
EXTREMELY IMPORTANT to
perform regular backups
of
the hard drive's contents.
Please keep in mind that you should only use the Reinstall program as a last
resort.
If
only a
few
files or directories on your disk have been corrupted, you
can use a program, such as the AmigaDOS program DISKDOCTOR, to try
to recover the corrupted files.
If
you are unfamiliar with file recovery pro-
grams, please consult your dealer for advice before deciding to use the
Reinstall disk.
If
you decide to proceed with the Reinstall program, turn
off
the power to
your Amiga 2500. Wait at least 30 seconds, insert the Reinstall disk into the
internal floppy drive (dfO:), and turn the machine back on. When the system
boots, you will see a Reinstall icon on the screen. Double-click on the icon,
and the following window appears:
...
I
1:1'
ILl•
r
~
Ho
Ho
I
~
~om
'lol
Fol'lia!HD
InstallHD
Systen
Utili
ties
Aniga
Ho
Pl'!PHD
r I
Workbench
Expansion
EMPtY
Aniga
~
Ho
rlol
Ho
WO!'k
FoN~atBoot
InstallBoot
=··
~~~
M
I)
~
Ho
Ho
1ii!i1
Preis
Reinstall
'lol
For11atWB
InstallWB
~
Ho
rlol
Ho
Tmhcan
Boot
FornatWork
InstallWork
I
13
The programs included on Reinstall are listed
below.
You
may need to run
one or more ofthese programs, depending on the severity
of
the damage.
PrepHD
FormatHD
InstallHD
FormatBoot
InstallBoot
FormatWB
InstallWB
FormatWork
InstallWork
Under severe conditions, your hard drive may
be
so
damaged that a complete reconstruction
is
necessary. PrepHD sets up the control cylin-
ders required to manage the disk
as
a whole
prior to a complete reformatting. This program
should be run only as an absolute final resort.
This procedure reformats all three partitions
and should be used only when a complete
reconstruction
is
required. Again, this program
should only be used
as
a last resort.
This program reinstalls Workbench in the Boot
and Workbench partitions, Extras in the Work-
bench partition, and the Trashcan and Empty
drawers in the Work partition.
Use
this program to rebuild only the Boot
partition.
Run this program to reinstall the Workbench
files on the Boot partition. FormatBoot auto-
matically starts this program.
Use
this program to rebuild only the Work-
bench partition.
Run this program to reinstall the Workbench
and Extras files on the Workbench partition.
FormatWB automatically starts this program.
Use
this program to rebuild only the Work par-
tition. This program will cause all
of
your
application software to be lost. Back up your
hard disk before using this program.
Run this program to reinstall the Empty and
Trashcan drawers in the Work partition. For-
matWork automatically starts this program.
14

Other Commodore Desktop manuals

Commodore Amiga Reference manual

Commodore

Commodore Amiga Reference manual

Commodore C-128 User manual

Commodore

Commodore C-128 User manual

Commodore PET 2001 Series User manual

Commodore

Commodore PET 2001 Series User manual

Commodore 4016 User manual

Commodore

Commodore 4016 User manual

Commodore C16 User manual

Commodore

Commodore C16 User manual

Commodore 8000 Series User manual

Commodore

Commodore 8000 Series User manual

Commodore PC 20 User manual

Commodore

Commodore PC 20 User manual

Commodore 64 User manual

Commodore

Commodore 64 User manual

Commodore Amiga 500 User manual

Commodore

Commodore Amiga 500 User manual

Commodore Plus 4 User manual

Commodore

Commodore Plus 4 User manual

Commodore 64 User manual

Commodore

Commodore 64 User manual

Commodore Amiga 500+ User manual

Commodore

Commodore Amiga 500+ User manual

Commodore COLT 286 User manual

Commodore

Commodore COLT 286 User manual

Commodore Amiga Quick user guide

Commodore

Commodore Amiga Quick user guide

Commodore 16 User manual

Commodore

Commodore 16 User manual

Commodore A1060 Sidecar User manual

Commodore

Commodore A1060 Sidecar User manual

Commodore 64 User manual

Commodore

Commodore 64 User manual

Commodore Amiga A500 Product manual

Commodore

Commodore Amiga A500 Product manual

Commodore Plus/4 User manual

Commodore

Commodore Plus/4 User manual

Commodore CDTV User manual

Commodore

Commodore CDTV User manual

Commodore SX-65 Portable User manual

Commodore

Commodore SX-65 Portable User manual

Commodore 64 User manual

Commodore

Commodore 64 User manual

Commodore PET 2001 Series Reference manual

Commodore

Commodore PET 2001 Series Reference manual

Commodore PC 10 User manual

Commodore

Commodore PC 10 User manual

Popular Desktop manuals by other brands

Asus Essentio CG8250 user manual

Asus

Asus Essentio CG8250 user manual

Newcastle Systems NB series owner's manual

Newcastle Systems

Newcastle Systems NB series owner's manual

HP Media Center Hardware

HP

HP Media Center Hardware

AOpen DE896-FL Assembly guide

AOpen

AOpen DE896-FL Assembly guide

SANDIA aerospace SAC 7-35 installation manual

SANDIA aerospace

SANDIA aerospace SAC 7-35 installation manual

TeleVideo TS 806H Maintenance manual

TeleVideo

TeleVideo TS 806H Maintenance manual

ACE COMPUTERS VS-U660I Technical reference guide

ACE COMPUTERS

ACE COMPUTERS VS-U660I Technical reference guide

Atari CX2600 owner's manual

Atari

Atari CX2600 owner's manual

Lenovo ThinkCentre A63 Manual do utilizador

Lenovo

Lenovo ThinkCentre A63 Manual do utilizador

Uplift Desk UDA100-freestand instructions

Uplift Desk

Uplift Desk UDA100-freestand instructions

Psion Teklogix Hand-Held Computer 7530 G2 user manual

Psion Teklogix

Psion Teklogix Hand-Held Computer 7530 G2 user manual

Acnodes RMC 3012A Specifications

Acnodes

Acnodes RMC 3012A Specifications

Dell Precision ND224 Quick reference guide

Dell

Dell Precision ND224 Quick reference guide

Lenovo ThinkCentre 6136 Hardware Maintenance Manual

Lenovo

Lenovo ThinkCentre 6136 Hardware Maintenance Manual

Lenovo ThinkCentre M90n-1 Setup guide

Lenovo

Lenovo ThinkCentre M90n-1 Setup guide

IPASON BLACK CRYSTAL user manual

IPASON

IPASON BLACK CRYSTAL user manual

Lenovo 30CE Hardware Maintenance Manual

Lenovo

Lenovo 30CE Hardware Maintenance Manual

Metro DataVac AccessPoint Operator's manual

Metro DataVac

Metro DataVac AccessPoint Operator's manual

manuals.online logo
manuals.online logoBrands
  • About & Mission
  • Contact us
  • Privacy Policy
  • Terms and Conditions

Copyright 2025 Manuals.Online. All Rights Reserved.