COMPANION COMPBI012 User manual

Australia’s original Outdoor brand
OWNERS MANUAL
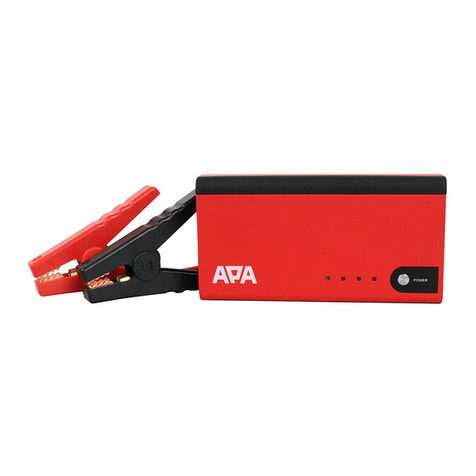
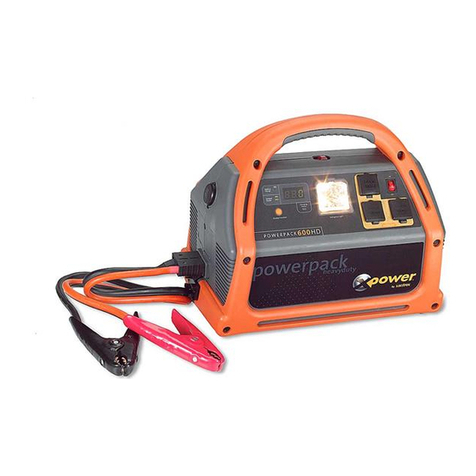
POWER PACK 44AH
Part No. COMPBI012

2
DIGITAL DISPLAY WITH VOLTAGE
AND AMPERAGE METER
OVERLOAD
PROTECTION BY
RESETTABLE
CIRCUIT
BREAKERS
12V DC
CIGARETTE
LIGHTER
SOCKET AND
12V DC MERIT
STYLE SOCKET
RESET SWITCH RESTORES POWER TO
THE DIGITAL DISPLAY AND ON/OFF SWITCHES
DISPLAY SWITCH
CHARGE INPUT VIA AC ADAPTOR (INCLUDED)
CHARGING (GREEN) LED INDICATOR
5V DC 2A USB PORT WITH ON/OFF SWITCH
FULLY CHARGED
(YELLOW) LED INDICATOR
ANDERSON STYLE PLUG/
SOCKET ALLOWS 2
WAY CHARGING FROM
SOLAR PANEL OR 12V
DC CHARGING LEAD AND
ALSO 12V DC OUTPUT
POWER
INDIVIDUAL ON/OFF
SWITCHES WITH LED
INDICATOR
LOW VOLTAGE WARNING (RED) LED
INDICATOR WITH AUDIBLE ALARM
HEAVY DUTY ABS CASE WITH
FOLDING CARRY HANDLE
SAFETY
• Please read, understand and follow the instruction manual before first use.
• Never expose the Power Pack to rain, water, snow or excessive moisture.
• When charging the Power Pack, DO NOT expose to open flame or cigarettes.
FEATURES

OWNERS MANUAL
3
1 x 44Ah Power Pack
Power Pack includes:
1 x 6A 240V AC charging adaptor 1 x 12V DC charging lead
(10A fused) 1.3m
UNDERSTANDING YOUR POWER PACK
INSTRUCTIONS FOR USE
12V DC
cigarette
lighter
socket
12V DC
Merit style
plug socket
5V DC
USB port
12V DC
Anderson
style plug
socket
2. Press the on/off switch. The LED indicator
should illuminate to show the power is supplied
to the socket.
Power appliances:
1. Simply connect the appliance’s power plug into the
corresponding socket: A, B, C or D.
A
C
B
D

4
3. Press the USB switch ON when charging 5V DC
appliances via the USB port. The USB (green)
indicator light will illuminate.
4. Insert Anderson style plug from the appliance
directly into the Anderson style plug socket on the
side of the Power Pack. The digital display will show
the VOLTAGE (V) of the Power Pack. The CURRENT (A)
amperage display will be zero (00.0).
Overload protection
12V DC output:
When an overload of 15 amp power draw is detected
on a single DC output socket, the circuit breaker will
automatically turn off the power to the socket to protect
the Power Pack. Switch OFF the DC output socket and
disconnect the appliance from the Power Pack. Press
the circuit breaker reset button to resume the power
supply. Reconnect the appliance and switch ON the
DC output socket.
When an overload of 16 amp combined power draw
is detected from both DC output sockets, both circuit
breakers will automatically turn off the power to the
sockets to protect the Power Pack. Switch OFF one of
the DC output sockets and disconnect that appliance.
Press both circuit breaker reset buttons to resume the
power supply and reconnect one of the appliances only.
Switch ON the DC output socket.
5V DC USB port:
If a power overload is detected while charging a 5V DC
appliance, the USB power supply will automatically
reset within 2 minutes after the appliance has been
disconnected from the USB port.

OWNERS MANUAL
5
Digital display
When the Power Pack is in use with an appliance
connected, press the DISPLAY SWITCH and the digital
display will show the VOLTAGE (V) of the Power Pack
and the CURRENT (A) amperage used by the appliance.
When you press the DISPLAY SWITCH with no appliances
connected, the digital display will show the VOLTAGE
(V) of the Power Pack and zero (00.0) CURRENT (A)
amperage.
When charging with the AC adaptor, the digital display
will show the VOLTAGE (V) and the CURRENT (A) that
the Power Pack is receiving.
When being charged by Solar or the DC lead via the
Anderson style plug socket, the digital display will
indicate the VOLTAGE (V) of what the Power Pack is
receiving from the charging source.
The CURRENT (A) will indicate zero (00.0) if there are
no 12V DC accessories connected.
If the Power Pack is connected with an appliance and
charged at the same time, the digital display will show
the VOLTAGE (V) and CURRENT (A) that the Power Pack
is receiving.
RESET switch
To restore power to the digital display screen or the
on/off switches, press the RESET switch before
recharging.
Note: All appliances and any charging adaptor
(or solar panel) must be disconnected from the Power
Pack for the RESET switch to operate.
The Power Pack will beep twice to confirm power has
been restored. The Power Pack can now be recharged.

6
WHEN THE POWER PACK IS IN USE and the voltage
decreases to 10.5V, the unit will automatically switch
OFF and the Low Voltage Warning indicator (red) will
commence flashing with an audible single beep every 5
seconds for 10 minutes and then remain illuminated.
WHEN THE POWER PACK IS STORED AND
NOT IN USE and the voltage decreases to 11.5V
a single beep will continue every 10 minutes as
a first alert warning to charge the Power Pack.
If the Power Pack is not recharged and the voltage
continues to decrease to 10.5V, the unit will
automatically switch OFF and the Low Voltage Warning
indicator (red) will commence flashing with a single
beep every 5 seconds for 10 minutes.
The Low Voltage Warning indicator (RED) will then
remain illuminated and the audible beep will stop.
IMPORTANT: THE POWER PACK MUST
NOW BE RECHARGED - FULLY RECHARGE EVERY 3
MONTHS.
To restore power to the digital display screen or
the on/off switches, press the RESET switch
before recharging.
Note: All appliances and any charging adaptor
(or solar panel) must be disconnected from the Power
Pack for the RESET switch to operate.
IMPORTANT: STORE FULLY CHARGED to maximise
performance and battery life of the Power Pack.
Low Voltage Warning
The Power Pack is equipped with a low voltage (low
battery capacity) warning system that activates
automatically when the Power Pack voltage decreases
to a low voltage level.
OWNERS MANUAL
7
Charging the Power Pack
1. Using the 240V AC charging adaptor (included);
Insert the 5.5mm Jack Plug into the ‘Charge Input’
socket (7) on the front of the Power Pack and other lead
to mains 240V AC. The ‘Charging’ LED (10) indicator
will illuminate (green) once the power is turned on
indicating that charging has commenced.
The fully charged indicator (11) will illuminate (yellow)
once the Power Pack is fully recharged.
Estimated charge time using the 240 AC adaptor is
approximately 8-10 hrs.
2. Using the 12V DC charging lead (included);
Insert the 50A Anderson style plug into the ‘Charge
Input’ socket (8) on the side of the Power Pack.
Note: The ‘Charging’ LED (10) indicator and the ‘Fully
Charged’ LED (11) indicator WILL NOT illuminate
when the Power Pack is being charged by the 12V DC
charging lead.
Pressing the ‘DISPLAY SWITCH’ (13) while being
charged, the digital display will indicate the VOLTAGE
(V) of what the Power Pack is receiving from the
charging source.

8
3. Using a Solar Panel Kit (not included):
IMPORTANT:
A Solar Charger/Regulator MUST be used in between the
Solar Panel and Power Pack to control the voltage and
current input. Failure to do so, will result in catastrophic
failure of the Power Pack, causing potential explosion
and or severe personal injury.
Insert a 50A Anderson style plug into the ‘Charge Input’
socket (8) on the side of the Power Pack.
Note: The ‘Charging’ LED (10) indicator and the ‘Fully
Charged’ LED (11) indicator WILL NOT illuminate when
the Power Pack is being charged by a Solar Panel Kit.
Pressing the ‘DISPLAY SWITCH’ (13) while being
charged, the digital display will indicate the VOLTAGE
(V) of what the Power Pack is receiving from the
charging source.
Refer to the Solar Charger/Regulator LED indicators or
LCD readout for charging status.
IMPORTANT:
When using appliances with high current draw i.e.
portable fridge, it is recommended to use a solar panel
in conjunction with the Power Pack. The solar panel
MUST be equipped with a regulator/charge controller.

OWNERS MANUAL
9
TECHNICAL DETAILS
SPECIFICATIONS
Part No. COMPBI012
Output Voltage 12V DC and 5V DC (USB)
Battery Type 2 x 22Ah AGM (Absorbed Glass Mat)
batteries
Output
12V/15A cigarette lighter socket
x 1pc
12V/15A heavy duty merit style
socket x 1pc
5V/2A USB port x 1pc
12V DC Anderson style plug/socket
Overload Protection
15A circuit breaker x 2pcs
Low voltage warning system with
LED indicator and audible alarm
Reset switch
Digital Display Digital voltage and current
(amperage) display
Charging Options
6A 240V AC adaptor (included)
12V DC lead (included)
Solar panel via
Anderson style plug/socket
(solar panel not included)
Maximum Charging Current 15A (via the Anderson style
plug/socket)
Dimensions 31.0L x 26.0W x 22.5Hcm
Weight 13.9kg
AFTER SALES SERVICE
For enquiries please contact:
Customer Service Tel: 1300 555 197
(Mon–Fri 8.30am–5.30pm AEST)
MAINTENANCE
Check the Power Pack voltage capacity regularly
(minimum once a month) and charge the Power Pack
as required.
When the Low Voltages Warning occurs, fully charge the
Power Pack immediately before use.

10
NOTES
________________________________________________________________________________
________________________________________________________________________________
________________________________________________________________________________
________________________________________________________________________________
________________________________________________________________________________
________________________________________________________________________________
________________________________________________________________________________
________________________________________________________________________________
________________________________________________________________________________
________________________________________________________________________________
________________________________________________________________________________
________________________________________________________________________________
________________________________________________________________________________
________________________________________________________________________________
________________________________________________________________________________
________________________________________________________________________________
________________________________________________________________________________
________________________________________________________________________________
________________________________________________________________________________
________________________________________________________________________________
________________________________________________________________________________
________________________________________________________________________________

OWNERS MANUAL
11
NOTES
________________________________________________________________________________
________________________________________________________________________________
________________________________________________________________________________
________________________________________________________________________________
________________________________________________________________________________
________________________________________________________________________________
________________________________________________________________________________
________________________________________________________________________________
________________________________________________________________________________
________________________________________________________________________________
________________________________________________________________________________
________________________________________________________________________________
________________________________________________________________________________
________________________________________________________________________________
________________________________________________________________________________
________________________________________________________________________________
________________________________________________________________________________
________________________________________________________________________________
________________________________________________________________________________
________________________________________________________________________________
________________________________________________________________________________
________________________________________________________________________________

BUN006
Distributed by
Companion Brands
Bundoora VIC 3083
www.companionbrands.com.au
Table of contents