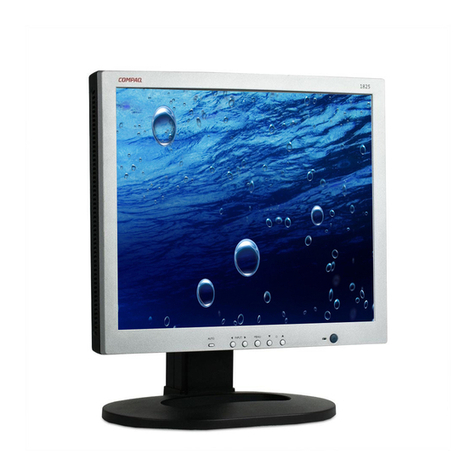
Compaq TFT450 User manual

Notice
The information in this guide is subject to change without notice.
COMPAQ COMPUTER CORPORATION SHALL NOT BE LIABLE FOR TECHNICAL OR
EDITORIAL ERRORS OR OMISSIONS CONTAINED HEREIN; NOR FOR INCIDENTAL OR
CONSEQUENTIAL DAMAGES RESULTING FROM THE FURNISHING, PERFORMANCE, OR
USE OF THIS MATERIAL.
This guide contains information protected by copyright. No part of this guide may be photocopied or
reproduced in any form without prior written consent from Compaq Computer Corporation.
1998 Compaq Computer Corporation.
All rights reserved. Printed in the U.S.A.
Compaq and Deskpro are registered in the U. S. Patent and Trademark Office.
Product names mentioned herein may be trademarks and/or registered trademarks of their respective
companies.
Maintenance & Service Guide
Compaq TFT450 Flat Panel Monitor
First Edition (January 1998)
Part Number 170436-001
Compaq Computer Corporation

Preface v
preface
This Maintenance & Service Guide is a troubleshooting guide that can be used for reference when
servicing the Compaq TFT450 Flat Panel Monitor. Only authorized technicians trained by Compaq
should attempt to repair this equipment.
Compaq Computer Corporation reserves the right to make changes to the Compaq TFT450 Flat Panel
Monitor without notice.
Symbols and Conventions
The following words and symbols mark special messages throughout this guide:
!WARNING: Text set off in this manner indicates that failure to follow directions in the warning could
result in bodily harm or loss of life.
CAUTION: Text set off in this manner indicates that failure to follow directions could result in damage to
equipment or loss of data.
✎Text set off in this manner presents commentary, sidelights, clarifying information, or specific
instructions.
Technician Notes
!WARNING: Only authorized technicians trained by Compaq should attempt to repair this equipment. All
troubleshooting and repair procedures are detailed to allow only subassembly/module level repair.
Because of the complexity of the individual components and subassemblies, no one should attempt to
make repairs at the component level or to make modifications to any printed wiring board. Improper
repairs can create a safety hazard. Any indications of component replacement or printed wiring board
modifications may void any warranty.
CAUTION: To properly ventilate your monitor, you must provide at least 3 inches (7.6 cm) of clearance at
the back of the monitor.
CAUTION: The monitor is designed to be electrically grounded. To ensure proper operation, plug the AC
power cord into a properly grounded AC outlet only.
System Serial Number
The serial number is displayed on the monitor's back panel.

vi Preface
Locating Additional Information
The following documentation is available to support the monitor:
User’s Guide
Compaq Service Advisories and Bulletins
Compaq QuickFind
Compaq Service Quick Reference Guide

Contents iii
CONTENTS
Preface
Symbols and Conventions............................................................................................. v
Technician Notes........................................................................................................... v
System Serial Number................................................................................................... v
Locating Additional Information ................................................................................. vi
chapter 1
Removal and Replacement Procedures
1.1 Electrostatic Discharge.........................................................................................1-1
1.1.1 Preventing Electrostatic Discharge ...........................................................1-1
1.1.2 Grounding Methods...................................................................................1-1
1.2 Serial Number ......................................................................................................1-2
1.3 Features................................................................................................................1-3
1.4 Front Bezel Assembly Controls and LEDs..........................................................1-4
1.5 Rear Panel Connectors.........................................................................................1-5
1.6 Disassembly and Assembly Procedures..............................................................1-6
1.6.1 AC Adapter ...............................................................................................1-6
1.6.2 Removal and Replacement Procedures.....................................................1-7
1.6.3 Monitor Panel............................................................................................1-8
1.6.4 Rear Enclosure ........................................................................................1-10
1.6.5 EMI Shield ..............................................................................................1-11
1.6.6 Controller Board......................................................................................1-12
1.6.7 Inverter Boards........................................................................................1-13
1.6.8 Front Bezel Assembly.............................................................................1-14
1.6.9 Protective Cover......................................................................................1-16
1.6.10 TFT Liquid Crystal Display (LCD) Panel Assembly............................1-17
1.6.11 Backlights.............................................................................................1-18
chapter 2
Illustrated Parts Map
..............................................................................................................2-1

CPS

Compaq TFT450 Flat Panel Monitor 1-1
chapter 1
REMOVAL AND REPLACEMENT
PROCEDURES
This chapter provides removal and replacement assembly procedures for the Compaq TFT450 Flat
Panel Monitor.
1.1 Electrostatic Discharge
A discharge of static electricity from a finger or other conductor may damage system boards or
other electrostatic-sensitive devices. This type of damage may reduce the life expectancy of the
devices.
1.1.1 Preventing Electrostatic Discharge
To prevent electrostatic damage, observe the following precautions:
■Avoid hand contact by transporting and storing products in electrostatic-safe containers.
■Keep electrostatic-sensitive parts in their containers until they arrive at electrostatic-free
workstations.
■Place parts on a grounded surface before removing them from their containers.
■Avoid touching pins, leads, or circuitry.
■Always be properly grounded when touching an electrostatic-sensitive component or
assembly.
1.1.2 Grounding Methods
There are several methods for grounding. Use one or more of the following methods when handling
or installing electrostatic-sensitive parts.
■Use a wrist strap connected by a ground cord to a grounded workstation or computer chassis.
Wrist straps are flexible straps with a minimum of 1 megohm +/- 10 percent resistance in the
ground cords. To provide proper ground, wear the strap snug against the skin.
■Use heelstraps, toestraps, or bootstraps at standing workstations. Wear the straps on both feet
when standing on conductive floors or dissipating floor mats.
■Use conductive field service tools.
■Use a portable field service kit with a folding electrostatic-dissipating work mat.

1-2 MSG/Removal and Replacement Procedures
✎If you do not have the suggested equipment for proper grounding, or if you need more
information on static electricity or assistance with product installation, contact a Compaq
authorized service provider.
1.2 Serial Number
The monitor serial number should be given to Compaq when requesting information or ordering
spare parts. The serial number is displayed on the monitor’s rear enclosure.
Locating the serial number

Compaq TFT450 Flat Panel Monitor 1-3
1.3 Features
■14.5-inch (36.8–cm) viewable display area
■Screen customizing adjustments displayed on-screen in five different languages: English,
Dutch, French, German, and Spanish
■Universal Serial Bus pass-through interface—plug and play connectors for use with USB
peripherals (mouse, keyboard, etc.)
■Plug and play capability, if supported by your system
■Fault Management and AssetControl
■Tilt and swivel base
■Removable base for flexible mounting solutions
■Automatically synchronizes with full screen expansion
■1024 × 768 maximum resolution
■Wide viewing angle to allow viewing from a sitting or standing position, or moving side-to-
side
■Energy Saver feature
■Programmable sleep mode timer

1-4 MSG/Removal and Replacement Procedures
1.4 Front Bezel Assembly Controls and LEDs
The controls and LEDs located on the monitor’s front bezel assembly are identified below.
Front Bezel Assembly Controls
No./Icon Control Function
1Menu Select button 1. Launches on-screen display.
2. Selects function adjustments.
3. Exits menus and on-screen display.
2−Minus button Selects and adjusts the functions.
3+Plus button Selects and adjusts the functions.
4Power switch Turns the monitor on and off.
5Power LED 1. Green indicates monitor is turned on.
2. Yellow indicates suspend mode.
3. Amber indicates sleep mode.
4. Blinking Green/Amber indicates programmable sleep mode.

Compaq TFT450 Flat Panel Monitor 1-5
1.5 Rear Panel Connectors
The following illustration shows the rear panel connectors and the signal and power cables on the
Compaq TFT450 Flat Panel Monitor. Each connector includes an icon to help you identify its
function.
Rear Panel Connectors
Rear Panel Cable and Connectors
No. Cable/Connector Function
nDC Power Cable Connects the monitor to the AC adapter.
oUSB* Connector Connects a USB peripheral to the monitor.
pUSB* Cable Connector Connects the USB signal cable to the computer.
qSignal Cable Connects the monitor to a computer.
*Universal Serial Bus connectors for USB peripherals such as a keyboard, mouse, etc., operate as a pass-through
system. Your computer must have a USB host controller installed for USB-connected devices to operate.

1-6 MSG/Removal and Replacement Procedures
1.6 Disassembly and Assembly Procedures
This section provides disassembly and assembly procedures for the Compaq TFT450 Flat Panel
Monitor. Before you begin any of these procedures, be sure to turn off the power to the monitor,
computer system, and other attached devices; then disconnect the power cable from the electrical
outlet.
CAUTION: As you disassemble the monitor, be sure to place the screws in a safe place, and separate
them according to their groupings.
1.6.1 AC Adapter
1. Before removing the AC Adapter (spare part no. 170427-001) from the monitor, disconnect
the power cord nfrom the wall socket.
2. Disconnect the AC Adapter connector ofrom the monitor base.
Disconnecting the AC Adapter
To reconnect the AC adapter, reverse this procedure.

Compaq TFT450 Flat Panel Monitor 1-7
1.6.2 Disconnect the video connector from the monitor panel.
Disconnecting the video connector from the monitor
To replace the video connector, reverse this procedure.

1-8 MSG/Removal and Replacement Procedures
1.6.3 Monitor Panel
1. Lay the front bezel on a soft area to prevent it from getting scratched, defaced, or broken.
2. Grasp the base cap and gently press in the sides. Then lift up and pull off the base cap (spare
part no. 170434-001).
Removing the base cap

Compaq TFT450 Flat Panel Monitor 1-9
3. Remove the two screws nas shown below.
Removing the two screws and separating the monitor panel from the base
4. Slide the monitor ofrom the monitor base (spare part no. 170418-001).
To replace the monitor back onto the monitor base, reverse this procedure.
✎If the mounting plate is installed, remove the 4 screws nand slide the mounting plate ofrom
the monitor.
Removing the four screws and separating the monitor panel from the mounting plate

1-10 MSG/Removal and Replacement Procedures
1.6.4 Rear Enclosure
1. Remove six screws nfrom the rear enclosure.
2. Separate the rear enclosure o(spare part no. 170419-001) from the monitor panel p.
Removing the rear enclosure
To replace the rear enclosure, reverse this procedure.
✎If you are replacing the protective cover only, skip the next few sections and turn to section
1.6.8, Front Bezel Assembly.

Compaq TFT450 Flat Panel Monitor 1-11
1.6.5 EMI Shield
1. Remove the 10 screws nfrom the EMI shield (spare part no. 170435-001).
2. Remove the EMI shield o.
Removing the EMI shield
✎When reinstalling the EMI shield, be sure to reapply the conductive tape in the correct
positions.

1-12 MSG/Removal and Replacement Procedures
1.6.6 Controller Board
1. Remove the four screws that secure the data cable n, then remove the cable.
2. Disconnect the three remaining cables o(spare part kit no. 170424-001) from the PCB.
3. Remove four screws pfrom the controller board.
4. Remove the four standoffs q.
Removing the screws and disconnecting the cables from the controller board
5. Remove the controller board r.
✎ When removing or replacing cables, disengage the cables from the cable clamp s.
To replace the controller board, reverse this procedure.

Compaq TFT450 Flat Panel Monitor 1-13
1.6.7 Inverter Boards
1. Remove two screws nfrom each inverter board (spare part no. 170432-001).
2. Disconnect the four cables ofrom the PCB.
3. Remove the inverter boards p.
Removing the inverter board
✎ When replacing the cables, slide the cables through the slots in the LCD panel.

1-14 MSG/Removal and Replacement Procedures
1.6.8 Front Bezel Assembly
1. Remove four screws nfrom the back of the bezel.
2. If you have removed the EMI shield, the controller board, and the inverter boards, lift off the
LCD panel o(spare part no. 170423-001).
Removing the front bezel assembly
To replace the front bezel assembly, reverse this procedure.

Compaq TFT450 Flat Panel Monitor 1-15
3. To only remove the protective cover, it is not necessary to remove the EMI shield, the
controller board, inverter boards, or the cables from the LCD panel. Lift up the opposite end of
the LCD panel and swing it over the front bezel assembly until it rests on the work surface.
A
ccessing the protective cover
Table of contents
Other Compaq Monitor manuals

Compaq
Compaq Compaq S710 User manual

Compaq
Compaq MV 540 User manual

Compaq
Compaq TFT 5000R User manual

Compaq
Compaq COMPAQ Q1859 User manual

Compaq
Compaq P900 User manual

Compaq
Compaq TFT 5000R User manual

Compaq
Compaq Compaq S710 User manual

Compaq
Compaq MV7540 User manual

Compaq
Compaq V70 User manual

Compaq
Compaq TFT 1501 User manual

Compaq
Compaq 5700 User manual

Compaq
Compaq 5017 - TFT - 15" LCD Monitor User manual

Compaq
Compaq V710 User manual

Compaq
Compaq V1000 User manual

Compaq
Compaq Compaq Q2159 User manual

Compaq
Compaq V700 User manual

Compaq
Compaq TFT5000 User manual

Compaq
Compaq 8000 - Elite Convertible Minitower PC User manual

Compaq
Compaq 7020 User manual

Compaq
Compaq MV5500 User instructions