Conair LT10WCSC User manual

L’UTILISATEUR
ENTRETIEN DE LA TONDEUSE
ENTRETIEN DES LAMES
La tondeuse étant un instrument précis
servant à une fin particulière, elle doit être
manipulée avec soin. Après chaque usage,
nettoyez les lames avec une brosse de net-
toyage.
NETTOYER LA TÊTE 3/4 PO
Tenez la tête
fermement du
pouce. Poussez
délicatement vers
le haut de la lame.
L’ensemble articulé
bascule vers le
haut. Brossez les
poils avec une brosse de nettoyage.
Réenclenchez la lame en place.
NETTOYER LA TÊTE 3/8 PO
Tenez la tête ferme-
ment avec le pouce.
Poussez le petit
loquet pour dégager
la lame. Poussez
délicatement la
lame en soulevant.
Brossez les poils
avec une brosse de nettoyage. Pour
remettre la tête en place, réalignez le
petit loquet et glissez la lame en position.
Relevez le loquet pour verrouillerla lame en
position.
1. Tête de tondeuse 3/4 po
2. Interrupteur de la tondeuse
3. Logement de la pile
4. Tête de tondeuse à sourcils 3/8 po
5. Peigne à sourcils
6. Petit peigne accessoire à 5 positions
7. Grand peigne accessoire à 5 positions
8. Sac de rangement
TONDEUSE LT10WCSC
1
2
37
6
5
4
8
GARANTIE LIMITÉE DE DEUX
ANS
Conair, à son choix, réparera ou remplacera
un appareil sans frais si, au cours des 24
mois suivant la date d’achat, il affiche un
vice de matière ou de fabrication.
Pour obtenir un service au titre de la garan-
tie, renvoyez l’appareil défectueux au ser-
vice après-vente ci-dessous, accompagné
du bon de caisse et de 5,50 $ pour les
frais de poste et d’administration. Si vous
n’avez pas le bon de caisse, la période de
garantie sera de 24 mois à compter de la
date de manufacture.
TOUTE GARANTIE IMPLICITE, OBLIGA-
TION OU RESPONSABILITÉ, Y COMPRIS
MAIS SANS Y ÊTRE LIMITÉ, LA GARAN-
TIE IMPLICITE DE BONNE VENTE ET
D’APTITUDE À ACCOMPLIR UNE TÂCHE
PARTICULIÈRE, SERA LIMITÉE À LA DU-
RÉE DE 24 MOIS DE CETTE GARANTIE
LIMITÉE ÉCRITE.
EN AUCUN CAS PEUT-ON TENIR CONAIR
RESPONSABLE DE QUELQUE DOMMAGE
SPÉCIAL, FORTUIT OU INDIRECT QUE
CE SOIT SUITE À UN MANQUE À CETTE
GARANTIE OU TOUTE AUTRE, EXPRESSE
OU IMPLICITE.
Cette garantie vous accorde des droits
particuliers et peut vous accorder
IB-7055
SERVICE APRÈS-VENTE
Conair Consumer Products Inc.
156 Parkshore Drive,
Brampton, Ontario, L6T 5M1.
1-800-472-7606
©2006 Conair Consumer Products Inc.
www.conaircanada.ca
Courriel du centre d’appels à la clientèle :
Consumer_Canada@Conair.com
06CN1036
7pièces
Conair vous remercie d’avoir opté
pour la trousse de toilette 7 pièces.
Nous savons que vous en tirerez
des années de service fiable.
Modèle LT10WCSC
TAKING CARE
OF YOUR TRIMMER
BLADE CARE
Because the trimmer blades are precision
made for a very special use, they should
always be handled with care. Each time you
finish using the trimmer, brush away any
loose hair that has collected in the blades.
TO CLEAN THE 3/4” TRIMMER
Hold attachment
firmly, using your
thumb. Push gently
upward on blade.
The hinged blade
assembly will ro-
tate upward. Brush
away any loose hair
with a cleaning brush. Gently snap blade
assembly back to operating position.
TO CLEAN THE 3/8”
ATTACHMENT
Hold attachment
firmly, using your
thumb. Push small
latch down to release
blade assembly.
Gently push away
and lift up blade
assembly. Brush
away any loose hair with a cleaning
brush. To replace blade assembly,
realign with small latch and slide blade into
place. Push latch upward to lock blade into
position.
1. 3/4” Trimmer Head
2. On/Off Switch on Body
3. Battery Compartment
4. 3/8” Eyebrow Trimmer Head
5. Eyebrow Comb Attachment
6. Small 5-Position Attachment Comb
7. Large 5-Position Attachment Comb
8. Storage Bag
LT10WCSC WOMEN’S
TRIMMER
1
2
3
7
6
5
4
8
LIMITED TWO
YEAR WARRANTY
Conair will repair or replace, at our option,
your appliance free of charge for 24 months
from the date of purchase if the appliance is
defective in workmanship or materials.
To obtain service under this warranty, return
the defective product to the service centre
listed below together with your sales slip
and $5.00 for postage and handling. In the
absence of a receipt, the warranty period
shall be 24 months from the date of manu-
facture.
ANY IMPLIED WARRANTIES,
OBLIGATIONS, OR LIABILITIES,
INCLUDING BUT NOT LIMITED
TO THE IMPLIED WARRANTY OF
MERCHANTABILITY AND FITNESS FOR A
PARTICULAR PURPOSE, SHALL BE LIM-
ITED IN DURATION TO THE 24 MONTH
DURATION OF THIS WARRANTY.
IN NO EVENT SHALL CONAIR BE
LIABLE FOR ANY SPECIAL,
INCIDENTAL, OR CONSEQUENTIAL
DAMAGES FOR BREACH OF THIS OR
ANY OTHER WARRANTY, EXPRESS OR
IMPLIED, WHATSOEVER.
This warranty gives you specific legal
rights, and you may also have other rights
which vary from province to province.
IB-7055
SERVICE CENTRE:
Conair Consumer Products Inc.
156 Parkshore Drive,
Brampton, Ontario, L6T 5M1.
1-800-472-7606
©2006 Conair Consumer Products Inc.
www.conaircanada.ca
Consumer Call Centre E-mail :
Consumer_Canada@Conair.com
06CN1036
7piece
Conair wants to thank you for
choosing our Ladies 7 piece Beauty Kit.
We know it will provide you with
years of reliable service.
Model LT10WCSC
LADIES Beauty Kit
Trousse de toilette
pour DAMES

IMPORTANT SAFETY
INSTRUCTIONS
When using electrical appliances, especially
when children are present, basic safety
precautions should always be followed,
including the following:
READ ALL INSTRUCTIONS
BEFORE USING
KEEP AWAY FROM WATER
DANGER –
To reduce the risk of injury:
1. Do not place or store appliance where it
can fall or be pulled into a tub or sink.
2. Do not use appliance while bathing or in
the shower.
3. Do not place appliance in, or drop into
water or other liquid.
WARNING–
To reduce the risk of burns, fire, or injury
to persons:
1. This appliance should not be used by,
on, or near children or individuals with
certain disabilities.
2. Use this appliance only for its intended
use as described in this manual. Do not
use attachments not recommended by
the manufacturer.
3. Never operate the appliance if it is not
working properly, has been dropped
or damaged,or dropped into water.
Return the appliance to a Conair
service centre for examination and
repair.
4. Never drop or insert any object into
any opening of the appliance.
5. Do not place the appliance on any
surface while it is operating.
6. Do not use the appliance with a
damaged or broken comb or with teeth
missing from the blades, as injury may
result. Before each use, make certain
the blades are aligned properly.
7. Do not use the appliance outdoors or
operate where aerosol (spray) prod-
ucts are being used or oxygen is being
administered.
SAVE THESE
INSTRUCTIONS
TROUBLESHOOTING
There are several things to look for if your
trimmer fails to operate:
1. Be sure the trimmer is turned ON.
2. Make sure that the battery is
properly placed in the battery compart-
ment. Test the battery to be sure it is
working.
3. Check the blades to see if they are
clogged with hair clippings; if so, use
the cleaning brush to remove hair.
4. If the trimmer still fails to operate,
take or send it to a Conair Service
Centre (see warranty procedure and
addresses).
FOR HOUSEHOLD
USE ONLY
OPERATING INSTRUCTIONS
FOR YOUR LT10WCSC
1. Remove the
battery cover
by rotating the
bottom cap
counter clock-
wise and lifting
straight off.
2. Being careful not to bend the clips,
insert the positive end of the battery
first, so it will slip easily into position.
3. Return the battery cover to its original
position by pushing it in and rotating
clockwise until you hear a small click
as it locks into place.
4. To use your trimmer, push ON/OFF
switch upwards to ON position.
5. After you finish using your trimmer,
push down on the ON/OFF switch to
turn the trimmer off.
*The LT10WCSC requires 1 “AA” battery
(not included). We recommend using
alkaline batteries in your trimmer because
they last longer. If you are not going to use
your trimmer for a long period of time, or
if the battery is dead, remove the battery
from the unit. This will increase the life of
your trimmer.
GETTING STARTED
TO SWITCH TRIMMER HEADS
Begin with trimmer in locked position (Fig.
1). Hold the handle of the trimmer while
turning the trimmer head counterclockwise
until the triangle on the trimmer head is
aligned with the dash on the side of the
handle (Fig. 2). At this point you should be
able to easily lift the trimmer head from the
handle (Fig. 3). To replace a trimmer head,
align the triangle on the trimmer head with
the dash on the side of the handle and
turn clockwise until the two triangles are
aligned.
OUTLINING
1. The (3/4”) bikini trimmer is espe-
cially useful for providing shape and
definition. It is best to begin with clean
slightly damp hair.
2. Beginning at the sides, use the cutting
blades to define the shape.
3. If you would like to shorten your hair,
run the blades over your hair until the
desired length is achieved using even
strokes.
4. Two separate attachment combs
provide 5 different cutting positions
for fine detailing.
TO TRIM YOUR EYEBROW
Attach the 3/8”
trimmer head and
then the eyebrow
comb attachment
to 3/8” angled head.
This comb has two
positions. At first,
use the longest
trim setting (you can always go back and
make your eyebrows a little shorter). Slide
the eyebrow comb attachment over the
trimmer head until it sits securely in posi-
tion. Starting from the centre of your brow,
use smooth even
strokes. Never
attempt to trim
against the natu-
ral growth of your
eyebrow, because
the hair will be cut
too short. With the
comb removed, you can shape and define
your eyebrow. Move the unit slowly so as
not to cut any hairs you do not intend to
trim.
MISES EN GARDE
IMPORTANTES
L’utilisation d’appareils électriques, surtout
en présence d’enfants, demande la prise de
précautions, dont les suivantes :
LIRE TOUTES LES
DIRECTIVES AVANT
L’USAGE TENIR LOIN DE L’EAU
DANGER –
Un appareil électrique est sous tension
même quand il est éteint. Pour réduire le
risque de blessure :
1. Ne le placez ni ne le rangez là où il peut
tomber ou être tiré dans une baignoire
unévier.
2. Ne l’utilisez pas dans la baignoire
oudouche.
3. Ne le placez ni ne l’échappez dans l’eau
ou un liquide quelconque.
ATTENTION–
Pour réduire le risque de brûlure, choc,
incendie ou blessure :
1. Assurez une surveillance étroite s’il est
utilisé par, sur ou près d’enfants ou de
personnes invalides.
2. Ne l’utilisez que pour l’usage prévu
dans ce livret. N’utilisez que les
accessoires recommandés par le
fabricant. N’utilisez pas de rallonge
avec le produit.
3. N’utilisez jamais l’appareil si le cordon
ou la fiche est endommagée, s’il ne
fonctionne pas bien, s’il a été échap-
pé, endommagé ou s’il est tombé
dans l’eau. Présentez-le à un service
après-vente où il sera inspecté et
réparé.
4. N’insérez ni n’échappez d’objets dans
les ouvertures.
5. Ne le déposez pas sur une surface al-
ors qu’il est en marche.
6. Ne l’utilisez pas avec un peigne brisé
ni avec dents manquantes car vous
risquez de vous blesser. Avant de
l’utiliser, assurezvous que les lames
sont bien alignées et huilées.
7. Ne l’utilisez pas à l’extérieur ni là où
l’on utilise des aérosols ou administre
de l’oxygène.
CONSERVEZ CES
DIRECTIVES
DÉPISTAGE DES PROBLÈMES
Il y a plusieurs points à considérer si la ton-
deuse ne fonctionne pas :
1. Assurez-vous qu’elle est en marche
(ON).
2. Assurez-vous que la pile est bien
posée dans le logement. Testez-la
pour vous assurer qu’elle possède une
charge.
3. Voyez si les lames sont obstruées de
poils; si c’est le cas, nettoyez-les avec
la petite brosse de nettoyage.
4. Si la tondeuse ne fonctionne pas,
présentez-la au service après-vente
Conair (voir garantie et marche à
suivre)
RÉSERVÉ À
L’USAGE MÉNAGER
DIRECTIVES D’UTILISATION
DE LA LT10PCSC
1. Enlevez le
couvercle de la
pile en tournant
le capuchon
dans le sens
antihoraire et
en le soule-
vant.
2. Prenant soin de ne pas plier les
contacts, insérez la pile, bout positif
dans le fond.
3. Remettez le couvercle en le poussant
et le tournant vers la droite jusqu’à ce
que vous entendiez un déclic.
4. Pour utiliser la tondeuse, réglez
l’interrupteur en position de marche.
5. Après l’usage, réglez l’interrupteur en
position d’arrêt.
* Le modèle LT10WCSC nécessite 1 pile
AA (non incluse). Si vous prévoyez ne pas
utiliser la tondeuse pendant un certain
temps ou si la pile est morte, enlevez la pile.
La tondeuse durera ainsi plus longtemps.
TOUT D’ABORD
CHANGER LA TÊTE DE COUPE
Commencez à la position verrouillée (ill. 1).
Tenez la poignée de la tondeuse tout en
tournant la tête dans le sens antihoraire
jusqu’à ce que le petit triangle sur la tête
soit aligné avec le point sur la poignée
(ill. 2). La tête devrait alors se séparer
facilement (ill.3). Pour poser une autre tête,
alignez le petit triangle de la tête avec le
point de la poignée et tournez dans le sens
horaire pour alignerles deux triangles.
DÉCOUPAGE
1. La tondeuse de ligne de bikini (3/4 po)
est superbe pour donner forme et défi-
nition. Il est préférable d’avoir les poils
propres et lègèrement humides.
2. Débutant sur le côté, utilisez les lames
pour définir la forme.
3. Pour raccourcir les poils, laissez
courir les lames sur les poils jusqu’à
l’obtention de la longueur voulue en
passant à plusieurs reprises dans un
mouvement de balayage.
4. Deux peignes accessoires fournissent
5 positions de coupe pour le découp-
age fin.
TAILLER LES SOURCILS
Attachez la tête an-
gulée de tondeuse
3/8 po sur la-quelle
vous posez le pei-
gne à sourcils. Ce
peigne offre deux
positions.
Au départ, utilisez le
réglage le plus long (vous pouvez toujours
faire une deuxième passe pour raccourcir
les sourcils). Faites glisser le peigne à
sourcils sur la tête de la tondeuse jusqu’à
ce qu’il s’enclenche
solidement. Partez
du centre du sourcil
et procédez à coups
doux et uniformes.
Ne taillez jamais à
contre-poil sinon
vos sourcils seront
très courts. Enlevez le peigne puis taillez et
définissez la forme du sourcil. Déplacez la
tondeuse lentement pour tailler avec plus
de précision.
Ill 1. Ill 2. Ill 3.
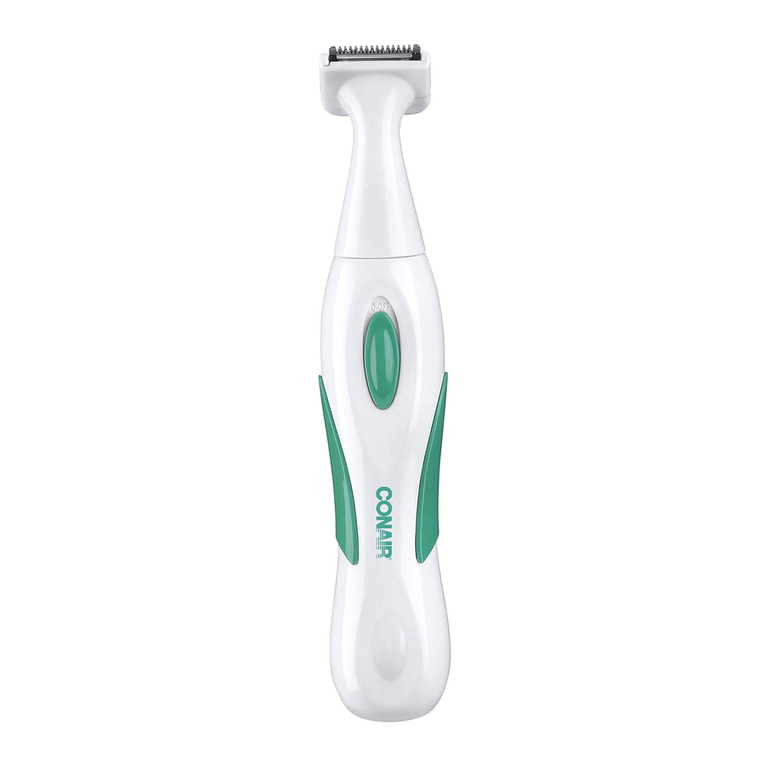
Table of contents
Other Conair Trimmer manuals

Conair
Conair For Men GMT836C User manual

Conair
Conair SuperStubbler GMT1000C User manual

Conair
Conair GMT255CSC User manual

Conair
Conair C794299A Nomad Owner's manual

Conair
Conair Precision Bikini User manual

Conair
Conair i-STUBBLE User manual

Conair
Conair TwinXTrim GMT155 User manual

Conair
Conair SuperStubbler GMT1000C User manual

Conair
Conair lumilisse 794281 Series User manual

Conair
Conair Precision Bikini User manual