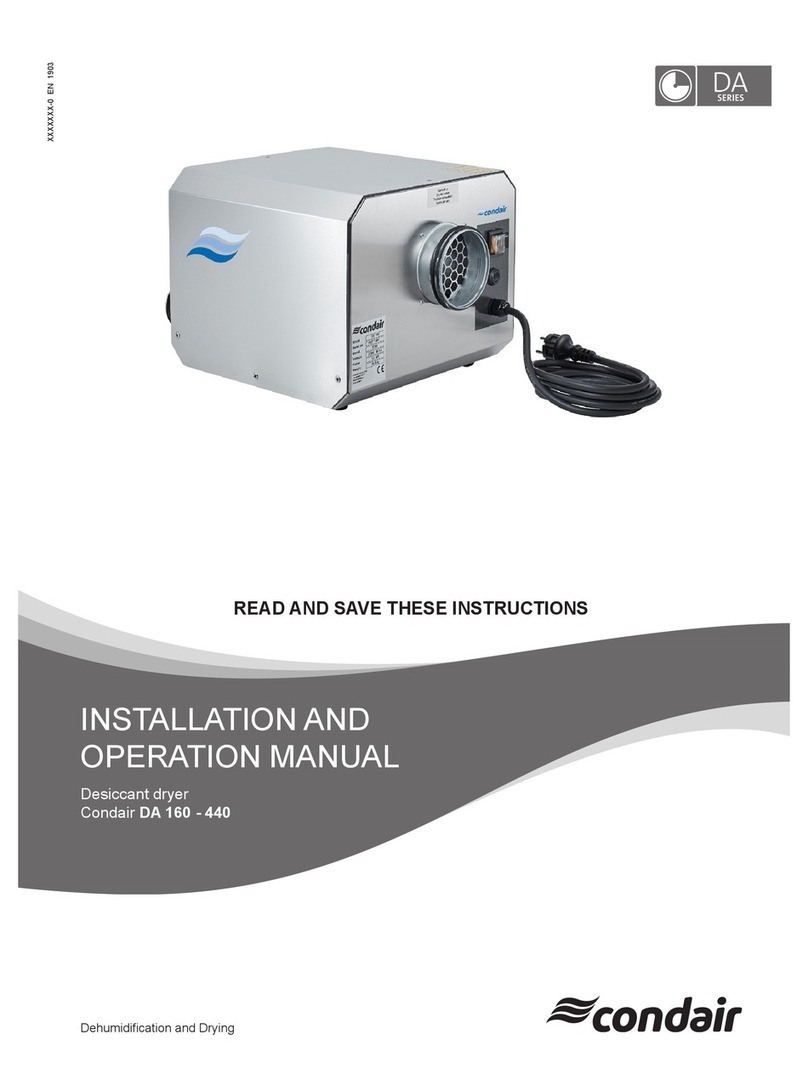
Condair DA 500-4000 Freezer Installation and operating instructions

2605173-0 EN 2211
Dehumidication and Drying
READ AND SAVE THESE INSTRUCTIONS
Desiccant dryer
Condair DA 500-4000 Freezer
ADDENDUM MANUAL

Thank you for choosing Condair
Installation date (MM/DD/YYYY):
Commissioning date (MM/DD/YYYY):
Site:
Model:
Serial number:
Proprietary Notice
This document and the information disclosed herein are proprietary data of Condair Group AG. Neither this docu-
ment, nor the information contained herein shall be reproduced, used, or disclosed to others without the written
authorization of Condair Group AG, except to the extent required for installation or maintenance of recipient's
equipment.
Liability Notice
Condair Group AG does not accept any liability due to incorrect installation or operation of the equipment or due
to the use of parts/components/equipment that are not authorized by Condair Group AG.
Copyright Notice
© Condair Group AG, All rights reserved.
Technical modications reserved

3Contents
Contents
1 Introduction 5
1.1 To the very beginning 5
1.2 Notes on the addendum manual 5
2 For your safety 7
3 Important notes 8
4 Product overview 9
4.1 Product designation 9
4.2 Applications 10
4.3 Operation principle 10
4.4 Product description 11
4.4.1 Casing 11
4.4.2 Rotor 11
4.4.3 Air lters 11
4.4.4 Fans for process- and reactivation air 11
4.4.5 Heater for reactivation air 12
4.4.6 Electrical cabinet 12
4.4.7 Operation Options 12
5 Installation 13
5.1 Installation and service access 13
5.2 Duct connections 13
5.2.1 Wet air duct 13
5.2.2 Reactivation air into the desiccant dryer 14
5.2.3 Process- and dry air ducts 14
5.2.4 Installation schematics 15
5.3 Electrical installation 15
6 Commissioning 16
7 Maintenance 17
7.1 Important notes on maintenance 17
7.2 Filters 18
7.3 Rotor 18
7.4 Rotor seals 19
7.5 Electrical motors 19
7.6 Heater 19
7.7 Rotor drive belt 19
7.8 General summary of maintenance intervals 19
8 Troubleshooting 20
9 Productspecication 21
9.1 Technical Data 21

5Introduction
1 Introduction
1.1 To the very beginning
We thank you for having purchased a Condair DA 500 - 4000 Freezer desiccant dryer (for short:
Condair DA).
The Condair DA desiccant dryers incorporate the latest technical advances and meets all recognized
safety standards. Nevertheless, improper use of the Condair DA desiccant dryer may result in danger
to the user or third parties and/or damage to property.
To ensure a safe, proper, and economical operation of the Condair DA desiccant dryer, please observe
and comply with all information and safety instructions contained in this addendum manual.
If you have questions after reading this documentation, please contact your Condair representative.
They will be glad to assist you.
1.2 Notes on the addendum manual
Limitation
The subject of this addendum manual are the Condair DA 500 - 4000 desiccant dryers in their
different versions. The various options and accessories are only described insofar as this is necessary
for proper operation of the equipment. Further information on options and accessories can be obtained
in the respective manuals.
This installation and operation manual is restricted to the installation, operation and maintenance of
the Condair DA desiccant dryer and is meant for well-trainedpersonnelbeingsufcientlyqualied
for their respective work.

6Introduction
Symbols used in this manual
NOTE!
The catchword “NOTE” used in conjunction with the hand symbol designates important notes in this
manual that require special attention.
CAUTION!
The catchword "CAUTION" used in conjunction with the caution symbol in the circle designates notes
in this operation manual that, if neglected, may cause damage and/or malfunction of the unit or
other material assets.
WARNING!
The catchword "WARNING" used in conjunction with the general caution symbol designates safety
and danger notes in this operation manual that, if neglected, may cause to injury to persons.
DANGER!
The catchword "DANGER" used in conjunction with the general caution symbol designates safety and
danger notes in this operation manual that, if neglected, may lead to severe injury or even death
of persons.
Safekeeping
Please safeguard this addendum manual together with the Condair DA installation and operation manual
in a safe place, where it can be immediately accessed. If the desiccant dryer changes hands, the ad-
dendum manual and the installation and operation manual must be passed on to the new operator.
If the documentation gets misplaced, please contact your Condair representative.
Language versions
This addendum manual is available in other languages. Please contact your Condair representative for
information.

7For your safety
2 For your safety
Note: It is mandatory that you observe and follow all the safety information in section 2 of the installation
and operation manual for the Condair DA 500-4000 desiccant dryer.

8Important notes
3 Important notes
Note: It is imperative that you observe and follow the important information on delivery, transport and
storage in section 3 of the installation and operation manual for the Condair DA 500-4000 desiccant dryer.

9Product overview
4 Product overview
4.1 Product designation
The product designation and the most important unit data are found on the specication label xed on
the right side below the operation panel (see example below):
Model DA 500
Serial no. 1927 1901
Manuf. 2022
Voltage 400 V, 50 Hz
Power 4,5 kW
Weight 185 kg
Condair Group AG
Gwattstrasse 17
8808 Pfäfkon
Switzerland
Fig. 1: Specication label

10 Product overview
4.2 Applications
The Condair desiccant dryers are based on the sorption principle (see description of the operating
principle in the installation and operation manual), which removes unwanted humidity from the air at
normal atmospheric pressure. With the Freezer version, Condair offers a special design for the device
sizes DA 500-4000, specially designed for use in the deep-freeze area. Compared to the standard DA
500-4000 dryer series, this device series has, among other features a 100 mm thick insulated AISI 304
stainless steel housing.
The desiccant dryer is designed for continuous operation and can be used at air temperatures from
-25 °C to +20 °C and humidity values of up to 100% RH.
Note: For operating conditions outside the above temperature range, please contact your Condair partner.
The Condair DA freezer units have been developed over many years and constantly been optimized
with regard to the aforementioned freezing temperatures. By completely eliminating critical thermal
bridges on the housing and by precisely matching key components such as the fans, the rotor and
the heating elements for example, high efciency and safety in system operation are optimized. The
special design allows the unit to be placed outside of the actual freezer area, where the installation of
the dryer often conicts with the storage area. By installing the dryer outside of the deep-freeze area,
valuable storage and useable space remain free. The application-optimized design of the Condair DA
Freezer desiccant dryer also eliminates the requirement for a complex and expensive installation of a
pre-heater. The Condair DA Freezer desiccant dryers are therefore the optimal solution for use in cold
stores, test rooms and applications with similar requirements, also in terms of cost-effectiveness, both
in procurement and operation.
4.3 Operation principle
The operation principle of the DA Freezer desiccant dryer is identical to that of the Condair DA 500-4000
standard devices. Please note the information in section 4.3 of the installation and operation manual for
the Condair DA 500-4000 desiccant dryer.

11Product overview
4.4 Product description
The Condair DA 500-4000 Freezer desiccant dryers with applied ducting meet the requirements of IEC
protective class IP23. The electrical panel meets the requirements of IEC protective class IP44.
4.4.1 Casing
The sandwich-panel housing is made of AISI 304 stainless steel and is lled with 100 mm of insulation
material. The internal structure is made of Aluzinc®. The heavily insulated construction, with a sealing
prole on the housing, is optimized against thermal bridges and achieves a high degree of tightness.
The service-friendly design allows easy access to internal components via a removable front panel.
4.4.2 Rotor
The desiccant dryer has a drying rotor made of 82% desiccant silica gel, 16% breglass and 2% adhe-
sive sealant. The rotor has a matrix of corrugated and at heat resistant sheets, which houses the Silica
Gel desiccant agent. This matrix creates a large number of axial utes through the rotor, which together
builds up an immense surface area for moisture adsorption in a small volume. The rotor is manufactured
and processed to be able to withstand moisture-saturated air without being damaged. Furthermore, the
rotor will not be damaged even if the fan or the heater for reactivation should fail during operation. The
desiccant rotor is tested according to ASTM E84-18b, and the results are Flame Spread Index (FSI) 0
and Smoke Developed Index (SDI) 0.
Rotor sealings
The rotor has two peripheral seals (PTFE/Silicone) on the rotor casing and four radial seals (PTFE)
Rotor drive system
An electrical gear motor and a belt drive achieve the slow rotation of the rotor. The belt sits on the outer
rim of the rotor and is driven by a pulley on the drive motor. A belt tension device keeps the belt in place
and maintains tension to prevent belt slip. Correct operation of the drive system, and direction of rotation
can be checked by opening the front panel.
The centre hub of the rotor is equipped with ball bearings. The rotor shaft is made from stainless steel.
4.4.3 Airlters
Two separate air lters class ISO coarse ≥65% are installed on the inlet of each air ow. These lters
protect primarily the internal components from dust.
4.4.4 Fans for process- and reactivation air
The device is equipped with two directly driven centrifugal fans, IP54 and ISO F, installed in the device.
The exact type can be found in the respective wiring diagram.

12 Product overview
4.4.5 Heater for reactivation air
For the units with electrical reactivation air heating, the reactivation heater is of the PTC-type (Positive
Temperature Coefcient). These special PTC heating elements are additionally protected against wet-
ness and moisture and offer the usual protection against overheating.
4.4.6 Electrical cabinet
The electrical cabinet is located in a separate compartment on the service side of the desiccant dryer.
The main switch and PLC display are located on the front on the right-hand side.
4.4.7 Operation Options
The operation of the desiccant dryer with a description of the built-in PLC can be found in the separate
PLC controller manual.

13Installation
5 Installation
5.1 Installation and service access
As standard the Condair desiccant dryer is designed for indoor installation, and must be installed in
horizontal position on its feet, preferably bolted to the oor.
The ambient conditions at the place of installation should be within the range:
– Ambient temperature: 0 °C to +30 °C (with reduced reactivation heat output up to +35 °C)
– Ambient humidity: 10-60 %rh (Ambient humidities of ≥60%RH require installation in a conden-
sate tray)
A weatherproof version is available on request.
For maintenance work, there should be a minimum distance (clearance) of 1,000 mm on the service
side of the desiccant dryer.
5.2 Duct connections
The DA Freezer desiccant dryer must be installed outside the room to be dehumidied.
All air duct connections are prepared for the connection of standard spiral ducts.
5.2.1 Wet air duct
If possible, the wet air from the desiccant dryer should be exhausted to the outside.
Depending on the installation situation, the wet air duct must be insulated and either installed with a
gradient of >2° starting from the desiccant dryer, or provided with a condensate drain at the lowest point.
There is a risk of condensate accumulation in the wet air duct and consequently in the device. To avoid
this, e.g. a ø4-6 mm hole at the lowest point of the wet air duct after the desiccant dryer must be provided.
The wet air duct should have a maximum pressure drop of 50 Pa. A higher pressure drop in the wet air
duct can lead to undesired device-internal inltration and must be compensated for by a damper in the
dry air duct if necessary.
In order to protect the desiccant dryer from incoming moisture when it is not in operation, an on-site
motorized damper is required in the wet air duct, which closes synchronously with the damper in the
reactivation air duct. When the desiccant dryer is switched off, the reactivation air fan continues to run
for a few seconds to prevent heat build-up in the reactivation section. The duration of the cooling cycle
must be taken into account when controlling the on-site motorized dampers.
Since there is a risk that the wet air temperature could exceed +80°C, it is recommended to insulate the
wet air duct system and to equip the wet air duct with an appropriate warning sign.
The wet air outlet to the outside should be protected with a coarse wire net.

14 Installation
5.2.2 Reactivation air into the desiccant dryer
The reactivation air duct to the desiccant dryer should be as short as possible. The intake opening of the
duct should have a coarse wire net, to stop foreign objects from entering the desiccant dryer.
Alternatively, the room air can also be used for reactivation.
Depending on the prevailing temperatures at the installation site, there is also a risk of condensation
forming in the regeneration air duct. For this purpose, an on-site condensate drain must be installed to
avoid condensate accumulation.
In order to protect the desiccant dryer from incoming moisture when it is not in operation, an on-site
motorized damper is required in the reactivation air duct, which closes synchronously with the damper
in the wet air duct. When the desiccant dryer is switched off, the reactivation air fan continues to run
for a few seconds to prevent heat build-up in the reactivation section. The duration of the cooling cycle
must be taken into account when controlling the on-site motorized damper.
The reactivation air ow is controlled by a damper in the inlet duct of the reactivation air.
The air ow must be measured during commissioning and the damper adjusted accordingly. For a
solution with a speed-controlled fan, please contact your Condair representative (see also installation
schematics in chapter 5.2.4).
5.2.3 Process- and dry air ducts
The ducting of the exhaust and supply air of the room to be dehumidied must be as airtight as possible
and adequately insulated for the temperatures to be expected.
The dried supply air should preferably be routed directly to the evaporator. The air is warmed up by the
dehumidication process and the drying process prevents icing on the cooling ns.
Alternatively, it also makes sense that the dried air is introduced above the opening, of the cold room
door, as this is where the moisture load is at its highest and, depending on the implementation, has an
inltration-inhibiting effect.
The process air ow is trimmed by installing a damper on site in the process air inlet duct. For a solution
with a speed-controlled fan, please contact your Condair representative.

15Installation
5.2.4 Installation schematics
Damper
Motorized
damper
Condensate drain
with trap
Condensate drain
with trap Motorized
damper
Damper
Wet air duct (4)
Delivery Condair
Reactivation air duct (3)
Process air duct (1)
Wet air
Out
Process air
In
Dry air duct (2)
Dry air
Out
Reactivation
air In
Fig. 2: Installation schematics
1 Process air duct
To adjust the airow to the required value during commissioning, the air ow needs to be adjusted
manually with a damper, which is installed at the process air inlet. The process inlet air damper is
not required if the system is tted with fan speed control option.
2) Dry air duct:
The dry air duct should have the lowest possible pressure drop (check available static pressure),
also to prevent unnecessary positive pressure building up in the dry air chamber inside the unit.
3) Reactivation air duct:
In order to adjust the correct air ow during commissioning, the air ow must be trimmed manually
using an on-site damper element in the reactivation air inlet duct. Depending on the ambient tem-
peratures at the installation site, there is a risk of condensate forming in the reactivation air duct. In
order to avoid any accumulation of condensate, the reactivation air duct should have a condensate
drain at the lowest point.
In order to protect the reactivation section of the dryer from condensate and ice formation when
not in operation, a motorized damper must be installed on site in the reactivation air duct, which
closes automatically when there is no demand for dehumidication. This damper must be switched
synchronously with the motorized damper in the wet air duct.
4) Wet air duct:
The wet air duct should be isolated and as short as possible, with a maximum pressure drop of
50 Pa. In the wet air duct, there is a risk of condensation. To prevent a collection of condensate,
this duct should slope down in angle of at least >2° or has a condensate drain on its lowest point.
In order to protect the reactivation section of the dryer from condensate and ice formation when not
in operation, a motorized damper must be installed on site in the wet air duct, which closes automati-
cally when there is no demand for dehumidication. This damper must be switched synchronously
with the motorized damper in the reactivation air duct.
5.3 Electrical installation
See Appendix 1 – electrical wiring diagram.

16 Commissioning
6 Commissioning
Note: Observe and follow the information on commissioning in section 6 of the installation and operation
manual for the Condair DA 400-5000 desiccant dryer.

17Maintenance
7 Maintenance
7.1 Important notes on maintenance
Qualicationofpersonnel
All maintenance work must be carried out only by well qualied and trained personnel authorised by the
owner. It is the owner’s responsibility to verify proper qualication of the personnel.
General note
The instructions and details for maintenance work must be followed and upheld.
Only the maintenance work described in this documentation may be carried out.
Only use original Condair spare parts to replace faulty parts.
Safety
Some maintenance work requires removal of the unit covers. Please note the following:
DANGER!
Danger of electric hazard!
The Condair DA desiccant dryer is mains powered. Live parts may be exposed when the unit
is open. Touching live parts may cause severe injury or danger to life.
Prevention: Before carrying out any work set the Condair DA desiccant dryer out of operation (switch
off the unit, disconnect it from the mains) and secure the unit against inadvertent power-up.
WARNING!
Risk of injury!
Inside the Condair DA desiccant dryer there are moving parts present, which can cause seri-
ousinjurytohandsandngers.
Prevention: Before carrying out any work set the Condair DA desiccant dryer out of operation (switch
off the unit, disconnect it from the mains) and secure the unit against inadvertent power-up.
Keep hands or other body parts away from moving parts.
WARNING!
Risk of burns!
Inside the Condair DA desiccant dryer are heating element present, which can cause burns if
touched.
Prevention: Before carrying out any work set the Condair DA desiccant dryer out of operation (switch
off the unit, disconnect it from the mains), secure the unit against inadvertent power-up, and wait at
least 15 minutes prior to opening any service panel, allowing the heater to cool down.
The maintenance intervals for the desiccant dryer depend on the surrounding environment and instal-
lation site. Recommended maintenance intervals could therefore differ from one installation to another.
Incorrect maintenance and service may result in reduced dehumidication capacity.

18 Maintenance
7.2 Filters
The desiccant dryer is equipped with two air lters, one for the process air and the other for the reactiva-
tion air. The lters are positioned at the respective inlets of the desiccant dryer. If required, the desiccant
dryer can be factory-equipped with air differential pressure switches for lter monitoring.
The lters should be checked at least once a month, especially in the early stages of operation, to detect
heavy air pollution or icing problems. It is recommended to equip at least the reactivation air lter with a
lter guard ex works, as there is a risk of icing depending on the operating conditions on site.
In addition, long-term high relative humidity >90% in the process air or incorrect operation of the desic-
cant dryer can lead to icing on the process air lter.
There is a service alarm in the PLC, which is activated after a specied time to ensure that the lters are
checked regularly. The interval should be adjusted according to local requirements.
CAUTION!
Never operate the desiccant dryer without the lters, as the rotor can be damaged by dust.
7.3 Rotor
The rotor is maintenance free. However should it be necessary to clean the rotor the rst choice should
be careful use of compressed air. With severe contamination, the rotor can be washed with water.
Cleaning with water is no routine matter; please contact your Condair representative.
Check the rotor bearing and the rotor surface once a year.
Note: Due to the effects of heat during the reactivation process, the white color of the desiccant rotor
changes to beige or brownish over time. This is normal and does not affect rotor performance.
DA desiccant dryers with built-in PLC have inductive rotor guard as standard. This feature is not avail-
able for units without PLC.
CAUTION!
Airborne chemical compounds, e.g. oily vapors or solvents can also be adsorbed by the rotor and
permanently reduces its capacity.

19Maintenance
7.4 Rotor seals
As with the air lters, the rotor seals should also be checked monthly, especially in the initial operating
phase, and then every quarter, since unfavorable or incorrect operation of the DA desiccant dryer, e.g.
operation with a constant process air ow, icing and increased wear on the rotor seals can occur. There
is service alarm in the PLC for this purpose, which can be adjusted as required.
7.5 Electrical motors
All electric motors are maintenance-free and do not require servicing or lubrication.
Check the motors for abnormal sound once a year.
7.6 Heater
The electric reactivation heater does not need maintenance, but should be checked twice a year for any
mechanical damage to the heating elements.
7.7 Rotor drive belt
Check the belt tensioning at regular intervals. The tension is maintained constantly by the belt tensioner,
and should not need to be adjusted during normal operation. Please note that the belt tension should
not be too tight as this can damage the drive motor.
7.8 General summary of maintenance intervals
Filter Rotor
bearing Motors Rotor
drive Heater Seals
As required x*
Every 3th month x*
Every 6th month x x
Every 12th month x x
* Check monthly in the initial phase

20 Troubleshooting
8 Troubleshooting
Note: For troubleshooting, observe the information in section 8 of the installation and operation manual
for the Condair DA 500-4000 desiccant dryer.
Other manuals for DA 500-4000 Freezer
1
Table of contents
Other Condair Dryer manuals