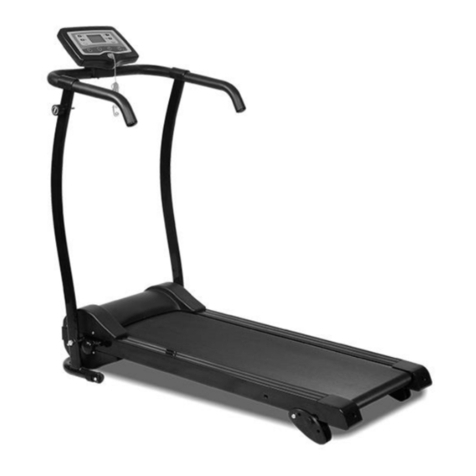
Confidence Fitness Power Plus User manual

Confidence
Fitness
Power Plus Treadmill

Parts List
Accessories
Part Quantity Quantity
1 1 M6* Inner Hexagonal Spanner
2 1 M6* 40 Inner Hexagonal Screw
3 1 M12* 50 Inner Hexagonal Screw
4 1 Emergency Stop Magnet
5 2 Toe Cap
6 2 M5*10 Screw
7 1 ocking Pin
Technical Specifications
Product Name Power Plus Electric Treadmill
Voltage Rate 220-240V
Rated Frequency 50/60HZ
Rated Power 600W
aximum User Weight 120Kgs

Warning & Safety Information
1. Ensure that you read the manual carefully before attempting to assemble or use
Confidence Power Plus Treadmill.
2. The Confidence Power Plus Treadmill must be positioned on a firm flat surface.
3. Should any electrical work be required on the Confidence Power Plus Treadmill please
ensure it is carried out by a qualified electrician.
4. The Confidence Power Plus Treadmill is designed for indoor use only. It is not to be used
outdoors.
5. Do not position the Confidence Power Plus Treadmill on a deep thick carpet as air
needs to be able to circulate underneath.
6. Always wear the correct clothing when using the Confidence Power Plus Treadmill. Do
not wear loose or long clothing as this may get caught in the moving belt.
7. Always ensure that correct foot wear is worn.
8. Do not stand on the Confidence Power Plus Treadmill belt before operating. Position
your feet on either side of the treadmill belt and as the motor starts step onto the
treadmill. Do not step on the belt if the Confidence Power Plus Treadmill is at full speed.
9. Before stepping onto the Confidence Power Plus Treadmill make sure that the
emergency cord is attached to you. If the emergency magnet becomes detached from
the control panel the treadmill will then stop.
10. Do not allow children or pets near the Confidence Power Plus Treadmill when in use.
11. Children and elderly should only use the Confidence Power Plus Treadmill under adult
supervision.
12. Always unplug the Confidence Power Plus Treadmill from the main power supply when
not in use.
13. Regularly clean the Confidence Power Plus Treadmill after use. Remove any dust and
sweat from the handles and the running belt. Use a light soapy water mixture to clean
the running belt. NEVER USE A C EANSER.
14. When the Confidence Power Plus Treadmill is not in use for an extended period fold
away it away and store in a clean dry place.
15. If any part of the electrical cable or plug is loose or becomes worn, do not use the
Confidence Power Plus Treadmill and have a qualified electrician inspect the problem.
16. The Confidence Power Plus Treadmill is not a toy and is not intended for use by persons
(including children) with any physical or mental conditions. The Confidence Power Plus
Treadmill should not be used by any person who has not read and understood the
manual.
17. If the user has had any prior medical condition they should consult a doctor before use.

Assembly Instructions
1. Open the box and remove the Confidence Power Plus Treadmill from the box.
2. Remove the plastic from the Confidence Power Plus Treadmill.
3. Position the handrail and insert the screw in hole provided.
4. Mount the Toe Cap provided and align it with the screw hole. Fix it in place with the 1
M5*10 screw. Repeat for the other side.

5. Take the control panel and position onto the handrail. Fix in place with M6 inner
hexagonal screw and tighten securely.
6.
7. Insert the Magnet Emergency Connector onto the control panel (photo 6).
8. Screw the ocking Pin into position (photo 7).

Control Panel
1. Plug the Confidence Power Plus Treadmill into the main power socket and place the
Emergency Stop Magnet on the Emergency Stop Switch.
2. The control panel will beep to indicate that the panel is on and in the standby mode.
The ED display will then flash ------.
3. Before starting the Confidence Power Plus Treadmill attach the emergency stop
magnet to your waist band.
Preset Speed and Running Time
1. Once the Confidence Power Plus Treadmill is in the standby mode press the Mode
button once and the ED screen will flash ------. You can now set the speed to one of the
3 set speed settings.
2. To go to preset mode 1 press the +speed button once.
3. To go to preset mode 2 press the + speed button two times.
4. To go to preset mode 3 press the + speed button three times.
5. Once you have selected the speed setting, select the exercise time period. Press the
mode button once and a default time of 10 minutes will be displayed. This can be
altered to the desired exercise time by pressing the speed + or –button. The time setting
can be set between 5 minutes and 30 minutes.
6. Once the exercise time has been set start the Confidence Power Plus Treadmill by
pressing the On button. The control panel will now count down from 3 and the running
belt will start.
7. To stop the machine at any time press the off button or pull the emergency stop magnet
from the stop switch.

anual Selection of Running Speed
1. Once the Confidence Power Plus Treadmill is in the standby mode press the On button
once. The control panel will beep and count down from 3 and then the running belt will
start at the default speed of 1.0.
2. Carefully step onto the moving belt and once comfortable the speed can be increased
by pressing the speed button + or decreased by pressing the speed button -
3. The maximum speed the Confidence Power Plus treadmill can be increased to is 10.0.
Adjusting the Running Belt
1. The running belt on the Confidence Power Plus Treadmill will shift slightly after
continuous use. This is normal for all treadmills.
2. To straighten/adjust the running belt turn the adjusting bolt on either side of the base,
see figure 1 and 2.
3. Do not allow for the running belt to catch the sides of the Confidence Power Plus
Treadmill as this will tear the belt.
aintenance
1. Before moving or cleaning your Confidence Power Plus Treadmill unplug it from the
main power supply.
2. Always clean the Confidence Power Plus Treadmill with a damp cloth avoiding the
control panel. DO NOT USE COURSE CLEANING AGENTS
3. Clean the power switch and control panel with a soft dry cloth. DO NOT USE A WET
CLOTH IN THESE AREAS.
4. Do not use your treadmill in wet, damp conditions or high dust areas as this can cause
damage to the Confidence Power Plus Treadmill.
5. Always use the Confidence Power Plus Treadmill on a level surface.

Folding Away the Confidence Power Plus
Treadmill
1. Turn off the Confidence Power Plus Treadmill. Remove from the mains power supply
2. oosen the ocking Pin.
3. ift up the base and tell the hole in the base aligns with the hole in the frame work and
then tighten the locking pin.

Preset Speed and Running Time
P1----The default time is 10 minutes
Order 1 2 3 4 5 6 7
Speed 1.0
3.0
5.0
7.0
5.0
3.0
1.0
Work time(seconds) 60 60 60 240
60 60 60
P2----The default time is 10 minutes
Order 1 2 3 4 5 6 7 8 9 10
Speed 2.0
3.0
4.0
5.0
6.0
5.0
4.0 3.0
2.0
3.0
Work time(seconds) 30 30 30 30 60 30 30 30 60 30
Order 11 12 13 14 15 16 17
Speed 4.0
5.0
6.0
5.0
4.0
3.0
2.0
Work time(seconds) 30 30 60 30 30 30 30
P3----The default time is 10 minutes
Order 1 2 3 4 5 6 7 8 9 10
Speed 3.0
5.0
8.0
5.0
8.0
5.0
8.0 5.0
8.0
5.0
Work time(seconds) 30 30 30 30 30 30 30 30 30 30
Order 11 12 13 14 15 16 17 18 19 20
Speed 8.0
5.0
8.0
5.0
8.0
5.0
8.0 5.0
8.0
5.0
Work time(seconds) 30 30 30 30 30 30 30 30 30 30


Confidence
Fitness
UK & Europe
www.shop247.co.uk
Units 3 & 4 Lower Park Farm
Storrage Lane
Alvechurch, Worcestershire B48 7ER
United Kingdom
Telephone: 01527 598388
USA
www.shop247.com
Suite 110-120
16 Sunset Way
Henderson, Nevada 89014
Telephone: 1-800-603-0004
AUS/NZ
www.shop247.com.au
Unit 7/350 Edgar Street
Condell Park, NSW 2018
Australia
Phone: 1300 795 828
Table of contents
Other Confidence Fitness Treadmill manuals
Popular Treadmill manuals by other brands

Tempo Fitness
Tempo Fitness 632T owner's manual

Nautilus
Nautilus Be Strong Commerical T916 Owner's and assembly manual addendum

Sears
Sears Pro-Form CROSS WALK owner's manual

Reebok
Reebok Z7 Assembly guide

York Fitness
York Fitness Treadmill owner's manual

Vision Fitness
Vision Fitness T9800S Engineering guide