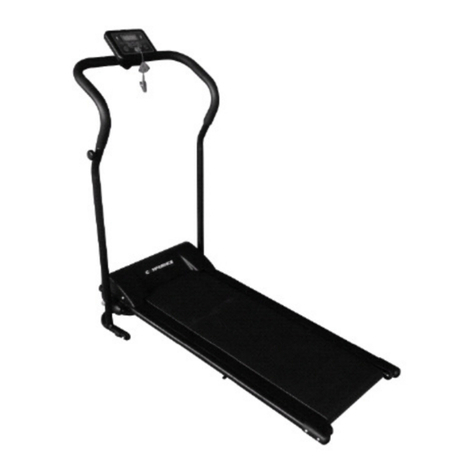
Confidence Fitness Power Trac User manual

Confidence
Fitness
Power Trac Treadmill

Parts List
Accessories
Part
Quantity
Quantity Part
Quantity
Quantity
1 1 M12x50 Locking pin(Lower) 6 1 Allen/Hex Key
2 1 M6x14 screw 7 1 T wrench Key
3 1 Red emergency stop magnet
8 4 M8x50 Screws
4 2 Handrail screw covers 9 1 Spring Locking pin (Upper)
5 2 M5x10 Screw 10 2 Toe Caps
Technical Specifications
Product Name Power Trac Electric Treadmill
Voltage Rate 220-240V
Rated Frequency 50/60HZ
Rated Power 600W
Maximum User Weight 120Kgs

Warning & Safety Information
1. Ensure that you read the manual carefully before attempting to assemble or use Confidence Power Trac Treadmill.
2. The Confidence Power Trac Treadmill must be positioned on a firm flat surface.
3. The Confidence Power Trac Treadmill is designed for indoor use only. It is not to be used outdoors.
4. Do not position the Confidence Power Trac Treadmill on a deep thick carpet as air needs to be able to circulate
underneath.
5. Always wear the correct clothing when using the Confidence Power Trac Treadmill. Do not wear loose or long
clothing as this may get caught in the moving belt.
6. Always ensure that correct foot wear is worn.
7. Do not stand on the Confidence Power Trac Treadmill belt before operating. Position your feet on either side of the
treadmill belt and as the motor starts step onto the treadmill. Do not step on the belt if the Confidence Power Trac
Treadmill is at full speed.
8. Before running on the Confidence Power Trac Treadmill make sure that the emergency cord is attached to you. If
the emergency magnet becomes detached from the control panel the treadmill will then stop.
9. Do not allow children or pets near the Confidence Power Trac Treadmill when in use.
10. Children and elderly should only use the Confidence Power Trac Treadmill under adult supervision.
11. Always unplug the Confidence Power Trac Treadmill from the main power supply when not in use.
12. Regularly clean the Confidence Power Trac Treadmill after use. Remove any dust and sweat from the handles and
the running belt. Use a light soapy water mixture to clean the running belt. NEVER USE A ROUGH CLEANING AGENT.
13. When the Confidence Power Trac Treadmill is not in use for an extended period fold away it away and store in a
clean dry place.
14. If any part of the electrical cable or plug is loose or becomes worn, do not use the Confidence Power Trac Treadmill
and have a qualified electrician inspect the problem.
15. The Confidence Power Trac Treadmill is not a toy and is not intended for use by persons (including children) with
any physical or mental conditions. The Confidence Power Trac Treadmill should not be used by any person who has
not read and understood the manual.
16. If the user has had any prior medical condition they should consult a doctor before use.

Assembly Instructions
Remove the plastic from the Confidence Power
Trac Treadmill.
Screw the locking screw into the posit
ion.(found
in the accompanying bag)
At the front of the belt, on the left side just below
the base of the handrail, to secure the treadmill.
Mounting the plastic Toe cap
Align the plastic Toe cap with the screw hole,
screw in place with accompanying M5*12 Screw
with small gasket.
Screw the locking pin into position(found in the
accompanying bag)

Mounting the control panel
Align the control panel with the screw hole,
screwing in place with accompanying M6 screw.
Mount the handrail on frame leg and tighten
screw with accompanying Allen key, Fasten the
Handrail decorative cover over the screws on the
handrail
Mount the modular contact in the outlet on the
right frame leg.
Put the
Emergency Stop Magnet on the control
panel.

Control Panel
1. Plug the Confidence Power Trac Treadmill into the mains power socket, switch on the red power switch which
located at the back of treadmill, and place the emergency stop magnet on the emergency stop switch.
2. The control panel will beep to indicate that the panel is on, the LCD will display Program Code" F10" for a second
then the LCD will fully display for a second and then beep to indicate that the panel is in the standby mode.
3. In Manual standby mode, the initial SPEED displays 0.0 KM/H; TIME displays 0:00; DIST shows 0.0; CAL shows 0.
A. Under the manual standby mode, by pressing the MODE key, you can choose normal, preset time or preset
distance to run. Normal setting - the treadmill will stop after work 60 minutes.
B. Under the preset setting, the initial time is 30:00 minutes, by pressing "+/-" keys you can adjust from 5:00-99:00
minutes and the treadmill will stop when the time displays "0".
C. Under the preset distance setting, the initial distance is 1.00KM, which can be adjusted by pressing "+/-" key to
0.50-1.00-1.50-99.5KM.
4. In manual standby mode, by pressing the PROGRAM key you can choose from 12 different programs. See next page
for each programs function. For programs P1 - P12, the initial work out time is 30 minutes and by pressing "+/-”key
you can adjust the running time from 5 to 99 minutes.
5. In the standby mode, the shortcut speed buttons are turned off. By pressing the stop key all return to Manual
standby mode.
6. In manual operation mode, by pressing the "+/-" button setting you can adjust the speed from 1.0-10.0 km/h. You
can choose 3 kph, 5 kph, 8kph or 10 kph, by pressing the shortcut speed keys. In automatic operation mode, "+/-"
and shortcuts speed keys are all functional.
7. Under the running status (both in the Automatic and Manual mode), the MODE and PROGRAM keys are non-
functional.
8. In automatic operation mode, you can accelerate or decelerate and use the shortcuts speed keys.
9. Under the running status, press Stop key, to bring the treadmill to a gradual halt and the treadmill will turn into
Manual standby mode, all of the movement parameters will display on the LCD.
10. By removing the Emergency Stop Magnet, the motor will quickly stop the treadmill and the LCD will display "-".
11. In standby or protection mode, without pressing any buttons for 30 seconds, the treadmill will go into standby
mode. In standby mode, press any key to start and the screen will light up.

Programs
P1
Order 1 2 3 4 5 6 7 8 9 10 11 12 13 14 15 16 17 18 19 20
Speed in kph 2.0
3.0
3.0
4.0
5.0
3.0
4.0
5.0
5.0
3.0
4.0
5.0
4.0
4.0
4.0
2.0
3.0
3.0
5.0
3.0
Time(Minutes) 1.5 1.5 1.5 1.5 1.5 1.5 1.5 1.5 1.5 1.5 1.5 1.5 1.5 1.5 1.5 1.5 1.5 1.5 1.5 1.5
P2
Order 1 2 3 4 5 6 7 8 9 10 11 12 13 14 15 16 17 18 19 20
Speed in kph 2 4 4 5 6 4 6 6 6 4 5 6 4 4 4 2 2 5 4 2
Time(Minutes) 1.5 1.5 1.5 1.5 1.5 1.5 1.5 1.5 1.5 1.5 1.5 1.5 1.5 1.5 1.5 1.5 1.5 1.5 1.5 1.5
P3
Order 1 2 3 4 5 6 7 8 9 10 11 12 13 14 15 16 17 18 19 20
Speed in kph 2 4 4 6 6 4 7 7 7 4 7 7 4 4 4 2 4 5 3 2
Time(Minutes) 1.5 1.5 1.5 1.5 1.5 1.5 1.5 1.5 1.5 1.5 1.5 1.5 1.5 1.5 1.5 1.5 1.5 1.5 1.5 1.5
P4
Order 1 2 3 4 5 6 7 8 9 10 11 12 13 14 15 16 17 18 19 20
Speed in kph 3 5 5 6 7 7 5 7 7 8 8 5 9 5 5 6 6 4 4 3
Time(Minutes) 1.5 1.5 1.5 1.5 1.5 1.5 1.5 1.5 1.5 1.5 1.5 1.5 1.5 1.5 1.5 1.5 1.5 1.5 1.5 1.5
P5
Order 1 2 3 4 5 6 7 8 9 10 11 12 13 14 15 16 17 18 19 20
Speed in kph 2 4 4 5 6 7 7 5 6 7 8 8 5 4 4 6 5 5 4 2
Time(Minutes) 1.5 1.5 1.5 1.5 1.5 1.5 1.5 1.5 1.5 1.5 1.5 1.5 1.5 1.5 1.5 1.5 1.5 1.5 1.5 1.5
P6
Order 1 2 3 4 5 6 7 8 9 10 11 12 13 14 15 16 17 18 19 20
Speed in kph 2 4 3 4 5 4 8 7 5 7 8 3 6 4 4 2 5 4 3 2
Time(Minutes) 1.5 1.5 1.5 1.5 1.5 1.5 1.5 1.5 1.5 1.5 1.5 1.5 1.5 1.5 1.5 1.5 1.5 1.5 1.5 1.5
P7
Order 1 2 3 4 5 6 7 8 9 10 11 12 13 14 15 16 17 18 19 20
Speed in kph 2 3 3 3 4 5 3 4 5 3 4 5 3 3 3 6 6 5 3 3
Time(Minutes) 1.5 1.5 1.5 1.5 1.5 1.5 1.5 1.5 1.5 1.5 1.5 1.5 1.5 1.5 1.5 1.5 1.5 1.5 1.5 1.5
P8
Order 1 2 3 4 5 6 7 8 9 10 11 12 13 14 15 16 17 18 19 20
Speed in kph 2 3 3 6 7 7 4 6 7 4 4 4 6 7 4 4 4 2 3 2
Time(Minutes) 1.5 1.5 1.5 1.5 1.5 1.5 1.5 1.5 1.5 1.5 1.5 1.5 1.5 1.5 1.5 1.5 1.5 1.5 1.5 1.5
P9
Order 1 2 3 4 5 6 7 8 9 10 11 12 13 14 15 16 17 18 19 20
Speed in kph 2 4 4 7 7 4 7 8 4 8 9 9 4 4 4 5 6 3 3 2
Time(Minutes) 1.5 1.5 1.5 1.5 1.5 1.5 1.5 1.5 1.5 1.5 1.5 1.5 1.5 1.5 1.5 1.5 1.5 1.5 1.5 1.5
P10
Order 1 2 3 4 5 6 7 8 9 10 11 12 13 14 15 16 17 18 19 20
Speed in kph 2 4 5 6 7 5 4 6 8 8 6 6 5 4 4 2 4 4 3 3
Time(Minutes) 1.5 1.5 1.5 1.5 1.5 1.5 1.5 1.5 1.5 1.5 1.5 1.5 1.5 1.5 1.5 1.5 1.5 1.5 1.5 1.5
P11
Order 1 2 3 4 5 6 7 8 9 10 11 12 13 14 15 16 17 18 19 20
Speed in kph 3 4 5 9 5 9 5 5 5 9 9 5 5 5 9 9 8 7 6 3
Time(Minutes) 1.5 1.5 1.5 1.5 1.5 1.5 1.5 1.5 1.5 1.5 1.5 1.5 1.5 1.5 1.5 1.5 1.5 1.5 1.5 1.5
P12
Order 1 2 3 4 5 6 7 8 9 10 11 12 13 14 15 16 17 18 19 20
Speed in kph 2 5 8 10 7 7 10 10 7 7 10 10 6 6 9 9 5 5 4 3
Time(Minutes) 1.5 1.5 1.5 1.5 1.5 1.5 1.5 1.5 1.5 1.5 1.5 1.5 1.5 1.5 1.5 1.5 1.5 1.5 1.5 1.5

Maintenance
1. Before moving or cleaning your Confidence Power Trac Treadmill unplug it from the main power supply.
2. Always clean the Confidence Power Trac Treadmill with a damp cloth avoiding the control panel. DO NOT USE
ROUGH CLEANING AGENTS.
3. Clean the power switch and control panel with a soft dry cloth. DO NOT USE A WET CLOTH IN THESE AREAS.
4. Do not use your treadmill in wet, damp conditions or high dust areas as this can cause damage to the Confidence
Power Trac Treadmill.
Adjusting the Running Belt
1. The running belt on the Confidence Power Trac Treadmill will shift slightly after continuous use. This is normal for
all treadmills.
2. To straighten/adjust the running belt turn the adjusting bolt on either side of the base, see figure 1 and 2.
3. Do not allow for the running belt to catch the sides of the Confidence Power Trac Treadmill as this will tear the belt.
Folding Away the Confidence Power Trac Treadmill
1. Turn off the Confidence Power Trac Treadmill. Remove from the mains power supply
2. Loosen the Locking Pin.
3. Lift up the base and tell the hole in the base aligns with the hole in the frame work and then tighten the locking pin.

Confidence
Fitness
Distributed globally by
UK & Europe
Shop 247
Units 3 & 4 Lower Park Farm
Storrage Lane
Alvechurch, Worcestershire B48 7ER
United Kingdom
Telephone: 01527 598388
USA –West Coast
Shop247.com Inc
Suite 110-120
16 Sunset Way
Henderson, Nevada 89014
Telephone: 1-800-603-0004
USA –East Coast
Shop247.com Inc
6965-K Northpark Blvd,
Charlotte,
North Carolina 28216
Telephone: 1-800-603-0004
AUS/NZ
Shop247.com.au Pty Ltd
Unit 7/350 Edgar Street
Condell Park, NSW 2018
Australia
Phone: 1300 795 828
Table of contents
Other Confidence Fitness Treadmill manuals
Popular Treadmill manuals by other brands

Tempo Fitness
Tempo Fitness 632T owner's manual

Nautilus
Nautilus Be Strong Commerical T916 Owner's and assembly manual addendum

Sears
Sears Pro-Form CROSS WALK owner's manual

Reebok
Reebok Z7 Assembly guide

York Fitness
York Fitness Treadmill owner's manual

Vision Fitness
Vision Fitness T9800S Engineering guide