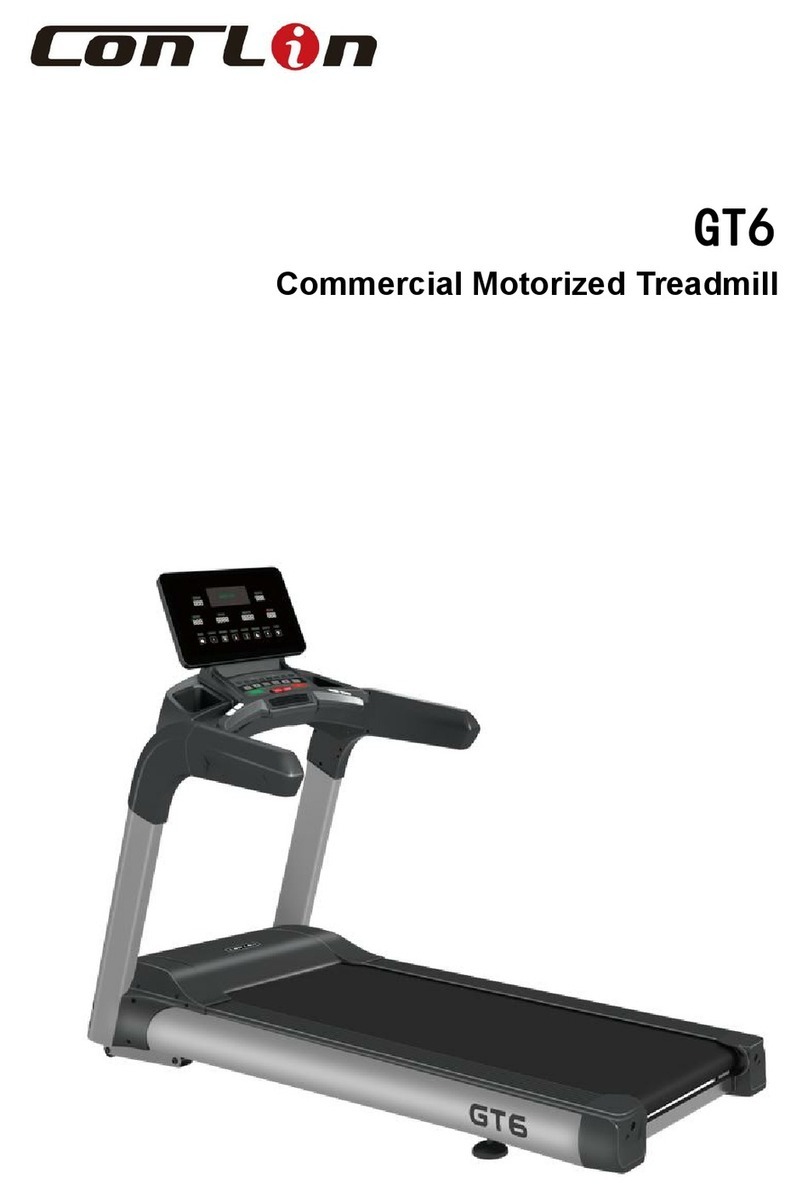
Conlin GT6A User manual

GT6A
Android Commercial Motorized Treadmill

- 1 -
Thank you very much to choose our products. Before installation and usage, please read the
instructions carefully.
Contents
I. Warning, main technical parameters and features ………………………………………………….…….............1
II. Product introduction ……………………………………………………..…………………………………..............3
III. Product explosion diagram …………………………………………………………….………………....…..........4
IV. Particular sheet of explosion diagram………………………………………………...…………………..............5
V. Assembly step ………………………………………………………………………………………………..............6
VI. Display and function operation of electronic meter.……………………………………………………...............7
VII. Use method and safety protection for treadmill …………………………………………………….............…20
VIII. Precautions …………………………………………………………………..…………………………..............21
IX. Daily servicing and maintenance of electric treadmill ……………………………..…………………..............22
X. Elimination methods for common faults…………………………………………..……………………...............24
XI. Precautions for exercise……………………………………………………………...…………………...............25
I. Warning, main technical parameters and features
Warning!
1. When you are using the treadmill, please prevent your kids from approaching the treadmill. Juveniles should
not use the treadmill without the adult’s accompany to prevent any accident.
2. Before using the treadmill, please clip the safety switch on the clothes of users. Please take down the safety
switch when you do not use the safety switch.
3. The power supply for treadmill should be well grounded. The tread
mill may be damaged by using outlet without good grounding and the Manufacturer may not provide warranty
for this! After the practice, stop the treadmill and shut off the power supply.
4. Laymen must not open the front cover of treadmill and adjust the electronic control without approval, to
avoid unnecessary troubles.
5. In order to lengthen the service life of treadmill and ensure your safety, it is forbidden for overweighed
(beyond the weight limit) persons to use the treadmill and for two or more persons to use one treadmill
simultaneously.
6. Please do not walk up or down the treadmill from the rear part to avoid getting hurt by the machine.
7. When the treadmill is operating, do not contact the running belt with hands or run on the treadmill with bare
feet.
8. The heart rate monitoring is only for reference and cannot act as medical data; hypertensives and
cardiopaths should not use the treadmill alone to prevent accident.
9. When you are using the treadmill, if you feel chest tightness and dizziness, stop your motion immediately for
excessive motion may cause serious harm or accident.
10. Emergency jump-off method: if emergency happens during the movement process and the treadmill belt
does not stop, hold the handrail with your hands to support your body and separate your feet from the
treadmill belt surface, step on the stepping platform at two sides as well as get away from the treadmill from
one side.
11. A 2000mm×1000mm safety area shall be reserved behind the treadmill to prevent accident during treadmill
operation.
12. For your safety, please operate the following functions when the treadmill is idle: “Wireless Net”,
“Bluetooth”, “Application”, “Time Zone”, “Video”, “Music”. When the treadmill is operating, please use the
real buttons on the control panel to perform relevant operations as possible.
For the health and safety of your family, please read following operating instructions and
precautions before your start practicing on it so that you can get more fun from the practice. (It is
forbidden for unauthorized after-sales service personnel to adjust the treadmill.)
The weight limit is exposed on this product. If your body weight is over 150Kg (330Ib), the service life of the
treadmill may be affected.
Special
Note

- 2 -
Main technical parameters
Input power voltage: AC220V-240V (50Hz-60Hz)
Rated voltage: 11A
Operating ambient temperature: 0~40℃
Motor power: 3375W
Scope of operating speed: 1~20 (km/h)
Gradient regulating range: 0-18%
Time display range: 0: 0 0: 00 ~ 99 : 59 : 59 (H : M: S)
Distance display range: 0.00~999.99(km)
Scope of heart rate: 50~200 (b/pm)
Scope of calorie display: 0~9999(calories)
Floor area: 20 0 ×86 × 15 0c m
Effective usable floor area: 146×55cm
Features
3375W AC motor
Dual safety protection mode with emergency stop.
Ergonomic PU armrests, comfortable, safe and environmentally friendly.
15.6-inch multi-point touch screen with a resolution of 1920X1080 high-definition LCD screen.
Android 7.1.2 operating system; Rockchip RK3288 eight-core processor (quad-core Cortex-A17
quad-core GPU Mail-400); memory: 2GB; hard disk: 8GB; network: WiFi supports 802.11b/g/n protocol.
Support WIFI connection, fast internet access, web browsing. Support MP3, WMA, WAV, APE, FLAC,
AAC, OGG, M4A, 3GPP format and 1080P HD video.
Equipped with USB port, user can play musics and videos directly from the U disk.
24 built-in exercise programs.
Built-in 3 real-life running modes to simulate outdoor running.
Energy-saving function, automatic shutdown after 5 minutes of no-load operation, safe, energy-saving and
environmentally friendly.
High-sensitivity heart rate sensor, real-time monitoring of the heartbeat status during exercise.
High-fidelity surround dual speakers. support Bluetooth music input.
Equipped with fans to enhance air circulation in the running area, increase oxygen supply.
Simple operation interface, convenient control, user-friendly system setting management.
New structure design, hidden mobile equipment support frame.
New non-bearing absorber system.
Information management system, user can create, store and query sports information data.
Smart sports App, supports multi-platform (IOS system and Android system.)
The intelligent IoT treadmill, makes the running process full of fun. Sharing running data, interacting with
the community, participating in online running competitions in real time.

- 3 -
II. Product introduction

- 4 -
III. Product explosion diagram

- 5 -
IV. Particular sheet of explosion diagram
S/N
Part name
Qty.
S/N
Part name
Qty.
1
Lower Console
1
34
Welding part of left upright pole
1
2
M6X25 hexagon socket head cap bolt
4
35
M10 small flat gasket
25
3
M6 flat shim
4
36
Bulkhead of upright pole
6
4
Screen
1
37
M10X30 round head hexagon socket screw
4
5
Safety switch
1
38
M8X20 hexagon socket pan head screw
6
6
Motor roller
1
39
Decorative element at lower left of the
meter
1
7
M8X45 hexagon socket head cap bolt
1
40
M4×10 round head tail-cut tapping screw
4
8
Dust cover
1
41
M4X8 flat head screw
18
9
Upper edge strip
2
42
Decorative element at lower right of the
meter
1
10
Running belt (tire tread)
1
43
AC motor
1
11
Rear roller
1
44
M10X60 hexagon screw
1
12
M8X75 hexagon socket head cap bolt
2
45
M10X30 hexagon screw
1
13
φ8×1.6 flat washer
9
46
M10X40 hexagon socket head cap screw
4
14
High-density running plate
1
47
M10X45hexagon socket pan head screw
1
15
Edge strip at right side
1
48
Lifting motor
1
16
Right regulating box
1
49
M10X95 hexagon socket pan head screw
1
17
Left regulating box
1
50
Plastic shim
2
18
Universal foot pad
2
51
Spring shim
4
19
Edge strip at left side
1
52
Left side strip trim
1
20
M10X70 hexagon socket pan head
screw
2
53
Decorative element of right upright pole
1
21
M10 self-locking nut
6
54
Rubber belt of motor
1
22
Welding part of erector
1
55
M8X45 crossed countersunk head screw
2
23
Castor
2
56
Support column of running plate
1
24
M10X60 hexagon socket pan head
2
57
Shock pad
6
25
Cover plate
1
58
M8X25 crossed countersunk head screw
6
26
Motor’s bottom cover
1
59
Edge strip positioning buckle
6
27
Decorative element of left upright pole
1
60
Motor shock absorption pad
4
28
Frequency converter
1
61
M4X12 flat head screw
4
29
Adapter
1
62
Welding part of running plate
1
30
Front protective cover
1
63
Tabletting of edge strip
4
31
One-piece switch
1
64
Right side strip trim
1
32
Welding part of right upright pole
1
89
Step on the anti-skid strip with your left foot
1
33
M10X20 round head hexagon socket
screw
4
90
Step on the anti slip strip with your right foot
1

- 6 -
V. Assembly step
All parts of electric treadmill have been strictly assembled and debugged before the ex works. An electric
treadmill can be easily assembled into if the installation is carried out by observing following steps.
Step I: Install upright pole: Open the packing box (box
B) and then bring out the treadmill. Firstly, lock the left
upright pole on the treadmill frame in 2 M10×20 and 2
M10×30 round head hexagon socket screw
(containing shim); secondly, connect the right upright
pole (control line is provided in the upright pole) with
the control line reserved on the control line; then,
insert the connector of the control line into the
wire-through hole of the right upright pole; finally, lock
the right upright pole on the treadmill frame in 2
M10×20 and 2 M10×30 round head hexagon socket
screw (containing shim), as shown in the figure below:
Step II: Install meter head: Open the packing box (box
A) and then bring out the meter head. Firstly, connect
the control line in the right upright pole with that at the
lower right of the meter head; secondly, insert the
meter head into the left and right upright poles; finally,
lock the meter head on the left and right upright poles
in 6 M8×20 hexagon socket pan head screw
(containing shim), as shown in the figure below:
Step III: Install screen: Open the packing box and
then take out the screen. Firstly, connect the wire of
the screen with that of the meter head in one-to-one
way; secondly, insert the screen into the meter head;
finally, lock the screen on the meter head in 4 M6×25
hexagon socket head cap bolts (containing shim), as
shown in the figure below:
Step IV: Install the decorative elements of upright pole
and lower meter: Firstly, fix the decorative elements of
left and right upright poles at the treadmill in 6 M8×8
large crossed flat head screw; secondly, fix the
decorative elements at lower left and right of the
meter on the left and right upright poles below the
meter head in 2 M4×8 large crossed flat head screw
and 4 M4×10 round head tail-cut tapping screw, as
shown in the figure below:

- 7 -
M4X8 flat
head screw
M4×10 round
head tail-cut
tapping screw
Step V: Install bulkhead and power line: Firstly, plug the installing holes below the left and right upright poles
and the meter head with 6 bulkhead; finally, connect the power line with one-piece power switch of the
treadmill (note: guarantee the power line is off before connecting the power line, so as to avoid personal
injury), as shown in the figure below:
Step VI: Carefully check if each part of the treadmill is tightened. Run the treadmill at the slow speed and check
if the each part of the running belt is flexibly rotated and whether the tightness of the running belt is proper. As
for the running belt, no offset and sliding will prevail (see “Daily maintenance of powered treadmill”). Move the
treadmill to the proper position and then use it after the check is completed.
VI. Display and function operation of electronic meter
1. Specification parameters of Android treadmill system:
Operation system
Android 7.1.2
Processor
Rockchips RK3288, OCTA Core
Screen
15.6 inches, 1920*1080 resolution, capacitive screen
System memory
2GB
Flash memory capacity
8GB

- 8 -
Wi-Fi
WiFi,802.11b/g/n
Video file
The formats supporting high definition include MP3, WMA, WAV, APE,
FLAC, AAC, OGG, M4A, 3GPP, etc.
Audio file
MP3,WMA etc.
USB
1 USB HOST
Physical button
Start/Pause, Stop, Speed+, Speed -, Incline︽, Incline︾, Volume switch,
Fresh air switch, Main interface button, Return button, Speed shortcut key,
Incline shortcut key
Bluetooth output
Bluetooth output one
Power supply
AC, 220V, 50hz

- 9 -
2. Functions of panel keys of the electronic meter:
2.1 “START/PAUSE” key: in case that power is on and safe lock is fully attracted, press this key to start
the treadmill; during operation of the treadmill, press this key to pause the treadmill and keep the
operating data, and press the key again to continue with the just-set parameters.
2.2 “STOP” key: during exercise, press this key to stop operation of the treadmill and reset.
2.3 “Speed+” and “Speed -” (SPEED) are speed +/- key: use these keys to regulate speed with the
regulating range of 0.1 km/time after start; when the keys are pressed and held for over 0.5s, the
speed increases or decreases continuously.
2.4 “Incline ︽” and “Incline︾” (INCLINE) are incline +/- key: use these keys to regulate incline with the
regulating range of 1 section/time after start; when the keys are pressed and held for over 0.5s, the
incline increases or decreases continuously.
2.5 “Speed: 5, 10, 15” are short-cut keys for speed regulating: they can be used to regulate the speed
quickly.
2.6 “Incline: 5%, 10%, 15%” are short-cut keys for gradient regulating: they can be used to regulate the
gradient quickly.
2.7 “volume switch (ON/OFF)” are power amplifier control key.
2.8 “Fresh air switch (FAN)” key: when fan is in closed state, press this key to operate fan, press this
key again to turn off fan.
2.9 “Main interface (Home)” key: press this key to enter into main interface at any operation
interface.
2.10 “Return (Return)” key: return to previous operation interface from current interface or exit from
application program.
3. Window display and unction description of touch keys
3.1 Starting interface
After power on, the display screen of the electronic watch shows the following startup interface:

- 10 -
3.2 Main interface of display screen of the electronic meter have two pages and display interfaces
are as follows after entering into standby state:
Page 1 Page 2
Touch the icon " "in the display screen interface to switch to the interface on page 2. Touch the icon " "in
the display screen interface to switch to the interface on page 1, and the left and right sliding screens
respectively can also switch to the main interface. In the above interface: touch any icon above the display
screen to enter the corresponding submenu.
3.3 User management: (it can be operated when the treadmill is in halted state)
3.3.1 Registration: After the mobile phone is connected to the Internet, scan the two-dimensional code to
download the sports show APP and register in accordance with the registration process. Basic information
(user name, password, nickname, weight, male/female) can be filled in or modified on the sports show
APP.
3.3.2 Login: After the treadmill is connected to the Internet, it can use the existing account to log in or log
out of the logged-in account.
The operation steps are as follows: touch the "login" button to fill in the user name and password, and
press "login" to complete. You can also use the sports show APP in your mobile phone to scan the
two-dimensional code in the upper right corner of the treadmill screen to log in (operation steps: open the
sports show APP→ discover → scan the icon in the upper right corner → scan the two-dimensional code
in the upper right corner of the treadmill screen to log in). You can also press "log out" to log out of your
account after running.

- 11 -
3.4 Manual mode
3.4.1 A. Directly press “Start” key in standby state. The screen starts three-second count-down with warning
tone. After count-down ends, the treadmill operates with the speed of 1.0km/h and incline of 0; and
then enter into “Target” window of the exercise interface.
B. The "Exercise Target" window starts counting forward and will stop automatically after 100 hours.
Press "Speed Plus and Minus Key" or "Speed Shortcut Key" to change the speed; Press "Slope
Addition and Subtraction Key" or "Slope Shortcut Key" to change the slope; Press the "Stop" button
during exercise to stop the running of the treadmill and reset it to zero.
C. It displays (time, distance, calories, heartbeat, movement target, climbing height, slope addition and
subtraction, stop, pause, speed addition and subtraction) in which slope addition and subtraction, stop,
pause, speed addition and subtraction can be synchronized with the electronic watch panel buttons in
the exercise interface window.
D. "Heartbeat" window: when the sporter steps on the side bar with both feet and starts the treadmill, the
heartbeat data will be displayed in the heartbeat window in the exercise interface for about 5-10 seconds
when both hands hold the heartbeat handle. (Hand-held heartbeat measurement data only serves as a
rough reference for the degree of exercise and cannot be used as medical data.)
3.4.2 “Distance” key: after setting exercise distance, user starts to move and ends exercise after expected
exercise distance is achieved. During exercise, user can freely increase and decrease speed and incline and
directly press “Stop” to stop its operation.
Operating steps are as shown in the following figure: touch “Distance” key, determine your target exercise
distance and press “Start” to start it.

- 12 -
3.4.3 “Time” key: after setting exercise time, user starts to move and ends exercise after expected exercise
time is achieved. During exercise, user can freely increase and decrease speed and incline and directly press
“Stop” to stop its operation.
Operating steps are as shown in the following figure: touch “Time” key, determine your target exercise time
and press “Start” to start it.
3.4.4 “Calorie” key: after setting exercise calories, user starts to move and ends exercise after expected
exercise calories are achieved. During exercise, user can freely increase and decrease speed and incline and
directly press “Stop” to stop its operation.
Operating steps are as shown in the following figure: touch “Calorie” key, determine your target exercise
calories and press “Start” to start it.
3.5 Exercise Program
24 intelligent scientific running programs (including lose weight, burn fat, mountain and so on) are built in
the system. After the user selects desired exercise program and sets exercise time, press “Start” key, the
treadmill start to operate built-in program. During operation of the treadmill, speed and incline can be regulated,
but when entering the following section, it can be automatically regulated to default values of the program.
During the exercise, user can press “Stop” key to stop the operation at any time.
Each built-in program includes 16 sections, and the operating time of each section is equal to the set
time/16. When the previous section ends, it automatically enters the following section, and the speed and
incline can be automatically regulated to the numbers of this section. When operation of all sections and
program are completed, treadmill slows down slowly and stops finally.

- 13 -
The operation steps are as follows: Touch the "Exercise Program" button, select the built-in program (the
built-in program table consists of 3 pages), press the arrow to select the upper and lower pages, or slide the
screen left and right to select the upper and lower pages, click the program you need, set the program exercise
time, and press "Start" to start the treadmill.
Built-in program data (divided into 16 segments, the running time of each segment is set time divided by 16)
Time section
Program
Operating time of each section = setting time/16
1
2
3
4
5
6
7
8
9
10
11
12
13
14
15
16
P01
Lose
weight
SPEED
3
6
7
8
9
10
9
8
8
9
10
9
8
7
6
3
INCLINE
0
2
2
4
4
4
2
2
2
3
3
4
4
3
2
1
P02
Burn fat
SPEED
5
7
9
9
11
8
8
10
10
8
10
8
6
5
4
3
INCLINE
3
5
4
4
3
5
5
3
3
5
3
5
5
3
3
3
P03
Mountain
SPEED
3
4
6
5
3
5
6
4
5
6
7
6
8
6
5
3
INCLINE
6
8
10
12
14
12
10
14
12
10
8
10
6
4
3
2

- 14 -
P04
Road
SPEED
3
6
7
7
8
9
9
10
10
10
9
9
8
6
4
3
INCLINE
1
1
2
2
3
3
3
2
2
2
3
3
2
2
1
1
P05
Race
SPEED
3
5
6
8
12
8
6
5
6
8
12
8
6
8
6
3
INCLINE
3
6
5
3
1
3
5
6
5
3
1
3
5
3
5
2
P06
Slow
walk
SPEED
3
4
5
5
6
5
5
4
5
5
6
5
5
4
5
3
INCLINE
2
2
3
2
3
2
3
2
3
3
2
2
3
3
2
2
P07
Quick
walk
SPEED
3
5
6
7
7
6
6
7
7
6
6
7
7
6
5
3
INCLINE
3
4
5
5
4
4
3
3
4
4
5
5
4
4
2
2
P08
Random
SPEED
5
10
6
11
7
11
8
11
9
6
10
7
11
9
6
3
INCLINE
3
4
5
6
5
4
5
6
5
4
5
6
5
4
3
2
P09
Jog
SPEED
5
7
8
9
9
9
8
8
9
9
9
8
9
8
6
5
INCLINE
2
2
3
3
4
4
3
3
4
4
3
3
4
4
3
2
P10
Sprint
SPEED
2
6
7
8
9
10
10
11
11
11
10
9
8
6
4
2
INCLINE
4
5
6
7
8
9
10
10
10
10
10
9
5
7
5
2
P11
Gradual
SPEED
3
4
5
6
7
7
5
6
7
7
5
7
6
5
4
3
INCLINE
2
2
3
2
3
2
3
2
3
3
2
3
2
3
2
2
P12
Learner
SPEED
3
5
6
5
5
6
5
5
6
5
5
5
5
4
3
3
INCLINE
2
3
2
3
3
2
3
4
3
3
3
3
3
2
2
1
P13
Basic
SPEED
6
6
6
5
5
5
5
4
4
3
3
3
2
4
4
4
INCLINE
1
2
3
4
5
6
7
8
9
10
11
12
4
2
2
0
P14
Strides
SPEED
2
2
8
2
2
8
8
10
4
4
12
4
4
12
4
2
INCLINE
0
2
2
2
6
6
2
2
4
4
2
2
4
2
2
0
P15
Park
SPEED
2
4
4
4
4
4
6
6
6
6
6
4
4
4
4
2
INCLINE
0
2
2
2
2
2
2
2
2
2
2
2
2
2
2
0
P16
Accelerate
SPEED
4
6
6
6
12
12
12
12
6
6
4
4
4
6
6
2
INCLINE
0
2
2
4
4
6
8
8
6
6
6
4
4
2
2
0
P17
Endurance
SPEED
2
4
6
12
12
12
4
4
4
4
12
12
12
6
4
2
INCLINE
0
2
4
6
6
6
6
6
6
4
4
2
2
2
4
0
P18
Recovery
SPEED
4
4
6
6
6
6
8
8
6
6
8
8
6
8
6
4
INCLINE
0
2
4
4
4
4
4
2
2
2
2
2
2
2
2
0
P19
Repeat
SPEED
2
2
2
3
3
3
4
4
4
3
3
3
2
2
2
2
INCLINE
0
1
1
1
1
2
2
2
2
1
1
1
1
1
1
0
P20
Interval
SPEED
2
2
6
6
6
8
8
10
10
12
8
6
6
6
4
4
INCLINE
0
2
2
4
2
2
2
4
2
2
2
4
2
2
2
0
P21
Mixed
SPEED
2
4
8
10
2
4
8
10
2
4
10
2
4
10
4
2
INCLINE
0
2
2
4
4
6
6
8
8
10
8
6
4
2
2
0
P22
SPEED
4
6
6
8
8
8
6
8
6
8
6
10
6
10
8
4

- 15 -
Cardio
INCLINE
0
2
2
2
4
4
4
4
4
4
6
6
6
4
4
0
P23
Long
Distance
SPEED
6
7
7
10
9
9
12
12
10
10
12
12
8
10
8
6
INCLINE
2
2
3
3
4
4
6
6
8
8
10
10
6
5
5
0
P24
Tempo
SPEED
4
6
8
10
8
6
4
6
8
12
8
6
8
12
12
6
INCLINE
0
2
2
4
4
6
6
8
8
6
6
4
4
2
2
0
3.6 Virtual Scenes: (Users Purchase Themselves as Needed)
After selecting the scene, start to operate the treadmill. During exercise, the scene will give people an
immersive feeling. During exercise, users can freely increase and decrease speed and incline, or directly press
“Stop” to stop operation. The speed of live scene can make the scene faster or slower according to manual
adjustment speed.
3.7 Exercise management
3.7.1 Exercise data: check data of previous exercise, including: time, distance and calorie.
3.7.2 Sports Records: After logging in to the user, you can view historical sports records and sports
statistics here. The exercise information stored in the system must meet certain conditions ≥ 200m before
being selected for storage. The exercise information temporarily will be stored in the system for a certain
period of time. The system automatically will clean up the exercise information stored for too long on a
regular basis.

- 16 -
3.8 Language
Users can choose to switch
to different languages
provided by the system. The
operation steps are as shown
in the right figure: touch the
"language" button, click the
language you need, and then
return to the main interface
automatically.
3.7.3 Record data of
historical exercise of the treadmill is
synchronous with data of terminals
of cellphone and pad. Open Sports
show on terminals of cellphone and
pad and check data. Data records
are shown in right figure. Specific
operation is shown in “Sports
show.pdf”. For cellphones of Apple
version 4S and above, log in Sport
show App sofeware(search “Sports
show”) at Apple Store. For
cellphones of Android version, log in
the latest version of App software at
http://www.fitshow.com/. Scan the
following two-dimensional code and
install Sports show App:

- 17 -
3.9 Help
Operating steps are as
shown in right figure: touch
“Help” key, window displays
precautions during use of
treadmill and introduction to
functions of keys on main
interface.
3.10 Wireless network
Operating steps are as shown
in right figure: touch “Wireless
network” key, select WI-FI
signal, input WI-FI connection
code, complete connection
and setting of WI-FI for
high-speed internet.
3.11 Setting
The operation steps are as
shown in the right figure: touch
the "Settings" button to select
brightness level, clear cache,
set engineering mode, and
restore with one key. The
engineering mode is owned by
treadmill developers and is not
open to users.
3.11.1 Bright adjust
The operation steps are
as shown in the right
figure: touch the
"brightness level" button,
select the required
brightness, and touch the
"Return" button to
complete backlight
adjustment.

- 18 -
3.11.2 Cache cleaning
The operation steps are
as shown in the right
figure: touch the "cache
cleaning" button, select
the application that needs
to clean the cache, and
touch the "cache
cleaning" button to
complete the cleaning.
3.11.3 One-click Restore
Operating Steps: Touch
"One Button Restore" to
quickly restore to the
factory state.
3.11.4 Bluetooth output
connection: Press the
"Bluetooth" button to search
for the device for pairing.
3.12 Application
System pre-loaded APP
application can be open.
Operating steps are as
shown in right figure:
touch “Application”key,
enter into APP application
interface, touch any icon
on upper side of the
display screen to enter
into corresponding
submenu.

- 19 -
3.13 Time zone
User can freely adjust
time zone and time
according to your time
zone.Operating steps are
as shown in right figure:
touch “Time zone”key,
enter into submenu and
set required time zone
and then return to main
interface.
3.14 Internet
Browse webpage online.
3.15Yahoo
Yahoo search is available.
3.16 Video
Play local video files. Insert
storage devices such as
USB flash disk equipped
with video into the USB
interface, click the "video"
button, and click the list file
to play the corresponding
video.
3.17 Music
Play local audio files. Insert
storage devices such as
USB flash disks with music
into the USB interface, click
the "Music" button, and
click the "Musician" local
song to enter the list to play
the corresponding music.
Table of contents
Other Conlin Treadmill manuals