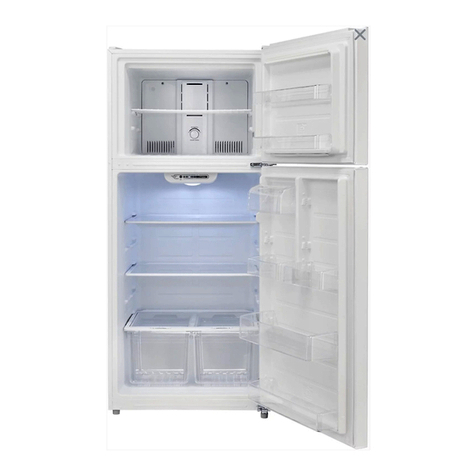
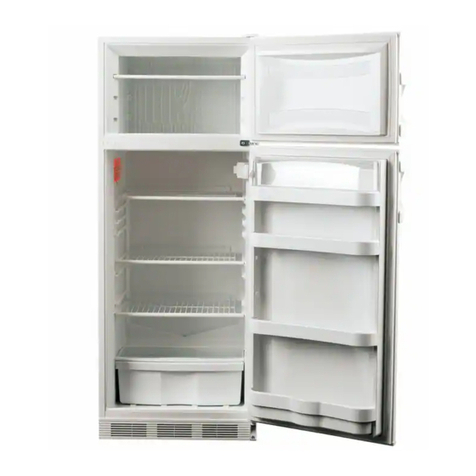
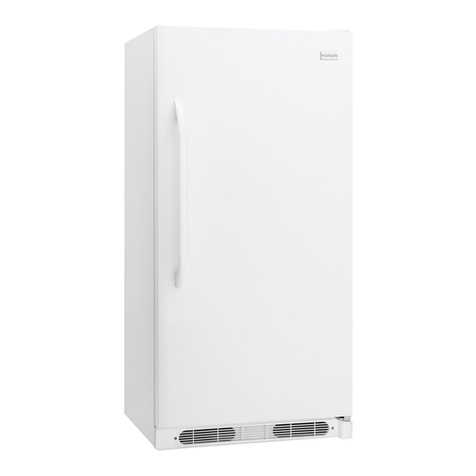
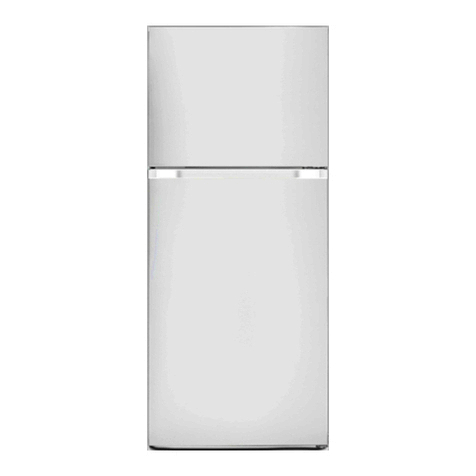
Conservator VPS10FGMWW Operating instructions

Write the model and serial numbers here:
Model # __________________________
Serial # __________________________
Find these numbers on a label on the left
side, near the middle of the refrigerator
compartment.
Top-Freezer Refrigerators
T
op-Freezer Refri
g
erators Owner’s Manual
and Installation
Instructions
Contents
Safety Information .................3
Using the Refrigerator
Parts and Features ...............5
Crispers ........................6
Care And Cleaning ................7
Installation Instructions
Install the Refrigerator .............8
Reversing the Door Swing ..........9
Troubleshooting Tips
Normal Operating Sounds .........12
Troubleshooting Tips .............13
Limited Warranty .................14
Consumer Support ...............16
Models: VPS10FGMWW, VPS10FGMBB, VPS10FSMSB
49-1000110 Rev. 0 08-18 GEA
Español
Para consultar una version
en español de este manual
de instrucciones,visite sitio
de internet crosley.com.

249-1000110 Rev. 0
Visit Conservatorappliances.com for more information about your Conservator appliance.

49-1000110 Rev. 0 3
CAUTION To reduce the risk of injury when using your refrigerator, follow these basic safety
precautions.
Ŷ 'RQRWFOHDQJODVVVKHOYHVRUFRYHUVZLWKZDUP
water when they are cold. Glass shelves and
covers may break if exposed to sudden temperature
changes or impact, such as bumping or dropping.
Tempered glass is designed to shatter into many
small pieces if it breaks.
Ŷ .HHSILQJHUVRXWRIWKH³SLQFKSRLQW´DUHDV
clearances between the doors and between the
doors and cabinet are necessarily small. Be careful
closing doors when children are in the area.
Ŷ 'RQRWWRXFKWKHFROGVXUIDFHVLQWKHIUHH]HU
compartment when hands are damp or wet, skin
may stick to these extremely cold surfaces.
Ŷ 'RQRWUHIUHH]HIUR]HQIRRGVZKLFKKDYHWKDZHG
completely.
SAFETY INFORMATION
READ AND SAVE THESE INSTRUCTIONS
WARNING To reduce the risk of fire, explosion, electric shock, or injury when using your
refrigerator, follow these basic safety precautions:
Ŷ 7KLVUHIULJHUDWRUPXVWEHSURSHUO\LQVWDOOHG
and located in accordance with the Installation
Instructions before it is used.
Ŷ 8QSOXJWKHUHIULJHUDWRUEHIRUHPDNLQJUHSDLUV
replacing a light bulb, or cleaning.
NOTE: Power to the refrigerator cannot be
disconnected by any setting on the control panel.
NOTE: Repairs must be performed by a qualified
Service Professional.
Ŷ 5HSODFHDOOSDUWVDQGSDQHOVEHIRUHRSHUDWLQJ
Ŷ 'RQRWXVHDQH[WHQVLRQFRUG
Ŷ 'RQRWVWRUHRUXVHJDVROLQHRURWKHUIODPPDEOH
vapors and liquids in the vicinity of this or any other
appliance.
Ŷ 'RQRWVWRUHH[SORVLYHVXEVWDQFHVVXFKDVDHURVRO
cans with a flammable propellant in this appliance.
Ŷ 7RSUHYHQWVXIIRFDWLRQDQGHQWUDSPHQWKD]DUGV
WRFKLOGUHQUHPRYHWKHIUHVKIRRGDQGIUHH]HU
doors from any refrigerator before disposing of it or
discontinuing its use.
Ŷ 7RDYRLGVHULRXVLQMXU\RUGHDWKFKLOGUHQVKRXOGQRW
stand on, or play in or with the appliance.
Ŷ &KLOGUHQDQGSHUVRQVZLWKUHGXFHGSK\VLFDOVHQVRU\
or mental capabilities or lack of experience and
knowledge can use this appliance only if they are
supervised or have been given instructions on safe
XVHDQGXQGHUVWDQGWKHKD]DUGVLQYROYHG
Ŷ 7KLVDSSOLDQFHLVLQWHQGHGWREHXVHGLQKRXVHKROG
and similar applications such as: staff kitchen areas
LQVKRSVRIILFHVDQGRWKHUZRUNLQJHQYLURQPHQWV
IDUPKRXVHVE\FOLHQWVLQKRWHOVPRWHOVEHG
EUHDNIDVWDQGRWKHUUHVLGHQWLDOHQYLURQPHQWV
catering and similar non-retail applications.
IMPORTANT SAFETY INFORMATION
READ ALL INSTRUCTIONS BEFORE USING THE APPLIANCE
INSTALLATION
WARNING EXPLOSION HAZARD Flammable Refrigerant
This appliance contains isobutane refrigerant, R600a, a natural gas with high environmental compatibility.
However, it is also combustible. Adhere to the warnings below to reduce the risk of injury or property damage.
1) When handling, installing and operating the
appliance, care should be taken to avoid damage to
the refrigerant tubing.
6HUYLFHVKDOORQO\EHSHUIRUPHGE\DXWKRUL]HG
VHUYLFHSHUVRQQHO8VHRQO\PDQXIDFWXUHUDXWKRUL]HG
VHUYLFHSDUWV´
3) Dispose of refrigerator in accordance with Federal
and Local Regulations. Flammable refrigerant and
insulation material used require special disposal
procedures. Contact your local authorities for the
environmentally safe disposal of your refrigerator.
.HHSYHQWLODWLRQRSHQLQJVLQWKHDSSOLDQFH
enclosures or in the built-in structure clear of
obstruction.
5) Do not use mechanical devices or other means to
accelerate the defrosting process.
6) Do not damage refrigerant circuit.
7) Do not use electrical appliances inside the food
storage compartment of the appliance.
449-1000110 Rev. 0
PROPER DISPOSAL OF YOUR OLD REFRIGERATOR
Do not, under any circumstances, cut or remove the third (ground) prong from the power cord. For
personal safety, this appliance must be properly grounded.
The power cord of this appliance is equipped with a
3-prong (grounding) plug which mates with a standard
SURQJJURXQGLQJZDOORXWOHWWRPLQLPL]HWKH
SRVVLELOLW\RIHOHFWULFVKRFNKD]DUGIURPWKLVDSSOLDQFH
Have the wall outlet and circuit checked by a qualified
electrician to make sure the outlet is properly
grounded.
Where a standard 2-prong wall outlet is encountered, it
is your personal responsibility and obligation to have it
replaced with a properly grounded 3-prong wall outlet.
Do not use an adapter.
The refrigerator should always be plugged into its own
individual electrical outlet which has a voltage rating
that matches the rating plate.
$9ROW$&+]RUDPSIXVHGJURXQGHG
electrical supply is required. This provides the best
performance and also prevents overloading house
ZLULQJFLUFXLWVZKLFKFRXOGFDXVHDILUHKD]DUGIURP
overheated wires.
Never unplug your refrigerator by pulling on the power
cord. Always grip plug firmly and pull straight out from
the outlet.
Immediately discontinue use of a damaged supply
cord. If the supply cord is damaged, it must be
replaced by a qualified service professional with an
DXWKRUL]HGVHUYLFHSDUWIURPWKHPDQXIDFWXUHU
When moving the refrigerator away from the wall, be
careful not to roll over or damage the power cord.
CONNECTING ELECTRICITY
WARNING ELECTRICAL SHOCK HAZARD
Plug into a grounded 3-prong outlet
Do not remove the ground prong
Do not use an adapter
Do not use an extension cord.
Failure to follow these instructions can result in death, fire, or electrical shock.
SAFETY INFORMATION
IMPORTANT SAFETY INFORMATION
READ ALL INSTRUCTIONS BEFORE USING THE APPLIANCE
READ AND SAVE THESE INSTRUCTIONS
WARNING SUFFOCATION AND ENTRAPMENT HAZARD
Failure to follow these disposal instructions can result in death or serious injury
IMPORTANT: Child entrapment and suffocation
are not problems of the past. Junked or abandoned
refrigerators are still dangerous even if they will sit
IRU³MXVWDIHZGD\V´,I\RXDUHJHWWLQJULGRI\RXUROG
refrigerator, please follow the instructions below to help
prevent accidents.
Before You Throw Away Your Old Appliance
Ŷ7DNHRIIWKHIUHVKIRRGDQGIUHH]HUGRRUV
Ŷ Leave the shelves in place so that children may not
easily climb inside.
Refrigerant and Foam Disposal:
Dispose of appliance in accordance with Federal and Local Regulations. Contact your local authorities for the
environmentally safe disposal of your appliance.

49-1000110 Rev. 0 5
Parts and Features
USING THE REFRIGERATOR: Parts and Features
Leveling Legs
Clear Crisper
Clear Glass
Crisper Cover
Adjustable
Temperature
Control
)XOO:LGWK)UHH]HU
Door Shelf
Full-Width
Door Shelf
)UHH]HU
Temperature
Control
)UHH]HU6KHOI
LED Light
Full-Width
Glass Shelves
Crisper Humidity
Control
Full-Width
Door Shelf
Light Switch
Gallon Storage
Compartment
2 Liter Bottle
Storage
Compartment
ADJUSTABLE TEMPERATURE DIAL
Your refrigerator will automatically maintain the
temperature level you select. The temperature control
dial has 7 settings. 1 is the warmest. 7 is the coldest. At
first, set the dial to 4 and allow 24 hours to pass before
adjusting the temperature to your needs.
To adjust the temperature range in the cold setting, turn
the temperature dial in a clockwise direction. For normal
operating conditions, keep the dial halfway between cold
and coldest. For your convenience, the factory presets
the control at normal operating conditions.
NOTE: ,IWKHUHIULJHUDWRUKDVEHHQSODFHGLQDKRUL]RQWDO
or tilted position for any period of time wait 24 hours
before plugging the unit in.
Freezer Section
<RXUIUHH]HUFRPSDUWPHQWLVHTXLSSHGZLWKDGMXVWDEOH
temperature control. For your convenience, temperature
is preset by the factory to the colder setting. There is
also an option to adjust the settings, either to cold or to
coldest.
REFRIGERATOR SECTION
INTERIOR LIGHT
Your refrigerator is equipped with an interior light in the
fresh food section for you to easily locate your food.
FROST- FREE REFRIGERATOR-FREEZER
<RXVKRXOGQHYHUQHHGWRGHIURVW\RXUIUHH]HUDVLW
automatically defrosts any ice build-up that may occur.
REFRIGERATOR INTERIOR SHELVES
(Shelves may vary by model)
The shelves of your refrigerator were designed with you
in mind. Their varied adjustability allows you to satisfy
your personal storage needs.
To remove or adjust a full-width slide-out shelf:
1. Gently tilt the shelf up and slide forward until the shelf
has been completely removed.
2. To replace the shelf, select the desired setting and
gently slide the shelf back until it rests in the locking
position.
DANGER RISK OF FIRE OR EXPLOSION
Flammable refrigerant used. Do not use mechanical de-
YLFHVWRGHIURVWUHIULJHUDWRURUIUHH]HU'RQRWSXQFWXUH
refrigerant tubing.

649-1000110 Rev. 0
Crispers
USING THE REFRIGERATOR: Crispers
CRISPERS AND CRISPER COVER
To remove and install the crisper:
1. Grip the crisper firmly and slide out completely.
2. Replace the crisper by placing the crisper properly in
position and gently sliding it back into place.
Your refrigerator may be equipped with a slide control to
raise or lower the humidity levels or your crispers. This
feature will increase the storage life of your fruits and
vegetables. Simply adjust the controls to the appropriate
setting for items you are storing in the crispers. Low
settings allow moist air to exit the crisper, for optimum
storage of fruit and/or vegetables that have skins. High
settings retains moist air in the crisper, for optimum
storage of leafy fresh vegetables.
REMOVING OR REPLACING THE CRISPER
COVER
1. Carefully grasp the crisper cover and slide out to
remove.
2. To replace, slide the rear of the crisper cover into the
right and left slots above the crisper area and gently
slide back into place.

49-1000110 Rev. 0 7
Care and Cleaning
CARE AND CLEANING
NOTE: Before using any cleaning products, be sure to
read the manufacturer’s instructions and warnings. This
will help avoid personal injury or damage to property.
INTERIOR CLEANING
Prepare a cleaning solution of 3-4 tablespoons of baking
VRGDPL[HGZLWKZDUPZDWHU8VHDVSRQJHRUVRIWFORWK
dampened with the cleaning solution, to wipe the inside of
your refrigerator.
Do not use harsh chemicals, ammonia, chlorine bleach,
concentrated detergent, solvents, abrasives or metal
scouring pads to clean your refrigerator, inside or out.
They can damage and/or discolor the refrigerator finish.
EXTERIOR CLEANING
8VHDFOHDQVRIWOLJKWO\GDPSHQHGFORWKZLWKNLWFKHQ
appliance wax or a mild detergent to clean the exterior of
the refrigerator.
8VHDFOHDQVRIWOLJKWO\GDPSHQHGFORWKZLWKZDUP
VRDS\ZDWHUWRFOHDQWKHKDQGOHVDQGWULP8VHDFOHDQ
soft towel to dry.
For stainless steel models, use a dry cloth and stainless
steel polish.
Door gaskets should be cleaned every three months
following the instructions for interior cleaning. Clean
gaskets will maintain a better seal than dirty gaskets.
Lightly apply petroleum jelly to the hinge side of the
gaskets to keep the gasket pliable and assure a good
seal.
Never use a dirty cloth to clean the exterior of the
refrigerator. Dirty cloths may leave residue on the
refrigerator that can damage the finish. Also, avoid the
use of harsh chemicals, ammonia, chlorine bleach,
concentrated detergent, solvents, abrasives or metal
scouring pads to clean the outside of the refrigerator.
LED LIGHTING REPLACEMENT
POWER INTERRUPTIONS
In the event of a power interruption, unplug your
refrigerator from the power source. Avoid opening
the doors until after power has been restored. Your
refrigerator will maintain a cold temperature for longer if
door opening is avoided or kept to a minimum.
Once power has been restored, plug your refrigerator
back into the power source and inspect food in the
refrigerator for spoilage or thawing. Cleaning your
refrigerator after a prolonged power outage is strongly
recommended to avoid odors and potential health
KD]DUGVGXHWRWKDZLQJ
VACATION
For long vacations or absences, unplug your refrigerator
and remove all food from it. Clean the refrigerator,
including the gaskets, according to the Proper Care and
Maintenance section. Leave the doors propped open to
allow air to circulate inside the refrigerator.
MOVING
Before moving your refrigerator, empty the food from it
and use adhesive tape to secure all loose items such
as shelves, door bins and racks, crispers and pans, etc.
8QSOXJWKHUHIULJHUDWRU$OZD\VPRYHWKHUHIULJHUDWRULQ
an upright position in order to avoid damaging the sealed
refrigerant system.
WARNING
Before cleaning your refrigerator, ALWAYS unplug it
from the power source. Failure to heed this warning
could result in injury or death from electric shock.
CAUTION
Do not clean glass shelves or covers with warm water
when they are cold. Glass shelves and covers may
break if exposed to sudden temperature changes
or impact, such as bumping or dropping. Tempered
glass is designed to shatter into many small pieces if it
breaks.
'RQRWZDVKDQ\SODVWLFUHIULJHUDWRUIUHH]HUSDUWVLQ
the dishwasher.
WARNING
Do not change the LED light by yourself. Please contact
the after-sales service for replacement. Failure to heed
this warning could result in injury or death from electric
shock.

849-1000110 Rev. 0
Installation Instructions
REFRIGERATOR LOCATION
IMPORTANT: This refrigerator is designed for free-
standing installation only. It should not be recessed or
built-in an enclosed cabinet. To ensure your refriger-
DWRUZRUNVDWRSWLPXPHႈFLHQF\\RXVKRXOGLQVWDOOLW
in a location where there is proper air circulation, and
electrical connections.
• Do not install the refrigerator where the temperature
will go below 60°F (16°C) because it will not run
often enough to maintain proper temperatures.
• Do not install the refrigerator where the temperature
will go above 100°F (37°C) because it will not
perform properly.
• Install it on a floor strong enough to support it fully
loaded.
• Do not install the refrigerator in a location exposed
to water (rain, etc.) or direct sunlight.
LEVELING REFRIGERATOR
• Your refrigerator has two leveling legs that
are located in the front bottom corners of your
refrigerator. After properly placing your refrigerator
under its final position, you can level your
refrigerator.
• Leveling legs can be adjusted by turning them
clockwise to raise your refrigerator or by turning
them counterclockwise to lower your refrigerator.
The refrigerator door will close easier when the
leveling legs are extended.
PROPER AIR CIRCULATION
• To ensure your refrigerator works at the maximum
efficiency it was designed for, you should
install it in a location where there is proper air
circulation, plumbing and electrical connections.
Your refrigerator is not designed to operate in
WHPSHUDWXUHVEHORZÛ)Û&RUDERYHÛ)
Û&
• Do not install your refrigerator in any location not
SURSHUO\LQVXODWHGRUKHDWHGHJJDUDJHHWF.HHS
out of direct sunlight and away from heating sources
such as radiators, heaters, and cooking appliances.
• The following are recommended clearances around
the refrigerator:
Sides ....´PP
Top .....´PP
Back ....´PP
DOOR ALIGNMENT
Freezer Door
1. Remove the top hinge cover.
2. Loosen the top hinge screws using a hex-head
screwdriver.
3. Adjust the door or put a spacer in between and
then tighten the screws.
4. Replace the top hinge cover.
WARNING
Explosion and Fire Hazard
Keep flammable materials and vapors, such as
gasoline, away from appliance.
Failure to do so can result in death, explosion or
fire.
INSTALLATION INSTRUCTIONS
LowerRaise
Hinge
Cover
Top
Hinge

49-1000110 Rev. 0 9
Installation Instructions
INSTALLATION INSTRUCTIONS
LEFT/RIGHT DOOR OPENING METHOD
This product allows you to reverse the door opening
from left to right and back. You can select your
preference of door opening by following the procedure
to make the change.
Tools Required
Phillips and Flat Head Screwdrivers, Ratchet Wrench
with 8 mm and 10 mm sockets.
Dismantling
$IIL[UHIULJHUDWRUDQGIUHH]HUGRRUE\VWLFNLQJ
adhesive tape on both sides to hold doors in place.
2. Remove the upper hinge cover by using flat head
screwdriver. Then remove three screws using ratchet
wrench with 10 mm head. Take out hinge by pulling
it vertically and keep it in safe place. Remove the top
hinge plug from the opposite side of the cabinet top.
5HPRYHWKHDGKHVLYHWDSHRQIUHH]HUGRRUOLIWLWDQG
take off the door and carefully put it aside.
4. Remove two screws of middle hinge using ratchet
wrench with 8 mm socket, and keep them in a safe
place.
5. Remove the adhesive tape on refrigerator door, lift it
and take refrigerator door, and carefully put it aside.
6. Remove the doorstoppers from the refrigerator and
IUHH]HUGRRUV
7. Insert left side doorstoppers (provided in your
packing) on the left side bottom hole of the
refrigerator door and on the left side bottom hole of
WKHIUHH]HUGRRU)DVWHQZLWKVFUHZVSURYLGHG
REVERSING THE DOOR SWING
WARNING Follow all steps when reversing the door swing. Failure to follow these instructions, leaving off
parts, or overtightening screws, can lead to the door falling off and result in injury and property damage.

10 49-1000110 Rev. 0
Installation Instructions
INSTALLATION INSTRUCTIONS
REINSTALLATION
1. Remove the lower hinge pin from the lower hinge
by turning counter clockwise. Move the pin to the
opposite hole and tighten.
2. Tilt refrigerator on a 45-degree angle to have access
to the bottom front.
3. Remove both left and right front feet from bottom.
4. Loosen the screws holding the bottom hinge and
remove it.
5. Align the holes in the bottom hinge to the
corresponding holes on the opposite side of the
cabinet. Insert and tighten the screws. Reinstall both
front feet.
6. To install refrigerator door: Line up the left bottom
hole of the refrigerator compartment door over
the bottom hinge pin. Move door forward to make
it straight and align with middle hinge. Install the
middle hinge again, and turn the hinge pin until it
completely enters the door body. Secure it with the
screws provided.
NOTE: Remove plugs from doorframe and install on
other side.
7RLQVWDOOIUHH]HUGRRU/LQHXSOHIWERWWRPKROHRIWKH
door over the middle hinge middle pin. Move door
IRUZDUGWRPDNHLWVWUDLJKWDQGDOLJQZLWKIUHH]HU
compartment. Place the hinge cover over the left
side of the top hinge, align holes with hole on the
refrigerator top and tighten with the screws provided.
Insert the top hinge plug into the holes on the
cabinet top from which you previously removed the 3
hinge screws
REVERSING THE DOOR SWING (CONT.)
WARNING Follow all steps when reversing the door swing. Failure to follow these instructions, leaving off
parts, or overtightening screws, can lead to the door falling off and result in injury and property damage.
CAUTION Two People Required
Bottom
RI8QLW Bottom
Hinge
Lower
Hinge Pin
Screw
Holes
Doorstopper
(left side)
Middle
Hinge Pin Middle
Hinge

49-1000110 Rev. 0 11
Normal Operating Sounds
TROUBLESHOOTING TIPS: Normal Operating Sounds
Ŷ The new high efficiency compressor may run faster
and longer than your old refrigerator and you may
hear a high-pitched hum or pulsating sound while it
is operating.
Ŷ You may hear a whooshing sound when the doors
FORVH7KLVLVGXHWRSUHVVXUHHTXDOL]LQJZLWKLQWKH
refrigerator.
Ŷ You may hear the fans spinning at high speeds.
This happens when the refrigerator is first plugged in,
when the doors are opened frequently or when a large
DPRXQWRIIRRGLVDGGHGWRWKHUHIULJHUDWRURUIUHH]HU
compartments. The fans are helping to maintain the
correct temperatures.
Ŷ The fans change speeds in order to provide optimal
cooling and energy savings.
&/,&.63236
&5$&.6DQG&+,536
Ŷ You may hear cracking or popping sounds when
the refrigerator is first plugged in. This happens as
the refrigerator cools to the correct temperature.
Ŷ Expansion and contraction of cooling coils during
and after defrost can cause a cracking or popping
sound.
:$7(56281'6
Ŷ 7KHIORZRIUHIULJHUDQWWKURXJKWKHIUHH]HUFRROLQJFRLOV
may make a gurgling noise like boiling water.
Ŷ Water dropping on the defrost heater can cause a
VL]]OLQJSRSSLQJRUEX]]LQJVRXQGGXULQJWKHGHIURVW
cycle.
Ŷ A water dripping noise may occur during the defrost
cycle as ice melts from the evaporator and flows into
the drain pan.
Ŷ Closing the door may cause a gurgling sound due to
SUHVVXUHHTXDOL]DWLRQ
HUMMM...
WHOOSH...
,IWKHUHIULJHUDWRUKDVEHHQSODFHGLQDKRUL]RQWDOSRVLWLRQIRUDQ\SHULRGRIWLPHZDLWKRXUVDIWHUUHWXUQLQJLWWRWKH
upright position before plugging it in.
IMPORTANT
'XULQJWKHDXWRPDWLFGHIURVWF\FOH\RXPD\QRWLFHDUHGJORZLQWKHYHQWVRQWKHEDFNZDOORI\RXUIUHH]HUFRPSDUW-
ment. This is normal during the defrost cycle.

12 49-1000110 Rev. 0
Troubleshooting Tips... Before you call for service
TROUBLESHOOTING TIPS
First try the solutions suggested here to possibly avoid the cost of a service call.
PROBLEM POSSIBLE CAUSES WHAT TO DO
Refrigerator does not run. Refrigerator is unplugged. Plug refrigerator into power source
The circuit breaker is tripped/
turned off or the fuse is blown. Reset/Turn on circuit breaker or replace
fuse.
Refrigerator is in defrost mode Wait about 30 minutes for defrost cycle
to end and cooling system to restart
Refrigerator or freezer is too
warm Temperature control is not set
low enough Turn temperature knob clockwise to
DGMXVWWRDORZHUWHPSHUDWXUHDOORZ
hours to adjust
Doors opened frequently or left
open .HHSGRRUFORVHG&KHFNWKDWD
package isn’t preventing door from
closing
Warm food added recently Allow time for food and refrigerator to
cool
Items against back of
compartments are blocking
SURSHUDLUÀRZ
Store items only inside the trim of the
JODVVVKHOYHVGRQ¶WSODFHLWHPVDJDLQVW
sides of the compartments or directly in
front of any vents
Refrigerator is in adaptive defrost
mode This is normal. Defrost cycle lasts about
30 minutes
Refrigerator or freezer is too cold Temperature control is set too
low Turn knob counter-clockwise to change
WRDZDUPHUVHWWLQJDOORZKRXUVWR
adjust
Refrigerator compressor runs
frequently or for long periods of
time
1RUPDOZKHQ¿UVWSOXJJHGLQ Allow 24 hours for the refrigerator to
cool down
Warm or large amounts of food
added This is normal
Door is left open Ensure that door is not being held open
by an item
Hot weather or frequent openings This is normal
Temperature control set to
coldest setting Adjust knob to a warmer setting
Moisture on exterior/interior of
refrigerator High humidity 7KLVLVQRUPDO'U\VXUIDFHDQGDGMXVW
temperature knob to slightly colder
setting
Doors opened frequently or left
open .HHSGRRUFORVHG&KHFNWKDWD
package isn’t preventing door from
closing
Open container of water in
refrigerator Cover or seal container

49-1000110 Rev. 0 13
Troubleshooting Tips... Before you call for service
PROBLEM POSSIBLE CAUSES WHAT TO DO
Refrigerator has an odor Food is not sealed or packaged
properly Re-seal packaging / Place an opened
box of baking soda in the refrigerator,
replace every three months
Interior needs to be cleaned Follow cleaning instructions in Proper
Care and Maintenance section
Light does not come on Refrigerator is unplugged Plug refrigerator in to power source
Light switch gets stuck Switch located at the right of Fresh
Food Compartment. Make sure it
moves freely when manually pressed
in and out
LED light broken Contact after-sale service for
replacement
Frost or ice crystals on frozen
food Freezer door left open or opened
frequently Turn temperature knob counter-
clockwise to change to a warmer
VHWWLQJDOORZKRXUVWRDGMXVW
Items blocking freezer air vents
DQGSUHYHQWLQJSURSHUDLUÀRZ
Move items away from rear wall
Hot or warm air from bottom of
refrigerator $LUÀRZFRPLQJIURPFRPSUHVVRU
during refrigeration process This is normal
Food freezing in refrigerator Food placed too close to the air
vent Move items away from the air vents
at the top and rear wall of the Fresh
Food section
Temperature control knob set too
low Adjust the knob counter-clockwise to a
warmer setting
Freezer door pops open when
closing the refrigerator door Normal if freezer door closes
afterwards on its own 7KLVLQGLFDWHVDJRRGVHDOLIIUHH]HU
door closes on its own
If freezer doesn’t close on its
own after popping open, adjust
leveling legs
See leveling leg feature instructions in
Installing Your Refrigerator section
Door does not close properly Refrigerator isn’t level See leveling leg feature instructions in
Installing Your Refrigerator section
Something is obstructing door
closure Check for and remove obstructions
Vibration or rattling 5HIULJHUDWRULVQRWUHVWLQJ¿UPO\
RQÀRRU
See leveling leg feature instructions in
Installing Your Refrigerator section
TROUBLESHOOTING TIPS

14 49-1000110 Rev. 0
LIMITED WARRANTY
Staple your receipt here. Proof of the original purchase
date is needed to obtain service under the warranty.
Ŷ Service trips to your home to teach you how to use
the product.
Ŷ,PSURSHULQVWDOODWLRQGHOLYHU\RUPDLQWHQDQFH
Ŷ)DLOXUHRIWKHSURGXFWLILWLVDEXVHGPLVXVHGRU
used for other than the intended purpose or used
commercially.
Ŷ/RVVRIIRRGGXHWRVSRLODJH
Ŷ5HSODFHPHQWRIKRXVHIXVHVRUUHVHWWLQJRIFLUFXLW
breakers.
Ŷ'DPDJHWRILQLVKVXFKDVVXUIDFHUXVWWDUQLVKRU
small blemishes not reported within 48 hours of
delivery.
Ŷ5HSODFHPHQWRIWKHOLJKWEXOEVH
Ŷ'DPDJHWRWKHSURGXFWFDXVHGE\DFFLGHQWILUH
floods or acts of God.
Ŷ,QFLGHQWDORUFRQVHTXHQWLDOGDPDJHFDXVHGE\
possible defects with this appliance.
Ŷ3URGXFWQRWDFFHVVLEOHWRSURYLGHUHTXLUHGVHUYLFH
This warranty will not cover:
For the Period of: GE Appliances Will Replace
One Year
From the date of the original
purchase
Any part of the refrigerator which fails due to a defect in materials or workmanship.
During the limited one-year warranty, GE Appliances will also provide, free of
charge, all labor and related service to replace the defective part.
Conservatorappliances.com
Your appliance is covered by a limited warranty, as listed below, by GE Appliances. All warranty service is provided by
RXU*($SSOLDQFHV)DFWRU\6HUYLFH&HQWHUVRUDQDXWKRUL]HGVHUYLFHWHFKQLFLDQ7RVFKHGXOHVHUYLFHFDOO&URVOH\DW
800.544.4780. Please have your serial number and your model number available when calling for service.
Conservator® Refrigerator Limited Warranty
EXCLUSION OF IMPLIED WARRANTIES
Your sole and exclusive remedy is product repair as provided in this Limited Warranty. Any implied warranties,
including the implied warranties of merchantability or fitness for a particular purpose, are limited to one year or the
shortest period allowed by law.
This limited warranty is extended to the original purchaser and any succeeding owner for products purchased for
KRPHXVHZLWKLQWKH86$,IWKHSURGXFWLVORFDWHGLQDQDUHDZKHUHVHUYLFHE\D*($SSOLDQFHV$XWKRUL]HG6HUYLFHU
LVQRWDYDLODEOH\RXPD\EHUHVSRQVLEOHIRUDWULSFKDUJHRU\RXPD\EHUHTXLUHGWREULQJWKHSURGXFWWRDQ$XWKRUL]HG
GE Appliances Service location for service. In Alaska, the limited warranty excludes the cost of shipping or service
calls to your home.
Some states do not allow the exclusion or limitation of incidental or consequential damages. This limited warranty
gives you specific legal rights, and you may also have other rights which vary from state to state. To know what your
legal rights are, consult your local or state consumer affairs office or your state’s Attorney General.
Warrantor: GE Appliances, a Haier company
Louisville, KY 40225

49-1000110 Rev. 0 15
Notes

16 49-1000110 Rev. 0
3ULQWHGLQ8QLWHG6WDWHV
CONSUMER SUPPORT
Consumer Support
Conservator® Website
Have a question or need assistance with your appliance? Try the Conservator Website 24 hours a day, any day of
the year at Conservatorappliances.com. You can also shop for more great Conservator products on our website.
Schedule Service
Crosley repair service is only one step away from your door. Call 800.544.4780 during normal business hours to
schedule service.
Parts and Accessories
Individuals qualified to service their own appliances can have parts or accessories sent directly to their homes (VISA,
MasterCard and Discover cards are accepted). Order on-line today 24 hours every day. Visit GEApplianceparts.com
or by phone at 877.959.8688 during normal business hours.
Instructions contained in this manual cover procedures to be performed by any user. Other servicing
generally should be referred to qualified service personnel. Caution must be exercised, since improper
servicing may cause unsafe operation.

49-1000110 Rev. 0 08-18 GEA
Congelador Superior
Refrigeradores
Con
g
elador Superior
Refri
g
eradores
Contenido
Información de Seguridad ..........3
Operación del Refrigerador
Piezas y características ............5
Recipientes .....................6
Cuidado y Limpieza ................7
Instrucciones Para La Instalación
Instala el refrigerador ..............8
Apertura inversa de la puerta .......9
Solución de Problemas
Sonidos normales de operación ....12
Consejos para la solución
de problemas ..................13
Garantía Limitada ................14
Soporte al Consumidor ............16
Models: VPS10FGMWW, VPS10FGMBB, VPS10FSMSB
Manual del
Propietario
e Instalación
Escriba los números de modelo y de serie aquí:
Número de modelo : ____________________
Número de serie: _______________________
Busque estos números en una etiqueta del
lado izquierdo, cerca de la parte intermedia del
compartimiento del refrigerador.

249-1000110 Rev. 0
Para más información sobre su electrodoméstico Conservator, visite Conservatorappliances.com.

49-1000110 Rev. 0 3
LEA Y GUARDE ESTAS INSTRUCCIONES
ADVERTENCIA PELIGRO DE EXPLOSIÓN Refrigerantes Inflamables
Este electrodoméstico cuenta con refrigerante isobutano, R600a, un gas natural con alto nivel de compatibilidad
medioambiental. Sin embargo, también es combustible. Siga las advertencias que figuran a continuación, a fin de reducir el
riesgo de lesiones o daños sobre la propiedad.
1) Al mover, instalar y operar el electrodoméstico, se deberá
tener cuidado de no dañar la tubería del refrigerante.
2) El servicio técnico sólo debe ser realizado por personal
autorizado del servicio. Use sólo piezas del servicio
autorizadas por el fabricante
3) Descarte el electrodoméstico de acuerdo con las
Regulaciones Federales y Locales. El refrigerante
inflamable y el material aislante inflamable usados
requieren procedimientos de descarte especiales.
Comuníquese con las autoridades locales para descartar
su refrigerador de forma ambientalmente segura.
4) Mantenga las aberturas de ventilación en el espacio
de protección del electrodoméstico o en la estructura
incorporada libres de obstrucción.
5) No use dispositivos mecánicos u otros medios para
acelerar el proceso de descongela miento.
6) No dañe el circuito del refrigerante.
7) No use dispositivos eléctricos dentro del compartimiento
de almacenamiento de comida del electrodoméstico.
INFORMACIÓN DE SEGURIDAD
INFORMACIÓN IMPORTANTE DE SEGURIDAD
LEA TODAS LAS INSTRUCCIONES ANTES DE USAR
PRECAUCIÓN A fin de reducir el riesgo de lesiones al usar el refrigerador, siga estas precauciones
básicas.
Ŷ 1ROLPSLHHVWDQWHVGHYLGULRQLWDSDVFRQDJXDFDOLHQWH
cuando estén fríos. Los estantes de vidrio y las tapas
se pueden romper si son expuestos a cambios de
temperatura repentinos o impactos, tales como sacudones
o caídas. El vidrio templado está diseñado para destruirse
en pequeñas piezas en caso de rotura.
Ŷ 0DQWHQJDORVGHGRVIXHUDGHORVHVSDFLRVGH³ULHVJRGH
lastimaduras”; los despejes entre las puertas y entre las
puertas y el gabinete son necesariamente pequeños.
Tenga el cuidado de cerrar las puertas cuando los niños
se encuentren en el área.
Ŷ 1RWRTXHODVVXSHUILFLHVIUtDVGHOFRPSDUWLPLHQWRGHO
freezer cuando las manos estén húmedas o mojadas,
ya que la piel se podrá adherir a estas superficies
extremadamente frías.
Ŷ 1RYXHOYDDFRQJHODUFRPLGDVTXHKD\DQHVWDGR
totalmente congeladas en forma previa.
Ŷ (QUHIULJHUDGRUHVFRQPiTXLQDVGHKDFHUKLHOR
automáticas, evite el contacto con las partes móviles del
mecanismo eyector o con el elemento de calefacción que
libera los cubos. No coloque los dedos ni las manos en el
mecanismo de la máquina de hielo automática mientras el
refrigerador esté enchufado.
ADVERTENCIA A fin de reducir el riesgo de incendio, explosión, descargas eléctricas o lesiones al usar
su refrigerador, siga estas precauciones básicas de seguridad:
Ŷ (VWHUHIULJHUDGRUVHGHEHUiLQVWDODU\XELFDU
adecuadamente de acuerdo con las Instrucciones de
Instalación antes de ser usado.
Ŷ 'HVHQFKXIHHOUHIULJHUDGRUDQWHVGHKDFHUUHSDUDFLRQHV
reemplazar una lámpara de luz o hacer una limpieza.
Nota: La corriente que va al refrigerador no puede ser
desconectada por ninguna configuración del panel de
control.
Nota: Las reparaciones deberán ser realizadas por un
Profesional del Servicio Técnico calificado.
Ŷ 5HHPSODFHWRGDVODVSLH]DV\SDQHOHVDQWHVGHOXVR
Ŷ 1RXVHXQSURORQJDGRU
Ŷ 1RJXDUGHQLXVHJDVROLQDXRWURVYDSRUHVLQIODPDEOHV\
líquidos cerca de este ni de otro electrodoméstico.
Ŷ 1RJXDUGHVXVWDQFLDVH[SORVLYDVWDOHVFRPRODWDV
de aerosoles con propelentes inflamables en este
electrodoméstico.
Ŷ $ILQGHHYLWDUULHVJRVGHTXHORVQLxRVVXIUDQDVIL[LDR
queden atrapados, retire las puertas de comidas frescas y
del freezer de cualquier refrigerador antes de deshacerse
o dejar de usar el mismo.
Ŷ /RVQLxRV\ODVSHUVRQDVFRQFDSDFLGDGItVLFD
sensorial o mental reducida o con falta de experiencia y
conocimiento podrán usar este electrodoméstico sólo si
son supervisados o les fueron dadas instrucciones sobre
un uso seguro y entienden los riesgos involucrados.
Ŷ (VWHHOHFWURGRPpVWLFRIXHGLVHxDGRSDUDXVRKRJDUHxR
y para aplicaciones similares tales como: áreas de
personal de cocina en tiendas, oficinas y otros espacios
laborales; casas de campo; por clientes en hoteles,
moteles, hostales y otros espacios residenciales, catering
y aplicaciones no minoristas similares.
INSTALACIÓN

449-1000110 Rev. 0
CONEXIÓN DE LA ELECTRICIDAD
INFORMACIÓN DE SEGURIDAD
INFORMACIÓN IMPORTANTE DE SEGURIDAD
LEA TODAS LAS INSTRUCCIONES ANTES DE USAR
LEA Y GUARDE ESTAS INSTRUCCIONES
Nunca, bajo ninguna circunstancia, corte o elimine el tercer cable (tierra) del cable de corriente. Para su seguridad
personal, este electrodoméstico debe estar adecuadamente conectado a tierra.
El cable de corriente de este electrodoméstico contiene un
enchufe de 3 cables (conexión a tierra) que se conecta a un
tomacorriente de pared estándar de 3 cables (conexión a
tierra) para minimizar la posibilidad de riesgos de descargas
eléctricas por parte del mismo.
Contrate a un electricista calificado para que controle el
tomacorriente y el circuito eléctrico, a fin de asegurar que el
enchufe esté correctamente conectado a tierra.
En caso de contar con un tomacorriente de pared de 2
cables, es su responsabilidad y obligación reemplazarlo
por un tomacorriente de pared de 3 cables correctamente
conectado a tierra. No use un adaptador.
El refrigerador debería estar siempre conectado a un enchufe
específico con un índice de voltaje equivalente al que figura
en su etiqueta de características técnicas.
Se requiere un suministro eléctrico con fusible y conexión
a tierra de 115 voltios de CA, 60 Hz, 15 o 20 amperes.
Esto garantiza el mejor funcionamiento y además previene
la sobrecarga de los circuitos del hogar, lo cual podría
ocasionar riesgos de incendio debido al recalentamiento de
cables.
Nunca desenchufe el refrigerador tirando del cable de
corriente. Siempre tome su enchufe firmemente y empuje el
mismo hacia afuera para retirarlo.
Repare o reemplace de inmediato todos los cables de
corriente pelados o con cualquier tipo de daño. No use
un cable con cortaduras o abrasión sobre su extensión o
extremos.
Al alejar el refrigerador de la pared, se deberá tener cuidado
de que no ruede sobre ni dañe el cable de corriente.
ADVERTENCIA RIESGO DE DESCARGA ELÉCTRICA
Enchufe en un tomacorriente con conexión a tierra de 3 cables.
No elimine el cable de conexión a tierra.
No use un adaptador.
No use un prolongador.
Si no se siguen estas instrucciones se podrá producir a muerte, incendios o descargas eléctricas.
ADVERTENCIA PELIGRO DE SUFFOCATION Y ENTRAPMENT
El incumplimiento de estas instrucciones de eliminación puede causar la muerte o lesiones graves.
IMPORTANTE: Que un niño quede atrapado o que sufra
una asfixia no son problemas del pasado. Los refrigeradores
antiguos o abandonados aún son peligrosos, incluso aunque
VHFRQVHUYHQSRU³VyORXQRVSRFRVGtDV´6LVHGHVKDUiGHVX
antiguo refrigerador, siga las siguientes instrucciones a fin de
evitar accidentes.
Antes de Descartar su Antiguo Aparato:
Ŷ Retire las puertas de comidas frescas y del freezer.
Ŷ Deje los estantes en su lugar de modo que los niños no
puedan trepar dentro con facilidad.
Cómo Eliminar Refrigerantes y Gomaespumas:
Descarte el electrodoméstico de acuerdo con las Regulaciones Federales y Locales. Comuníquese con las autoridades locales
para descartar su electrodoméstico de forma ambientalmente segura
This manual suits for next models
2
Table of contents
Languages:
Other Conservator Refrigerator manuals

Conservator
Conservator GRLH184TW User manual

Conservator
Conservator GRH1482TW User manual

Conservator
Conservator GRM072AW User manual

Conservator
Conservator GRM183TW User manual

Conservator
Conservator GRLH152SW User manual

Conservator
Conservator GRMH183UW User manual

Conservator
Conservator GRM183QW User manual

Conservator
Conservator GRM183UW User manual

Conservator
Conservator GRMH141AW User manual