Contrec 515 FA01 User manual

i
Model 515 Flow Computer
Operation Manual
Application FA01
Add or Subtract
Flow Computer
for
Volumetric Applications
29 August 2021

i i
Model 515 Flow Computer - Operation Manual
© Contrec Limited 2021
The instructions given herein cover the general description, installation, operation and maintenance of the subject
equipment. Contrec Limited. reserves the right, without prior notice, to make engineering refinements that may not
be reflected in this manual.
Should any questions arise which cannot be answered specifically by this manual, they should be directed to
Contrec Limited for further detailed information and technical assistance.
Contrec Limited will not accept any liability for either direct or consequential damages resulting from the use or
misapplication of the contents of this manual.
Part of the software embedded in this product is eCos - Embedded Configurable Operating System, a trademark of
Red Hat. Portions created by Red Hat are Copyright © 1998, 1999, 2000 Red Hat, Inc.
(http://www.redhat.com). All rights reserved
The software in this product was in part provided by Red Hat and any express or implied warranties, including, but
not limited to, the implied warranties of merchantability and fitness for a particular purpose are disclaimed. In no
event shall the author be liable for any direct, indirect, incidental, special, exemplary, or consequential damages
(including, but not limited to, procurement of substitute goods or services; loss of use, data, or profits; or business
interruption) however caused and on any theory of liability, whether in contract, strict liability, or tort (including
negligence or otherwise) arising in any way out of the use of this software, even if advised of the possibility of such
damage.
Contrec Limited
Riverside, Canal Road, Sowerby Bridge,
West Yorkshire HX6 2AY UNITED KINGDOM
Tel: +44 1422 829944
Email: [email protected]
Website: www.contrec.co.uk
Contrec Systems Pty Ltd
5 Norfolk Avenue Ringwood, Melbourne 3134 AUSTRALIA
Tel: +61 4 413 505 114
Email: [email protected]
Contrec - USA, LLC
916 Belcher Drive Pelham AL 35124 USA
Tel: +1 (205) 685 3000 Fax: +1 (205) 685 3001
Email: [email protected]
Publication No: 515-FA01-OM - 29 August 2021

515 FA01 - 29 August 2021 iii
Safety Notice
The information in this safety notice is for the prevention of injury to personnel and
damage to the instrument.
The manufacturer assumes no liability for injury or damage caused by misuse of the
instrument or for modifications made to the instrument.
This document must be consulted in all cases where the following “Caution” safety symbol is
used :
Qualified Personnel
The instrument must be installed, operated and serviced by persons who have been properly
trained and authorised. Personnel must read and understand this manual prior to installation and
operation of the instrument. Refer to section 3 for further information regarding permitted
maintenance operations. The safety of any system incorporating the equipment is the
responsibility of the assembler of the system.
Static Hazard
The 500 series flow computer uses high speed CMOS circuitry which is sensitive to static
damage. The user should observe accepted safety practices for handling electronic devices,
especially during servicing. Once the unit is installed, grounded and interconnected, the chances
of static damage are greatly reduced.
Voltage Hazard
Before connecting power to the instrument, ensure that the supply voltage for the AC or DC
input is suitable. The AC voltage rating is as stated on the instrument rating plate. Personnel
should take all due care to avoid electric shock. For safe operation it is essential to connect a
mains safety earth to the A.C. power inlet. Do not operate at altitudes above 2000m.
Welding Hazard
Do not perform electric welding in close proximity to the instrument or its interconnecting
cables. If welding in these areas must be performed, disconnect all cables from the instrument.
Failure to do so may result in damage to the unit.
Moisture Hazard
To avoid electrical faults and corrosion of the instrument, do not allow moisture to remain in
contact with the instrument. Operate only in a clean, dry and pollutant-free environment.
Operating & Storage Temperature
Operating: If a heater is being used, DO NOT isolate the instrument in temperatures below
-20°C.
Storage: DO NOT store the equipment below -20°C.
515 FA01 - 29 August 2021

i v 515 FA01 - 29 August 2021
Disconnection Device
When powered from a mains supply this unit requires the provision of a suitable mains isolation
device, capable of interrupting both poles of the supply and meeting your local wiring
regulations, to be suitably located and easily accessible near to the installed instrument. It must
be marked as the disconnecting device for the equipment. It must be suitably rated with respect
to the cross sectional area of the supply conductors.
Instrument Disposal
Contrec instrumentation should not be thrown into the general waste system.
If within EU member states, this instrument should be disposed of according to
the guidelines set by the WEEE (Waste Electrical and Electronic Equipment)
directive 2012/19/EU. If outside of the EU, this equipment should be
responsibly disposed of according to local and national regulations for EEE
(Electrical and Electronic Equipment).
By not discarding of this product along with other house hold waste you are
preserving natural resources and reducing waste sent to landfill and incinerators.
Remove batteries and dispose of separately (see Disposal of Batteries) before disposal of
Contrec instrumentation.
Disposal of Batteries
Batteries have an environmental impact. Safe and responsible disposal should
be undertaken.
In all EU member states, as per Directive 2006/66/EC, batteries must not be
thrown away with general waste. Contact your local environmental authority
for information regarding disposal or recycling of used batteries, alternatively
they can be returned directly to Contrec Ltd. for disposal.
Please Contact Contrec Ltd before returning batteries for disposal.
Explanation of IEC Symbols Used
You should familiarise yourself with the following symbols which are used both within this
manual and on the instrument itself.
This document must be consulted in all cases where the following “Caution” safety
symbol is used.
DC Input (DC).
AC Input (AC).
Protective Earth Terminal.

515 FA01 - 29 August 2021 v
1 Introduction
Features . . . . . . . . . . . . . . . . . . . . . . . . . . . . . . . . . . . . . . . . . . 1
Overview . . . . . . . . . . . . . . . . . . . . . . . . . . . . . . . . . . . . . . . . . . 1
Calculation Modes . . . . . . . . . . . . . . . . . . . . . . . . . . . . . . . . . . . 2
Calculations . . . . . . . . . . . . . . . . . . . . . . . . . . . . . . . . . . . . . . . 2
Analog Input Scaling . . . . . . . . . . . . . . . . . . . . . . . . . . . . . . . . . . 3
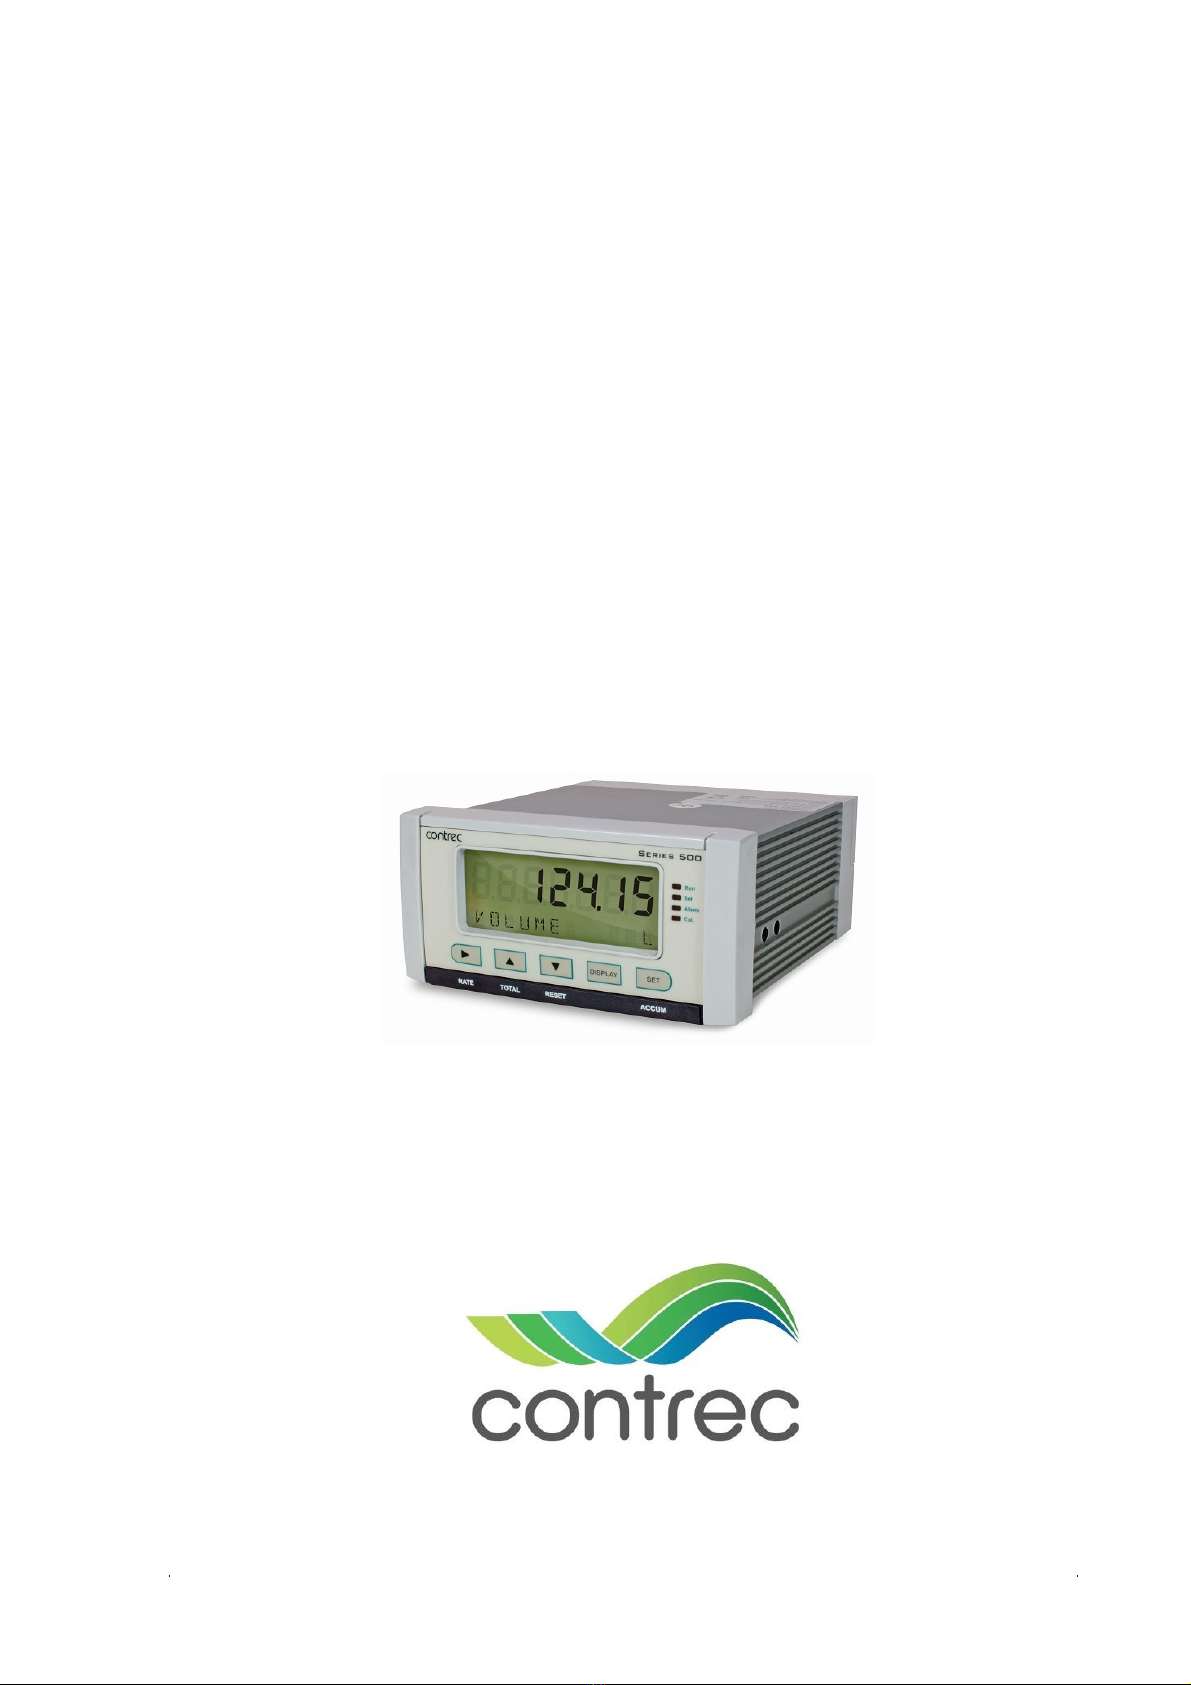
Displayed Information . . . . . . . . . . . . . . . . . . . . . . . . . . . . . . . . . 3
Main Menu Variables . . . . . . . . . . . . . . . . . . . . . . . . . . . . . . . . . . 3
Communications . . . . . . . . . . . . . . . . . . . . . . . . . . . . . . . . . . . . 4
Isolated Outputs . . . . . . . . . . . . . . . . . . . . . . . . . . . . . . . . . . . . 4
Relay Outputs . . . . . . . . . . . . . . . . . . . . . . . . . . . . . . . . . . . . . . 4
Software Configuration . . . . . . . . . . . . . . . . . . . . . . . . . . . . . . . . . 5
Limitations of Use . . . . . . . . . . . . . . . . . . . . . . . . . . . . . . . . . . . 5
Approvals . . . . . . . . . . . . . . . . . . . . . . . . . . . . . . . . . . . . . . . . 6
2 Specifications
Specification Table . . . . . . . . . . . . . . . . . . . . . . . . . . . . . . . . . . . . 7
3 Installation & Maintenance
Installation Instructions . . . . . . . . . . . . . . . . . . . . . . . . . . . . . . . . . . 9
Cleaning and Decontamination . . . . . . . . . . . . . . . . . . . . . . . . . . . . . 9
Panel Mounting . . . . . . . . . . . . . . . . . . . . . . . . . . . . . . . . . . . . . . 9
Electrical Connection . . . . . . . . . . . . . . . . . . . . . . . . . . . . . . . . . . 10
Rear Panel Connections . . . . . . . . . . . . . . . . . . . . . . . . . . . . . . . 10
Terminal Designations . . . . . . . . . . . . . . . . . . . . . . . . . . . . . . . . 11
Terminal Wiring Insulation . . . . . . . . . . . . . . . . . . . . . . . . . . . . . . 12
Relay Wiring . . . . . . . . . . . . . . . . . . . . . . . . . . . . . . . . . . . . . 12
Mains Power Wiring . . . . . . . . . . . . . . . . . . . . . . . . . . . . . . . . . 12
Inputs . . . . . . . . . . . . . . . . . . . . . . . . . . . . . . . . . . . . . . . . . . 13
Frequency Input Connection . . . . . . . . . . . . . . . . . . . . . . . . . . . . . 13
Analog Input Connections . . . . . . . . . . . . . . . . . . . . . . . . . . . . . . 14
Logic Input Connection . . . . . . . . . . . . . . . . . . . . . . . . . . . . . . . 15
Outputs . . . . . . . . . . . . . . . . . . . . . . . . . . . . . . . . . . . . . . . . . . 16
4-20 mA Output Connection . . . . . . . . . . . . . . . . . . . . . . . . . . . . . 16
Pulse Output Connection . . . . . . . . . . . . . . . . . . . . . . . . . . . . . . . 17
Control Relays (Alarms) . . . . . . . . . . . . . . . . . . . . . . . . . . . . . . . . . 18
RC Network for Interference Suppression . . . . . . . . . . . . . . . . . . . . . . 19
Communications . . . . . . . . . . . . . . . . . . . . . . . . . . . . . . . . . . . . . 20
COM-1 RS-232 Port . . . . . . . . . . . . . . . . . . . . . . . . . . . . . . . . . 20
COM-2 RS-485 Port Option . . . . . . . . . . . . . . . . . . . . . . . . . . . . . 20
COM-2 Ethernet Port Option . . . . . . . . . . . . . . . . . . . . . . . . . . . . 21
Mains Connection . . . . . . . . . . . . . . . . . . . . . . . . . . . . . . . . . . . . 21
Earthing and Shielding . . . . . . . . . . . . . . . . . . . . . . . . . . . . . . . . 21
Disconnection Device . . . . . . . . . . . . . . . . . . . . . . . . . . . . . . . . 21
Maintenance Instructions . . . . . . . . . . . . . . . . . . . . . . . . . . . . . . . . 21
Battery Replacement . . . . . . . . . . . . . . . . . . . . . . . . . . . . . . . . . 22
Battery Type . . . . . . . . . . . . . . . . . . . . . . . . . . . . . . . . . . . . . 22
Contents
515 FA01 - 29 August 2021

v i 515 FA01 - 29 August 2021
4 Operation
Normal Operation . . . . . . . . . . . . . . . . . . . . . . . . . . . . . . . . . . . . 23
Default Total . . . . . . . . . . . . . . . . . . . . . . . . . . . . . . . . . . . . . 23
Status LEDs . . . . . . . . . . . . . . . . . . . . . . . . . . . . . . . . . . . . . . 23
Front Panel Keys . . . . . . . . . . . . . . . . . . . . . . . . . . . . . . . . . . . 24
Remote Reset . . . . . . . . . . . . . . . . . . . . . . . . . . . . . . . . . . . . . 24
Main Menu Items . . . . . . . . . . . . . . . . . . . . . . . . . . . . . . . . . . . 25
Detail and Basic Menu . . . . . . . . . . . . . . . . . . . . . . . . . . . . . . . . 25
Peak Flowrates . . . . . . . . . . . . . . . . . . . . . . . . . . . . . . . . . . . . 26
Data Logs . . . . . . . . . . . . . . . . . . . . . . . . . . . . . . . . . . . . . . . 26
Model Information . . . . . . . . . . . . . . . . . . . . . . . . . . . . . . . . . . 28
5 Instrument Calibration
Introduction . . . . . . . . . . . . . . . . . . . . . . . . . . . . . . . . . . . . . . . 29
Calibration View Mode . . . . . . . . . . . . . . . . . . . . . . . . . . . . . . . . . 30
Calibration Set Mode . . . . . . . . . . . . . . . . . . . . . . . . . . . . . . . . . . 30
Changing the Instrument Settings . . . . . . . . . . . . . . . . . . . . . . . . . . 32
Program Backup & Reports . . . . . . . . . . . . . . . . . . . . . . . . . . . . . . . 33
Backup via 500 Series Program Manager . . . . . . . . . . . . . . . . . . . . . . 33
Printing Configuration Report . . . . . . . . . . . . . . . . . . . . . . . . . . . . 33
Upload and Clone of Application Software . . . . . . . . . . . . . . . . . . . . . 33
Calibration Menu Tree . . . . . . . . . . . . . . . . . . . . . . . . . . . . . . . . . . 34
Instrument Settings . . . . . . . . . . . . . . . . . . . . . . . . . . . . . . . . . . . . 36
Units of Measurement . . . . . . . . . . . . . . . . . . . . . . . . . . . . . . . . 36
Parameters . . . . . . . . . . . . . . . . . . . . . . . . . . . . . . . . . . . . . . 37
Inputs . . . . . . . . . . . . . . . . . . . . . . . . . . . . . . . . . . . . . . . . . 37
Outputs . . . . . . . . . . . . . . . . . . . . . . . . . . . . . . . . . . . . . . . . 43
Alarms . . . . . . . . . . . . . . . . . . . . . . . . . . . . . . . . . . . . . . . . 45
Communications . . . . . . . . . . . . . . . . . . . . . . . . . . . . . . . . . . . 47
Time Settings and Data Logging . . . . . . . . . . . . . . . . . . . . . . . . . . . 48
General Setup Parameters . . . . . . . . . . . . . . . . . . . . . . . . . . . . . . . 51
Test Menu . . . . . . . . . . . . . . . . . . . . . . . . . . . . . . . . . . . . . . . 54
System Messages . . . . . . . . . . . . . . . . . . . . . . . . . . . . . . . . . . . . . 55
Error Messages . . . . . . . . . . . . . . . . . . . . . . . . . . . . . . . . . . . . 55
Warning Messages . . . . . . . . . . . . . . . . . . . . . . . . . . . . . . . . . . 56
6 Communications
Overview . . . . . . . . . . . . . . . . . . . . . . . . . . . . . . . . . . . . . . . . . 57
Hardware Interconnection . . . . . . . . . . . . . . . . . . . . . . . . . . . . . . 57
Protocols . . . . . . . . . . . . . . . . . . . . . . . . . . . . . . . . . . . . . . . . . 59
Simple ASCII Protocol . . . . . . . . . . . . . . . . . . . . . . . . . . . . . . . . . 59
Requests Format . . . . . . . . . . . . . . . . . . . . . . . . . . . . . . . . . . . 59
Instrument Responses . . . . . . . . . . . . . . . . . . . . . . . . . . . . . . . . . 61
Corrupted or Invalid Requests . . . . . . . . . . . . . . . . . . . . . . . . . . . . 64
Modbus RTU Protocol . . . . . . . . . . . . . . . . . . . . . . . . . . . . . . . . . 65
List of Data Registers . . . . . . . . . . . . . . . . . . . . . . . . . . . . . . . . . 67
Printer Protocol . . . . . . . . . . . . . . . . . . . . . . . . . . . . . . . . . . . . . 71
Types of Printouts . . . . . . . . . . . . . . . . . . . . . . . . . . . . . . . . . . . 72

515 FA01 - 29 August 2021 vii
Printer Data Control . . . . . . . . . . . . . . . . . . . . . . . . . . . . . . . . . 75
Appendix A Glossary
Glossary . . . . . . . . . . . . . . . . . . . . . . . . . . . . . . . . . . . . . . . . . 77
Appendix B Model Numbers
Product Codes . . . . . . . . . . . . . . . . . . . . . . . . . . . . . . . . . . . . . . 79
Custom Version Codes . . . . . . . . . . . . . . . . . . . . . . . . . . . . . . . . . 80
Application Information Code . . . . . . . . . . . . . . . . . . . . . . . . . . . . . . 80
Appendix C Ethernet Port & Setup
Ethernet Port . . . . . . . . . . . . . . . . . . . . . . . . . . . . . . . . . . . . . . . 82
Connecting 515 Ethernet to Networks/Routers . . . . . . . . . . . . . . . . . . . . . 82
Connecting DataMod via Ethernet . . . . . . . . . . . . . . . . . . . . . . . . . . . 83
Index . . . . . . . . . . . . . . . . . . . . . . . . . . . . . . . . . . . . . . . . . . . . 85

viii 515 FA01 - 29 August 2021

515 FA01 - 29 August 2021 ix515 FA01 - 29 August 2021
List of Figures
1 Typical Application Diagram . . . . . . . . . . . . . . . . . . . . . . . . . . . . 5
2 500 Series Instrument Panel Mounting . . . . . . . . . . . . . . . . . . . . . . . 9
3 Rear Panel Connections - Original . . . . . . . . . . . . . . . . . . . . . . . . 10
4 Rear Panel Connections - New RS485 Version . . . . . . . . . . . . . . . . . . 10
5 Rear Panel Connections - New Ethernet Version . . . . . . . . . . . . . . . . . 11
6 Externally Powered Voltage Transmitter . . . . . . . . . . . . . . . . . . . . . 14
7 Internally Powered Voltage Transmitter . . . . . . . . . . . . . . . . . . . . . 14
8 Externally Powered Current Loop . . . . . . . . . . . . . . . . . . . . . . . . . 15
9 Internally Powered Current Loops . . . . . . . . . . . . . . . . . . . . . . . . 15
10 Logic Inputs Connection Diagram . . . . . . . . . . . . . . . . . . . . . . . . 16
11 Output 4-20 mA Connection Diagram . . . . . . . . . . . . . . . . . . . . . . . 17
12 Output Pulse Connection Diagram . . . . . . . . . . . . . . . . . . . . . . . . 17
13 Relay Connection Diagram . . . . . . . . . . . . . . . . . . . . . . . . . . . . 18
14 RS-485 Interface Connections . . . . . . . . . . . . . . . . . . . . . . . . . . . 20
15 Logged Data Display Methods . . . . . . . . . . . . . . . . . . . . . . . . . . 27
16 Calibration Menu Tree Sheet 1 . . . . . . . . . . . . . . . . . . . . . . . . . . 34
17 Calibration Menu Tree Sheet 2 . . . . . . . . . . . . . . . . . . . . . . . . . . 35
18 RS-232 Cable Connections to a Computer . . . . . . . . . . . . . . . . . . . . 57
19 RS-485 Connections . . . . . . . . . . . . . . . . . . . . . . . . . . . . . . . . 58
20 DataMod - Modbus Connection Settings . . . . . . . . . . . . . . . . . . . . . 83

x 515 FA01 - 29 August 2021

Introduction
515 FA01 - 29 August 2021 1
Chapter 1
Introduction
Features
•Programmable for either frequency or analog flow inputs
•Tailored for volumetric units of measure
•Freely assignable alarms for high or low levels
•Selection of Detail or Basic main menu to suit operator and application
•Selection of second language and user tags
•RTC logging with over 1000 entries.
•Programmable pulse width and scaling of pulse output
•4-20 mA retransmission
•RS232 and RS485 or Ethernet (optional) serial ports
•Modbus RTU, Printer and other serial port protocols
•Front panel adjustment of 8-24 V DC output voltage
•Backlit display
Overview
The 515 FA01 application pack is an add or subtract flow computer that is
tailored specifically for volume measurement. It can perform either addition
or subtraction on two frequency inputs or on two analog inputs.
The flow computer is suitable for accepting signals directly from
flowmeters or for collecting re-transmitted signals from other flow
computers providing a resultant rate and total. The instrument displays the
flow rate and total for each channel as well as the result.
The frequency input is compatible with a wide range of frequency signals,
including millivolt signals, reed switches, Namur proximity switches and
pulse trains via its smart front-panel program selection. The analog input
can be scaled and have filtering, non-linear correction and cutoff points
applied to the signal.
515 FA01 - 29 August 2021

Introduction
2 515 FA01 - 29 August 2021
Calculation Modes
This instrument is capable of operating in the following modes:
• Addition (Channel 1 + Channel 2)
• Subtraction (Channel 1 - Channel 2)
When subtraction mode is selected the larger flow should be connected to
channel 1. The instrument can also be programmed to perform the
calculation on either the frequency inputs (FINP1 and FINP2) or the analog
inputs (AINP3 and AINP4).
The operation mode can be observed via Modbus RTU communications.
Please refer to Instrument Control and I/O on page 69 for further details.
Calculations
The following equations identify the derivation of some of the displayed
variables. If your interest is more in the operation of the instrument, you can
skip this section and allow the instrument to take care of the calculations.
For frequency inputs the calculation of totals are exact as the instrument
collects all pulses detected on each channel.
channel total = pulses / k-factor
The flow rates are derived from an accurately measured frequency:
channel flow = frequency / k-factor
For analog inputs, to derive the flow rate, the analog input is normalised to
a value (A) between 0 and 1.
channel flow = (Vf
max-Vf
min)A+Vfmin
The resultant values are then:
ADD result = channel 1 + channel 2
SUB result = channel 1 - channel 2
channeltotal channelflow t
=

Introduction
515 FA01 - 29 August 2021 3
Analog Input Scaling
The analog inputs in this instrument are scaled by the following general
formula:
where:
Correction Type
•LINEAR: when the instrument is not required to apply
correction
•NON-LINEAR: when the instrument applies correction from
the points in the correction table
Displayed Information
The front panel display shows the current values of the input variables and
the results of the calculations.
The instrument can be supplied with a real-time clock for data logging of
over 1000 entries of the variables as displayed on the main menu.
Main Menu Variables
Pmin = minimum point (equivalent to offset)
Pmax = maximum point (Pmax – Pmin is equivalent to span)
A* = normalised signal (0 to 1) with correction applied for a flow input
f
A Pmin Pmax Pmin–A*+=
A* A=
A* Ac
=
Main Menu
Variables
Default
Units
Variable
Type
Total 1 m3Total
Flowrate 1 m3/min Rate
Total 2 m3Total
Flowrate 2 m3/min Rate
Resulting Total m3Total
Resulting Flowrate m3/min Rate

Introduction
4 515 FA01 - 29 August 2021
Units of Measurement
In the 500 Series instruments there is a wide range of available units of
measurement to be selected from. These can be viewed and selected either
during initial Software Configuration via the 500 Series Program Manager
(see below) or from within the instrument’s calibration settings (if access
has been granted) as per Units of Measurement on page 36.
Communications
There are two communication ports available as follows:
•COM-1 RS-232 port
•COM-2 RS-485 port (optional) or Ethernet (optional)
All types of ports can be used for remote data reading, while RS-232 and
RS-485 serial ports can be used for printouts and for uploading and
downloading of the application software to the instrument.
Isolated Outputs
The opto-isolated outputs can re-transmit any main menu variable. The type
of output is determined by the nature of the assigned variable. Totals are
output as pulses and rates are output as 4-20 mA signals. One output is
standard, a second output is available as an option.
Relay Outputs
The relay alarms can be assigned to any of the main menu variables of a rate
type. The alarms can be fully configured including hysteresis. Two relays
are standard with two additional relays available as an option.

Introduction
515 FA01 - 29 August 2021 5
Software Configuration
The instrument can be programmed to suit the particular application needs
and the flexible I/O can be assigned as required. Program settings can be
changed either via the front panel (depending on assigned access levels) or
via the 500 Series Program Manager (500-PM software).
The 500-PM software is a free comprehensive configuration tool and
resource centre that can be used to further tailor an instrument to suit
specific application needs including units of measurement, custom tags and
text, access levels and more.
The software is a Windows based program that is freely available from the
download section of the Contrec website. The program can be used to create
a custom version of an existing application to be saved for backup purposes
and/or to generate a PDF of configuration report for record keeping.
The instrument stores all set-up parameters, totals and logged data in non-
volatile memory with at least 30 years retention.
Figure 1 Typical Application Diagram
Limitations of Use
Negative Resultant Flow
In subtraction mode the instrument is capable of calculating and displaying
a negative resultant flow when Flow 2 is greater than Flow 1. However it
can not represent this with a retransmission output pulse. The pulse output
will only represent positive resultant flow, i.e. Flow 1 > Flow 2.
Channel 1 Flow
Frequency Input 1
or Analog Input 3
Channel 2 Flow
Flowmeter or
Frequency Input 2
or Analog Input 4
retransmitted signals

Introduction
6 515 FA01 - 29 August 2021
Approvals
This instrument conforms to the EMC-Directive of the Council of
European Communities 2014/30/EU, the LVD safety directive 2014/35/EU
and the following standards:
•EN61326:2013 Electrical equipment for measurement, control and
laboratory use – EMC requirements: Industrial Environment.
•EN61010:2010 Safety requirements for electrical equipment for
measurement, control, and laboratory use.
In order to comply with these standards, the wiring instructions in Chapter
3 - Installation & Maintenance must be followed.
FCC Declaration
This equipment has been tested and found to comply with the limits for a
Class A digital device, pursuant to Part 15 of the FCC Rules. These limits
are designed to provide reasonable protection against harmful interference
when the equipment is operated in a commercial environment. This
equipment generates, uses, and can radiate radio frequency energy and, if
not installed and used in accordance with the instruction manual, might
cause harmful interference to radio communications. Operation of this
equipment in a residential area is likely to cause harmful interference, in
which case the user will be required to correct the interference at his own
expense.
Properly shielded and grounded cables and connectors must be used in order
to meet FCC emission limits. Contrec Ltd is not responsible for any radio or
television interference caused by using other than recommended cables and
connectors or by unauthorized changes or modifications to this equipment.
Unauthorized changes or modifications could void the user's authority to
operate the equipment.
This device complies with Part 15 of the FCC Rules. Operation is subject to
the following two conditions: (1) this device might not cause harmful
interference, and (2) this device must accept any interference received,
including interference that might cause undesired operation.

Specifications
515 FA01 - 29 August 2021 7
Chapter 2
Specifications
Specification Table
Operating Environment
Temperature +5 °C to +40 °C (standard - no coating)
-20 °C to +60 °C (with conformal coating)
-30 °C to +60 °C (ExD housing with heater)
Humidity 0 to 95% non condensing (conformal
coating)
5% to 85% non condensing (no coating)
Power Supply 100-240 V AC (+/-10%) 50-60 Hz (+/-
10%) or 12-28 V DC
Consumption 10 W (max) Overvoltage category II
Protection Sealed to IP65 (Nema 4X) when panel
mounted
Dimensions
(panel option)
147 mm (5.8") width
74 mm (2.9") height
170 mm (6.6") depth (behind the panel)
Display
Type Backlit LCD with 7-digit numeric display
and 11-character alphanumeric display
Digits 15.5 mm (0.6") high
Characters 6 mm (0.24") high
LCD Backup Last data visible for 15 min after power
down
Update Rate 0.3 second
Non-volatile Memory
Retention > 30 years
Data Stored Setup, Totals and Logs
Approvals
Interference compliance
Enclosure IECEx, ATEX and CSA approved
enclosures available for hazardous areas
Real Time Clock (Optional)
Battery Type 3 volts Lithium button cell
- For Issue 7 option card, type CR2450N
manufactured by Renata only
- For conformal coated ‘C’ version, type
BR2032 manufactured by Panasonic only
- For non-conformal coated versions, type
BR2032 and CR2032 manufactured by
Panasonic or Sony
Battery Life 5 years (typical)
Frequency Input (General)
Range 0 to 10 kHz for Pulse input type
0 to 5 kHz for Coil & NPS input types
Overvoltage 30 V maximum
Update Time 0.3 sec
Cutoff frequency Programmable
Configuration Pulse, coil or NPS input
Non-linearity Up to 10 correction points
Pulse
Signal Type CMOS, TTL, open collector, reed switch
Threshold Signals switch below 1.3 & above 2 volts
Coil
Signal Type Turbine and sine wave
Sensitivity 15 mV minimum amplitude (typical)
NPS
Signal Type NPS sensor to Namur standard
Analog Input (General)
Overcurrent 100 mA absolute maximum rating
(30mA for 4-20mA inputs)
Update Time < 1.0 sec
Configuration 4-20 mA, 0-5V and 1-5V input
Non-linearity Up to 20 correction points (some inputs)
4-20 mA Input
Impedance 100 Ohms (to common signal ground)
Accuracy 0.05% full scale (20 C)
0.1% (full temperature range, typical)
0-5 or 1-5 Volts Input
Impedance 10 MOhms (to common signal ground)
Accuracy 0.05% full scale (20 C)
0.1% (full temperature range, typical)
Logic Inputs
Signal Type CMOS, TTL, open collector, reed switch
Overvoltage 30V maximum
515 FA01 - 29 August 2021

Specifications
8 515 FA01 - 29 August 2021
Important: Specifications are subject to change without notice.
Relay Output
No. of Outputs 2 relays plus 2 optional relays
Voltage 250 volts AC, 30 volts DC maximum
(solid state relays use AC only)
Current 3A maximum - mechanical relays
1.5A maximum - solid state relays
Communication Ports
Ports COM-1 RS-232 port
COM-2 RS-485 or Ethernet port (optional)
Baud Rate 2400 to 19200 baud
Parity Odd, even or none
Stop Bits 1 or 2
Data Bits 8
Protocols ASCII, Modbus RTU, Modbus TCP/IP
(Ethernet Port), Printer
Transducer Supply
Voltage 8 to 24 volts DC, programmable
Current 70 mA @ 24 V, 120 mA @ 12 V maximum
Protection Power limited output
Isolated Output
No. of Outputs 2 configurable outputs
Configuration Pulse/Digital or 4-20 mA output
Pulse/Digital Output
Signal Type Open collector
Switching 200 mA, 30 volts DC maximum
Saturation 0.8 volts maximum
Pulse Width Programmable: 10 , 20, 50, 100, 200 or
500ms
4-20 mA Output
Supply 9 to 30 volts DC external
Resolution 0.05% full scale
Accuracy 0.05% full scale (20C)
0.1% (full temperature range, typical)

Installation & Maintenance
515 FA01 - 29 August 2021 9
Chapter 3
Installation & Maintenance
Installation Instructions
The safety of any system incorporating the equipment is the responsibility
of the assembler of the system and should be installed such that there is no
risk of impact damage.
This instrument is intended for fixed installation only, e.g. within a panel or
cabinet, and is not intended for desktop use. It is not suitable for outdoor use
unless fitted into an appropriate outdoor enclosure with a minimum type 3,
IP54, rating. The instrument has a ‘Pollution degree II’ rating.
Cleaning and Decontamination
For general maintenance or to clean an instrument suitable for return to a
service centre for repair or inspection, use only a damp cloth and mild
detergent. Do not use abrasive cleaners or high pressure water jets. An
instrument must be decontaminated before returning.
Panel Mounting
The instrument should be located in an area with a clean, dry atmosphere
that is also relatively free of shock and vibration.
The standard mounting procedure is panel mounting in a cutout that is
139 mm wide by 67 mm high. Two side clips secure the unit into the panel.
Figure 2 shows the panel mounting requirements for the 500 Series
Instrument.
Figure 2 500 Series Instrument Panel Mounting
145 mm
Side View
22 mm
70 mm
67 mm
139 mm
25 mm
66 mm
Min. 189 mm
Panel Cut-out
Front
Panel
74 mm
Mounting Clip
138 mm
147 mm
Rear Connectors Top View RS232
Port
515 FA01 - 29 August 2021

Installation & Maintenance
1 0 515 FA01 - 29 August 2021
Electrical Connection
Rear Panel Connections
N.B. Depending on the specification and age of the instrument,
there are different versions of the upper output card. Ensure the instrument
is wired as per the correct terminal designation printed on the rear of the
instrument bezel and below.
Figure 3 shows the connections on the rear panel of the instrument where
relays 1 to 4 (terminals 32-35) share a single Relay Common (terminal 31).
N.B. The 5 way relay terminal block is GREEN.
Figure 3 Rear Panel Connections - Original
Figure 4 shows the connections on the rear panel of the instrument where
relays 1 and 2 (terminals 32-33) share Relay Common 1-2 (terminal 31) and
relays 3 and 4 (terminals 34-35) share Relay Common 3-4 (terminal 36.
N.B. The 6 way relay terminal block is ORANGE.
Figure 4 Rear Panel Connections - New RS485 Version
Table of contents
Other Contrec Measuring Instrument manuals

Contrec
Contrec 202A User manual

Contrec
Contrec 505 Series Installation manual

Contrec
Contrec 415 User manual

Contrec
Contrec 500 Series User manual

Contrec
Contrec 212 User manual

Contrec
Contrec 202D User manual

Contrec
Contrec 515 User manual

Contrec
Contrec 103D User manual

Contrec
Contrec 515 User manual

Contrec
Contrec 104D User manual
Popular Measuring Instrument manuals by other brands

Dilog
Dilog CombiVolt DL6780 instruction manual

AVTECH ELECTROSYSTEMS LTD.
AVTECH ELECTROSYSTEMS LTD. AVO-9W-B-P-P2D instructions

FRONIUS
FRONIUS Smart Meter TS 100A-1 operating instructions

cliMATE
cliMATE HP32 Handbook

Contec
Contec VNA-300M-PCI user guide

Aquametro
Aquametro CONTOIL Series Spare Parts - Repair - Maintenance