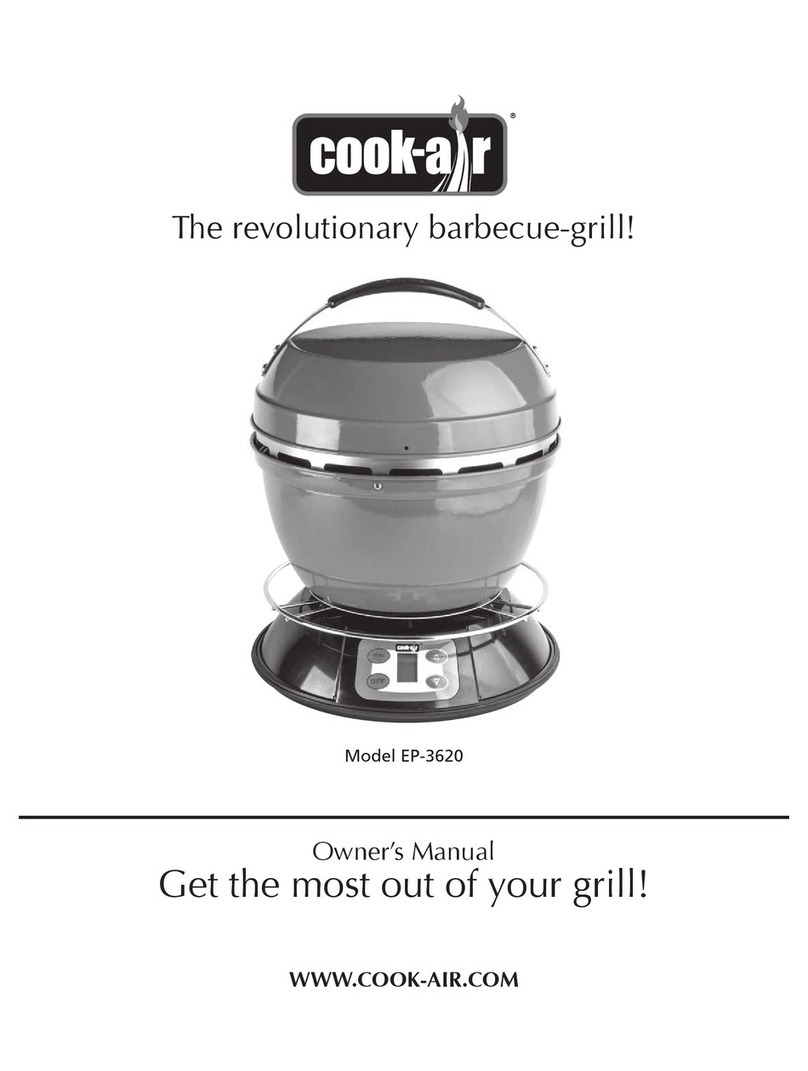
Cook-air EP-3615 User manual

®
Owner’s Manual
Get the most out of your grill!
The revolutionary barbecue-grill!
WWW.COOK-AIR.COM
Mod l EP-3615

2
WARRANTY COVERAGE
COOK-AIR warranty obligations ar limit d to th t rms s t forth
b low: Cata Mark ting Inc. (“Cata”) warrants this product
against d f cts in mat rials and workmanship for a p riod of
ONE (1) YEAR from th dat of original r tail purchas . This guar-
ant is valid only for th original purchas r of th COOK-AIR
and only if th COOK-AIR is us d for dom stic purpos s (non
comm rcial). This guarant is not valid in th following cas s: in-
appropriat us , modifications mad to th barb cu -grill,
br akag during transport or if us d for purpos s oth rs than
thos sp cifi d in th Own r’s manual. If a d f ct xists, at its
option Cata will (1) r pair th product at no charg , using n w
parts, (2) xchang th product with a product that is n w or (3)
r fund th purchas pric of th product. A r plac m nt prod-
uct/part assum s th r maining warranty of th original product
or nin ty (90) days from th dat of r plac m nt or r pair,
which v r provid s long r cov rag for you. Wh n a product or
part is xchang d, any r plac m nt it m b com s your prop rty
and th r plac d it m b com s Cata’s prop rty. Wh n a r fund
is giv n, your product b com s Cata’s prop rty.
OBTAINING WARRANTY SERVICE
If you purchas d this product in th U.S.A. or Canada, you may
contact us by mail d scribing th natur of your probl m, i-
th r by visiting th warranty s ction of our W bsit
WWW.COOK-AIR.COM or dir ctly at s rvic @cook-air.com.
Upon r c ipt of your inquiry and analysis of your probl m, w
will indicat th proc dur to follow. You may n d to r turn to
us th product car fully packag d, fr ight and insuranc pr -
paid. Wh n you contact us, pl as supply your nam , addr ss,
phon numb r and th original proof of purchas d tailing a
d scription of th product(s), dat of purchas and s rial num-
b r(s) of th COOK-AIR unit(s).
EXCLUSIONS AND LIMITATIONS
This Limit d Warranty appli s only to COOK-AIR products man-
ufactur d by or for Cata that can b id ntifi d by th “COOK-
AIR” trad mark, trad nam , or logo affix d to th m. Th
Limit d Warranty do s not apply to any non-COOK-AIR prod-
ucts. COOK-AIR and its Authoriz d S rvic Provid rs ar not li-
abl for any damag to or loss of any non-COOK-AIR product or
part not cov r d by this warranty. This warranty do s not apply:
(a) to damag caus d by accid nt, abus , misus , misapplication,
or non-COOK-AIR products; (b) to damag caus d by comm rcial
us of this product; (c) to a product or a part that has b n mod-
ifi d without th writt n p rmission of Cata; or (d) if any COOK-
AIR s rial numb r has b n r mov d or d fac d.
THIS WARRANTY AND REMEDIES SET FORTH ABOVE ARE EX-
CLUSIVE AND IN LIEU OF ALL OTHER WARRANTIES, REMEDIES
AND CONDITIONS, WHETHER ORAL OR WRITTEN, EXPRESS OR
IMPLIED. CATA SPECIFICALLY DISCLAIMS ANY AND ALL IMPLIED
WARRANTIES, INCLUDING, WITHOUT LIMITATION, WARRANTIES
OF MERCHANTABILITY AND FITNESS FOR A PARTICULAR PUR-
POSE. IF CATA CANNOT LAWFULLY DISCLAIM IMPLIED WAR-
RANTIES UNDER THIS LIMITED WARRANTY, ALL SUCH
WARRANTIES, INCLUDING WARRANTIES OF MERCHANTABILITY
AND FITNESS FOR A PARTICULAR PURPOSE ARE LIMITED IN DU-
RATION TO THE DURATION OF THIS WARRANTY. No COOK-AIR
r s ll r, ag nt, or mploy is authoriz d to mak any modifi-
cation, xt nsion, or addition to this warranty.
CATA MARKETING INC. IS NOT RESPONSIBLE FOR DIRECT, SPE-
CIAL, INCIDENTAL OR CONSEQUENTIAL DAMAGES RESULTING
FROM ANY BREACH OF WARRANTY OR INNAPROPRIATE USE
CONDITION, OR UNDER ANY OTHER LEGAL THEORY, INCLUD-
ING BUT NOT LIMITED TO LOST PROFITS, DOWNTIME, GOOD-
WILL DAMAGE. Som stat s and provinc s do not allow th
xclusion or limitation of incid ntal or cons qu ntial damag s
or xclusions or limitations on th duration of impli d war-
ranti s or conditions, so th abov limitations or xclusions may
not apply to you. This warranty giv s you sp cific l gal rights,
and you may also hav oth r rights that vary by stat or
provinc .
COOK-AIR One (1) Year Limited Warranty
U.S., Canada

3
© 2011 Cata Marketi g , I c. All rights reserved. COOK-AIR a d the COOK-AIR logo are trademarks of
Cata Marketi g , I c., registered i the U.S. a d Ca ada.
Customer Service
INSTRUCTIONS NOTICE
1. Do not att mpt to r pair or adjust any l ctrical or
m chanical compon nts of this grill. To do so
would void your warranty.
2. If you hav any inquiri s and/or comm nts r gar -
ding this grill or r quir h lp using it, pl as call
1 332
•
CATA (22 2) to sp ak with a Cus to m r
S rvic R pr s ntativ .
3. For r f r nc purpos s, pl as stapl or attach
your original sal s r c ipt to this manual. Also,
tak th tim to writ th product information
b low. Th y will b us ful wh n sp aking with
on of our Custom r S rvic R pr s ntativ s.
Important information
Mod l numb r
S rial numb r
Dat of purchas
Nam of stor
AVIS
Do ot retur
this product to the store.
For a y i quiry,
please call Customer Service at :
1 332
•
CATA (22 2)
United States, Canada
(9.00 am - 5.00 pm Easter time)
ORIGINAL PROOF OF PURCHASE
REQUIRED FOR WARRANTY SERVICE

4
Quick and efficient!
Thanks to a n w combustion t chnology, COOK-AIR quickly
r ach s a v ry high cooking t mp ratur ! It asily xc ds
1,000° F. Ap proximat ly four to fiv (4-5) minut s aft r starting
th unit, you ar r ady to cook hamburg rs, hot dogs, chops,
st aks, sausag s, chick n, fish or any food of your choic ! Onc
you ar don cooking, COOK-AIR cools off just as quickly simply
l t th fu l r sidu burn (+/-15 minut s)!
Simple and precise!
No mor charcoal bags or h avy gas tanks!
From now on, all you will n d is som solid wood fu l and th
COOK-AIR fir start r. It’s simpl , cl an, asy to stor and to us !
Solid wood fu l is a v ry saf , availabl and r n wabl n rgy
sourc and th r for contribut s to th cons rvation of our r -
sourc s.
H at control is not a v ry common charact ristic with barb cu
grills! How v r, COOK-AIR has a variabl sp d fan that allows
you to control th t mp ratur and cooking tim r quir d for
ach food.
Furth rmor , cl aning th unit is also v ry simpl ; you just hav
to saf ly dispos of th small quantity of ash s r maining in th
combustion chamb r.
Totally revolutionary!
Anoth r gr at surpris awaits you with COOK-AIR! In addition
to giving you xc ptional p rformanc , thanks to its int ns dry
coo king h at, COOK-AIR mak s it possibl to also smok your
food. This is just on of th many simpl t chniqu s you will b
abl to us with COOK-AIR… Go ah ad and xp rim nt!
To smok food, you simply hav to follow th simpl st ps pro-
vid d. A f w minut s b for cooking is compl t d, r duc th
fan's sp d to minimum and r plac th lid. Th food will ab-
sorb a “barb cu flavor”, which is why it is important to us
quality fu l. You can also add 1 or 2 pi c s of bark-cov r d
wood, which will incr as th quantity of smok . D p nding on
th kind of wood you us , such as ch rry, appl , hickory, mapl ,
ach will giv a uniqu aroma to your food.
Th n w COOK-AIR barb cu -grill promis s culinary xp ri nc s
full of gr at mom nts. How v r, sinc it is a highly r volution-
ary product mad and d sign d with advanc d t chnology, it is
imp rativ that you r ad this us r’s manual car fully. Onc you
fully und rstand th f atur s and how it op rat s, you can mak
th most of all it has to off r!
LE GRIL-BARBECUE RÉVOLUTIONNAIRE COOK-AIRTHE REVOLUTIONARY COOK-AIR BARBECUE GRILL
Owner’s Manual
Congratulations! A uniqu xp ri nc awaits you thanks to th stat -of-th -art COOK-AIR barb cu grill!
Outdoor cooking will n v r b th sam ! COOK-AIR is a tru littl marv l that will n v r c as to amaz you!

5
SAFE USE OF THE
COOK-AIR BARBECUE GRILL
(Warnings)
To g t th most out of your COOK-AIR, it is s-
s ntial to und rstand how it works and to always
follow basic saf ty standards. R ad all th in-
structions car fully b for op rating your COOK-
AIR barb cu -grill :
1. K p th COOK-AIR barb cu -grill out of th
r ach of childr n and p ts. Childr n should not
op rat this applianc .
2. CAUTION : N v r us alcohol,
gasolin , or any oth r liquid fu l
to light or r activat your COOK-
AIR. Us as fir start r a ball of
crumpl d pap r, th COOK-AIR
pap r fir start r, or a fir start r
that compli s with EN 1860-3.
3. N v r us charcoal or ch mically-tr at d wood
as fu l b caus it produc s a lot of cr osot
and mits toxic gas s. Also, n v r us wood
from conif rous tr s, such as c dar, fir, spruc
or oth rs. For b tt r r sults, us th COOK-AIR
solid wood fu l. You can also us blocks of dry
hardwood sp ci s as fu l.
4. Th combustion chamb r should n v r b fill d
mor than thr quart rs full (USE WOOD ONLY).
5. Always us th fan on low sp d (l v l 1) for
ignition (30 to 45 s c.) th n on high sp d
(l v l 5).
6. To avoid fir hazards, always put th cooking
grat prop rly position d b for pr ssing th
high sp d control button (l v l 5).
7. To handl your cooking grat saf ly, always in-
s rt th handl (fig. 1-A) in on of th 4 slots
d sign d for this purpos (fig. 1-B).
8. To r fu l whil cooking, slid th cooking
grat using th handl . Always us tongs to
add wood. Do not n v r att mpt to r mov
or lift th coo king grat that has food on it.
9. Always r mov xc ss fat from food and
drain marinat d m at in ord r to r duc x-
c ssiv flar -ups.
10. N v r op rat th COOK-AIR with th lid
tightly clos d, xc pt wh n smoking food. To
smok food, s t th control button on mini-
mum sp d (l v l 1). If you us th lid for
cooking wh n th fan s t on high sp d, b
sur to position th lid so as to allow th air to
circulat ; oth rwis , th h at could mov to
th low r s ction and damag th l ctrical
m chanism. Tak not that s tting th fan
control on minimum sp d (l v l 1) incr as s
th l v l of smok .
11. Wh n you ar finish d cooking, s t th fan
on m dium (l v l 2 or 3). Fu l r sidu s will
burn saf ly.
Fig. 1-B
Fig. 1-A

6
12. Aft r ach us of your grill, always mak sur
th ash s ar compl t ly cold b for r moving
th m. Put th ash s or r maining wood in a
nonflammabl contain r.
13. Always r mov th batt ri s b for trans-
porting th unit or storing it for a long p riod
of tim .
14. CAUTION : N v r us your COOK-AIR indoors
or in nclos d ar as, such as a t nt or a garag .
15. This applianc should n v r b l ft unat-
t nd d whil in us . It must b plac d on a
stabl , horizontal surfac prior to us .
16. To avoid burns, n v r touch th cooking grat
or xt rior of your COOK-AIR whil in us .
Always us th wood handl s or th handl
ring.
17. To avoid burns, always install th warming
rack b for grill ignition. Always allow th
grill is compl t ly cold b for manipulat or
r mov th warming rack.
18. B caus of th int ns h at produc d by
COOK-AIR, n v r put your fac , hands or
clothing dir ctly abov th grill whil th unit
is in us . This could r sult in s rious burns.
19. CAUTION: N v r mov th applianc whil it
is in us or hot.
20. Always allow th applianc to cool b for
moving or storing.
21. Always mak sur that th vinyl cov r is pro -
p rly plac d and that th cord is s cur ly
(fig. 2-A) b low th handl ring (fig. 2 B)
b for transporting th unit (fig. 2-C).
22. This applianc is not int nd d for us by p r-
sons (including childr n) with r duc d physi-
cal, s nsory or m ntal capabiliti s, or lack of
xp ri nc and knowl dg , unl ss th y hav
b n giv n sup rvision or instruction conc rning
us of th applianc s by a p rson r sponsibl
for th ir saf ty.
ALWAYS BE EXTREMELY CAREFUL WHEN USING
AN APPLIANCE THAT PRODUCES SEVERE HEAT
Fig. 2-A
Fig. 2-B Fig. 2-C

7
COOK-AIR INSTALLATION AND ASSEMBLY
Step. 1 Step. 2
Step. 3
Th COOK-AIR barb cu grill is fully ass mbl d. Using a scr w
driv r, firmly install th handl on th lid (St p 1 to 3). Simply
follow th instructions b llow and it will b r ady to us .
Ill. 3
Ill. 2
Ill. 4
Ill. 5 Ill. 7
Ill. 8
Ill. 6
GRILL POWER SUPPLY
List of accessories
AC adaptor (ill. 2)
Cigar tt light r
adapt r (ill. 3)
(Optional in c rtain country)
Burn r brush (ill. 4)
Warming rack (ill. 5)
(Optional in c rtain country)
Vinyl cov r (ill. 6)
Wood tongs (ill. 7)
(Optional in c rtain country)
Cooking grat handl (ill. 8)
Th r ar thr ways to supply your COOK-AIR with th 12 volts
DC n rgy sourc it r quir s:
1. “D” alkalin batt ri s
2. AC COOK-AIR adapt r
3. Automobil cigar tt light r adapt r
Batteries
COOK-AIR us s ight (8) “D” alkalin batt ri s. To install th
batt ri s in your barb cu grill:
1. R mov th cov r and cooking grat , turn th unit upsid
down and s t down on a flat l v l surfac .
2. R mov th cov r from th batt ry compartm nt.
3. Ins rt th batt ri s, car fully placing th m according to th
polarity indicat d.
4. Ch ck that th batt ri s ar corr ctly install d by pr ssing th
control button (ON); th fan motor should start.
5. R plac th cov r on th batt ry compartm nt.
Onc th batt ri s ar install d, COOK-AIR b com s totally
portabl . Th batt ri s last up to 20 hours on high sp d and
v n mor on low. For your cooking to b a succ ss, it is impor-
tant to s ar th m at. COOK-AIR is amazing wh n it com s to
doing this rapidly.

8
COOK-AIR AC adapter
Th AC adapt r, suppli d with your COOK-AIR, xt nds batt ry
lif and allows to us th barb cu grill anywh r you hav
acc ss to l ctrical pow r supply. For saf us , always follow th
following r comm ndations. To install:
1. Plug th adapt r cord into th int nd d sock t (fig. 4-A and
4-B) th n plug th oth r nd into an approv d l ctrical
sourc . Th barb cu -grill can now op rat normally.
2. B car ful wh n unplugging th COOK-AIR AC adapt r. N v r
pull on th cord; you could damag th cord or th grill’s
sock t.
Cigarette lighter adapter
(optional in certain country)
Th COOK-AIR 12-volt cigar tt light r adapt r is v ry v rsatil .
It allows for maximum us . Plug it in your car, motor hom ,
trail r, boat or into any oth r 12-volt n rgy sourc . Using this
adapt r will allow you to njoy your COOK-AIR v rywh r
without using your batt ri s.
Warming Rack (optional in certain country)
Your COOK-AIR barb cu
grill is quipp d with an
asy to install warming rack
(fig. 5-A). It will b v ry us -
ful to warm up hot dog or
hamburg r buns. If you wish
to install or r mov it, it
tak s just a f w s conds.
To clos th lid with th warming rack insid , r mov th r ar
clamps from th ir anchor d position on th sid of th cooking
grat and pivot th m inward (fig. 5-B). Low r th ntir rack
flat and ins rt th 2 sid clamps into th sid of th cooking
grat (fig. 5-C).
Pl as tak not that you will not b abl to tightly clos th
grill lid for smoking food wh n th warming rack is install d.
Control panel
Th control pan l of your COOK-AIR barb cu grill was d sign d
for asy us (fig. 6). H r is how it works:
(ON) button: starts th fan.
(OFF) button: stops th fan.
Th arrows: s t th pow r l v l of th fan to th d sir d
l v l. Th low st l v l is (1) and th high st is (5). Th
strong r th fan l v l, th hott r th cooking surfac .
Fig. 6
ON
OFF
Fig. 4-A Fig. 4-B
Fig. 5-A
Fig. 5-B Fig. 5-C

9
Follow th s instructions wh n starting your barb cu grill.
Plac th applianc on a flat, l v l surfac at a conv ni nt cook-
ing h ight.
1. R mov th cov r and ins rt th
handl in on of th four slots on
th cooking grat (fig. 7), th n r -
mov th cooking grat to b abl
to acc ss th combustion chamb r.
2. Plac a ½ strip of pr viously fold d
COOK-AIR fir start r pap r (fig. 8)
at th bottom of th combustion
chamb r. A ball of crumpl d n ws
pap r may b us d if you do not
hav any COOK-AIR fir start r
pap r.
N v r, und r any circumstanc s, us
light r fluid, k ros n or any oth r
flammabl liquid on COOK-AIR fir
start r pap r or wood fu l.
3. Ignit th COOK-AIR fir start r
using a long handl d barb cu
light r or fir plac match (fig. 9).
4. Onc th COOK-AIR fir start r-
pap r is w ll ignit d, us tongs to
car fully put on or mor pi c s of dry wood or on ortwo
pucks of COOK-AIR solid fu l on th fir start r in th bottom
of th combustion chamb r (fig. 10). Using th control button,
s t th fan on low (l v l 1).
N v r, und r any circumstanc s, us charcoal with your COOK-
AIR grill
5. Put th cooking grat back into plac .
6. Wait 30 to 45 s conds and th n, using th control button, s t
th fan on high (l v l 5).
7. If n c ssary r p at th first st ps to achi v full ignition.
About four or fiv minut s aft r ignition and d p nding on th
ambi nt t mp ratur , your COOK-AIR should hav r ach d its
cooking t mp ratur . S l ct th h at output r quir d for th
food you ar cooking by varying th fan sp d using th control
button and by adding wood as n d d.
CAUTION: Wh n op rating th COOK-AIR for th first tim ,
light th applianc at l ast 10 to 20 minut s prior to us in ord r
to burn off any r sidu on th m tal.
Wood fuel
COOK-AIR us s an advanc d d sign and pat nt d t chnology
combustion chamb r to r ach v ry high th rmal and combus-
tion ffici nci s.
It is r comm nd d to us only dry hardwood sp ci s as fu l.
Gr n or w t wood can produc smok and r duc h at l v ls,
som softwood can spark xc ssiv ly.
COOK-AIR was d sign d to r ach th high st combustion ffi-
ci ncy and works b st wh n using dry hardwood or COOK-AIR
solid wood fu l. It is th r for to your advantag to choos
th s sourc s of fu l. All you n d is a light r!
If you wish, you can also pr par your own wood. To do so, you
will n d v ry dry hardwood sp ci s, such as mapl , ash, hickory,
appl or ch rry. Each vari ty of hardwood will giv food a
uniqu flavour. Hardwood chunks should b no thick r than
5 cm by 5 cm (2" x 2") and no long r than 7.5 cm (3"). Branch s
up to 5 cm (2") in diam t r can also b us d if th y ar cut in
l ngths no long r than 7.5 cm (3").
You should b abl to find various typ s of kindling in most
hardwar stor s and m gastor s that can b cut to th siz
r quir d for th COOK-AIR. You can also us wax-fr and ch -
mical-fr cological fir logs sold in stor s. Th y'r asy to cut
to th d sir d siz using a hamm r and an awl or a scr wdriv r.
Th y burn asily and produc lots of h at.
For gr at r combustion ffici ncy,
th wood fu l should b pil d in
th upp r position, similar to a
campfir , in th combustion cham-
b r, which should n v r b mor
than thr quart rs full.
STARTING YOUR COOK-AIR
Fig. 7
Fig. 8
Fig. 9
Fig. 10

10
Cooking
COOK-AIR is capabl of r aching v ry high t mp ratur s in
r cord tim . You must b com familiar with th fan control to
mast r th int nsity of th cooking h at.
CAUTION: Always r mov xc ss fat from food and drain mar-
inat d m at in ord r to r duc xc ssiv flar -ups and smok .
Contrary to oth r typ s of barb cu grills on th mark t, which
cannot r ach th high t mp ratur s r quir d to s ar m at
(1,000F and +), COOK-AIR allows you to s ar your m at and s al
in its natural juic s. For m at 1 to 1.25“ thick (2.5 - 3 cm), you just
hav to s ar it on high for 1 1/2 minut on ach sid . For m at
¾ inch thick (2 cm), on minut on ach sid will suffic .
Onc th m at is s ar d, giv n th v ry high t mp ratur r a-
ch d by th COOK-AIR, it is advisabl to fr qu ntly turn th
m at ( v ry 60 s conds) until th d sir d cooking is r ach d.
To njoy a n w cooking xp ri nc , just b for your food is
cook d, r duc th fan sp d to l v l 1 and plac th lid on th
grill. Wh n fully ignit d, th wood fu l produc s a smok d
wood aroma that is absorb d by th food. Ev ry vari ty of wood
fu l has its own charact ristics and, cons qu ntly, produc s a
uniqu flavour and incomparabl tast .
To add wood fuel
If you must add wood fu l whil cooking, turn th fan control
button to minimum sp d (l v l 1).
Always us th suppli d handl to slid th cooking grat .
NEVER PUT THE HOT COOKING GRATE DOWN ON ANOTHER
SURFACE, IT COULD DAMAGE IT.
Add wood to th combustion chamb r using th tongs pro-
vid d. R plac th cooking grat and r s t th fan to th
r quir d sp d to r sum cooking.
Th lid should not b tightly clos d xc pt to smok food that
is almost fully cook d. Th fan must b s t on minimum sp d
(l v l 1) during this proc ss.
COOK-AIR HINTS AND TIPS
Maintenance
As pr viously m ntion d, th COOK-AIR is a high t ch applianc .
Minimum and r gular maint nanc is nough to nsur y ars
of out door cooking njoym nt. To cl an th combustion cham-
b r, first wait until th unit is cold, th n:
1. First, s t th fan on low (l v l1). Onc th cooking grat is
r mov d, loos n ash r sidu s in th combustion chamb r
using th suppli d brush in a circular motion.
2. R mov th ash s saf ly and mak sur that th r is no
r sidu l ft in th chamb r. Mak sur that th burn r hol s
insid th combustion chamb r ar cl ar of d bris. If n d d,
cl an th hol s with an ordinary pap rclip.
3. Unit car :
• Prot ct your barb cu from bad w ath r
• Car fully dry your barb cu wh n w t
• Us th vinyl cov r wh n transporting your COOK-AIR and
to prot ct it in storag
• Stor in a cool, dry location
Storage
B for storing your COOK-AIR, cl an th combustion chamb r as
indicat d abov . Cl an th cooking grat with r gular hous hold
cl an r and wip all stainl ss st l surfac s with a damp cloth.
Mak sur that th unit is in th OFF position to avoid draining
th batt ri s. For s asonal storing or wh n transporting, r mov
th batt ri s from th applianc .

11
C-001A Cover handle
C-003B Cooking grate handle
C-002 Grate
C-006 Inner casing cone
C-009 Inner casing tube
C-011 Air chamber
C-012 Air tube
C-004 Mid outer housing
C-022 Circuit board
C-032A Nut (3)
Base control cover
+ battery casing C-015A
Battery door C-015B
Air pump C-018
C-023 Touch switch board
C-003 Thermal pan
C-015C Rubber ring
Base control housing C-015
Ring handle C-021
Disc baffle C-014
Combustion chamber C-010A
Cooking grate
Top cover C-001
Bolt (3) C-032
COOK-AIR PARTS LIST
Mod l EP-3615

© 2011 Cata Marketi g , I c. All rights reserved. COOK-AIR a d the COOK-AIR logo are trademarks of
Cata Marketi g, I c., registered i the U.S. a d Ca ada.
Mad in China for: CATA Mark ting Inc. • Granby (Qc) Canada J2J1E9
®
Try it with your favorite dishes and… bon appétit!
WWW.COOK-AIR.COM
Other manuals for EP-3615
1
Other Cook-air Grill manuals
Popular Grill manuals by other brands

George Foreman
George Foreman GGR50B user manual

AmazonBasics
AmazonBasics B0B8QV3MS2 user manual

Masport
Masport VACATIONER 6 S2 owner's manual

Diamond
Diamond BMF 1/1G instruction manual

NORDIC SEASON
NORDIC SEASON Hamilton 3.0 Instruction and user's manual

EXPERT GRILL
EXPERT GRILL XG18-101-002-07 owner's manual