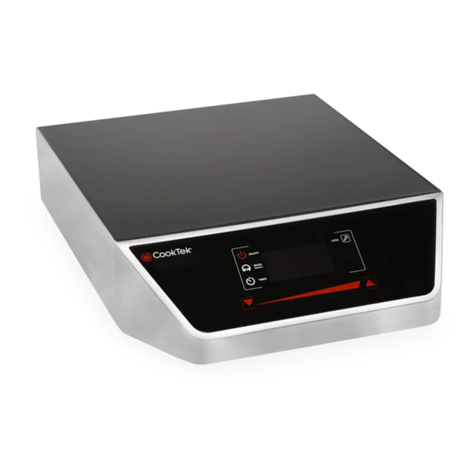
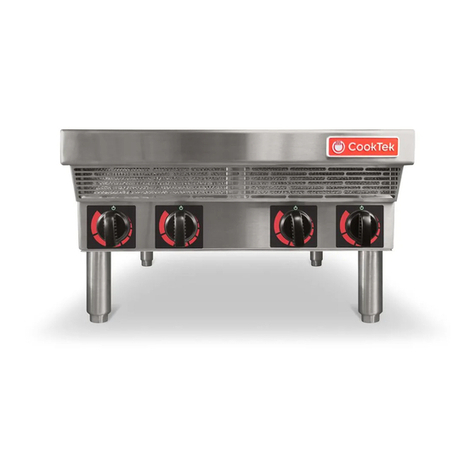
CookTek MCD1800G User manual

Apogee Cooktop
Phone: 1-800-908-8726
+1 214-379-6000
Fax: +1 214-379-6073
www.cooktek.com

This page intentionally left blank.

• Read all instructions before using this appliance.
• Install or locate this appliance only in accordance with the provided installation
instructions on pages 2-3 of this manual.
• This product may only be serviced by an authorized service agent or by CookTek
personnel.
• DO NOT attempt to open the unit or perform service of any kind. For service
information, contact CookTek at +1 (214) 379-6000.
• DO NOT use the equipment for anything other than its intended use as described in
this manual. This unit is designed to heat food and is not intended for laboratory or
industrial use.
• Avoid installing the unit near other equipment that generates excessive heat that
can be pulled into the CookTek unit by its fan (i.e. griddles, fryers, etc.).
• Avoid placing the unit near items that generate excessive steam that can be pulled
into the CookTek unit by its fan (i.e. pasta cookers, steam baths, dishwashers, etc.).
• Never heat empty cookware. It may damage the unit or cookware and overheat the
unit. Always turn the unit off when not in use.
• Keep appliance away from person(s) with reduced physical, sensory, or mental
capabilities unless supervised/instructed on how to properly use the appliance.
• Keep children 8 years and younger away from the appliance when in operation.
Children 8 years and above may use the appliance with proper adult supervision.
DO NOT allow children to clean or perform maintenance on this appliance without
adult supervision. DO NOT allow children to play with this appliance.
• Metallic objects such as kitchen utensils, knives, spoons, etc. should not be placed
on appliance. Use caution when wearing rings, watches, and other metallic objects
as they may get hot if placed near the unit’s surface.
• Only use induction crockery and induction pans recommended by the manufacturer.
• DO NOT let the power cord touch hot surfaces or hang over the edge of the
counter. DO NOT move the unit when electric power is connected.
• Never immerse cords, plugs, or the appliance in water.
• DO NOT leave the unit unattended while in use.
• Users wearing a pacemaker should consult their doctor or the pacemaker
manufacturer prior to operating CookTek induction equipment. The electromagnetic
eldmayinterferewiththeproperfunctionofthepacemaker.
• DO NOT place aluminum foil or plastic objects on top of the ThermaCube charger.
• DO NOT use the unit near a faucet, swimming pool, sink, or other areas where
water can be found. Never store the unit upside down or in a non-climate controlled
environment.
• DO NOT strike or damage the unit.
• DO NOT put the unit in your luggage. Throwing or dropping the unit can damage
the internal components or crack it, voiding your warranty.
• If the surface of the unit becomes cracked, unplug the unit immediately and do not
use it.

• DO NOT obstruct, block, or alter openings or holes. DO NOT stick foreign objects
into these openings.
• DO NOT use a water jet to clean the appliance. See page 5 in this manual for
proper cleaning procedures.
• If a large amount of liquid is spilled onto the Apogee interface, it may respond
to the liquid on the interface. Wipe the liquid clean and allow the unit to sit for
approximately 2 seconds untouched and normal sensitivity to the buttons will come
back.
• Never heat an empty pan. It may damage the cooktop or cookware and overheat
theunit.Whenoverheatingoccurs,anerrorcodewillashontheLCDInformation
Center and the cooktop will shut itself off automatically. When the temperature
returns to normal, the cooktop will start to cook again.
• Remember to turn the cooktop off after each use.
• Be sure to dry off the outside of the pan before use. Otherwise, as the pan
temperature rises, the water droplets on the outside of the pan may begin to boil
and patter.
• DO NOT touch the ceramic plate (or the top of the cooktop) immediately after use.
The heat from the pan will be transferred to the ceramic plate causing it to be
hot to the touch.
The cooktop must be properly grounded. In the event of an electrical short circuit,
grounding reduces the risk of electric shock by providing a safe path for the electric
current. The cooktop has a power cord with a 3-prong grounding plug, which must be
used in a compatible and properly grounded outlet. It is the owner’s responsibility to
replace any 2-prong wall outlet with a properly grounded 3-prong wall receptacle.
If the power cord is damaged, it must be replaced by the manufacturer, its service
agent,orasimilarlyqualiedperson.
PleasemakesurethatthepowercordisrmlyattachedtoyourCookTekunit
BEFORE plugging the unit into the power receptacle and attempting operation.
Every installation site has different electrical wiring. Because many different local
codes exist, it is the owner and installer’s responsibility to comply with those codes.
CookTek is not responsible for any consequential damages as a result of failure to
comply with installation requirements.

Read all installation instructions carefully before starting installation.
• Linevoltageshouldneverexceed264VACfor240VACunitsand132VACfor
120VACunits.
• For your safety, never cut, remove, or disable the electrical (ground) connection
from the plug. Never use an adapter plug or an extension cord.
• CookTek recommends that a dedicated electrical line be used for each cooktop
installed. Electrical circuits should not be shared with any other electrical
equipment.
• It is the responsibility of the installer to comply with all federal, state and local
codes.
• Anyinstallationnotmatchingthespecicationsdiscussedinthismanual
automatically voids the product’s warranty.
CookTekcooktopshavebeentestedtobeinconformancewithUL197andCSA
C22.2 standards and bear the commercially-rated approvals. CookTek’s cooktops
have been tested to be in conformance with the European Economic Area
standards and bear the CE marking signifying European conformity.
• Remove all packing material and save for subsequent shipment or in case of
concealed shipping damage.
• Remove cooktop carefully from carton.
• Placetheunitonadry,level,hard,stable,andnon-ammablesurface.
• Remove all loose packaging and accessories and save for subsequent shipment or
in case of concealed shipping damage.
• Ifyourunitcomesequippedwithagreaselteronthebottomoftheunit,please
readthesectiononcleaningandmaintenanceofthegreaselter(page11).
• All units should be checked for build up and debris around the intake and exhaust
vents on the bottom of the unit.
• If debris is found on the vents, you should unplug the unit and clean away the
debriswithadryclothtoensureproperairowisprovidedtotheequipment.
• Avoidambienttemperaturesexceeding50˚C/122˚F.
• Units dropped into the counter will require the following:
• Single units require a minimum 70CFM (2.0m3/min) of fresh air to the unit.
• Double units require a minimum of 140CFM (4.0m3/min) of fresh air to the
unit.

Models MC1800G, MC2500G, MC3000G, and MC3500G
Height: 4.98” (126 mm)
Width: 13.85” (351 mm)
Depth: 17.66” (448)
Weight: 17.75 lb. (8.1 kg)
Front: 2” (51 mm)
Back: 2” (51 mm)
Sides: 2” (51 mm)
All units require a minimum clearance of two 2” (51 mm) between all sides of the
housing and any surface or obstacle. All drop-in units require a minimum clearance of
open space below the unit of 6” (152 mm). The space must have openings allowing
fortheowofcoolair(ambienttemperaturenottoexceed50˚C/122˚F)tothecooktop
housing intake vents. If either the air intake or exhaust outlet is blocked, the internal
temperature will rise, causing an error code to occur (NOTE: The 6” (152 mm) can be
reduced if additional fans and ducting are added to provide forced ventilation).
Models MCD1800G, MCD2500G, MCD3000G, and MCD3500G
Height: 3.63” (92 mm)
Width: 16.16” (410 mm)
Depth: 20.67” (525)
Weight: 23 lb. (10.4 kg)
Width: 15.30 (388 mm)
Depth: 19.81 (503 mm)
Front: 2” (51 mm)
Back: 2” (51 mm)
Sides: 2” (51 mm)
Bottom: 6” (152 mm)
4.98”
(126 mm)
1.25” (32 mm)
13.85” (351 mm)
17.66”
(448 mm)
17.66”
(448 mm)
13.85” (351 mm)
4.98”
(126 mm)
1.25” (32 mm)
3.63”
(92 mm)
17.66”
(448 mm)
20.67”
(525 mm)
13.85” (351 mm)
16.16” (410 mm)
15.30”
(388 mm)
19.81
(503 mm)
Figure1:ApogeeSingleBurnerCooktopTopandRightSideViews
Figure2:ApogeeSIngleBurnerDrop-inTopandRightSideViews
Figure 3: Apogee SIngle Burner Drop-in Cutout Dimensions

Models MC2502FG and MC3002FG
Height: 4.98” (126 mm)
Width: 13.85” (351 mm)
Depth: 30.42” (772)
Weight: 31.20 lb. (14.2 kg)
Front: 2” (51 mm)
Back: 2” (51 mm)
Sides: 2” (51 mm) 13.85” (351 mm)
30.42”
(772 mm)
13.85” (351 mm)
4.98”
(126 mm)
1.25” (32 mm)
4.98”
(126 mm)
1.25” (32 mm)
Figure4:ApogeeSingleBurnerCooktopTopandRightSideViews

6
The controls for the Apogee are based on capacitive touch technology. When
attemptingtopressabutton,placeyourngerontheglassoverthesymbolforthe
feature you desire (i.e. to turn the unit on, press the “ON/OFF” symbol on the glass).
Use this button to turn the unit on and off.
Use this button to switch between the Power Cook and Temperature modes. This
buttonisalsousedtoconrmaselectionfromthemenuscreens.
Usethisbuttontosetaspeciccooktime.
Displays all vital cooking information and alerts the user of any possible problems.
This button is used to prevent users from adjusting the settings. Press this button
three times and the only button that will work is the Power Button. When the unit is
locked, press this button three times to unlock the controls.
This button allows you to quickly set your Power Cook settings or Temperature
settings, depending on the operating mode.
These arrow keys allow you to adjust Power Cook and Temperature settings more
precisely. These buttons are also used to navigate through menu options in the
menu screens.
Figure 5: Apogee User Interface
1
2
3
4
5
6
7

Plug cooktop into a grounded, single-phase receptacle. Models will run on 100-
120VACdrawingupto1800Wdependingonmodel,oron200-240VACdrawinga
maximum of 3500W depending on model. Check rating plate on unit to verify
correctvoltageandwattage.Voltagesbelow120VACor240VACcanresultinless
than rated power and slower heating times.
●Turnthecooktop“ON”bypressingthePOWERbuttonontheglass.
●Adjustyourpowersettingsusingthesliderfrom0-100(MAX).Youcanalsouse
the precision control buttons to adjust to more precise power settings.
●Useyourngeronthesliderorprecisioncontrolbuttonstoadjustthepower
levels. The left side will lower power and the right side will increase power.
The pan logo in the upper right corner indicates
an induction compatible pan is on the unit. If
thereisan“X”acrossthepan,theunitis
indicating that there is a non-induction
compatible pan on the unit or no pan at all.
●Toturnthecooktopoff,pressthePOWERbuttonontheglassandtheLCD
InformationCenterwilldisplaytheCookTeklogoasshowningure6above.
Figure6:LCDInformationCenterdisplay
when plugged in, but in the OFF position.
Figure 7: Cook Mode Screen

Thisfeatureisusedwhencookingandholdingatspecictemperatures.
●Withtheunitpoweredon,presstheMODE/SELECTbuttonontheglass.
●Usethesliderorprecisioncontrolbuttonstoadjusttoyourdesiredtemperature
from85-500˚Fand30-260˚C.
NOTE:InFahrenheitmodefrom85-125˚,incrementscanbeincreasedoneata
time. However, if you press and hold the precision control button down,
itwillincreaseinstepsof2.From125˚-MAX,itwillincrementby5,andby10if
youpressandholdtheprecisioncontrolbuttons.InCelsiusmode,from30-100˚,
you will be able to increment in steps of one. However, if you press and hold the
precisioncontrolbuttondown,itwillincreaseinstepsof2.From100˚-MAX,itwill
increment by 5, and by 10 if you press and hold the precision control buttons.
●Usethesliderorprecisioncontrolbuttonstoadjustthetemperatures.Theleftside
will decrease the temperature and the right side will increase the temperature.
●Whiletheunitisheatingtotheselectedtemperature,theunitwillash“HEATING”
on the screen. Once the selected temperature has been reached, the unit will
display “AT TEMP.”
●ToexitTemperaturemode,presstheMODE/SELECTbuttonontheglasstoreturn
to Cook Mode.
When you place an induction-compatible pan
ontheunit,the“X”willnolongerbe
on the pan logo in the top right corner.
NOTE: When you switch between Cook and Temperature Modes, the unit will
remember your previous power setting or temperature setting.
This feature is designed to allow you to cook according to time. This will also give you
an audible alarm for cooking processes that require you to add items after a certain
periodoftime.Youwillbeabletosetthetimersanywherefrom1minuteto11hours
and59minutes.Intheupperleft-handcorneroftheLCDInformationCenter,theunit
will display a clock logo and the set time you have programmed.
NOTE: Any time you are in a menu and you want to get out of the screen without
making a selection, just press POWER and the unit will turn off and reset.
●Whiletheunitispoweredon,presstheTIMERbutton.
●Theadjacentmenu(gure9)willbedisplayedand
allow you to select Cook Timer, Alarm Timer, or to
cancel the timer.
Figure 8: Temperature Mode Screen
Figure 9: Timer Mode Screen

9
●Usetheprecisioncontrolbuttonstomovethecursorupanddowntogettothe
setting you desire. For example, to set the alarm, press the precision control
button on the left two times.
●Onceyouhavemovedthecursortoyourchoice,presstheMODE/SELECT
button to move to the next screen which will allow you to set the time (see
gure10).
●Youwillnowselectyourtimeinhours,minutes,orboth.UsethePrecision
Controlbuttonstoselectyourdesiredtime.Youcanchoosefrom1minuteup
to 11 hours and 59 minutes. The slider also has preset times programmed. To
selectaprogrammedtime,pressthesliderwithyournger.
●Afteryouhavedeterminedyourdesiredtime,presstheMODE/SELECTbutton.
●Ifyouhavesetthe“cooktime,”itwillbegincountingdownregardlessifyou
have a pan on the unit or not. Once the time has expired, the unit will beep and
turn off.
●Ifyouhaveselectedthe“alarm”time,theunitwillcountdownthetime
regardless if you are cooking or not. When the alarm goes off, the unit will
beep, but if there is a pan on the unit, it will continue to cook. Press the TIMER
button to turn off the timer after it has expired.
●Tocancelthetimeryouhaveselected,presstheTIMERbuttonandselectthe
“Cancel Timer” option.
This section will describe how you can customize your Apogee unit. The features
that will be covered are the lock out feature which will allow you to set the unit to a
specictemperatureorcookingpowerandcanonlybeadjustedbyusingaspecic
key sequence, and the feature that will allow you to change from Fahrenheit to
Celsius or vice versa.
To enter the Options menu,
●TurnofftheunitsothattheLCDInformationCenterisdisplayingtheCookTek
logo.
●Placeyourngeronthedownprecisioncontrolbuttonandcontinuetohold
yourngeronthebuttonuntiltheunitbeginstobeep.
●Aftertheunitbeginsbeeping,removeyourngerfromtheprecisioncontrol
button and then press the POWER button.
Note:Youwillonlyhaveonetotwosecondsto
press the POWER button to get into the menu
screen.
●AfterpressingPOWER,theunitwilldisplaythe
Set Options screen (see adjacent).
Figure 10: Set Cook Time Screen
Figure 10: Set Options Screen

●Usetheprecisioncontrolbuttonstomovethecursortothedesiredsettingand
thenpresstheMODE/SELECTbutton.
●Ifyouselect“SetTempScale,”youwillhavetwooptionstochoosefrom-
Fahrenheit or Celsius. Again, use the precision control buttons to move the
cursortoyourdesiredselection,andtheMODE/SELECTbuttontoconrmyour
choice.
●“ShowLockInfo”allowsyoutodecideif
you want the key sequence to unlock the unit to
be visible when the user presses any button.
The unit will give you the option to hide or show
thekeysequence,andthentheunitwillconrm
your choice.
●Ifyouselectthe“ResetDefaults”option,theunitwillthensetthesettingsto
Fahrenheit and show lock feature.
●Inordertolocktheunit,youwillwanttopresstheLOCKbuttonthreetimes.The
unit will beep to indicate that it has been locked.
●Anytimesomeonetouchesakeyaftertheunithasbeenlocked,amessagewill
appearontheLCDInformationCenterreading“Locked.”Theunitwillalso
remaininLockedModeeveniftheunitisturnedoff.TheLockmodemaybereset
by unplugging the unit, but the unit must be on when doing this. Simply unplugging
theunitwhileitispoweredoffwillnotresettheLockmode.
●Theunlocksequencewillbedisplayedasafactorydefault.Ifyouchangeto
“HideUnlock,”itwillnotbeshownwhenthe“Locked”messageappearsonthe
screen.
NOTE: Factory settings have the unit start in Fahrenheit and Show Unlock
mode. The standard factory unlock code requires the LOCK button to be
pressed three times to unlock the unit.
Figure 11: Show/Hide Unlock Screen

YourCookTekInductionCooktopiseasytokeepclean.Besuretofollowthese
instructions:
●TurntheunitOFFandremovetheplugfromanypoweroutletspriortocleaning.
●Whentheunitiscool,wipethesurfaceandbodywithadampcloth.Useamild
scouring agent on the stainless steel housing such as Bon Ami or Barkeeper’s
Friend for grease or resistant soiling. Do not use a lye-based cleaner, such as
an oven cleaner, as it may damage the cooktop.
●Tocleantheglasssurface,useamilddetergentorglasscooktopcleansing
cream.
●Neverimmersethecooktopinwaterorputitinthedishwasher.
Thisunitcomesequippedwithagreaselter(s)toprotecttheelectronicsfrom
contaminants.
Greaseltercleaningprocedures:
●Greaselter(s)shouldberemovedandcleanedeverytwoweeks.More
frequent cleaning may be necessary if they appear clogged and/or operate in
heavy grease laden environments.
●Slidelter(s)outofthetrackonthebottomoftheunit.
●Backushwithhotwatertoremovedirtandgrease.
●Shakeremainingwateroutandletstanduntilcompletelydry.
●Reinstalllter(s)ensuringthearrowontheedgeofthelter(s)ispointinginto
the unit.
NOTE: Filters are dishwasher safe.
●Donotoperatetheunitwithoutthegreaselter(s)installed.
●Iftheunitdisplaysanderrorcodeof“E4”-theoverheaterror-thismayindicate
acloggedlter.Followtheprocedureaboveandlettheunitcooldownbefore
resuming operation (turn off for approximately 5 minutes).

No power (no
lights or fan
noise.)
• Unit unplugged.
• No power to receptacle.
• Plug unit into appropriate receptacle
• Make sure that receptacle is energized.
• Check wall switches.
• Check circuit breaker.
• Plug a different electronic device into the
receptacle to make sure that power is
present.
Pan does not
heat.
• Pan is not induction
efcient.
• Pan diameter is less than
7 inches.
• Pan not centered
over cooktop logo not
centered.
• Useinductionefcientpan.
• Usealargerinductionefcientpan
• Center pan.
Cooktop suddenly
stops heating
• Possible power brown
out.
• Circuit shared with
another electrical device.
• Air vents blocked or
insufcientaircirculation
• Safety shut-off engaged.
• Assure proper voltage/power levels.
• Make sure the cooktop is not
sharing a circuit with electrical devices.
• Check air vents to make sure that they
are not blocked. Make sure that there is
sufcientairowaroundtheappliance.
• The safety shut-off will engage if an
empty pan is left on the surface while
the unit is working at full power. Make
sure that the surface is clear. Wait 15-20
minutes for the unit to reset.
Pan does not get
hot enough even
though power
levels are set
to maximum –
inductionefcient
pan in use
• Extension cord in use.
• Circuit shared with
another electrical device.
• DO NOT use extension cords. Extension
cords may affect the power levels
reaching the appliance.
• Make sure that the unit is not sharing a
circuit with other electrical devices.
Pan heats
unevenly, does
not maintain heat
level, or
overheats.
• Pan is not induction
efcient.
• Pan bottom may not be
atenough.
• Pan not centered.
• Pan diameter is less than
7” (178 mm).
• Useinductionefcientpan.
• Useatterpan.
• Center pan.
• Usealargerinductionefcientpan.

In the event of a possible malfunction, your CookTek cooktop will display an Error
CodeontheLCDInformationCenterandtheunitwillbeepthenumberoftimes
indicated by the error. Please consult the following table when encountering an
Error Code. To reset the error conditions, remove the pan from the unit and press
the POWER button or unplug the unit.
1 Shorted RTD Temperature sensor
failed. Call dealer.
Service required.
2 Opened RTD Temperature sensor
failed. Call dealer.
Remove any pans from cooktop
surface and let unit cool. Then turn
unit off, then on. If problem
was temperature related, the unit
will return to normal operation.
Otherwise, service is required.
3 Over current (peak) Incompatible pan. Try different cookware. Service
may be required.
4Open TCO Overheating. Check
airow.Unplug,letcool.
Checkairow.Clearairvents.
Listenforfanoperation.
5Airowblocked Airowblocked.Clean
greaselter.
Checktoensurethegreaselteris
clean and dry. Make certain there
are no foreign objects blocking air
ow.Checktheairltertoensure
thatthearrowonthelteris
pointing up.
6 High line voltage Input voltage too high.
Check main voltage.
To reset, unplug unit, wait 5 sec-
onds, and plug in again. If problem
persists, have an electrician moni-
tor the line voltage.
7 Hardware failure Call dealer for service. Service required. Turn unit off,
then on. Plug unit into outlet on
different circuit breaker. If problem
persists, service is required.
8 Zero cross failure Call dealer for service. Service required. Turn unit off,
then on. Plug unit into outlet on
different circuit breaker. If problem
persists, service is required.
9 Clock corrupt Reset clock. Reset clock.
10 Pan RTD failure Pan temperature
sensor failure.
RFID pan needs repair. Service
needed for pan.
11 Tag communication
failure
Reposition pan and
cycle power.
Ensure the RFID tag on the pan is
properly located.
12 RFID reader failure Call dealer for service. Service required.
14 User interface error Cycle power. Service required.
16 Critical error Call dealer for service. Service required.

CookTekProductModelsCoveredUnderthisLimitedWarranty
“Portable” CookTek products shall mean all Single and Double Burner Cooktops
(countertop or built-in), Woks (countertop or built-in), FaHeaters, Soup Warmers,
ThermaCube Delivery Systems, and Pizza Delivery Systems.
CookTek warrants to you, the purchaser, that under normal use the CookTek
Induction System you have purchased (the “Equipment”) will be free from defects
in material and workmanship during the Warranty Period, subject to the terms and
conditions set forth herein. The “Warranty Period” is twenty-seven (27) months
from the date the Equipment is shipped from CookTek’s U.S. factory or distribution
center in Carrollton, Texas. This warranty is conditioned upon you promptly notifying
CookTek of any claims, as provided in the paragraph entitled “Warranty Claims”
below, and providing CookTek with all data and information requested by CookTek in
connection with such claims. This warranty is made only to the initial purchaser of the
Equipment from CookTek or its authorized dealer; it is not assignable to subsequent
purchasers unless CookTek consents to such assignment in writing. THIS
WARRANTYDOESNOTINCLUDEANYTHIRD-PARTYINSTALLATION,REMOVAL,
ORDAMAGECOSTINCLUDING(BUTNOTLIMITEDTO)LABOR,MATERIALS,
ANDTRAVELFORCAULKINGINDROP-IN(BUILT-IN)UNITS,ORREPAIRS/
REPLACEMENTSOFFUSES,BREAKERS,MILLWORKAND/ORCOUNTERTOPS.
ExceptasprovidedintheLimitedWarrantyabove,theEquipmentisprovided“as-
is”. CookTek disclaims all other warranties, express, statutory or implied, including
without limitation, the implied warranties of title, non-infringement, merchant- ability
andtnessforaparticularpurpose.CookTekdoesnotwarrantthattheEquipmentwill
meetyourspecicationsorneeds.Youacknowledgethatyouaresolelyresponsible
for the selection of the Equipment and determining the suitability of the Equipment for
your needs.
Improper Installation, Operation or Maintenance: Equipment that is not installed,
operated and maintained in accordance with CookTek’s manual (as may be updated
by CookTek from time to time, the “Manual”), a copy of which is provided to you with
the Equipment or otherwise will be furnished to you upon request, is excluded from
this warranty. This warranty does not apply to damage or failure which results, in
CookTek’s sole opinion, from failure to provide a suitable installation and operating
environment(includingpowerandHVAC)andfacilitiesasprescribedbytheManual,
misuse, abuse, accident, neglect, power failure or power surges (over or under
voltage),ortodamageorfailurefromood,re,lightningorothernaturalorman-
made disasters, or other Acts of God, or to Equipment that has missing or altered
serial numbers.

ModicationsandRepair:Equipmentthathasbeenmodiedoralteredbypersons
other than CookTek or its service agents, or Equipment that has had non-approved
devices or connection items attached thereto, is excluded from coverage under this
warranty. Repair of the Equipment by anyone other than CookTek or its authorized
service agents will void all warranties on the Equipment.
Accessories: All accessories and parts (collectively “Accessories”) such as pans,
bags, ceramic cooking platters, paddles, approved cleaning chemicals, and other
non-electrical devices are warranted against defects in materials and workmanship
for a period of 90 days from the date of shipment from CookTek’s factory. Failure
of or damage to Equipment or components from the use of non-approved cleaning
chemicals, devices or processes is excluded from this warranty.
Outstanding Invoices: If the full invoiced amount for the original Equipment purchased
orforanon-returnedAdvanceReplacementUnithasnotbeenpaidwithinforty-ve
(45) days from the invoice date, then CookTek will have no obligation to honor this
or any other warranty on the Equipment until payment is received in full, including
anyaccruedinterestorothercharges,hasbeensatised,atwhichtimewarranty
coverage will be reinstated, but the Warranty Period will not be extended.
CookTek will be solely responsible for determining whether or not the Equipment or
any component thereof is Defective. Defective Equipment will be repaired exclusively
underCookTek’sAdvanceReplacementWarrantyService.Uponnoticationof
a repair issue, CookTek will send an Advance Replacement Unit to the address
provided at its expense. The Advance Replacement unit may be new or refurbished
at CookTek’s sole discretion. Upon receipt, you must remove and/or uninstall the
defective equipment and place the defective equipment in the packaging provided
with the Advance Replacement Unit. It is your sole responsibility to pack and return
the defective equipment to CookTek using the packaging and shipping label provided.
Units that are not returned after 30 days or units that are improperly packaged
and damaged shall be charged to the customer at current list price. The Advance
Replacement Unit’s warranty will continue through the end of your original warranty
period. In no case will an Advance Replacement Unit extend the duration of the
warranty period. This paragraph states CookTek’s sole and exclusive obligation and
liability and your sole and exclusive remedy under this warranty. CookTek shall not be
responsible for a failure to provide warranty services due to a user’s non-compliance
with this clause.
Claims under this warranty must be reported to CookTek during our normal working
hours at 800.90TURBO, or such other reporting service as CookTek may designate.
Uponreceiptoftheclaimandrelatedinformationandpreliminaryvericationthat
the claim is valid, CookTek will promptly send an Advance Replacement Unit to the
requested location within North America.

CookTek disclaims all incidental, special and consequential damages, including but
notlimitedtolossofuse,lostrevenueorprots,orsubstituteuse,sufferedbyyouor
any third party, whether arising in contract, tort (including negligence), or otherwise,
resulting from any breach by CookTek or its service agents of this warranty, or
resulting from the manufacture, use, or defects, of or in the Equipment, even if
CookTek was apprised of the possibility of such damages.
Youagreetoindemnify,defendandholdCookTekharmlessfromallthirdparty
claims, demands, judgments, fees and costs directly or indirectly arising out of
orrelatedtoyouruseoftheEquipment.Youfurtheragreetoindemnifyandhold
CookTek harmless from any incidental, consequential or special damages suffered by
you,includinglostrevenueorprots,lossofuse,orsubstituteuse,duringperiodsof
Equipment failure or loss of use.
This warranty is valid in the United States of America, Canada and Puerto Rico.
This warranty shall be governed and construed in accordance with the laws of the
StateofTexas,USA(exceptwithrespecttoitsprovisionsregardingconictsoflaws).
The warranty described herein is the complete and only warranty for Equipment and
supersedes all prior oral or written agreements and understandings that may have
existed between us relating to Equipment warranties. The terms of this warranty may
notbealtered,amendedormodiedexceptbyasignedwritingfromCookTek.Any
purportedalteration,amendmentormodicationbyaserviceagentoranyoneelse
will not be enforceable against CookTek.

This page intentionally left blank.

Phone: 1-800-908-8726
+1 214-379-6000
Fax: +1 214-379-6073
www.cooktek.com
This manual suits for next models
9
Table of contents
Other CookTek Cooktop manuals

CookTek
CookTek MC14004-200 User manual

CookTek
CookTek PL362CR-200/240 User manual

CookTek
CookTek MagnaWave MC1800 Installation instructions

CookTek
CookTek MC14004-200 User manual

CookTek
CookTek MagnaWave MC1500 Safety guide

CookTek
CookTek MagnaWave MC1800 User manual

CookTek
CookTek MC1800G User manual

CookTek
CookTek CKT0044 User manual

CookTek
CookTek MW1800G User manual

CookTek
CookTek MagnaWave MC1800 Operating instructions