INS #
Brand Logo
reversed out of
black
INS #
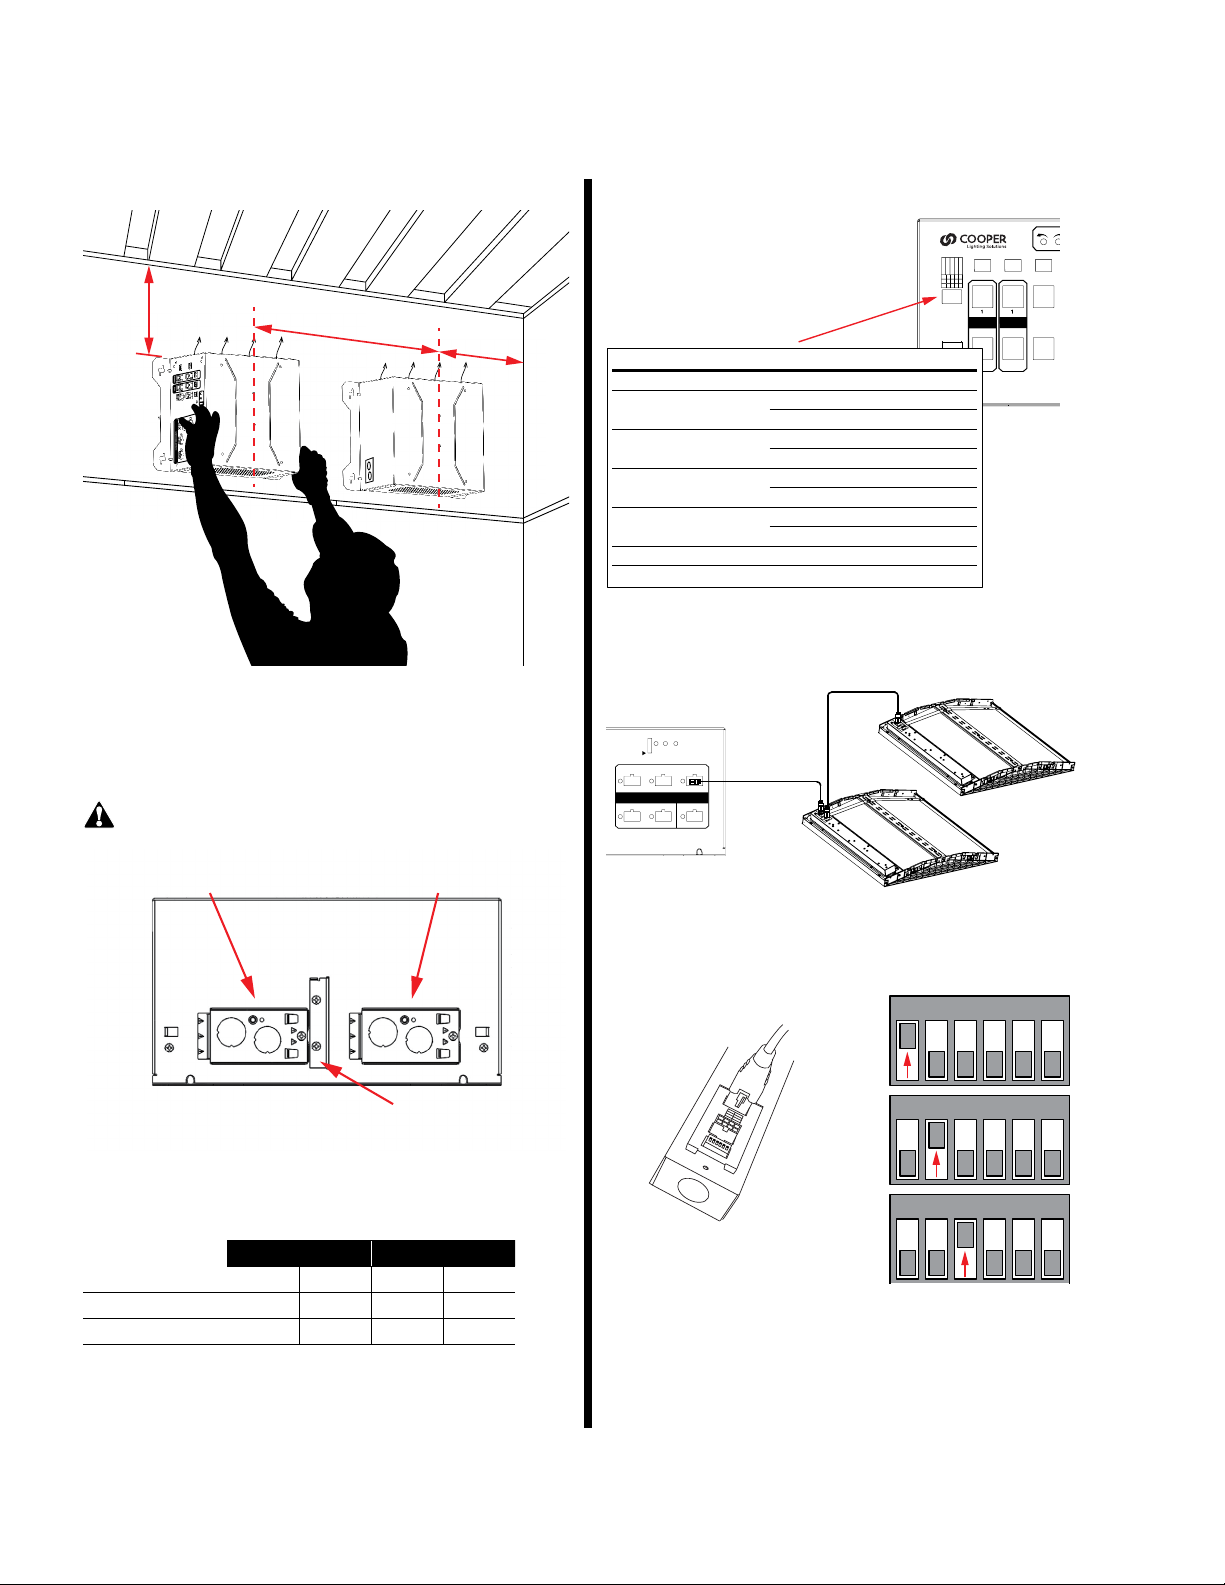
Distributed Low Voltage Power System
Quick Start Guide DLVP
NOTICE: Designed for indoor installation and use only. Dry location rated.
IMPORTANT SAFEGUARDS
When using electrical equipment, basic safety precautions should always be followed including the following:
a) READ AND FOLLOW ALL SAFETY INSTRUCTIONS.
b) Do not use outdoors (this item may be omitted if the product is suitable for outdoor use).
c) Do not let power supply cords touch hot surfaces.
d) Do not mount near gas or electric heaters.
e) Use caution when servicing batteries. Battery acid can cause burns to skin and eyes. If acid is spilled on skin or
in eyes, flush acid with fresh water and contact a physician immediately.
f) Equipment should be mounted in locations and at heights where it will not readily be subjected to tampering
by unauthorized personnel.
g) The use of accessory equipment not recommended by the manufacturer may cause an unsafe condition.
h) Caution: Halogen cycle lamp(s) are used in this equipment. To avoid shattering: Do not operate lamp in excess
of rated voltage, protect lamp against abrasion and scratches and against liquids when lamp is operating, dis-
pose of lamp with care.
i) Halogen cycle lamps operate at high temperatures. Do not store or place flammable materials near lamp.
j) Do not use this equipment for other than intended use.
SAVE THESE INSTRUCTIONS
WARNING
Risk of Fire, Electrical Shock, Cuts or other Casualty Hazards- Installation and maintenance of this
product must be performed by a qualified electrician. This product must be installed in accordance
with the applicable installation code by a person familiar with the construction and operation of the
product and hazards involved. For continued protection against shock hazard replace all covers and
guards after field wiring is completed.
Risk of Fire and Electric Shock- Before installing or performing any service, the power MUST be
turned OFF. All installations should be in compliance with the National Electric Code and all state
and local codes.
Risk of Burn- Disconnect power and allow fixture to cool before handling or servicing.
Risk of Personal Injury- Due to sharp edges, handle with care. Failure to comply with these instructions
may result in serious injury (including death) and property damage. Use caution when handling the
wallstation while the faceplate is removed.
DISCLAIMER OF LIABILITY: Cooper Lighting Solutions assumes no liability for damages or losses of any kind
that may arise from the improper, careless, or negligent installation, handling or use of this product.
IMPORTANT: Read carefully before installing fixture. Retain for future reference.
NOTICE: Fixture may become damaged and/or unstable if not installed properly.
Note: Specifications and dimensions subject to change without notice.
ATTENTION Receiving Department: Note actual fixture description of any shortage or noticeable damage on
delivery receipt. File claim for common carrier (LTL) directly with carrier. Claims for concealed damage must be
filed within 15 days of delivery. All damaged material, complete with original packing must be retained.