c) Never work while people, especially children, or pets are nearby.
d) Keep in mind that the operator or user is responsible for accidents or hazards occurring to other people
or their property.
2. Preparation
a) While working always wear substantial footwear and long trousers. Do not operate the equipment
when barefoot or wearing open sandals.
b) Thoroughly inspect the area where the equipment is to be used and remove all objects which can be
thrown up by the machine.
c) Before using, always visually inspect to see that the tools are not worn out or damaged. Replace worn
out or damaged elements and bolts in sets to preserve balance.
3. Operation
a) Wear protective glasses or goggles.
b) Work only in daylight or in good artificial light.
c) Always be sure of your footing on slopes.
d) Walk, never run with the machine.
e) For wheeled rotary machines, work across the slopes, never up or down.
f) Exercise extreme caution when changing direction on slopes.
g) Do not work excessively steep slopes.
h) Use extreme caution when reversing or pulling the machine towards you.
i) Start the engine carefully according to manufacturer instructions and with feet well away from the tool.
j) Do not put your hands or feet near or under rotating parts.
k) Never pick up or carry a machine while the machine is running.
l) Never operate the machine with damaged guard or without the guards in place.
m) Use only manufacturer’s recommended replacement parts and accessories.
n) Disconnect the machine from the mains before checking, cleaning or working on the machine and
when it is not in use.
4. Maintenance and storage
a) Keep all nuts, bolts and screws tight to ensure the equipment is in safe working condition.
b) Replace worn and damaged parts for safety.
Warning: When using the machine, the safety rules must be followed. For your own safety and that of
bystanders please read these instructions before operating the machine. Please keep the instructions safe
for later use.
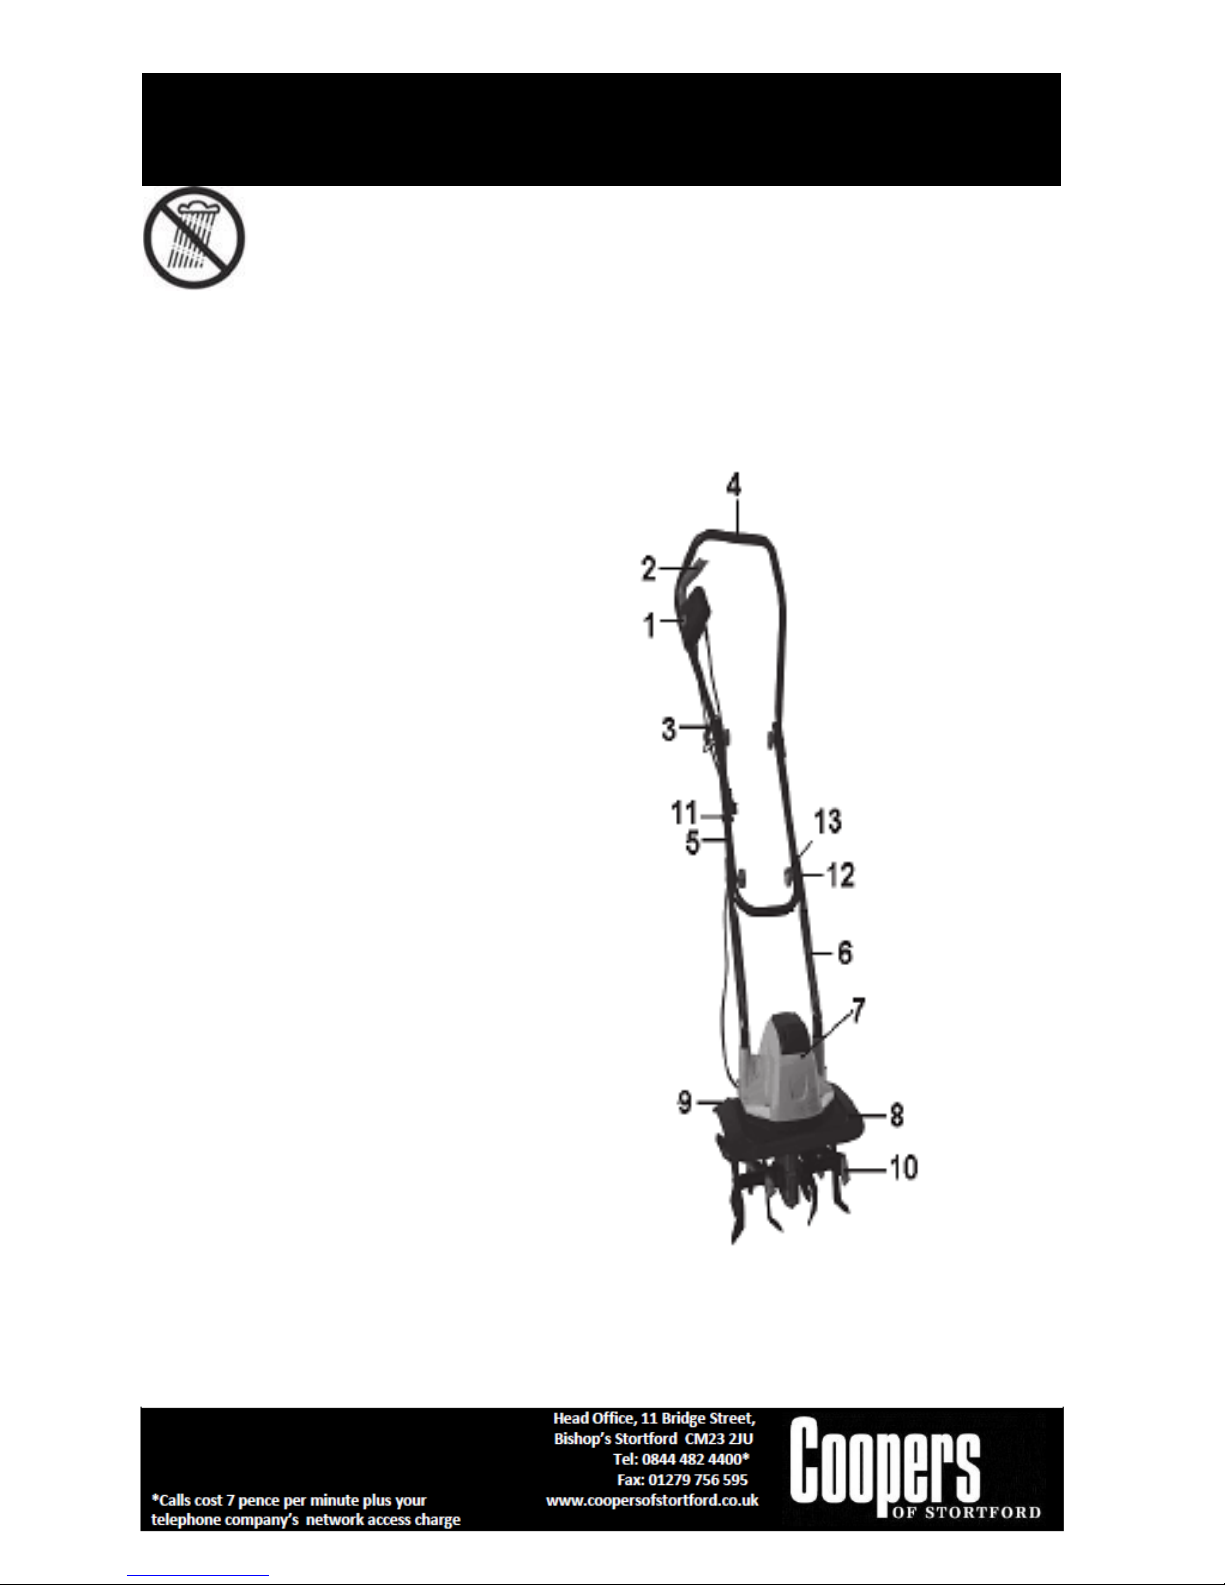
Before operation
The appliance must be assembled correctly before use.
The appliance should be checked carefully before use. You should only work with an appliance that is in
good condition. If you notice any defect on the machine that may cause danger to the operator, do not
operate the appliance until defects are rectified.
Replace worn or damaged parts for safety. Use only original spare parts. Parts not produced by
manufacturer may cause poor fit and possible injury.
Before use, all foreign bodies must be removed from the lawn, also pay attention to foreign bodies
during the operation.
Dress properly. Wear the following clothing while using the appliance: