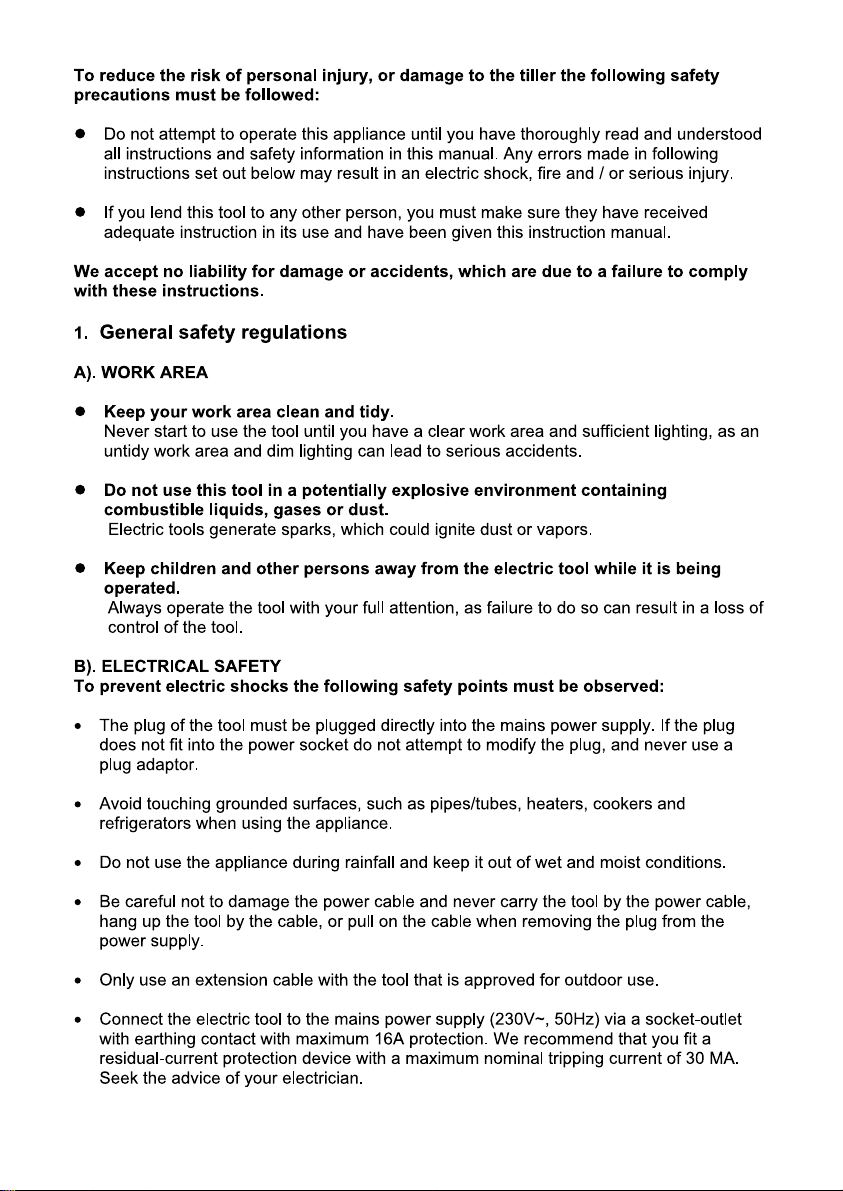
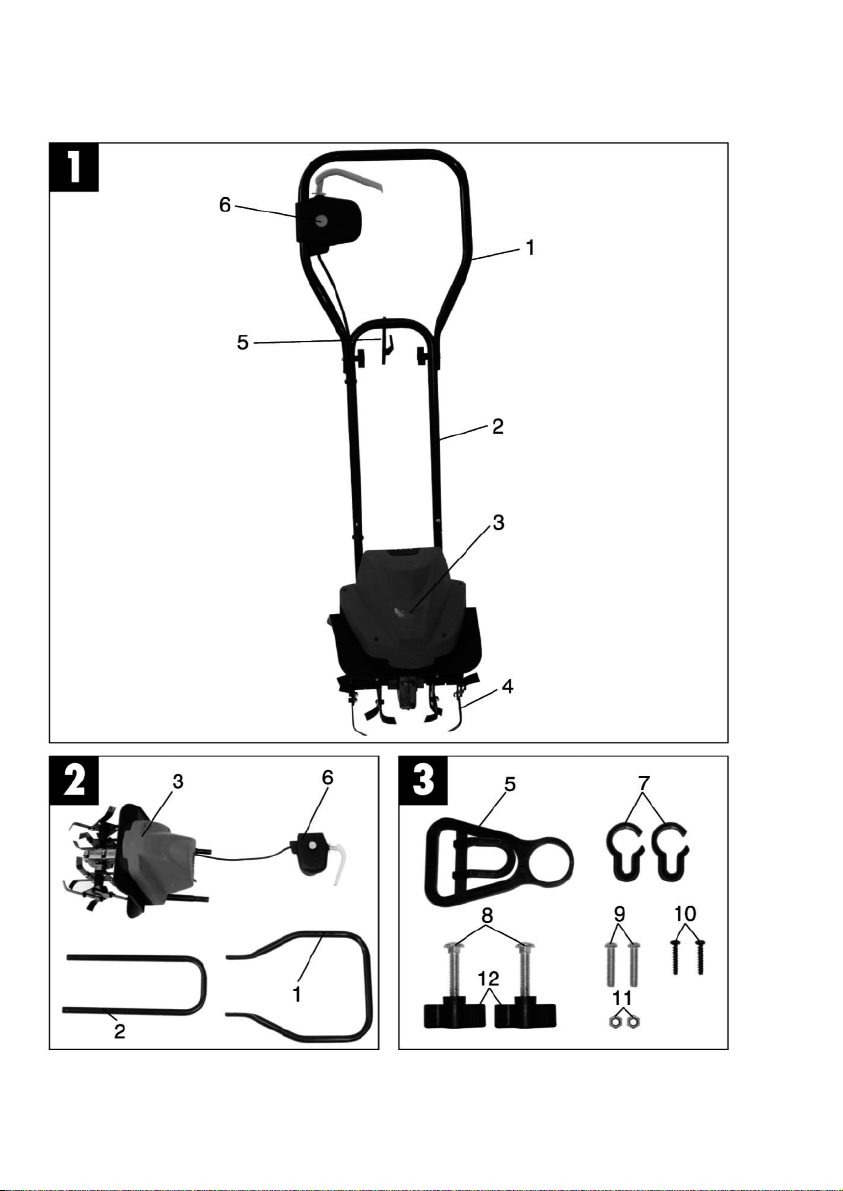
4. Assembly (Fig. 4-11)
Place the motor unit and the push bars on the ground in order of assembly (Fig. 4).
Important. Do not forget to slide the cable strain relief clamp (Fig. 6 / ltem 5) over the
bottom push bar. Slide the bottom push bar on to the push bar holder and secure the two
components together (Fig. 5). Then secure the top push bar to the bottom push bar (Fig.
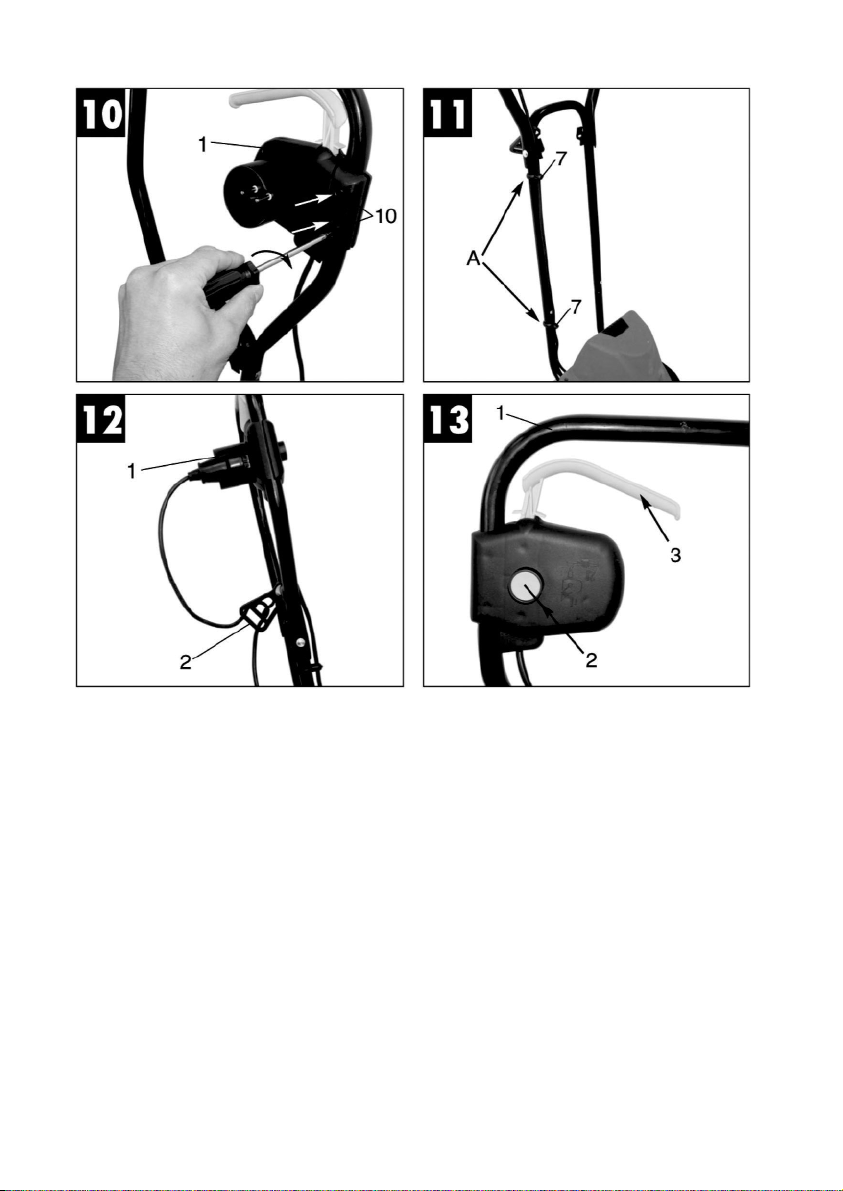
6). Install the 2 hand safety switch as shown in Fig. 7 10. Finally secure the cable using
the supplied securing clips as shown in (Fig. 11 / A)
Connect the power cable to the appliance as shown in (Fig. 12/ Item 1) and secure it into
position with the strain relief clamp (Fig 12/ ltem 2).
Im ortant! To prevent accidental start up of the machine, the push bar (Fig. 13/ ltem 1) is
equipped with a two point switch (Fig. 13/ ltem 2) which must be pressed before the lever
switch (Fig. 13/ ltem 3) can be pressed. If the lever switch is released, the machine will
switch off. Repeat this process several times so that you are sure that the machine
functions properly.
Before you perform any repair or maintenance work on the machine, ensure that the hoe
blades are not rotating and that the power supply is disconnected.
Always ensure that a safe distance (provided by the long handles) is maintained between
the machine and the user. Be especially careful when changing direction on slopes and
inclines.
Use caution when backing up and pulling the machine (tripping hazard).
When working on an incline work from side to side, not up and down.
5. Ti s for correct o eration
With the machine switched off, place it in front of the area you wish to hoe and hold it
securely on the push bar. Switch on the machine and guide the hoe blades over the area
in straight lines (to avoid bare strips) making sure the hoe blades do not travel over the
cable. When working on inclined areas work across the slope and not up and down. When
you arrive at the end of the area you wish to hoe, need to change direction, or need to
check the hoes blades make sure that you switch off the machine first.
After use make sure the underside of the machine is clean and remove any soil deposits,
as debris makes it more difficult to start the machine and decreases the working depth.
Im ortant!
The hoe blades will continue to rotate for a few seconds after the motor is switched off.
Never attempt to manually stop them. In the event that the rotating hoe blade strikes an
object, immediately switch off the machine and wait for the hoe blades to come to a
complete stop, and then inspect the condition of the hoe blades. If any parts of the tiller are
damaged make sure that it is repaired immediately.
9