Core Troy-Bilt TB4200 User manual

769-11329 / 01 03/16
Operator’s Manual
TB4200 / TB4200B
Cordless Trimmer
TABLE OF CONTENTS
Service . . . . . . . . . . . . . . . . . . . . . . . . . . . . . . . . . . . . . . . . . . . . . . .1
Safety . . . . . . . . . . . . . . . . . . . . . . . . . . . . . . . . . . . . . . . . . . . . . . .2
now Your Unit . . . . . . . . . . . . . . . . . . . . . . . . . . . . . . . . . . . . . . . .7
Specifications . . . . . . . . . . . . . . . . . . . . . . . . . . . . . . . . . . . . . . . . .8
Assembly . . . . . . . . . . . . . . . . . . . . . . . . . . . . . . . . . . . . . . . . . . . . .8
Starting and Stopping . . . . . . . . . . . . . . . . . . . . . . . . . . . . . . . . . .10
Operation . . . . . . . . . . . . . . . . . . . . . . . . . . . . . . . . . . . . . . . . . . . .11
Maintenance . . . . . . . . . . . . . . . . . . . . . . . . . . . . . . . . . . . . . . . . .13
Cleaning and Storage . . . . . . . . . . . . . . . . . . . . . . . . . . . . . . . . . .14
Troubleshooting . . . . . . . . . . . . . . . . . . . . . . . . . . . . . . . . . . . . . . .15
Warranty . . . . . . . . . . . . . . . . . . . . . . . . . . . . . . . . . . . . . . . . . . . .17
MPORTANT: Read this manual thoroughly before using this product. Follow all instructions.
DO NOT RETURN TH S UN T TO THE RETA LER. PROOF OF
PURCHASE W LL BE REQU RED FOR WARRANTY SERV CE.
For assistance regarding the assembly, operation or maintenance of
the unit, please call 1-800-828-5500 (in the United States) or 1-800-
668-1238 (in Canada). Additional information can be found at
www.troybilt.com (in the United States) or www.troybilt.ca (in
Canada).
Warranty service is available through an authorized service center.
To locate a service center in your area, please visit our website or
call the number listed above. Service on this unit, both within and
after the warranty period, should only be performed by an
authorized and approved service center. When servicing, use only
identical replacement parts.
SERV CE
All information, illustrations, and specifications in this manual are based
on the latest product information available at the time of printing. We
reserve the right to make changes at any time without notice.
The product may vary slightly from the illustrations contained in this
manual.
Copyright© 2016 MTD SOUTHWEST INC, All Rights Reserved.
SAVE THESE NSTRUCT ONS
NOTE: This operator's manual covers multiple models. Features
may vary by model. Not all features in this manual are applicable
to all models. The model depicted may differ from yours.
BC

2
SAFETY
SYMBOL MEAN NG
WARN NG:Signals a SERIOUS hazard.
Failure to obey a safety WARN NG symbol CAN result in
serious injury to yourself or to others.
CAUT ON:Signals a MODERATE hazard.
Failure to obey a safety CAUT ON symbol MAY result in
property damage or injury to yourself or to others.
The purpose of safety symbols is to attract your attention to
possible dangers. The safety symbols, and their explanations,
deserve your careful attention and understanding. The safety
warnings do not by themselves eliminate any danger. The
instructions or warnings they give are not substitutes for proper
accident prevention measures.
NOTE: Advises you of information or instructions vital to the
operation or maintenance of the equipment.
DANGER:Signals an EXTREME hazard.
Failure to obey a safety DANGER symbol W LL result in
serious injury or death to yourself or to others.
Read the operator’s manual and follow all warnings and safety
instructions. Failure to do so can result in serious injury to the
operator and/or bystanders.
CAL FORN A PROPOS T ON 65
WARN NG:This product contains a chemical
known to the state of California to cause cancer, birth defects
or other reproductive harm.
• MPORTANT SAFETY NSTRUCT ONS •
READ ALL NSTRUCT ONS BEFORE OPERAT NG
WARN NG:Read all safety warnings and all
instructions. Failure to follow the warnings and instructions
may result in electric shock, fire and/or serious injury.
1. SAVE THESE NSTRUCT ONS - This manual contains
important safety and operating instructions.
2. Before using this product, read all instructions and cautionary
markings on the battery, battery charger, and the unit(s) powered
by the battery.
WARN NG:Only use a 4044 battery charger
to charge 4144 or 6216 batteries. DO NOT attempt to
charge any other batteries with a 4044 battery charger.
Other types of batteries may burst, causing fire, personal
injury or property damage.
WARN NG:Only charge 4144 or 6216
batteries with a 4044 battery charger. DO NOT attempt to
use any other battery charger to charge 4144 or 6216
batteries. Other types of battery chargers may cause the
batteries to burst, resulting in fire, personal injury or
property damage.
WARN NG:Only use 4144 or 6216 batteries
with this unit. DO NOT use any other type of battery,
attachment or accessory with this unit. Other types of
batteries, attachments or accessories could lead to serious
injury, property damage or damage to the unit.

3
GENERAL SAFETY WARN NGS
• Read the instructions carefully. Be familiar with the controls and
proper use of the unit.
• Stay alert. Do not operate this unit when tired, ill or under the
influence of alcohol, drugs or medication.
• Never allow children to operate the unit. Teens must be trained,
accompanied and supervised by an adult. Never allow adults to
operate the unit without proper instruction.
• All guards and safety attachments must be installed properly
before operating the unit.
• Inspect the unit before use. Check for damaged parts. Make
sure all parts operate properly. Make sure all fasteners are in
place and secure. Make sure all moving parts are properly
aligned and are not bound. Have all damaged or improperly
working parts repaired or replaced by an authorized service
center. Do not operate the unit with loose or damaged parts.
• Be aware of risk of injury to the head, hands and feet.
• Carefully inspect the area before starting the unit. Remove
rocks, broken glass, nails, wire, string and other objects that
may be thrown or become entangled with the unit.
• Clear the area of children, bystanders and pets; keep them
outside a 50-foot (15 m) radius, at a minimum. Even then, they are
still at risk from thrown objects. Encourage bystanders to wear
eye protection. If you are approached, stop the unit immediately.
• This unit is intended for occasional, household use only.
• Do not allow the unit to be used as a toy.
SAFETY WARN NGS FOR ELECTR C UN TS
General Electric Safety
• Do not expose the unit to rain or wet conditions.
• Do not handle the unit with wet hands.
• Do not operate the unit in the rain, in wet conditions or on wet
surfaces.
• To reduce the risk of electric shock, avoid body contact with
grounded conductors, such as metal pipes or wire fences.
• Do not operate the unit in explosive atmospheres, such as in the
presence of flammable liquids, gases or dust.
Battery Charger Safety
• A nameplate on the unit indicates the voltage used. Never
connect the unit to an AC voltage that differs from this voltage.
• An extension cord should not be used unless absolutely
necessary. Use of an improper extension cord could result in a
risk of fire, electric shock or electrocution.
• Do not use multiple extension cords.
• Make sure the extension cord is heavy enough to carry the current
drawn by the unit. An undersized extension cord will cause a drop
in line voltage, resulting in a loss of power and overheating. If in
doubt, use the next heavier gauge cord. The smaller the gauge
number, the heavier the cord.
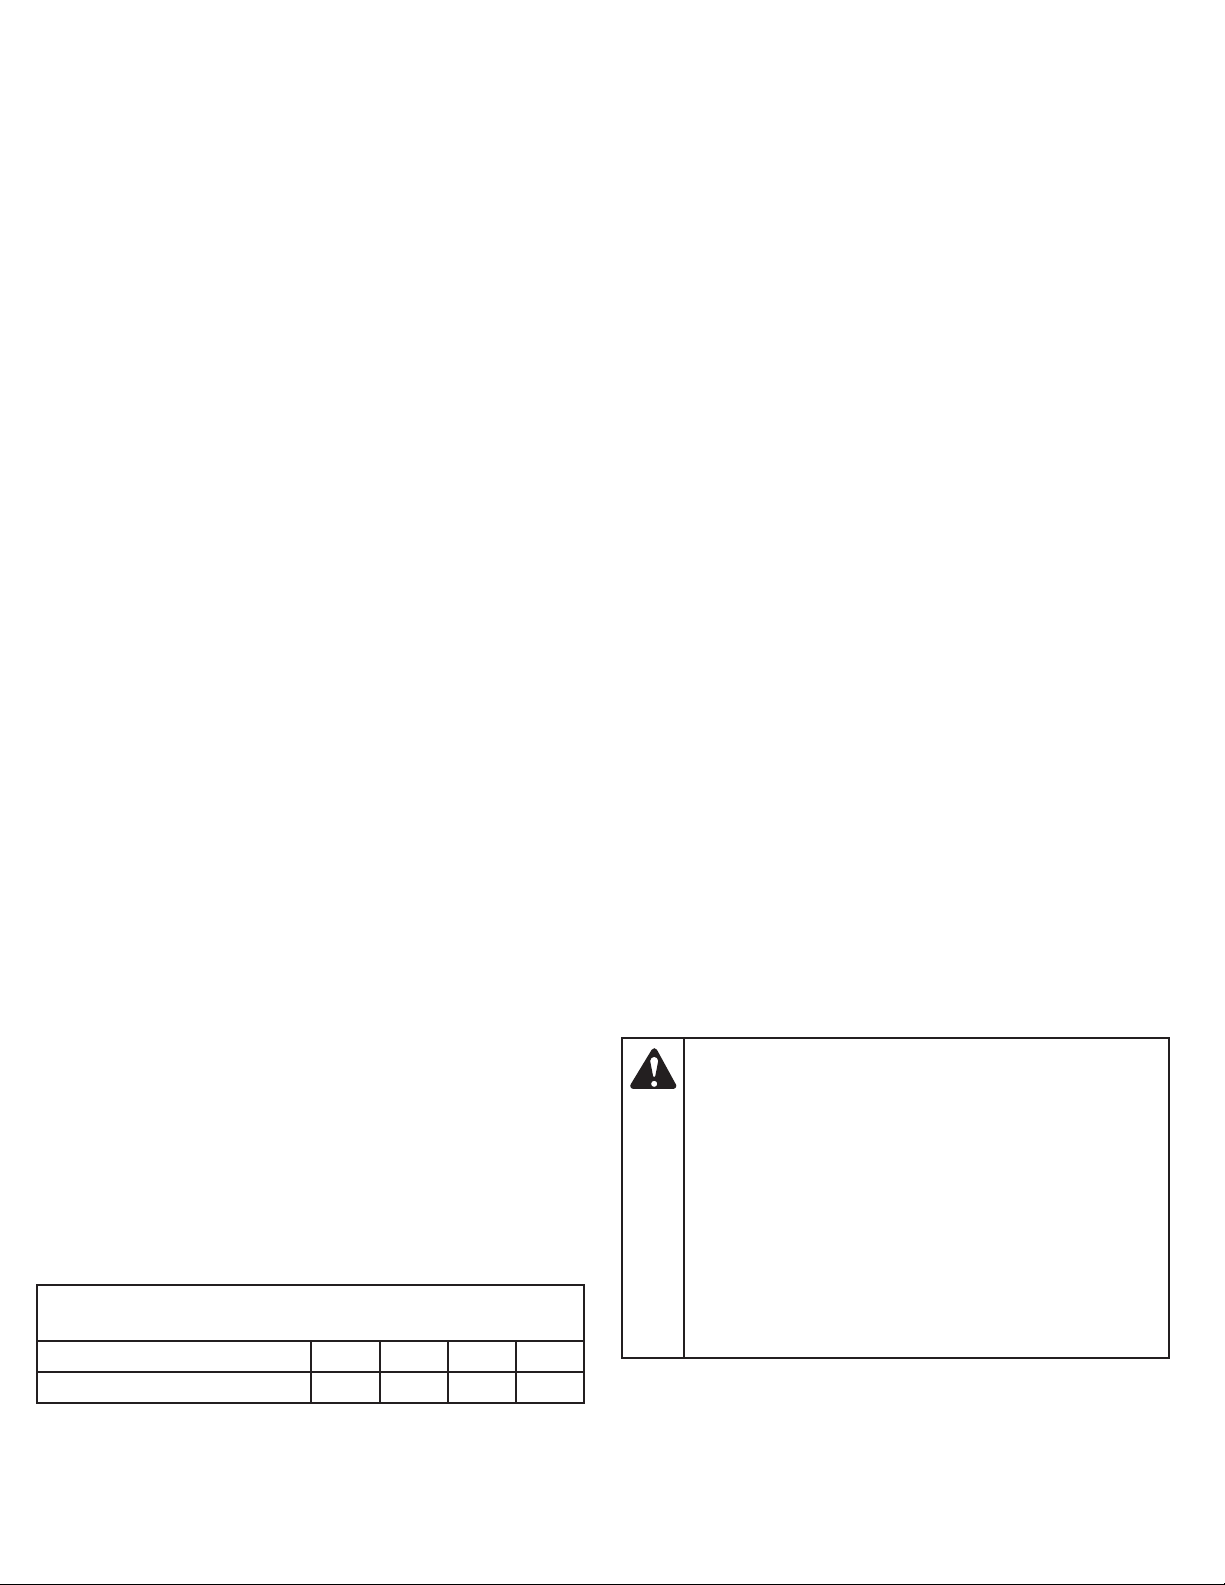
M N MUM W RE S ZE FOR EXTENS ON CORDS FOR
120 VOLT APPL ANCES US NG 0-6 AMPS
Cord Length (ft.) 25 50 100 150
Wire Size (AWG) 16 16 16 14
• Make sure the cords are in good condition. Inspect the power
cord and extension cord periodically. Look closely for
deterioration, cuts or cracks in the insulation. If a cord is
damaged in any manner while plugged in, disconnect the cord
from both the outlet and the unit. Do not use a damaged cord.
Damaged cords should be repaired or replaced.
• Do not abuse cords. Never pull or carry the unit by a cord. eep
cords away from heat, oil, water, sharp edges, and moving
objects. Always grasp the plug when disconnecting a cord.
• Never modify a plug, cord or outlet in any way.
• Ground Fault Circuit Interrupter (GFCI) protection should be
provided on the circuit(s) or outlet(s) to be used with this unit.
For an extra measure of safety, use receptacles with built-in
GFCI protection.
• Do not place the battery charger where cords might be stepped
on, tripped over or subjected to damage.
• Do not charge batteries in the rain or in wet conditions. eep the
battery charger in a cool and dry area.
• eep the battery charger away from all liquid.
• Do not allow small metal items or material such as steel wool,
aluminum foil or other foreign particles into the charger port.
• Do not probe the charger with conductive material. There is a
risk of electric shock.
• Do not cover the battery charger. The battery charger may
overheat.
• Do not allow the battery or battery charger to overheat. If they
are warm, allow them to cool down. Only charge batteries in
temperatures between 32° and 104° F (0° and 40° C).
• Always unplug the battery charger before cleaning it. Always
unplug the battery charger when it is not in use.
Battery Safety
• Do not expose the battery to fire or to temperatures over 176º F
(80º C). Doing so could cause an explosion.
• Handle batteries with care. Do not short the battery with
conductive materials, such as rings, bracelets, keys, etc.
Shorting the battery may cause personal injury, damage to the
battery or a fire.
• When the battery is not in use, keep it away from small metal
objects, such as paper clips, coins, nails, etc. These items could
connect one terminal to another and short the battery.
• Do not attempt to charge a cracked or damaged battery.
• Do not use a damaged or modified battery. Doing so could result
in a fire, explosion or personal injury.
WARN NG:The battery may present a risk of
fire or chemical burn if mistreated. Do not disassemble,
overheat or incinerate the battery. The battery may develop a
small leak under extreme usage or temperature conditions.
f battery fluid contacts skin:
- Immediately wash the area with soap and water.
- Neutralize the battery fluid with a mild acid (lemon
juice, vinegar, etc.).
- Seek immediate medical attention.
f battery fluid gets in the eyes:
- Immediately flush the eyes with clean water for at
least 15 minutes.
- Seek immediate medical attention.

4
FCC STATEMENT
NOTE: This equipment has been tested and found to comply with the
limits for a Class B digital device, pursuant to part 15 of the FCC
Rules. These limits are designed to provide reasonable protection
against harmful interference in a residential installation. This
equipment generates, uses and can radiate radio frequency
energy and, if not installed and used in accordance with the
instructions, may cause harmful interference to radio
communications. However, there is no guarantee that interference
will not occur in a particular installation. If this equipment does
cause harmful interference to radio or television reception, which
can be determined by turning the equipment off and on, the user
is encouraged to try to correct the interference by one or more
of the following measures:
— Reorient or relocate the receiving antenna.
— Increase the separation between the equipment and receiver.
— Connect the equipment into an outlet on a circuit different
from that to which the receiver is connected.
— Consult the dealer or an experienced radio/TV technician for help.
CAUT ON:Changes or modifications not
expressly approved by the party responsible for compliance
could void the user's authority to operate the equipment.
D SPOS NG OF DAMAGED OR WORN-OUT BATTER ES
WARN NG:To prevent contamination of the
environment, contact your local waste disposal agency for
specific instructions before disposing of damaged or worn-
out lithium-ion batteries. Take batteries to a local recycling
and/or disposal center, certified for lithium-ion battery
disposal.
WARN NG:Do not use broken or cracked
batteries, even if there isn't leakage. Replace damaged or
worn-out batteries with new batteries. DO NOT ATTEMPT
TO REPAIR BATTERIES! Repair attempts may result in
severe personal injury, due to explosion or electrical shock.
WARN NG:The following toxic and
corrosive material is used in this unit's battery:
LITHIUM-ION, a toxic material.
To avoid personal injury and damage to the environment:
• Do not attempt to remove or destroy any of the battery
components. Do not open or mutilate the battery. If a leak
develops, released electrolytes are corrosive and toxic. Do not get
the solution in your eyes or on your skin, and do not swallow it.
• Do not dispose of the battery in the regular household trash.
• Do not dispose of the battery in a fire. The cell may explode.
• Do not dispose of the battery where it will become part of any
waste landfill or municipal solid waste stream.
• Cover the battery terminals with heavy-duty adhesive tape.
• Dispose of the battery according to local, state and federal
regulations.
• Dispose of the battery promptly.
About Call2Recycle Battery Seals
Call2Recycle’s industry steward program helps
battery and product manufacturers fulfill recycling
requirements in the U.S. and Canada, including
compliance with extensive state, provincial and
federal regulations, such as the Mercury-
Containing and Rechargeable Battery Act (The
Battery Act). Call2Recycle®Licensees/Industry
Stewards, participating battery and product manufacturers and
marketers, purchase the rights to imprint the Call2Recycle Battery
Seals on their rechargeable batteries and products. When you see the
Call2Recycle Battery Seal, you can feel confident knowing that your
battery or product can be safely and responsibly recycled.
About Call2Recycle
Since 1994, Call2Recycle has diverted more than 75 million pounds
of rechargeable batteries from local landfills and established a
network of 30,000 recycling drop-off locations. More than 200 battery
and/or product manufacturers, Call2Recycle Industry Stewards, have
united to ensure that batteries are responsibly recycled when they
reach their end of life and fund the program that is operated by
Call2Recycle, Inc., a 501(c)4 nonprofit public service organization.
To locate the nearest recycling center, please call 1-800-822-8837.

5
OTHER SAFETY WARN NGS
• Maintain the unit with care.
• Do not perform maintenance procedures other than those
described in this manual. Do not attempt to repair the unit; there
are no user-serviceable parts inside. All service, other than the
maintenance procedures described in this manual, should be
performed by an authorized service dealer.
• If the unit is not working as it should, has been dropped,
damaged, left outdoors or dropped into water, do not use the unit.
• Never remove, modify or make inoperative any safety device
furnished with the unit.
• Before inspecting, maintaining, cleaning, storing, transporting or
replacing any parts on the unit:
1. Stop the motor. Refer to Sta ting and Stopping.
2. Wait for all moving parts to stop.
3. Remove the battery.
4. Allow the unit to cool.
• Secure the unit while transporting.
• Store the unit in a dry place, secured or at a height to prevent
unauthorized use or damage. eep the unit out of the reach of
children.
• Never douse or squirt the unit with water or any other liquid.
Avoid getting water in the motor and electrical connections.
eep handles dry and clean (free from debris, oil and grease).
Clean the unit after each use. Refer to Cleaning and Sto age. Do
not use solvents or strong detergents.
• eep these instructions. Refer to them often and use them to
instruct other users. If you loan this unit to others, also loan
them these instructions.
SAVE THESE NSTRUCT ONS
WH LE OPERAT NG
• Wear safety glasses or goggles that meet current ANSI / ISEA
Z87.1 standards and are marked as such. Wear ear/hearing
protection when operating this unit. Wear a face mask or dust
mask if the operation is dusty.
• Wear heavy long pants, boots, gloves and a long sleeve shirt. Do
not wear loose clothing, jewelry, short pants, sandals or go
barefoot. Secure hair above shoulder level.
• Use the unit only in daylight or good artificial light.
• Use the right tool. Only use this tool for its intended purpose.
• Always hold the unit with a firm grip when operating.
• Do not overreach. Always keep proper footing and balance. Take
extra care when working on stairs, steep slopes or inclines. To
avoid serious injury, do not operate the unit while on a ladder or
a roof.
• eep hair, face, hands, feet and all other body parts away from
moving parts and openings. Do not touch or try to stop moving
parts.
• Do not touch the motor or heat sink. These parts get extremely
hot from operation, even after the unit is turned off.
• Do not operate the unit faster than the speed needed to do the
job. Do not run the unit at high speed when not in use.
• Do not force the unit. It will do a better, safer job when used at
the intended rate.
• Always stop the unit when operation is delayed or when walking
from one location to another.
• Before setting the unit down, always make sure the motor is off
and all moving parts have stopped.
• Avoid starting the unit unintentionally. Make sure the throttle
lockout is in the locked position before installing or removing the
battery. Never carry the unit with fingers on the throttle control.
• Remove the battery from the unit when it is not in use.
• Do not use the unit if the throttle lockout and throttle control do
not start and stop the unit.
• If the unit strikes or becomes entangled with a foreign object,
stop the motor immediately, remove the battery and check for
damage. If damaged, do not restart or operate the unit until it is
repaired. Do not operate the unit with loose or damaged parts.
• Use only original equipment manufacturer (OEM) replacement
parts and accessories for this unit. These are available from your
authorized service dealer. Use of any other parts or accessories
could lead to serious injury to the user, or damage to the unit,
and void the warranty.
• eep the unit clean. Stop the motor, remove the battery and
allow the unit to cool. Carefully remove vegetation and other
debris that could block moving parts.
• If the unit starts to vibrate abnormally, stop the motor, remove the
battery and allow the unit to cool. Inspect the unit for the cause of
the vibration. Vibration is generally an indicator of trouble.
WARN NG:To reduce the risk of electric
shock, do not expose the unit to rain or wet conditions.
Store the unit indoors.
TR MMER SAFETY
• Only use the trimming line described in the Specifications section
of this manual. Never use metal-reinforced line, wire, chain or
rope. These can break off and become dangerous projectiles.
• Do not replace the cutting head with rigid or metal blades. Doing
so could result in serious injury.
• The cutting head shield must always be in place while operating
the unit. Do not operate the unit without both trimming lines
extended and the proper line installed. Do not extend the
trimming line beyond the length of the shield.
• Adjust the handle to provide the best grip, if applicable.
• Make sure the cutting head is not in contact with anything
before starting the unit.
• Always hold the unit with both hands when operating. Using
only one hand could lead to a loss of control and result in
serious personal injury.
• eep hands and feet away from the cutting area.

6
• SAFETY & NTERNAT ONAL SYMBOLS •
This operator's manual describes safety and international symbols and pictographs that may appear on this product. Read the operator's
manual for complete safety, assembly, operating and maintenance and repair information.
SYMBOL MEAN NG SYMBOL MEAN NG
• SAFETY ALERT SYMBOL
Indicates danger, warning or caution. May be used in
conjunction with other symbols or pictographs.
• READ OPERATOR'S MANUAL
WARN NG: Read the operator’s
manual(s) and follow all warnings and safety
instructions. Failure to do so can result in serious
injury to the operator and/or bystanders.
• WEAR EYE AND HEAR NG PROTECT ON
WARN NG:Thrown objects and loud
noise can cause severe eye injury and hearing loss.
Wear eye protection meeting current ANSI / ISEA
Z87.1 standards and ear protection when operating
this unit. Use a full face shield when needed.
• WEAR FOOT PROTECT ON
Always wear heavy-duty, non-slip footwear when
operating this unit.
• WEAR HAND PROTECT ON
Always wear heavy-duty, non-slip gloves when
handling this unit.
• HANDLE POS T ON
Make sure the handle is positioned beyond the end of
the safety label.
• THROWN OBJECTS CAN CAUSE SEVERE NJURY
WARN NG:Small objects can be
propelled at high speed, causing injury.
Min. 50 ft
15 m
• KEEP BYSTANDERS AWAY
WARN NG: eep all bystanders,
especially children and pets, at least 50 feet (15 m)
from the operating area.
• HOT SURFACE
WARN NG:Do not touch the motor or
heat sink. You may get burned. These parts get
extremely hot from operation. When turned off, they
remain hot for a short time.
• SHARP BLADE
WARN NG:There is a sharp blade on
the cutting head shield. To prevent serious injury, do
not touch the line cutting blade.
• DO NOT USE METAL BLADES
WARN NG:To prevent serious injury, do
not replace the cutting head with rigid or metal blades.
• DO NOT USE N THE RA N
WARN NG:Avoid dangerous
environments. Never operate the unit in the rain or in
damp or wet conditions. Moisture is a shock hazard.
• DO NOT D SPOSE N HOUSEHOLD TRASH
Recycle the battery or dispose of the battery
according to local, state and federal regulations.

7
Battery*
Battery Charger*
Trimmer
KNOW YOUR UN T
APPL CAT ONS
• Cutting grass and light weeds
• Decorative trimming around trees, fences, etc.
ASSEMBLY TOOLS REQU RED:
• Flat-head Screwdriver
Charge Meter
Button
Charge Meter
Lights
Terminals
LED
Charging Dock
Power Cord
Terminals
Cutting Head
Shield
Cutting Head Line Cutting Blade
Motor
Handle
Shaft Grip
Shaft Housing
Throttle Control
Throttle Lockout
Heat Sink
Battery Latch Battery Port
Boost Button
Power Meter
* The battery and battery charger are not included with model TB4200B.
Shoulder Strap / Harness Loop

8
SPEC F CAT ONS
Approximate Unit Weight (without the battery) . . . . . . . . . . . . . . . . . . . . . . . . . . . . . . . . . . . . . . . . . . . . . . . . . . . . . . . . 7.5 - 8.5 lbs. (3.4 - 3.9 kg)
Trimmer Mechanism . . . . . . . . . . . . . . . . . . . . . . . . . . . . . . . . . . . . . . . . . . . . . . . . . . . . . . . . . . . . . . . . . . . . . . . . . . . . . . . . . . . . . . . Bump Head
Trimming Line Diameter . . . . . . . . . . . . . . . . . . . . . . . . . . . . . . . . . . . . . . . . . . . . . . . . . . . . . . . . . . . . . . . . . 0.080 to 0.095 in. (2.03 to 2.41 mm)*
Cutting Path Diameter . . . . . . . . . . . . . . . . . . . . . . . . . . . . . . . . . . . . . . . . . . . . . . . . . . . . . . . . . . . . . . . . . . . . . . . . . . . . . . . . . . . 16 in. (40.6 cm)
Battery Type (Model 4144) . . . . . . . . . . . . . . . . . . . . . . . . . . . . . . . . . . . . . . . . . . . . . . . . . . . . . . . . . . . . . . . . . . . . . . . . . . . 40V, 4Ah Lithium-Ion
Battery Type (Model 6216) . . . . . . . . . . . . . . . . . . . . . . . . . . . . . . . . . . . . . . . . . . . . . . . . . . . . . . . . . . . . . . . . . . . . . . . . . . . 40V, 6Ah Lithium-Ion
Approximate Battery Weight . . . . . . . . . . . . . . . . . . . . . . . . . . . . . . . . . . . . . . . . . . . . . . . . . . . . . . . . . . . . . . . . . . . 3.25 - 3.75 lbs. (1.5 - 1.7 kg)
Optimum Charging Temperature . . . . . . . . . . . . . . . . . . . . . . . . . . . . . . . . . . . . . . . . . . . . . . . . . . . . . . . . . . . . . . . . . . 32° to 104° F (0° to 40° C)
Battery Charger Input . . . . . . . . . . . . . . . . . . . . . . . . . . . . . . . . . . . . . . . . . . . . . . . . . . . . . . . . . . . . . . . . . . . . . . . . . . . . . . . 120 V 60 Hz AC only
Battery Charger Output . . . . . . . . . . . . . . . . . . . . . . . . . . . . . . . . . . . . . . . . . . . . . . . . . . . . . . . . . . . . . . . . . . . . . . . . . . . . . . . . . . . . 6 A 42 V DC
Approximate Charging Time (Model 4144) . . . . . . . . . . . . . . . . . . . . . . . . . . . . . . . . . . . . . . . . . . . . . . . . . . . . . . . . . . . . . . . . . . . . . . . 45 minutes
Approximate Charging Time (Model 6216) . . . . . . . . . . . . . . . . . . . . . . . . . . . . . . . . . . . . . . . . . . . . . . . . . . . . . . . . . . . . . . . . . . . . . . . 60 minutes
Approximate Battery Charger Weight . . . . . . . . . . . . . . . . . . . . . . . . . . . . . . . . . . . . . . . . . . . . . . . . . . . . . . . . . . . . . 2.75 - 3.25 lbs. (1.2 - 1.5 kg)
ASSEMBLY
NSTALL NG AND ADJUST NG THE HANDLE
nstalling the Handle
1. Push the handle down onto the shaft housing (Fig. 1). Make sure
the bolt hole faces to the right (Fig. 1).
2. Insert the bolt into the bolt hole and push it through (Fig. 1).
Tighten the bolt with a flat-head screwdriver, but do not tighten
the bolt completely .
3. Hold the unit in the operating position (Fig. 8) and move the
handle to a comfortable location (Fig. 1). Make sure the handle is
positioned beyond the end of the safety label (Fig. 1).
4. Tighten the bolt with a flat-head screwdriver until the handle is
secure.
Adjusting the Handle
If the handle requires adjustment:
1. Loosen the bolt with a flat-head screwdriver (Fig. 1).
NOTE: If the handle was pre-installed under the shaft housing,
rotate the handle until it is in the proper upright position (Fig. 1).
2. Hold the unit in the operating position (Fig. 8) and move the
handle to a comfortable location (Fig. 1). Make sure the handle is
positioned beyond the end of the safety label (Fig. 1).
3. Tighten the bolt with a flat-head screwdriver until the handle is
secure.
Fig. 1
Bolt Hole
Handle
Shaft
Housing
Bolt
Safety Label
All specifications are based on the latest product information available at the time of printing. We reserve the right to make changes at any
time without notice.
*Use 0.080 in. (2.03 mm) diameter line for light-duty jobs and maximum runtime.
*Use 0.090 in. (2.29 mm) diameter line for the perfect balance of runtime and performance (available at www.troybilt.com).
*Use 0.095 in. (2.41 mm) diameter line for heavy-duty jobs and a small compromise in runtime.

9
WALL-MOUNT NG THE CHARGER (OPT ONAL)
The battery charger can be mounted to a permanent surface, such
as a wall or work bench. Use mounting fasteners (not included)
capable of supporting the combined weight of the battery and
battery charger. Wall-mounting holes are located on the bottom of
the charger (Fig. 2).
Fig. 2
Wall-Mounting
Holes
CHARG NG THE BATTERY
NOTE: The battery is not shipped fully charged.
NOTE: Lithium-ion batteries will not develop a memory and may be
charged at any time.
For maximum run time, fully charge the battery before each use.
1. Plug the battery charger into an appropriate power outlet.
2. Insert the battery into the charging dock (Fig. 3). The LED should
illuminate (Fig. 4). If it does not:
• Make sure the battery is fully inserted into the charging dock.
• Make sure the battery charger is fully plugged into an
appropriate power outlet.
• Make sure the power outlet is functioning by testing it with
another electrical device.
3. Examine the LED. The LED will indicate the battery status:
•Green (blinking): The battery is charging. Charge the battery
until the green light stops blinking.
•Green (constant): The battery is fully charged.
•Red (blinking): The battery and/or charger are too hot or too
cold. Make sure the battery and charger are in an environment
between 32° and 104° F (0° and 40° C). Allow time for the
battery and/or charger to warm up or cool down.
•Red (constant): The battery is no longer functional. Refer to
the Wa anty section for replacement information.
4. Once the battery is fully charged, remove it from the battery
charger. Optionally, the battery can be stored in the battery
charger, but the battery charger should be unplugged from the
power outlet.
Fig. 3
Battery
Charging Dock
Fig. 4
LED

10
NSTALL NG AND REMOV NG THE BATTERY
nstalling the Battery
1. Grasp the shaft grip firmly. DO NOT press the throttle lockout or
squeeze the throttle control. Refer to Sta ting and Stopping.
2. Slide the battery into the battery port (Fig. 5). Push the battery
firmly until the battery locks into place (Fig. 5). There should be
an audible “click” and the battery latch should be in the upright
position (Fig. 5).
Removing the Battery
1. Grasp the shaft grip firmly. DO NOT press the throttle lockout or
squeeze the throttle control. Refer to Sta ting and Stopping.
2. Press the battery latch down to unlock the battery (Fig. 5).
3. Pull the battery out of the battery port (Fig. 5).
WARN NG: Avoid accidentally starting the unit. To
prevent serious injury, DO NOT press the throttle lockout
or squeeze the throttle control when installing or removing
the battery. Refer to Sta ting and Stopping. Remove the
battery from the unit when it is not in use.
START NG AND STOPP NG
START NG NSTRUCT ONS
To prevent the motor from starting accidentally, this unit has a
throttle lockout. The throttle control cannot be squeezed unless the
throttle lockout is also engaged.
1. Install the battery. Refer to Installing the Batte y.
2. Press and hold the throttle lockout (Fig. 6).
3. Continue to hold the throttle lockout. Squeeze the throttle
control to start the motor (Fig. 6).
4. Continue to hold the throttle lockout and squeeze the throttle
control. Squeeze the throttle control to the degree needed for
the operation.
STOPP NG NSTRUCT ONS
1. Release the throttle control and wait for all moving parts to come
to a complete stop (Fig. 6).
Fig. 6
Throttle Lockout
Throttle Control
Fig. 5
Battery
Battery Latch
Shaft Grip
Battery Port

11
OPERAT ON
US NG THE BOOST BUTTON
Press the boost button to switch between MAX and ECO modes, as
needed (Fig. 9).
•MAX mode provides maximum power for tough jobs.
•ECO mode conserves energy for maximum run time. ECO mode
is appropriate for most jobs.
NOTE: The unit will reset to ECO mode a few seconds after the
motor is turned off.
Fig. 9
CHECK NG THE BATTERY CHARGE LEVEL
Press the charge meter button on the battery. The number of lights
that illuminate will indicate the current charge level of the battery
(Fig. 7). If all four lights are dark, charge the battery before any
further use.
NOTE: While in use, lithium-ion batteries provide power with
minimal power fade. When the battery is fully discharged, it will
immediately cut power to the unit and require charging. Fig. 7
Charge Meter
Button
75% - 100%
50% - 75%
25% - 50%
0% - 25%
WARN NG: Do not expose power tools to rain or wet
conditions.
HOLD NG THE UN T
• Stand in the operating position (Fig. 8). Stand up straight. Do not
bend over.
• eep feet apart and firmly planted.
• Hold the shaft grip with the right hand. eep the right arm
slightly bent.
• Hold the handle with the left hand. eep the left arm straight.
• Hold the unit at waist level.
• Position the cutting head a few inches above the ground.
Fig. 8
Boost Button
WARN NG: Always wear eye, hearing, hand, foot and body
protection to reduce the risk of injury when operating this unit.
Wear a face mask or dust mask if the operation is dusty.

12
T PS FOR BEST RESULTS
• To direct clippings away from the operator, tilt the cutting head
slightly down to the left; cut from right to left whenever possible.
• Do not trim wet grass or weeds.
NOTE: Some line breakage will occur from:
• Entanglement with foreign matter
• Normal line fatigue
• Attempting to cut thick vegetation
• Forcing the line into objects such as walls or fence posts
• Remove the battery from the unit when it is not in use.
DECORAT VE TR MM NG
When trimming around trees, posts, fences, etc., rotate the whole
unit so that the cutting head is at a 30° angle to the ground (Fig. 11).
ADJUST NG THE TR MM NG L NE LENGTH
This unit is equipped with a bump head. Trimming line can be
released from the cutting head without stopping the motor.
To release more line, lightly tap the bump knob on the ground (Fig. 10)
while operating the unit at high speed. For best results, tap the bump
knob on bare ground or hard soil.
NOTE: Do not rest the cutting head on the ground while the unit is
running.
Each time the bump knob is tapped, about 1 inch (25.4 mm) of
trimming line is released.
NOTE: Always keep the trimming line fully extended. Line release
becomes more difficult when the cutting line gets shorter.
A blade in the cutting head shield will cut the line to the proper
length if any excess line is released.
CAUT ON: Do not remove or alter the line cutting blade
assembly. This may lead to serious personal injury or
damage to the unit.
Fig. 10
Bump Knob
Fig. 11

13
MA NTENANCE
WARN NG: To prevent serious injury, never perform
maintenance on the unit while it is running. Always remove
the battery to prevent the unit from starting accidentally.
Always allow the unit to cool before maintaining the unit.
Before maintaining the battery charger, always unplug it
from the power outlet.
REPLACING THE TRIMMING LINE
NOTE: Only use the type of trimming line described in the
Specifications section.
NOTE: Always use the correct line length when installing trimming
line. The line may not release properly if the line is too long.
NOTE: The cutting head will remain attached to the unit and the
inner reel will remain attached to the outer spool.
NOTE: DO NOT disassemble the cutting head to install new line.
Install ng New Tr mm ng L ne
1. If necessary, remove any old trimming line and/or obstructions
from the cutting head. Refer to Removing Old T imming Line and
Obst uctions.
2. Cut one 16 foot (4.9 m) length of new trimming line. Cut one end
at a 30 degree angle (Fig. 13).
3. Turn the bump knob to align the load arrows on the bump knob
with the load lines on the outer spool (Fig. 12).
NOTE: Turn the bump knob slowly for greater control. Turn the bump
knob in the direction indicated on the bump knob. It will only turn
one way. DO NOT push the bump knob down while turning.
4. Insert the angled end of the trimming line through an eyelet and
into the small hole in the inner reel (Fig. 13). Push the line
through the cutting head until a few inches protrude from the
other side. Pull the line through the cutting head until the lengths
of line on either side of the cutting head are equal.
5. Turn the bump knob to wind the line until about 5 inches (12.5
cm) protrude from each side of the cutting head (Fig. 14).
NOTE: If too little line is left protruding, it could retract inside the
cutting head.
Remov ng Old Tr mm ng L ne and Obstruct ons
1. When the trimming line runs out, the last piece should automatically
eject from the cutting head. If it does not, push the bump knob
down and pull the remaining line out of the cutting head.
2. If the line will not come out or the cutting head is otherwise
obstructed:
a. Firmly press both tabs to disconnect the bump knob from the
outer spool (Fig. 15). DO NOT press the tabs with a
screwdriver or other object.
b.Remove the bump knob. DO NOT disassemble any other
parts of the cutting head.
c. Remove any old trimming line and/or obstructions.
d.Use a clean cloth to clean the inside of the cutting head.
e. Make sure the spring is securely connected to the outer spool
(Fig. 15). Align the tabs on the bump head with the holes on
the outer spool (Fig. 15). Push the bump head onto the outer
spool until the tabs securely snap into the holes.
WARNING: Never use metal-reinforced line, wire, chain or
rope. These can break off and become dangerous projectiles.
F g. 15
Outer Spool
Inner Reel
Bump Knob
Tab
Hole
30º
X
Fig. 13
Eyelet
Trimming Line
Fig. 14
Fig. 12
Bump Knob
Load Arrow
Outer Spool
Bump Knob
Load Line
Small Hole
Spr ng
5 in. (12.5 cm)
5 in. (12.5 cm)

14
CLEAN NG AND STORAGE
CLEAN NG
• Use a small brush or clean, dry cloth to clean the outside of the
unit, battery and battery charger.
STORAGE
• Remove the battery from the unit.
• Allow the unit, battery and/or battery charger to cool.
• Thoroughly clean the unit, battery and battery charger. Inspect
them for any loose or damaged parts. Replace damaged parts
and tighten loose screws, nuts or bolts.
• Lock up the unit, battery and battery charger to prevent
unauthorized use or damage.
• Store the unit, battery and battery charger indoors, in a dry, well-
ventilated area.
• Store the battery and battery charger in an area that is between
65 and 75˚ F (18 and 24˚ C).
• Always unplug the battery charger when it is not in use.
• Store the unit, battery and battery charger out of the reach of
children.
• If the battery is left unused for more than two months, fully
charge the battery before use.
WARN NG: To prevent serious injury, never clean the
unit while it is running. Always remove the battery to
prevent the unit from starting accidentally. Always allow the
unit to cool before cleaning the unit. Always unplug the
battery charger before cleaning the battery charger.
WARN NG: To prevent serious injury, do not use water
to clean the unit, battery or battery charger. Do not use
strong detergents. Household cleaners that contain
aromatic oils such as pine and lemon, and solvents such
as kerosene, can damage plastic.
MA NTA N NG THE BATTERY CHARGER
• eep the battery charger clean and clear of debris. Do not allow
foreign material into the charging dock or onto the terminals (Fig.
16). Inspect the battery charger for foreign material before each use.
• Make sure the charger has not been shorted by debris. Inspect
the terminals for soot and signs of melting. Do not attempt to
use a shorted charger.
Fig. 16
Terminals
Charging Dock

Device protection systems have engaged Remove and reinstall the battery
15
The cutting head is dirty or bound with grass Stop the motor, remove the battery and clean the cutting head. If
necessary, open the cutting head and clean inside.
The cutting head is out of line Stop the motor, remove the battery and refill the cutting head with
new line
The line is twisted or bound up Stop the motor, remove the battery, remove the line, then refill the
cutting head with line
Not enough line is extended Stop the motor, remove the battery and allow the unit to cool. Push
the bump knob and pull the line until 4 inches (102 mm) is outside of
the cutting head.
There is oil, cleaner or lubricant in the cutting head Stop the motor, remove the battery and allow the unit to cool. Clean
and thoroughly dry the cutting head.
The battery charger is not plugged in Plug the battery charger into a 120V 60hz AC source
The battery is not fully inserted into the battery charger Remove and then reinsert the battery into the battery charger
completely
The battery and/or charger are too hot or too cold Make sure the battery and charger are in an environment between
32° and 104° F (0° and 40° C). Allow time for the battery and/or
charger to warm up or cool down.
The battery and/or battery charger are no longer functional Refer to the Wa anty section for replacement information
TROUBLESHOOT NG
The battery lacks sufficient charge Charge the battery completely
The battery is not installed correctly Remove and reinstall the battery
The throttle lockout was not engaged Press and hold the throttle lockout before squeezing the throttle
control
PROBLEM SOLUT ON
The battery is not fully charged Charge the battery completely
The battery and/or battery charger are no longer functional Refer to the Wa anty section for replacement information
f further assistance is required, contact an authorized service dealer.
THE CUTT NG HEAD W LL NOT ADVANCE L NE
THE CUTT NG L NE ADVANCES UNCONTROLLABLY
THE BATTERY W LL NOT CHARGE
THE BATTERY D ES QU CKLY
THE MOTOR W LL NOT RUN
THE MOTOR STOPS WH LE N USE AND THE POWER METER BL NKS

16
NOTES

17
Troy-Bilt LLC
L M TED WARRANTY FOR CORE POWERED PRODUCT
L M TED WARRANTY
The limited warranty set forth herein is given by Troy-Bilt LLC with respect to new Troy-Bilt-branded products powered by CORE technology
(“CORE Product”) to the Initial Purchaser (as defined herein), purchased in the United States, its possessions and territories, and Canada.
Scope of the Limited Warranty
Troy-Bilt LLC offers the following limited warranty (for residential or commercial use, as detailed below) to the Initial Purchaser: except for the
Exclusions (defined herein), during the Warranty Period (as defined herein), the CORE Product will be free from manufacturing defects
(including workmanship and materials). The “Initial Purchaser” is the first person to purchase a new CORE Product from an authorized Troy-
Bilt dealer, distributor and/or retailer of such CORE Product. This limited warranty is non-transferable.
Residential Use
Except as otherwise set forth herein, for the purposes of non-commercial (i.e. residential) use, the limited warranty period for this new CORE
Product purchased by the Initial Purchaser is five (5) years from the date of purchase as shown on the original sales receipt for the CORE
Product (“Warranty Period”). Notwithstanding the foregoing, the battery and its charger shall be warranted to be free from manufacturing
defects (including workmanship and materials) for three (3) years from the date of purchase as shown on the original sales receipt for the
CORE Product for residential purposes.
Commercial Use
Except as otherwise set forth herein, for purposes of commercial use, the applicable limited Warranty Period for this new CORE Product
shall be two (2) years from the date of purchase as shown on the original sales receipt. Notwithstanding the foregoing, the battery and its
charger shall be warranted to be free from manufacturing defects (including workmanship and materials) for one (1) year from the date of
purchase as shown on the original sales receipt for the CORE Product when used commercially.
*With regard to both residential and commercial use, in addition to, and not in lieu of, the limited warranties as stated above, Troy-Bilt
extends a limited lifetime warranty specifically and exclusively for the CORE Product motor (the motor being comprised of the motor
housings, rotors, magnets, stator, and bearings) against defects in material and workmanship for the life of the CORE Product to the Initial
Purchaser only, commencing from the date of manufacture.
Defects in Workmanship or Materials
Except for the Exclusions, the CORE Product is warranted to be free from manufacturing defects in either workmanship or materials for the
Warranty Period. During the Warranty Period, Troy-Bilt LLC will, at its option, either repair or replace any original part that is covered by this
limited warranty and is determined to be defective in workmanship or material.
To qualify for this limited warranty the CORE Product:
1. Must have been purchased from an authorized retailer.
2. Must have been purchased within the United States its possessions or territories or in Canada, by the Initial Purchaser.
3. Must have been used in a manner consistent with the normal and proper intended use for the CORE Product. This CORE Product is not
intended for rental use.
Who can perform repairs under this warranty?
In order to qualify for the limited warranty as set forth herein, the repairs made under this warranty must be performed by an authorized Troy-
Bilt service provider.
WARRANTY

18
How to Get Service Under This Limited Warranty
To locate a Troy-Bilt warranty service provider, contact your authorized Troy-Bilt dealer, distributor, or retailer or contact Troy-Bilt LLC at P.O.
Box 361131, Cleveland, Ohio 44136-0019 or call 1-800-828-5500 or log on to our Website at www.troybilt.com. For Canada, contact MTD
Products Limited, 97 ent Ave, itchener, ON N2G 3R2, or call 1-800-668-1238 or log on to our Website at www.troybilt.ca. This limited
product warranty is provided by Troy-Bilt LLC and is the only product warranty provided by Troy-Bilt LLC for the CORE Product. A COPY OF
YOUR SALES RECEIPT IS REQUIRED FOR WARRANTY SERVICE.
What This limited Warranty Does Not Cover
This limited warranty does not cover the following (the “Exclusions”):
1. Damage due to lack of maintenance and/or improper maintenance, as described in the Operator’s Manual.
2. Normal wear and tear resulting from use of the CORE Product.
3. Any expendable, consumable, or routine maintenance item that needs replacement or service as part of normal maintenance, unless
such items have defects that cause failure or premature wear within the first thirty (30) days. Normal wear items include, where
applicable, bump knobs, outer spools, cutting line, inner reels, drive belts, saw chains, guide bars, cultivator tines, and/or blades.
4. Use of the CORE Product that is not consistent with the intended use thereof, as described in the operating instructions, including, but
not limited to, abuse, misuse and/or neglect of the CORE Product or any use inconsistent with and/or non-compliant with instructions
contained in the Operator’s Manual.
5. Any product that has been altered or modified in a manner not consistent with the original design of the product or in a manner not
approved by Troy-Bilt LLC.
This warranty does not cover and Troy-Bilt LLC disclaims any responsibility for:
1. Loss of time or loss of use of the CORE Product.
2. Transportation costs and other expenses incurred in connection with the transport of the CORE Product to and from the authorized Troy-
Bilt service provider.
3. Any loss or damage to other equipment or personal items.
4. Damages caused by improper maintenance, exposure, or use of the product that is not consistent with the intended use thereof, as
described in the operating instructions, including, but not limited to, abuse, misuse and/or neglect of the CORE Product.
5. Damage resulting from the installation or use of any accessory or part not approved by Troy-Bilt for use with the CORE Product.
Limitations:
1. THERE ARE NO IMPLIED WARRANTIES, INCLUDING, BUT NOT LIMITED TO, ANY IMPLIED WARRANTY OF MERCHANTABILITY OR
FITNESS FOR A PARTICULAR PURPOSE. NO WARRANTY SHALL APPLY AFTER THE APPLICABLE WARRANTY PERIOD AS SET
FORTH ABOVE AS TO THE PARTS AS IDENTIFIED. NO OTHER EXPRESS WARRANTY OR GUARANTY, WHETHER WRITTEN OR
ORAL, EXCEPT AS MENTIONED ABOVE, GIVEN BY ANY PERSON OR ENTITY, INCLUDING A DEALER OR RETAILER, WITH RESPECT
TO ANY PRODUCT SHALL BIND TROY-BILT LLC. DURING THE WARRANTY PERIOD, THE EXCLUSIVE REMEDY IS REPAIR OR
REPLACEMENT OF THE DEFECTIVE PART, AS SET FORTH ABOVE. (SOME STATES DO NOT ALLOW LIMITATIONS ON HOW LONG AN
IMPLIED WARRANTY LASTS, SO THE ABOVE LIMITATION MAY NOT APPLY TO YOU.)
2. THE PROVISIONS AS SET FORTH HEREIN PROVIDE THE SOLE AND EXCLUSIVE REMEDY ARISING FROM THE SALE. TROY-BILT
SHALL NOT BE LIABLE FOR INCIDENTAL OR CONSEQUENTIAL LOSS OR DAMAGES INCLUDING, WITHOUT LIMITATION, FOR
TRANSPORTATION OR FOR RELATED EXPENSES, OR FOR RENTAL EXPENSES TO TEMPORARILY REPLACE A WARRANTED
PRODUCT. (SOME STATES DO NOT ALLOW THE EXCLUSION OR LIMITATION OF INCIDENTAL OR CONSEQUENTIAL DAMAGES, SO
THE ABOVE EXCLUSION OR LIMITATION MAY NOT APPLY TO YOU.)
3. In no event shall recovery of any kind be greater than the amount of the purchase price of the product sold. Alteration of the safety
features of the product shall void this limited warranty. You assume the risk and liability for loss, damage, or injury to you and your
property and/or to others and their property arising out of the use or misuse or inability to use the product.
How State Law Relates To This Warranty
This limited warranty gives you specific legal rights, and you may also have other rights which vary from state to state.
*The Core Product has a useful life of seven (7) years from the date of manufacture. Please see your retailer, or visit www.troybilt.com for
more information.

769-11329 / 01 03/16
Manual del Operador
TB4200 / TB4200B
Recortadora inalámbrica
ÍND CE
Reparación y mantenimiento . . . . . . . . . . . . . . . . . . . . . . . . . . . .19
Seguridad . . . . . . . . . . . . . . . . . . . . . . . . . . . . . . . . . . . . . . . . . . .20
Conozca su unidad . . . . . . . . . . . . . . . . . . . . . . . . . . . . . . . . . . . .25
Especificaciones . . . . . . . . . . . . . . . . . . . . . . . . . . . . . . . . . . . . . .26
Montaje . . . . . . . . . . . . . . . . . . . . . . . . . . . . . . . . . . . . . . . . . . . . .26
Arranque y parada . . . . . . . . . . . . . . . . . . . . . . . . . . . . . . . . . . . . .28
Funcionamiento . . . . . . . . . . . . . . . . . . . . . . . . . . . . . . . . . . . . . . .29
Mantenimiento . . . . . . . . . . . . . . . . . . . . . . . . . . . . . . . . . . . . . . . .31
Limpieza y almacenamiento . . . . . . . . . . . . . . . . . . . . . . . . . . . . .32
Solución de Problemas . . . . . . . . . . . . . . . . . . . . . . . . . . . . . . . . .33
Garantía . . . . . . . . . . . . . . . . . . . . . . . . . . . . . . . . . . . . . . . . . . . . .39
Toda la información, las ilustraciones y las especificaciones
contenidas en este manual se basan en la información más reciente
disponible en el momento de impresión del manual. Nos reservamos
el derecho de hacer cambios en cualquier momento sin aviso previo.
El producto puede variar ligeramente de las ilustraciones contenidas
en este manual.
Copyright © 2016 MTD SOUTHWEST INC. Todos los derechos
reservados.
MPORTANTE: Lea este manual por completo antes de utilizar este producto. Siga todas las instrucciones.
SERV C O
NO DEVUELVA ESTA UN DAD AL VENDEDOR. PARA
SOL C TAR SERV C O POR GARANTÍA, DEBERÁ
PRESENTAR EL COMPROBANTE DE COMPRA.
Para obtener ayuda en relación con el montaje, el funcionamiento o el
mantenimiento de la unidad, llame al 1-800-828-5500 (en los Estados
Unidos) o al 1-800-668-1238 (en Canadá). Se puede encontrar
información adicional en www.troybilt.com (en los Estados Unidos)
o www.troybilt.ca (en Canadá).
El servicio de la garantía está disponible a través de su distribuidor
local de servicio autorizado. Para ubicar un Centro de servicio de
reparaciones en su zona, visite nuestro sitio web o llame al número que
aparece arriba. La reparación y el mantenimiento de la presente
unidad, tanto dentro del período de la garantía como después de él,
sólo deben realizarlos un centro de servicio autorizado. Cuando vaya a
dar mantenimiento al equipo, utilice solo piezas de repuesto idénticas.
CONSERVE ESTAS
NSTRUCC ONES
NOTA: Este manual del operador cubre múltiples modelos. Las
características pueden variar según los modelos. No todas las
características de este manual son aplicables a todos los
modelos. El modelo descripto puede diferir del suyo.
BC

20
SEGUR DAD
SÍMBOLOS S GN F CADO
ADVERTENC A:Indica un peligro
GRAVE.
Si no se respeta un símbolo de ADVERTENC A de
seguridad usted mismo u otras personas PUEDEN sufrir
lesiones graves.
PRECAUC ÓN:Indica un peligro de
GRAVEDAD MODERADA.
Si no se respeta un símbolo de seguridad de
PRECAUC ÓN usted mismo u otras personas PUEDEN
sufrir lesiones o se PUEDEN producir daños materiales.
El objetivo de los símbolos de seguridad es dirigir su atención hacia
posibles peligros. Los símbolos de seguridad, así como sus
explicaciones, necesitan su atención y comprensión completas. Las
advertencias de seguridad no eliminan por sí mismas ningún
peligro. Las instrucciones o advertencias que contienen no
reemplazan a las medidas adecuadas de prevención de accidentes.
NOTA: Proporciona información o instrucciones de vital importancia
para el funcionamiento o el mantenimiento del equipo.
PEL GRO:Indica un peligro EXTREMO.
Si no se respeta un símbolo de seguridad de PEL GRO
usted mismo u otras personas sufrirán lesiones graves o la
muerte.
Lea el manual del operador y siga todas las advertencias e
instrucciones de seguridad. Si no lo hace, el operador y/o los
observadores pueden sufrir lesiones graves.
PROPOS C ÓN 65 DEL ESTADO DE CAL FORN A
ADVERTENC A:Este producto
contiene una sustancia química que según el Estado de
California puede producir cáncer, defectos de nacimiento
u otros problemas reproductivos.
• NSTRUCC ONES DE SEGUR DAD MPORTANTES •
LEA TODAS LAS NSTRUCC ONES ANTES DE USAR LA
UN DAD
1. GUARDE ESTAS NSTRUCC ONES - Este manual contiene
instrucciones importantes de seguridad y funcionamiento.
2. Antes de usar este producto, lea todas las instrucciones y las
marcas de precaución que figuran en la batería, el cargador de
baterías y las unidades que se accionan con la batería.
ADVERTENC A:Utilice únicamente
baterías 4144 o 6216 con esta unidad. NO utilice ningún
otro tipo de batería, accesorio o aditamento con esta
unidad. Otros tipos de baterías, accesorios o implementos
podrían producir lesiones graves, daños a los bienes o
daños a la unidad.
ADVERTENC A:Utilice únicamente un
cargador de baterías 4044 para cargar las baterías 4144 o
6216. NO intente cargar ninguna otra batería con un cargador
de baterías 4044. Otros tipos de baterías pueden explotar y
causar un incendio, lesiones personales o daños materiales.
ADVERTENC A:Lea todas las
advertencias de seguridad y todas las instrucciones. Si no
se siguen las advertencias y las instrucciones se pueden
producir descargas eléctricas, un incendio y/o lesiones
graves.
ADVERTENC A:Cargue únicamente
baterías 4144 o 6216 con un cargador de baterías 4044.
NO intente utilizar ningún otro cargador de baterías para
cargar las baterías 4144 o 6216. Otros tipos de cargadores
de baterías pueden hacer que las baterías exploten
ocasionando un incendio, lesiones personales o daños
materiales.
This manual suits for next models
1
Table of contents
Languages:
Other Core Trimmer manuals