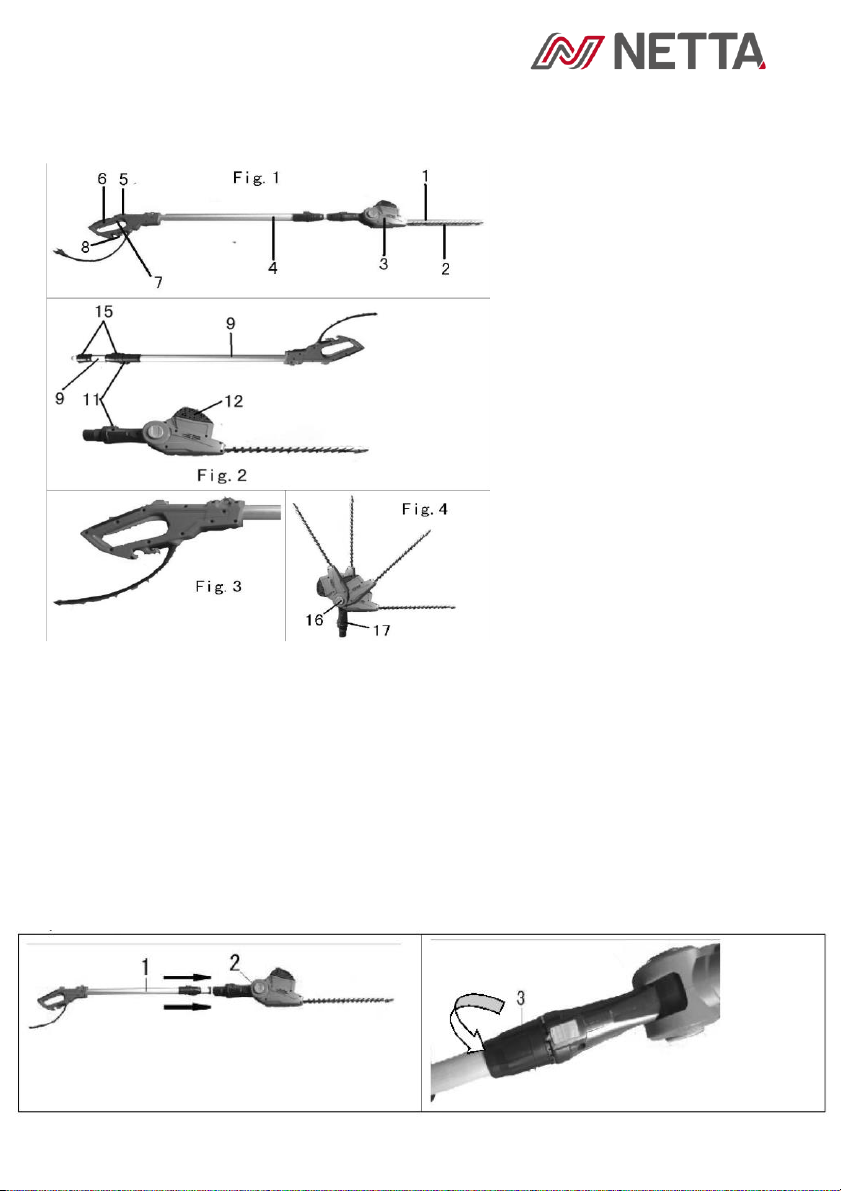
ASSEMBLING THE PRODUCT
ADJUSTING THE PIVOTING HEAD
Disconnect the plug from the power supply and place the hedge trimmer on a
sturdy and flat surface.
Push the pivot button and adjust the trimmer head until it snaps securely into
place at one of the four positions indicated by the notches.
ADJUSTING THE TELESCOPIC POLE
Disconnect the pole hedge trimmer from the power supply.
Loosen the inner hexagon screw M6X20 with the hex key, push the poles
towards each other to shorten the pole or pull away from each other to
lengthen the pole.
Note: Extend the telescopic pole only to the length required to reach the
hedges being trimmed. Do not extend the handle above waist height. When
the desired length is achieved, tighten the inner hexagon screw M6X20 with
a hex key. Keep proper balance at all times.
CUTTING TIPS
Do not force the hedge trimmer through heavy shrubbery.
Do not attempt to cut branches thicker than ¾ inch.
If blades become jammed, unplug the device, and allow to stop before
touching.
Wear gloves when trimming thorny or prickly growth.
When trimming new growth, use a wide sweeping action so that the stems
are fed directly into the cutting blade. Older growth will have thicker stems
and will be trimmed easiest by using a sawing movement.
To cut to a set height, you can stretch a piece of string along the desired
height of the hedge and trim just above it. Trim the side of the hedge so that
is will be slightly narrower at the top. More of the hedge will be exposed when
shaped this way, making it more uniform.