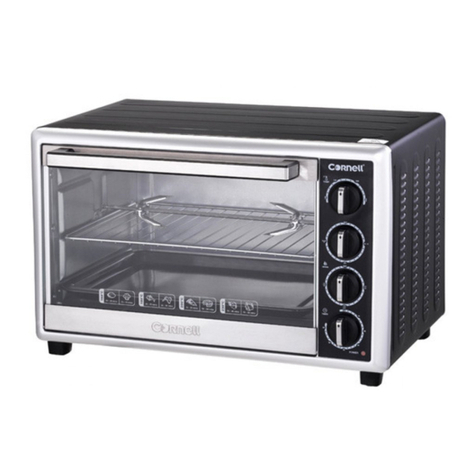
Cornell CEO-E331GL User manual

Electric CEO-E331GL
Oven CEO-E331BL
CEO-E431BL

1
1) Always switch off and unplug the appliance from the electrical outlet
BEFORE cleaning and also when is not in use.
2) NEVER IMMERSE THE APPLIANCE, POWER CORD OR PLUG
INTO WATER OR OTHER LIQUIDS.
3) Close supervision is needed when operating the appliance near
children. Ensure that the power cord does not hang over the work
surface.
4) Do not operate the appliance with a damaged power cord set or plug.
Any repairs should always be carried out by the Customer Service
Centre or by an authorized service centre.
5) Do not place the appliance on or near a hot gas or electric burner, in a
heated oven, or near easily flammable materials.
6) Do not use the appliance in the outdoors or in a damp area.
7) Do not use this appliance for any purposes other than its intended
use.
8) Always place the appliance on a flat sturdy surface. When moving it,
always take precaution not to touch the hot surfaces.
9) Use of accessories or equipments not supplied by the manufacturer
may cause damages or malfunction on the appliance or injuries to the
user.
10) This appliance should not be used by people who are physically or
mentally impaired (including children) unless proper guidance is
provided during operation.
General Safety Precautions

2
1. Handle
2. Glass Door
3. Temperature Knob
4. Temperature Light (Pilot Light)
5. Function Selector Knob
6. Timer Knob
7. Fan On/Off Switch
8. Grill Tray
9. Tray Handle
10. Bake Tray
11. Rotisserie Set
12. Crumb Tray
Parts Identification

3
Model No.
CEO-E331BL
CEO-E431BL
Model No.
CEO-E331GL
Voltage / Frequency
220-240V ~ 50/60Hz
Power
2000W
2000W
Capacity
33.0L
43.0L
Before Using the Appliance
1. Wash the oven accessories with mild soapy water, then rinse with
water and allow them to dry thoroughly. Use a damp cloth to lightly
wipe the inner walls of the oven.
2. Reassemble the grill tray and other accessories to their respective
positions inside the oven.
3. Heat the oven at its highest temperature setting for approximately 5
minutes. An odour may be detected. This is normal and the odour
should dissipate within a few minutes.
4. The oven lamp will illuminate once the oven starts operating and will
turn off when the oven stops operating.
5. Turn off the oven and allow it to cool down.
Specifications
Operating Instructions

4
General Advice
When baking or grilling, it is advisable to always preheat the oven to the
desired temperature to get the best possible cooking results.
Cooking times depend on the product quality, the food temperature and
on individual taste. The times shown in the table of oven are only
indications and are susceptible to variations and do not take into
account of the time needed to preheat the oven.
When cooking frozen-dried foods, check the times suggested on the
products’ packaging.
Keeping food warm
Set the function selector knob to position and turn on the fan switch.
Set the temperature to “100” degrees.
Insert the grill tray and place the food on top of it.
If the food needs to be kept warm for longer than 10-20 minutes, it
should be covered with aluminum foil to prevent it from becoming too
dry.
Do not leave the food in the oven for a long time as it may become too
dry.
Baking
This function is ideal for flans, fruit puddings, quiche, and pies.
Insert the grill tray to the bottom position.
Turn the Function Selector Knob to position and switch the “fan
switches” on.
Set the Temperature Knob to the required temperature.
Set the Timer Knob to the required cooking time.
Wait for the oven to reach the set temperature (the pilot light goes off),
then put the food in.

5
If cooking is completed before the end of the time set, manually turn the
Timer Knob to position “0”.
Traditional oven cooking
This function is ideal for cooking great pizzas, lasagna, first courses au
gratin, small fowl, all types of fish, stuffed vegetables au gratin and
some types of cakes.
Insert the grill tray in the oven.
Turn the Function Selector Knob to position .
Set the Temperature Knob to the required temperature.
Set the Timer Knob to the required cooking time.
Wait for the oven to reach the set temperature (the pilot light goes off),
then put the food in.
If cooking is completed before the end of the time set, manually turn the
timer knob to position “0”.
Grill
This function is ideal for grilling hamburgers, chops, frankfurters,
sausages etc. In addition, this function may be used for browning foods:
coquilles saint-jacques etc.
Insert the grill tray at the top position and the bake tray above the
bottom heating element. We suggest pouring two glasses of water into
the bake tray so as to avoid smoke and bad odour resulting from
burning fat, and for easy cleaning.
Set the Function Selector Knob to position .
Set the Temperature Knob to the required temperature.
Set the Timer Knob to the required cooking time.
Preheat the oven for about 5 minutes, with the door slightly ajar.

6
Place the food on the grill tray, and close the door, leaving it ajar, and
remember to turn the food half way through cooking.
If cooking is completed before the end of the time set, manually turn the
timer knob to position “0”.
Convection
This function is ideal for cooking great savoury pies, all types of
meat-based main dishes (apart from small fowl), roast potatoes and
cakes in general. It is also suitable for simultaneous cooking on two
different levels.
Insert the grill tray into the oven.
Turn the Function Selector Knob to position and turn the “fan
switch” on.
Set the Temperature Knob to the required temperature.
Set the Timer Knob to the desired time setting.
Wait for the oven to reach the set temperature (the pilot light goes off),
then put the food in.
If cooking is completed before the end of the time set, manually turn the
timer knob to position “0”.
Rotisseries
This function is used for chicken, meat, kebabs and etc.
Insert the bake tray at the bottom position.
Set the Function Selector Knob to position .
Set the Temperature Knob to the required temperature.
Set the Timer Knob to the required cooking time.

7
Allow the appliance to cool down completely before cleaning. Unplug
the power cord from the electrical outlet.
The grill tray, bake tray and tray handle may be washed as other kitchen
ware, either by hand or in the dishwasher.
To clean the outside surfaces, always use a moist sponge. Avoid using
abrasive products that could damage the finishing. Ensure water or
soap does not penetrate into the oven through the vents on the outside
body of the oven.
Never immerse the appliance in water or other liquids.
Do not use aluminium-corrosive products (spray detergents) to clean
the aluminium walls inside the oven and never scrape the walls with
sharp or pointed objects.
Top heating tube can be clean by turning the hook which holds the
heating tube to clockwise and pull down the heating tube for cleaning.
After cleaning the heating tube, lock it by turning the hook to anti
clockwise.
Care and Cleaning

8
This manual suits for next models
2
Table of contents
Other Cornell Oven manuals